
Introduction
Thank you for choosing the iTOMA CKS801 Alarm Clock. This device combines a digital alarm clock with convenient features such as wireless charging, a USB charging port, dual alarms, an adjustable night light, and an indoor temperature and humidity display. This manual will guide you through the setup, operation, and maintenance of your new alarm clock to ensure optimal performance and user experience.
Product Features
- Wireless Charging Function: Compatible with most universal wireless charging enabled mobile phones.
- USB Charging Port: Provides an additional port for charging other mobile devices.
- Dual Alarm with Snooze: Set two independent alarms with a 9-minute snooze function (up to 6 times).
- Adjustable Night Light: Features two night light modes for ambient lighting.
- 4-Level Display Dimmer: Adjust the brightness of the LED display.
- Indoor Temperature and Humidity Display: Shows ambient temperature (Celsius/Fahrenheit) and relative humidity.
- 12/24 Hour Time Format: Select your preferred time display format.
Device Layout
Familiarize yourself with the buttons and display elements of your iTOMA CKS801 alarm clock.
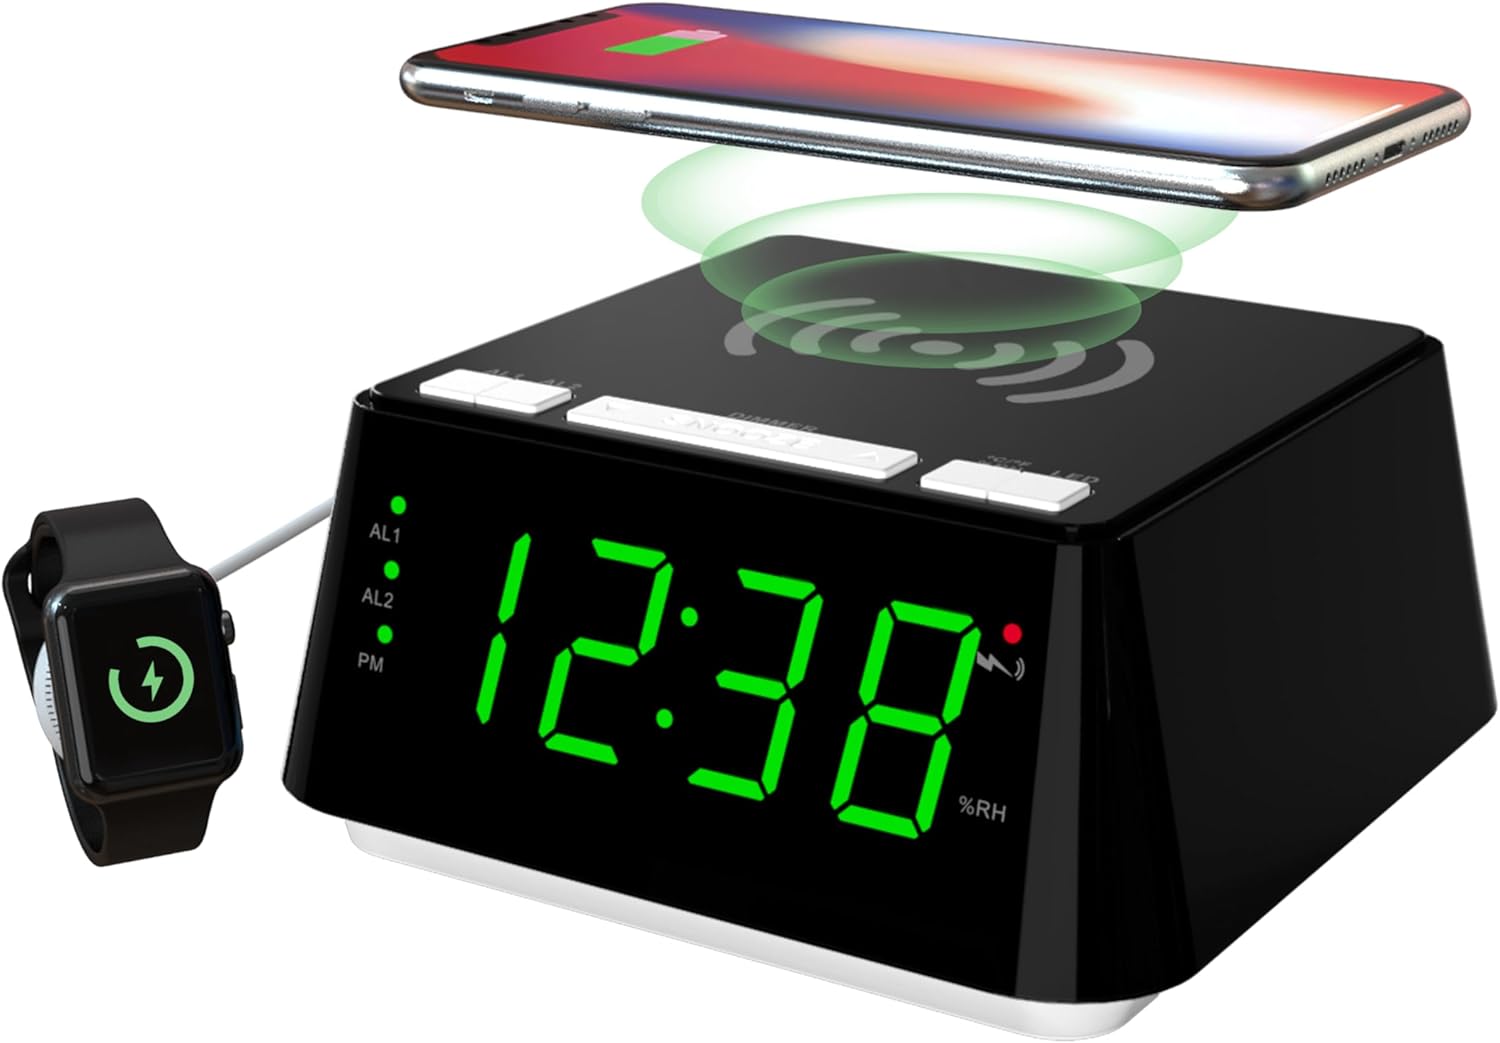
Image 1: Front and top view of the iTOMA CKS801 alarm clock, showing the digital time display, alarm indicators (AL1, AL2), PM indicator, humidity percentage (%RH), and the wireless charging pad on top. A smartphone is shown wirelessly charging, and a smartwatch is connected to the USB port.
- Top Panel: Wireless charging pad, SNOOZE/DIMMER button, AL1/AL2 buttons, °C/°F/%RH button, LED (Night Light) button.
- Front Display: Large LED display showing time, AL1/AL2 indicators, PM indicator, temperature, and humidity.
- Rear Panel: Power input, USB charging port.
Setup
- Power Connection: Connect the provided power adapter to the DC input port on the back of the alarm clock and then plug it into a standard wall outlet. The display will light up.
- Initial Time Setting: Upon first power-up, the clock may display a default time. Refer to the "Time Setting" section under Operating Instructions to set the correct time.
Operating Instructions
1. Time Setting
- Press and hold the TIME SET button (if available, otherwise use a combination of buttons, e.g., SNOOZE/DIMMER for setting mode and AL1/AL2 for adjustment).
- Use the AL1 or AL2 buttons (or dedicated UP/DOWN buttons if present) to adjust the hour.
- Press the TIME SET button again to move to minute adjustment. Use AL1 or AL2 to adjust minutes.
- Press the TIME SET button once more to confirm and exit time setting mode.
- To switch between 12-hour and 24-hour format, press the °C/°F/%RH button while the time is displayed. The PM indicator will appear for 12-hour format afternoon times.
2. Alarm Setting (AL1 & AL2)

Image 2: Close-up of the iTOMA CKS801 display and top buttons, illustrating the dual alarm indicators (AL1, AL2) and the three alarm modes: ALL-7-DAY, WEEKDAY, and WEEKEND.
- Setting Alarm 1 (AL1):
- Press and hold the AL1 button. The hour display will flash.
- Use the SNOOZE/DIMMER button (or dedicated UP/DOWN) to adjust the alarm hour.
- Press AL1 again to move to minute adjustment. Use SNOOZE/DIMMER to adjust minutes.
- Press AL1 again to select the alarm mode (ALL-7-DAY, WEEKDAY, WEEKEND). Use SNOOZE/DIMMER to cycle through modes.
- Press AL1 once more to confirm and activate Alarm 1. The AL1 indicator will light up.
- Setting Alarm 2 (AL2): Follow the same steps as for AL1, using the AL2 button.
- Activating/Deactivating Alarms: Briefly press the AL1 or AL2 button to toggle the respective alarm on or off. The AL1/AL2 indicator will show its status.
- Snooze Function: When an alarm sounds, press the large SNOOZE/DIMMER button on top to activate snooze. The alarm will pause for 9 minutes and sound again. This can be repeated up to 6 times.
- Stopping an Alarm: To stop an alarm completely, press any other button (e.g., AL1, AL2, LED) except the SNOOZE/DIMMER button. The alarm will reset for the next day.
3. Wireless Charging

Image 3: A smartphone placed on the top surface of the iTOMA CKS801 alarm clock, indicating active wireless charging with a charging icon on the phone screen.
- Place your Qi-compatible smartphone directly on the wireless charging pad located on the top surface of the alarm clock.
- Ensure the phone is centered on the charging pad for optimal charging.
- A charging indicator (usually on your phone screen) will confirm that charging has begun.
- Remove any metal objects or thick cases from your phone that may interfere with wireless charging.
4. USB Charging Port
- Locate the USB charging port on the rear of the alarm clock.
- Connect your device's USB charging cable to this port.
- This port provides a convenient way to charge non-wireless charging devices or additional accessories like smartwatches.
5. Night Light Operation

Image 4: The iTOMA CKS801 alarm clock displaying the time, with its integrated night light illuminated, casting a soft glow around the base.
- Press the LED button on the top panel to turn the night light on.
- Press the LED button again to cycle through the available night light modes (e.g., different brightness levels or colors, if applicable, as the description mentions "two modes").
- Press the LED button repeatedly until the night light turns off.
6. Temperature and Humidity Display

Image 5: Two iTOMA CKS801 alarm clocks side-by-side, one displaying "23C" (Celsius) and the other "73F" (Fahrenheit), demonstrating the temperature display feature.

Image 6: The iTOMA CKS801 alarm clock displaying "55%RH", indicating the indoor humidity percentage.
- The alarm clock automatically displays the indoor temperature and humidity.
- To switch between Celsius (°C) and Fahrenheit (°F) for temperature, briefly press the °C/°F/%RH button.
- The humidity is displayed as a percentage (%RH).
7. Display Dimmer Control

Image 7: Four views of the iTOMA CKS801 alarm clock, demonstrating the four levels of display brightness: High (L-3), Medium (L-2), Low (L-1), and Off.
- Briefly press the SNOOZE/DIMMER button to cycle through the 4 levels of display brightness: High (L-3), Medium (L-2), Low (L-1), and Off.
- Select the brightness level that is most comfortable for your environment.
Maintenance
- Cleaning: Wipe the device with a soft, dry cloth. Do not use abrasive cleaners or solvents.
- Placement: Place the alarm clock on a stable, flat surface away from direct sunlight, heat sources, and moisture.
- Power: Always use the original power adapter provided with the device.
Troubleshooting
| Problem | Possible Cause / Solution |
|---|---|
| Clock display is off or flickering. |
|
| Wireless charging is not working. |
|
| Alarm does not sound. |
|
| Incorrect temperature/humidity reading. |
|
Specifications
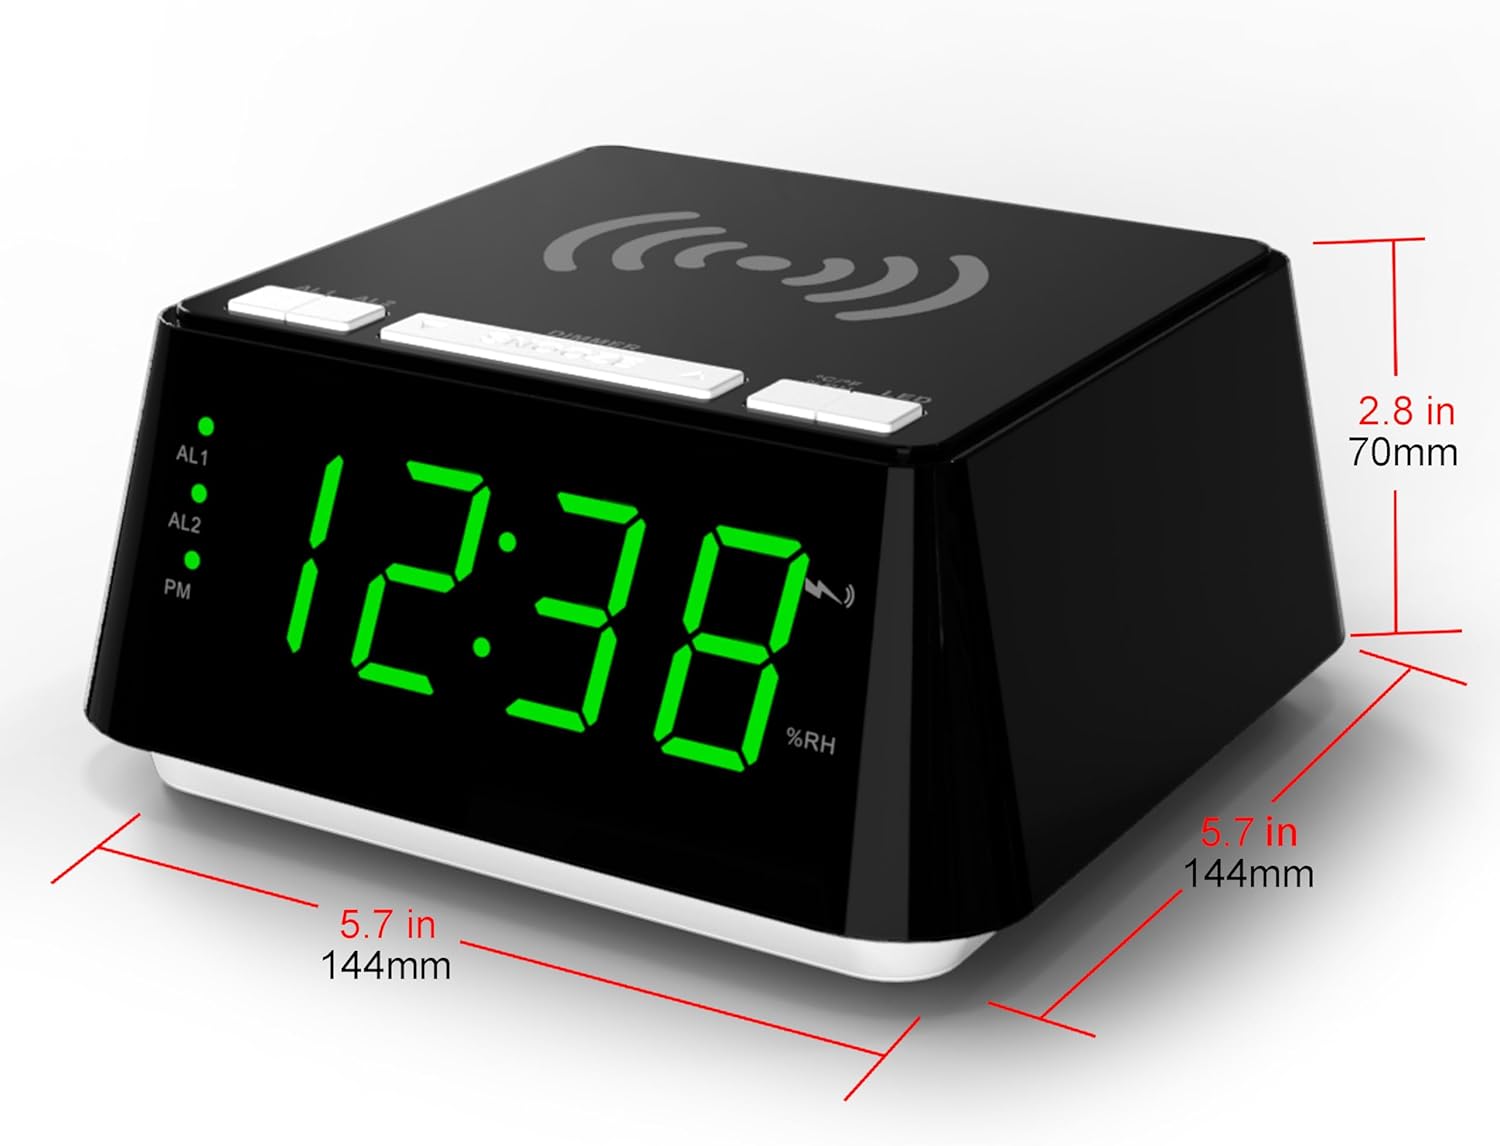
Image 8: Diagram showing the dimensions of the iTOMA CKS801 alarm clock: 5.7 inches (144mm) in width, 5.7 inches (144mm) in depth, and 2.8 inches (70mm) in height.
| Feature | Detail |
|---|---|
| Model | CKS801 |
| Dimensions (L x W x H) | 14.4 x 13 x 7.11 cm (5.7 x 5.1 x 2.8 inches) |
| Weight | 381.02 g (0.84 lbs) |
| Display Type | Digital LED |
| Color | Green (LED display color, product casing is black) |
| Power Source | AC Power Adapter (Batteries not required for operation) |
| Special Features | Alarm, Wireless Charging, USB Charging, Night Light, Temperature Display, Humidity Display |
Warranty and Support
For warranty information or technical support, please refer to the documentation included with your purchase or visit the official iTOMA website. If you encounter any issues not covered in this manual, please contact iTOMA customer service for assistance.


