
1. Introduction
Thank you for choosing the SMARTGYRO Z-One 2 Electric Scooter. This manual provides essential information for the safe operation, maintenance, and troubleshooting of your scooter. Please read it thoroughly before your first ride and keep it for future reference.
The SMARTGYRO Z-One 2 is a lightweight electric scooter designed for urban mobility. It features a 350W 36V Brushless motor, a 8,000 mAh lithium battery offering approximately 30 km of range, and 10-inch pneumatic wheels for a comfortable ride. Safety features include a triple braking system and integrated lighting.
2. Safety Guidelines
Your safety is paramount. Always adhere to local traffic laws and regulations. Wearing a helmet and appropriate protective gear is strongly recommended.
- Always wear a helmet and other protective gear (knee pads, elbow pads) when riding.
- Do not ride in heavy rain, snow, or icy conditions.
- Avoid riding on slippery surfaces, loose gravel, or uneven terrain.
- Maintain a safe speed and distance from other vehicles and pedestrians.
- Do not perform stunts or sudden maneuvers.
- Ensure both hands are on the handlebars at all times.
- Do not carry passengers or heavy loads.
- Check tire pressure, brakes, and all fasteners before each ride.
- Be aware of your surroundings and potential hazards.
- The maximum weight limit for the rider is 100 kg.
3. Package Contents
Upon unpacking, please verify that all items are present and in good condition:
- SMARTGYRO Z-One 2 Electric Scooter
- Power Adapter/Charger
- User Manual
- Assembly Tools (if required)
4. Setup
4.1 Unfolding the Scooter
Carefully remove the scooter from its packaging. Locate the folding mechanism near the base of the handlebar stem. Release the latch and lift the handlebar stem until it locks securely into the upright position. Ensure the locking mechanism is fully engaged before use.

Image: The SMARTGYRO Z-One 2 Electric Scooter in its unfolded, ready-to-ride state, viewed from the side.
4.2 Initial Charging
Before first use, fully charge the scooter's battery. Connect the charger to the charging port on the scooter and then to a power outlet. The indicator light on the charger will typically change from red to green when charging is complete. This usually takes 4-5 hours.
4.3 Tire Pressure Check
The Z-One 2 features 10-inch pneumatic tires. Ensure they are inflated to the recommended pressure (check the tire sidewall for specific PSI/BAR). Proper tire pressure is crucial for safety, performance, and battery range.
4.4 App Connection
For enhanced features and control, download the 'SmartGyro Core' application on your smartphone. Follow the in-app instructions to connect your scooter via Bluetooth. This app allows you to monitor battery status, adjust settings, and more.
5. Operating Instructions
5.1 Powering On/Off
Press and hold the power button on the handlebar display to turn the scooter on or off.
5.2 Display Functions
The handlebar display shows essential information such as current speed, battery level, and selected driving mode. Refer to the display for real-time operational data.

Image: A close-up view of the scooter's handlebar, highlighting the integrated turn signal and controls.
5.3 Driving Modes
The Z-One 2 offers three driving modes, selectable via the display:
- Eco Mode: For maximum range and energy efficiency, with reduced speed.
- Comfort Mode: A balanced mode offering a good mix of speed and range for daily commuting.
- Sport Mode: Provides maximum power and speed for dynamic riding.
5.4 Starting the Scooter
To engage the motor, kick-start the scooter by pushing off with your foot, then press the accelerator lever. The motor will engage once a minimum speed is reached.
5.5 Braking System
The scooter is equipped with a triple braking system for optimal safety:
- Electric Front Brake: Activated via a lever on the handlebar.
- Rear Disc Brake: Activated via a separate lever on the handlebar.
- Regenerative Braking: Integrated with the electric brake, this system converts braking energy back into electricity to recharge the battery, extending range and reducing brake wear.

Image: Detail of the handlebar showing the brake lever and the 'Regenera' system logo, indicating regenerative braking.
5.6 Lights and Turn Signals
The scooter features a front LED light, rear brake light, and integrated turn signals for visibility and safety. Operate these as required by local regulations and riding conditions.
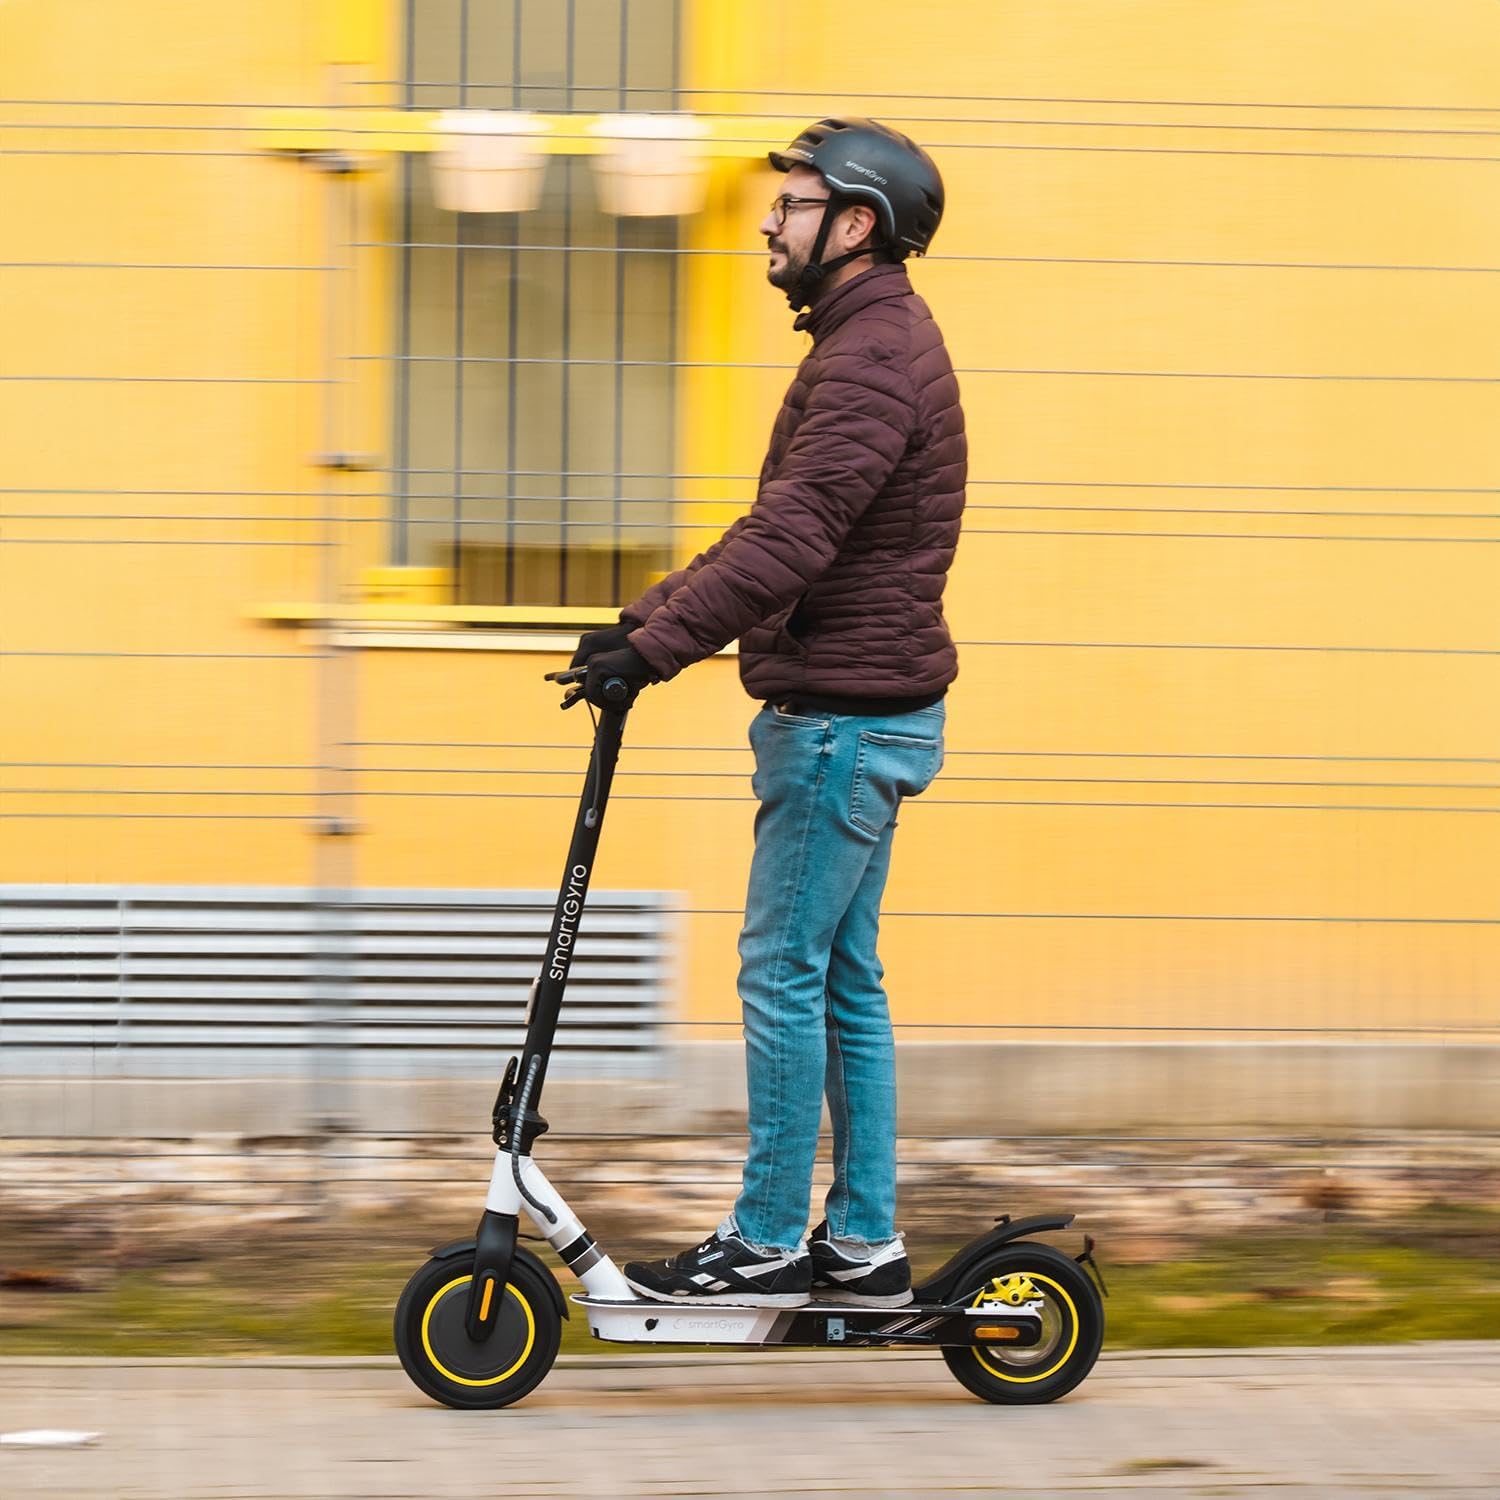
Image: A rider demonstrating the SMARTGYRO Z-One 2 Electric Scooter in use on a paved path, highlighting its operational state.
5.7 Folding the Scooter
To fold the scooter for storage or transport, ensure it is powered off. Locate the folding mechanism, release the latch, and carefully fold the handlebar stem down until it clicks into place. This compact design facilitates portability.
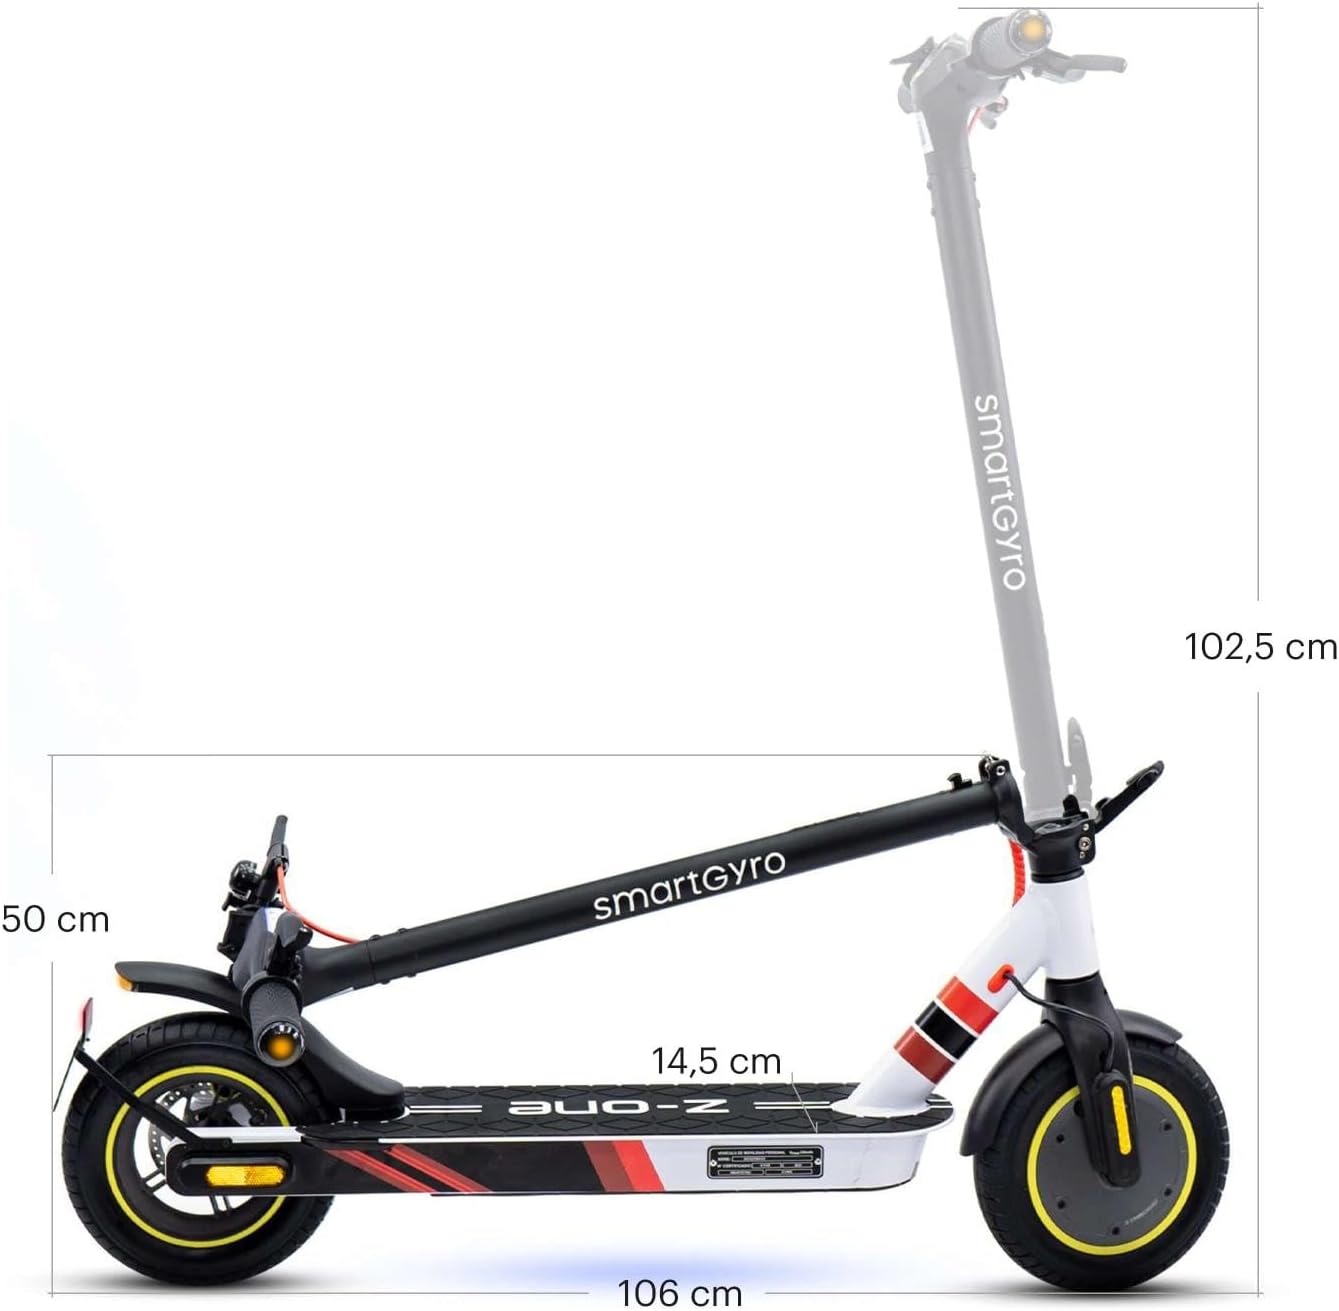
Image: A diagram illustrating the dimensions of the SMARTGYRO Z-One 2 Electric Scooter, including its folded state.
6. Maintenance
6.1 Battery Care
- Charge the battery regularly, even if not in use, to maintain its health.
- Avoid completely draining the battery before recharging.
- Store the scooter in a cool, dry place, away from direct sunlight and extreme temperatures.
- Use only the original charger provided.
6.2 Tire Maintenance
- Regularly check tire pressure and inflate to the recommended PSI/BAR.
- Inspect tires for wear, punctures, or damage. Replace worn tires promptly.
6.3 Brake Inspection
- Periodically check the functionality of both electric and disc brakes.
- Ensure brake levers operate smoothly and return to their original position.
- Inspect brake pads for wear and replace if necessary.
6.4 General Cleaning and Storage
- Clean the scooter with a damp cloth. Do not use high-pressure water or harsh chemicals.
- Ensure the charging port cover is securely closed to prevent water ingress.
- Store the scooter indoors in a dry environment when not in use.
7. Troubleshooting
If you encounter issues with your SMARTGYRO Z-One 2, refer to the following common problems and solutions:
| Problem | Possible Cause | Solution |
|---|---|---|
| Scooter does not power on | Low battery; loose connection | Charge the battery; check all cable connections. |
| Reduced range | Low tire pressure; heavy load; riding uphill; cold weather | Check tire pressure; reduce load; use Eco mode; charge fully. |
| Brakes not effective | Worn brake pads; loose brake cable | Inspect and replace brake pads; adjust brake cable tension. |
| Unusual noises | Loose components; foreign object in wheel | Inspect scooter for loose parts; remove any obstructions. |
If the problem persists or is not listed here, please contact SMARTGYRO customer support or visit an authorized service center.
8. Specifications
Technical specifications for the SMARTGYRO Z-One 2 Electric Scooter:
| Feature | Specification |
|---|---|
| Model Number | SG27-135 |
| Motor Power | 350W 36V Brushless (Nominal) |
| Battery Type | Lithium Ion |
| Battery Capacity | 8,000 mAh |
| Approximate Range | Up to 30 Km |
| Charging Time | 4-5 hours |
| Wheel Size | 10 inches (Pneumatic) |
| Braking System | Electric front, Rear disc, Regenerative |
| Max Load Capacity | 100 Kilograms |
| Approximate Unfolded Dimensions (L x W x H) | 112 x 58 x 108 cm |
| Approximate Weight | 17 Kg |
| Frame Material | Aluminum |
| Special Features | Lightweight, Foldable, DGT Certified |
| Manufacturer | Woxter |
| Country of Origin | China |
9. Warranty and Support
SMARTGYRO is committed to providing quality products and excellent after-sales service. The Z-One 2 Electric Scooter comes with a warranty that includes:
- Up to 5 years warranty on motors (or up to 100,000 km).
- Access to a network of over 100 authorized workshops nationwide for maintenance and repairs.
- Availability of 100% original spare parts to ensure your scooter remains in optimal condition.
For warranty claims, technical support, or to locate a service center, please refer to the official SMARTGYRO website or contact their customer service department. A circulation certificate can also be redeemed online.


