
1. Introduction
This manual provides detailed instructions for the safe and efficient operation, maintenance, and troubleshooting of your JAVA WSD18-010B Fully Automatic Espresso Latte Machine. Please read this manual thoroughly before using the appliance and keep it for future reference.
The JAVA WSD18-010B is designed to prepare espresso, cappuccino, and latte beverages using either coffee beans or pre-ground coffee powder. It features a 15-bar pressure extraction system, an integrated conical grinder, and an automatic milk frother.
2. Safety Instructions
Always follow basic safety precautions when using electrical appliances to reduce the risk of fire, electric shock, and injury to persons.
- Do not immerse the appliance, power cord, or plug in water or other liquids.
- Ensure the voltage specified on the appliance matches your local power supply.
- Keep the appliance out of reach of children.
- Unplug the appliance before cleaning and when not in use.
- Do not operate the appliance with a damaged cord or plug.
- Use only accessories recommended by the manufacturer.
- Place the appliance on a stable, level surface.
3. Product Overview
Familiarize yourself with the components of your JAVA WSD18-010B machine.

Figure 1: Front View of the JAVA WSD18-010B. This image displays the front of the espresso machine, highlighting the control panel with its LCD display, buttons for power and coffee selection, the coffee spout, and the drip tray. A white coffee cup with the JAVA logo is placed on the drip tray.

Figure 2: Machine in Use. The JAVA WSD18-010B is shown in a home setting, preparing coffee. Two glasses of coffee, one latte and one espresso, are visible next to the machine, along with coffee beans and pastries, illustrating its use in a daily routine.
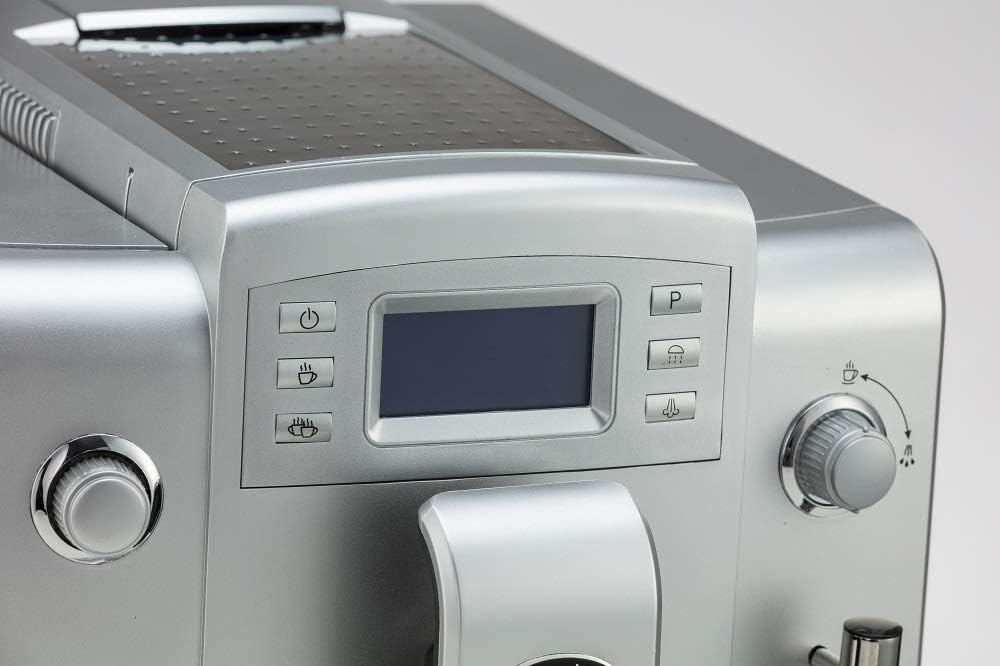
Figure 3: Control Panel Detail. A close-up view of the machine's control panel, featuring the LCD screen and various function buttons. These buttons include power, single cup, double cup, steam, and a program button, allowing for intuitive operation.

Figure 4: Coffee Spout and Frother. This image focuses on the adjustable coffee spout and the integrated milk frother wand. The frother is designed for automatic milk foaming, simplifying the preparation of milk-based coffee drinks.
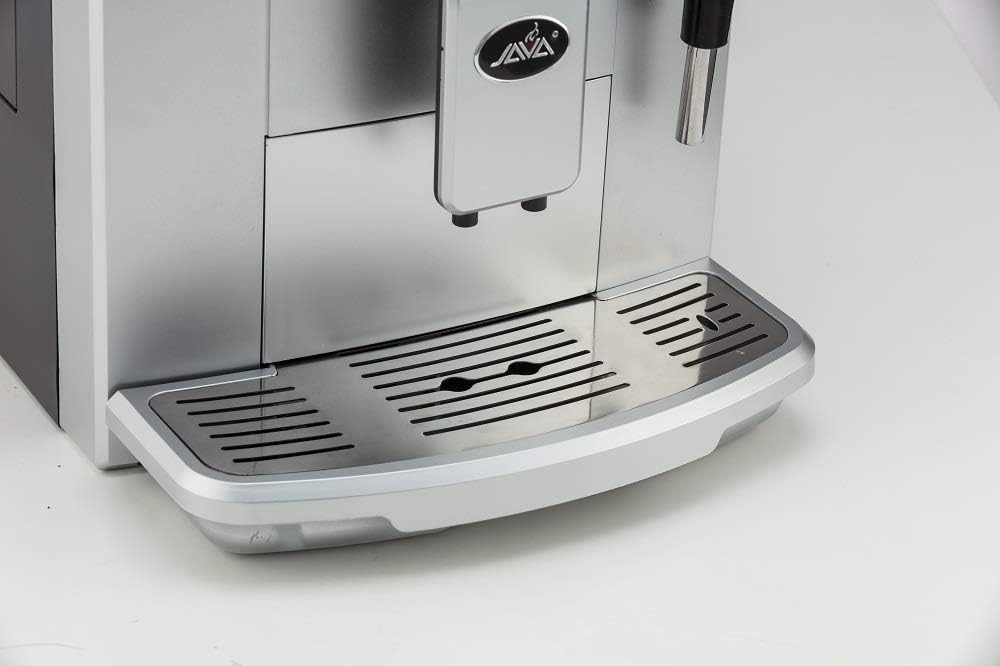
Figure 5: Drip Tray. A detailed view of the removable drip tray and cup rest area. The design allows for easy cleaning and accommodates various cup sizes, ensuring a tidy coffee preparation experience.
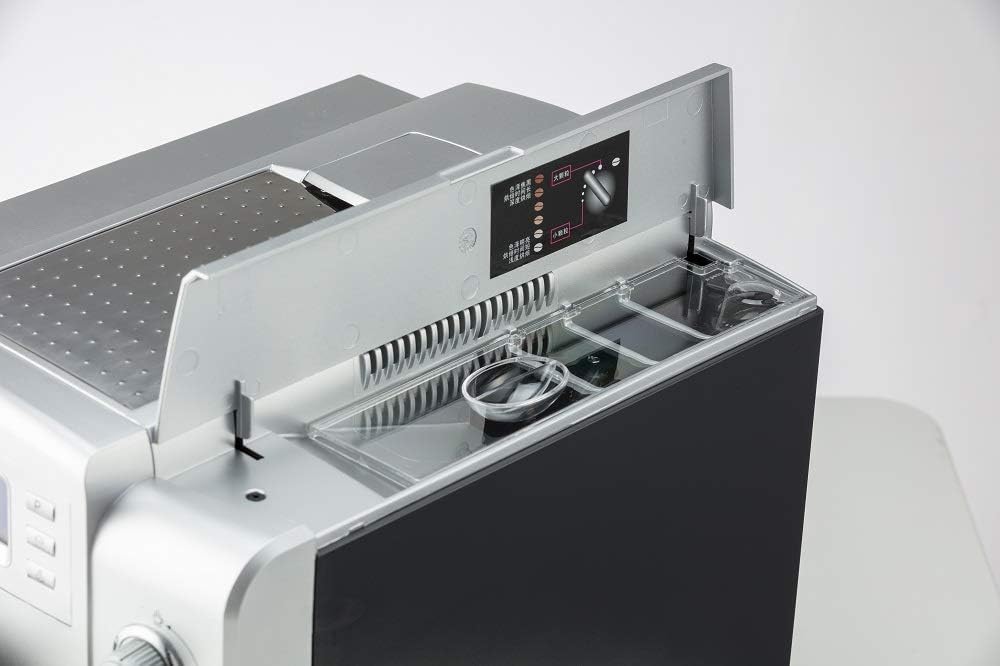
Figure 6: Top Compartments. This image shows the top of the machine with the lid open, revealing the coffee bean hopper and the access point for the water tank. Instructions for grind adjustment are also visible, indicating the machine's integrated grinding capabilities.

Figure 7: Cup Warming Plate. A view of the top surface of the machine, which functions as a cup warming plate. Two clear glass cups are placed upside down, demonstrating how cups can be pre-warmed for optimal coffee temperature.
4. Setup
- Unpacking: Carefully remove the machine from its packaging. Retain packaging for future transport or storage.
- Placement: Place the machine on a stable, level, and heat-resistant surface, away from water sources and direct sunlight. Ensure adequate ventilation around the appliance.
- Water Tank: Remove the 1.9L water tank, rinse it with fresh water, and fill it to the MAX level with clean, cold water. Reinsert the tank securely.
- Bean Hopper: Open the lid on top of the machine and fill the coffee bean hopper with fresh coffee beans. Ensure the lid is closed properly.
- Power Connection: Plug the power cord into a grounded electrical outlet.
- Initial Rinse Cycle: Upon first use or after extended periods of inactivity, the machine may perform an automatic rinse cycle. Follow any on-screen prompts.
5. Operating Instructions
5.1. Making Espresso or Coffee
- Power On: Press the power button on the control panel. The machine will heat up and perform a brief rinse cycle.
- Select Coffee Type: Use the single cup or double cup buttons to select your desired coffee strength and volume.
- Adjust Grind (Optional): If using whole beans, you can adjust the grinding thickness using the dial inside the bean hopper. There are 6 adjustable settings.
- Place Cup: Position a cup under the coffee spout.
- Start Brewing: Press the selected coffee button again to start brewing. The machine will automatically grind beans, brew, and dispense coffee.
5.2. Using the Automatic Milk Frother
- Prepare Milk: Insert the soft suction tube into a container of cold milk.
- Position Frother: Place a cup under the milk frother wand.
- Activate Frother: Press the steam/froth button on the control panel. The machine will automatically froth and dispense milk into your cup.
- Combine: Once milk is frothed, you can brew espresso into the same cup to create lattes or cappuccinos.
5.3. Using Pre-Ground Coffee
The machine also supports pre-ground coffee. Refer to the specific instructions in the full manual for the dedicated ground coffee compartment and selection process.
6. Maintenance and Cleaning
Regular cleaning ensures optimal performance and longevity of your machine.
- Automatic Cleaning System: The machine features an automatic cleaning system that activates after each use.
- Drip Tray: The drip tray should be emptied and cleaned regularly. Remove the tray, discard collected liquid, and wash with warm, soapy water. Rinse thoroughly and dry before reinserting.
- Water Tank: Clean the 1.9L separable water tank periodically with warm, soapy water. Rinse well to remove any soap residue.
- Coffee Grounds Container: Empty and clean the used coffee grounds container regularly.
- Milk Frother: After each use, ensure the milk frother is cleaned to prevent milk residue buildup. Run a short steam cycle with a cup of water to clear the nozzle.
- Descaling: The machine will indicate when descaling is required. Follow the instructions provided on the LCD display and use a suitable descaling solution.
- Exterior Cleaning: Wipe the exterior of the machine with a soft, damp cloth. Do not use abrasive cleaners or solvents.
7. Troubleshooting
If you encounter issues with your JAVA WSD18-010B, refer to the following common problems and solutions:
| Problem | Possible Cause | Solution |
|---|---|---|
| Machine does not turn on. | No power supply. | Check if the power cord is securely plugged into the outlet and the machine. |
| Coffee is not brewing. | Water tank empty; coffee beans empty; brewing unit blocked. | Refill water tank or bean hopper. Refer to manual for brewing unit cleaning. |
| Milk frother not producing foam. | Frother nozzle blocked; milk too warm; incorrect milk type. | Clean the frother nozzle. Use cold, fresh milk. |
| "Descale" message appears. | Machine requires descaling. | Perform a descaling cycle as per the instructions in the full manual. |
For more complex issues, please consult the full product manual or contact customer support.
8. Specifications
- Model: WSD18-010B
- Brand: JAVA
- Pressure: 15 bar
- Water Tank Capacity: 1.9 Liters
- Dimensions (L x D x H): 11.24 x 18.11 x 13.39 inches
- Net Weight: 20.9 pounds
- Special Features: Integrated Coffee Grinder, Automatic Milk Frother, NTC Temperature Control, Instant Boiler, LCD Display (10 languages)
- Operation Mode: Fully Automatic
- Included Components: Milk Frother
- Color: Silver
- Manufacturer: Wan Shida
9. Warranty and Support
For information regarding warranty coverage, technical support, or service inquiries, please refer to the warranty card included with your product or visit the official JAVA website. Please have your model number (WSD18-010B) and purchase date available when contacting support.


