
ORIENTEK T45
ORIENTEK T45 FTTH Fiber Optic Fusion Splicer Machine User Manual
Model: T45 | Brand: ORIENTEK
1. Introduction
This manual provides comprehensive instructions for the safe and efficient operation, maintenance, and troubleshooting of the ORIENTEK T45 FTTH Fiber Optic Fusion Splicer Machine. Please read this manual thoroughly before using the device to ensure proper functionality and to prevent damage or injury.
The ORIENTEK T45 is a high-precision core alignment fusion splicer designed for various fiber optic applications, including FTTH, FTTx, and general fiber network installations. Its advanced features ensure reliable and low-loss splices.
2. Product Overview
The ORIENTEK T45 is a robust and portable fiber optic fusion splicer, engineered for demanding field conditions. It features a 4.3-inch high-definition capacitive touch screen for intuitive operation and precise fiber alignment.
2.1 Key Features
- 7-second fast splicing and 18-second highly efficient heating.
- Equipped with four high-precision motors for accurate fiber alignment.
- Automatic fiber end-face checking technology.
- Temperature and pressure compensation for stable performance.
- High-speed image processing and special precision-positioning technology for low splice loss.
- Compatible with 0.25mm, 0.9mm, 3.0mm, flat, and drop cables.
- Multi-language support: English, French, Portuguese, Spanish.
- Electrodes designed for approximately 4,000 splices without replacement.
- Integrated LED lighting for use in dim environments.
2.2 Main Components
The T45 fusion splicer consists of the main splicing unit, a fiber cleaver, and various accessories essential for fiber preparation and splicing. The unit is designed for portability and durability.

Figure 2.1: The ORIENTEK T45 Fusion Splicer kit, including the main unit, fiber cleaver, and various tools for fiber optic work.

Figure 2.2: Detailed view of the T45 splicer's internal components, including the optical fiber fixture, electrodes, and the 4.3-inch HD capacitive touchscreen.

Figure 2.3: The T45 features a screen that can rotate 180 degrees for optimal viewing angles during operation.
3. Setup
3.1 Unpacking and Initial Inspection
- Carefully remove all components from the packaging.
- Inspect the splicer and accessories for any signs of damage during transit. Report any damage to your supplier immediately.
- Verify that all items listed in the configuration list are present.

Figure 3.1: The complete list of components and accessories included with the T45 Fusion Splicer package.
3.2 Powering On
- The T45 is powered by a 12V lithium polymer battery (7800mAh) which is included. Ensure the battery is fully charged before first use.
- Connect the AC adapter (100~240V) to charge the battery or operate the splicer directly from mains power.
- The device also supports DC 12V automobile power outlet for charging or operation in vehicles.
- Press the power button to turn on the splicer. The display will illuminate.
3.3 Preparing the Workstation
The carrying case for the T45 is designed to serve as a stable work platform. Place the splicer securely within the designated area of the case.
Video 3.1: This video demonstrates the setup of the ORIENTEK T45 Fusion Splicer, including placing the unit on its work platform and preparing fibers for splicing. It covers the entire splicing process from start to finish.
4. Operating Instructions
4.1 Fiber Preparation
- Strip the Fiber: Use professional fiber strippers to remove the outer jacket and coating layers of the fiber, exposing the bare fiber. Ensure the stripped length is appropriate for cleaving.
- Clean the Fiber: Thoroughly clean the stripped fiber with an alcohol wipe (e.g., 99% isopropyl alcohol) to remove any residue or contaminants. Allow it to air dry completely.
- Cleave the Fiber: Place the cleaned, stripped fiber into the fiber cleaver. Ensure the fiber is positioned correctly and then operate the cleaver to achieve a precise, clean end-face. A good cleave is crucial for low splice loss.

Figure 4.1: The fiber cleaver, an essential tool for preparing fiber ends with a precise, clean cut before splicing.
4.2 Fiber Placement
- Carefully open the wind protector and fiber clamps of the splicer.
- Place the prepared fibers into the V-grooves of the splicer. Ensure the fiber ends are positioned correctly and gently close the clamps.
- The T45 supports various fiber types, including 0.9mm fiber cable, bare fiber, FTTH drop cable, and 3.0mm jump cable.

Figure 4.2: The T45 splicer is versatile, accommodating various fiber types such as 0.9mm, bare fiber, FTTH drop cable, and 3.0mm jump cable.
4.3 Splicing Process
- Close the wind protector. The splicer will automatically begin the alignment process.
- Monitor the alignment and splicing process on the 4.3-inch LCD screen. The T45 performs core alignment for optimal splice quality.
- The splicing process typically takes 7 seconds. The screen will display the estimated splice loss (e.g., 0.01dB for SMF).
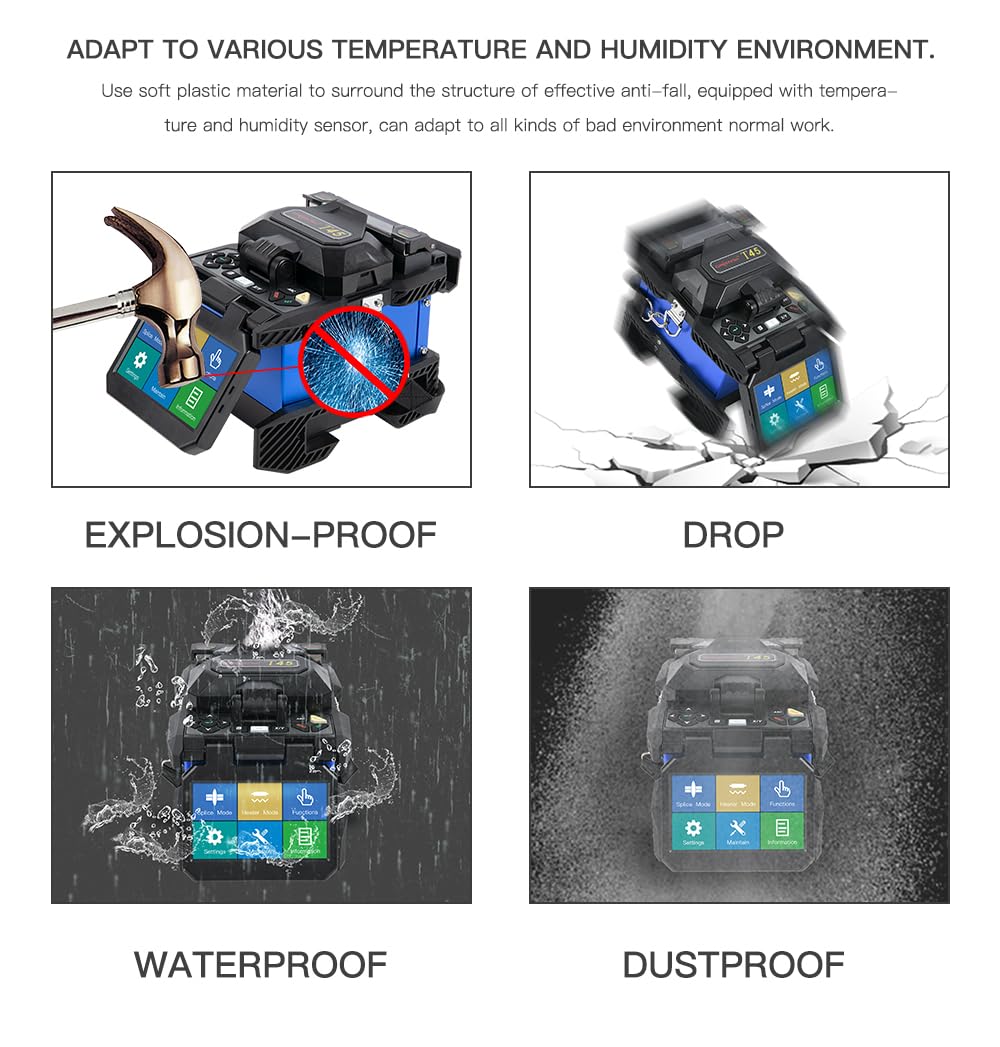
Figure 4.3: The T45's display during the splicing process, showing fiber alignment and fusion status.
4.4 Heat Shrinking
- After a successful splice, carefully open the wind protector and fiber clamps.
- Gently remove the spliced fiber and slide the heat shrinkable tube over the splice point.
- Place the fiber with the heat shrinkable tube into the heating oven. Close the oven lid.
- The heating process typically takes 18 seconds. Once complete, carefully remove the fiber and place it in the cooling tray to cool down.

Figure 4.4: The cooling tray of the T45 splicer, used to cool down the heat-shrunk fiber after the heating process.
5. Maintenance
Regular maintenance ensures the longevity and optimal performance of your ORIENTEK T45 Fusion Splicer.
5.1 Cleaning
- V-Grooves and Clamps: Regularly clean the V-grooves and fiber clamps with a cotton swab moistened with alcohol to remove fiber debris and dust.
- Electrodes: If the electrodes become dirty or show signs of wear, clean them carefully with a soft, lint-free cloth.
- Lenses and Mirrors: Use a lens cleaning solution and a soft cloth to clean the optical lenses and mirrors to ensure clear fiber imaging.
- General Casing: Wipe down the exterior of the splicer with a damp cloth to keep it free from dust and grime.
5.2 Electrode Replacement
The electrodes have a lifespan of approximately 4,000 splices. When splice loss increases or the arc becomes unstable, it may be time to replace the electrodes. Refer to the detailed instructions in the full service manual for proper replacement procedures.
5.3 Battery Care
- Charge the battery fully before long periods of storage.
- Store the splicer and battery in a cool, dry place away from direct sunlight.
- Avoid completely discharging the battery, as this can reduce its lifespan.
6. Troubleshooting
This section provides solutions to common issues encountered during the operation of the ORIENTEK T45 Fusion Splicer. For problems not listed here, please contact customer support.
| Problem | Possible Cause | Solution |
|---|---|---|
| High Splice Loss | Dirty fiber ends, poor cleave, worn electrodes, dirty V-grooves. | Re-clean and re-cleave fibers. Replace electrodes if worn. Clean V-grooves. |
| Splicer Not Powering On | Low battery, faulty power adapter, power button issue. | Charge battery. Check power adapter connection. Contact support if issue persists. |
| Fiber Not Aligning | Dirty V-grooves, damaged fiber clamps, incorrect fiber placement. | Clean V-grooves. Ensure fibers are seated correctly. Inspect clamps for damage. |
| Heating Oven Not Working | Heating element failure, incorrect settings. | Check heating settings. Contact support for repair. |
7. Technical Specifications
Below are the detailed technical specifications for the ORIENTEK T45 FTTH Fiber Optic Fusion Splicer Machine.
| Feature | Specification |
|---|---|
| Applicable Fibers | SM/MM/DS/NZDS |
| Compatible Fiber / Cable | 0.25mm/0.9mm/3.0mm/Flat/Drop cable |
| Fiber Cleave Length | 250µm (Coat): 8 ~ 16mm, 900µm: 16mm |
| Typical Splice Loss | SMF: 0.02dB, MMF: 0.01dB, DSF: 0.04dB, NZDSF: 0.04dB |
| Return Loss | Less than -60dB |
| Splice Time | Typical 7 seconds |
| Tube Heat Time | Typical 18 seconds with S-160 (60mm) Tube |
| Program SPLICE Mode | 100 |
| Heat Mode | 50 |
| Storage of Splice Result | 4,000 results |
| Dimensions (W*L*H) | 120W*130L*154H (include Monitor) |
| Weight | 2.2Kg (Exclude Battery) / 18 Pounds (Package) |
| Terminal | USB, VGA, External Power |
| Power | DC 14.8V Battery (7800mAh), 100~240V AC Adapter |
| Additional Power | DC 12V automobile power outlet available |
| No. of Splice/Heating with Battery | 330 cycles, lithium polymer batteries |
| Mechanical Proof Test | 2N / 4.4N (OPTION) |
| Display | Two CMOS cameras and 4.3'' color LCD monitor |
| Fiber View and Magnification | X/Y 330X, 170X |
| Color | Yellow, Black, Orange |

Figure 7.1: The physical dimensions of the T45 splicer, indicating its compact design.

Figure 7.2: The T45 is designed to withstand various environmental conditions, featuring explosion-proof, drop-resistant, waterproof, and dustproof capabilities.
8. Warranty and Support
For information regarding the product warranty, please refer to the warranty card included with your purchase or contact your local ORIENTEK distributor. Keep your proof of purchase for warranty claims.
For technical support, service, or spare parts, please contact ORIENTEK customer service or visit the official ORIENTEK website. Provide your product model number (T45) and serial number when seeking assistance.
Related documentsT45


Ask a question about this manual
Ask about setup, troubleshooting, compatibility, parts, safety, or missing instructions. Manuals+ will review the question and use this page’s manual context to help answer it.