1. Introduction
Thank you for purchasing the ieGeek Portable DVD Player. This manual provides essential information for the safe and efficient operation of your device. Please read it thoroughly before use and retain it for future reference.
Safety Information
- Do not expose the device to rain or moisture.
- Do not disassemble the device. Refer all servicing to qualified personnel.
- Use only the specified power adapters and accessories.
- Avoid extreme temperatures and direct sunlight.
- Keep the device away from strong magnetic fields.
2. Package Contents
Verify that all items are present in the package:
- ieGeek Portable DVD Player
- Remote Control
- Car Charger
- AC Power Adapter
- 3-in-1 AV Cable
- User Manual

Figure 2.1: Included Accessories
3. Product Overview
The ieGeek Portable DVD Player features a 10.5-inch HD swivel screen and supports various media formats for versatile entertainment.
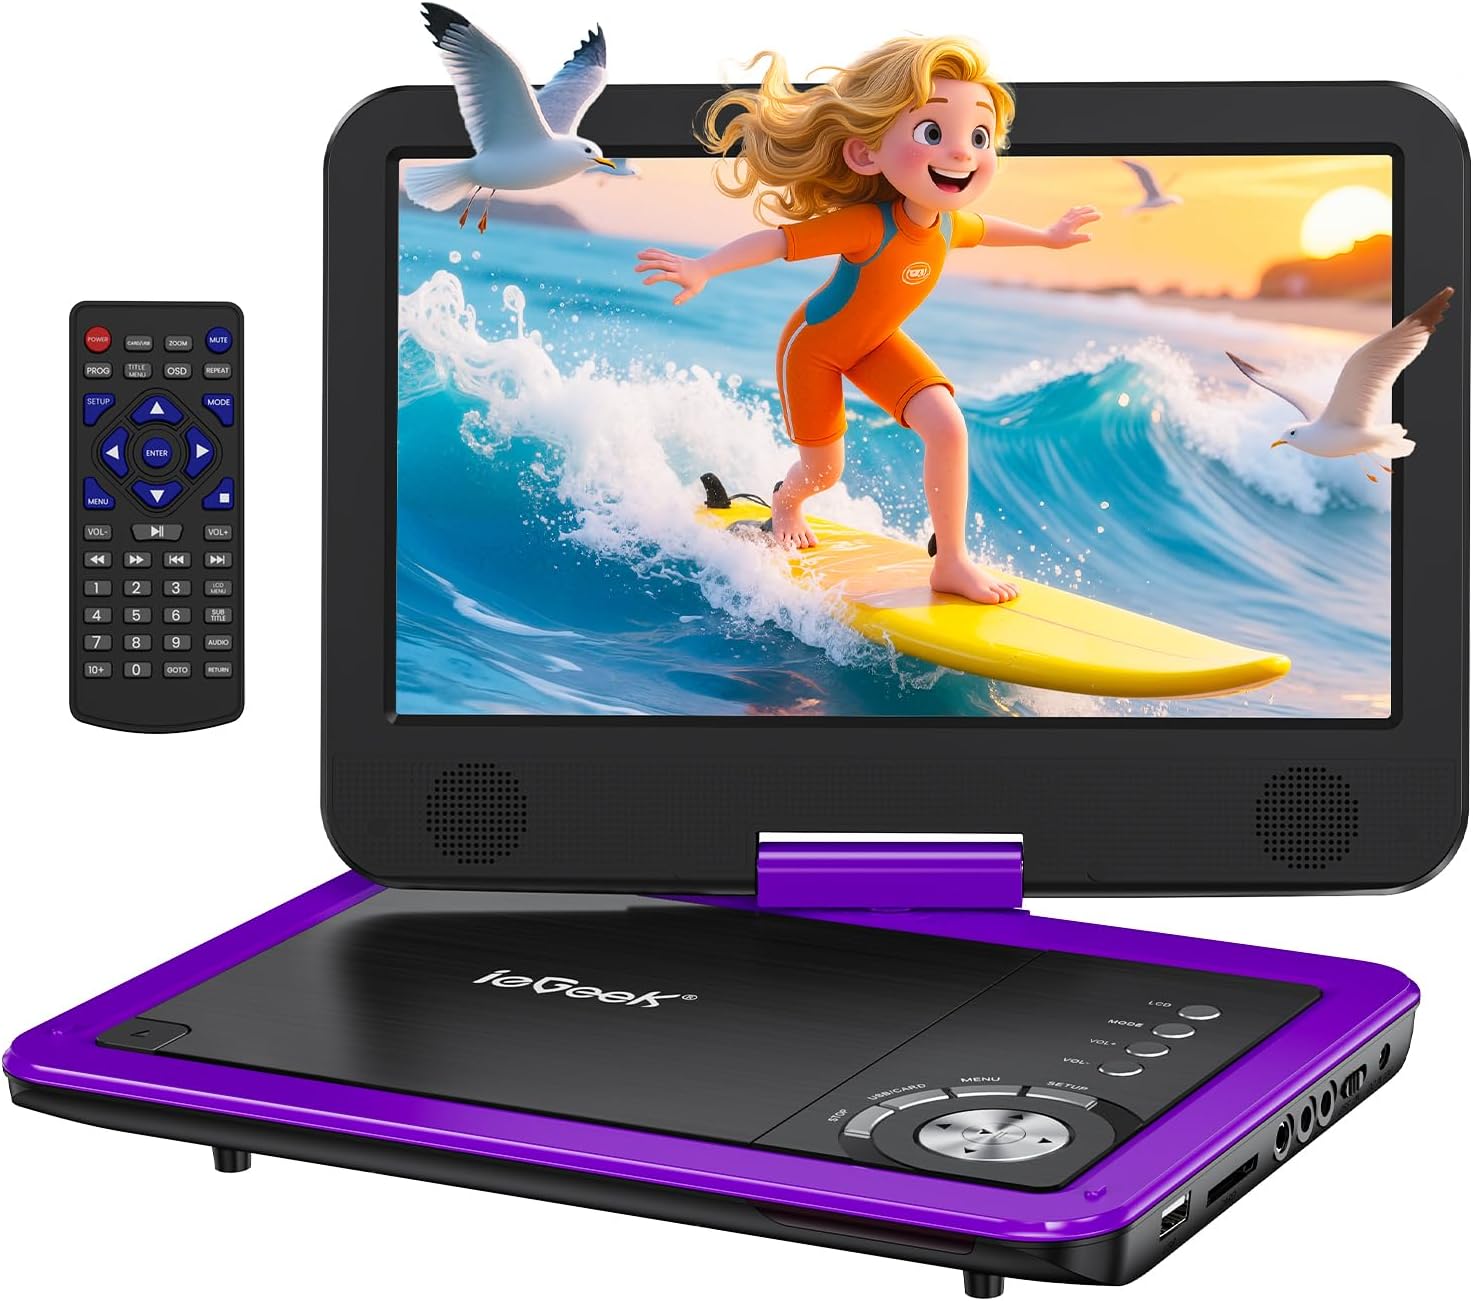
Figure 3.1: ieGeek Portable DVD Player
Controls and Ports

Figure 3.2: Side Ports and Controls
- USB Port: For connecting USB flash drives.
- SD Card Slot: For inserting SD memory cards.
- Earphone Jack: For connecting headphones.
- AV OUT: Connects to a TV or projector for larger screen viewing.
- AV IN: Connects to another portable DVD player for synchronized viewing.
- ON/OFF Switch: Powers the device on or off.
- DC IN 12V: Power input for AC adapter or car charger.
- GAME Port: For connecting a game controller (if supported).
4. Setup
4.1 Initial Charging
Before first use, fully charge the portable DVD player. The built-in rechargeable battery provides approximately 5 hours of video playback.
- Connect the AC Power Adapter to the DC IN 12V port and a power outlet.
- Alternatively, use the Car Charger to power the device in a vehicle.

Figure 4.1: Charging Options
4.2 Loading a Disc
- Slide the 'OPEN' latch to open the disc lid.
- Place the DVD or CD onto the spindle, ensuring it clicks into place.
- Close the disc lid firmly. The player will begin loading automatically.
Note: Blu-ray discs are not supported.
4.3 Inserting USB/SD Card
- Insert a USB flash drive into the USB port.
- Insert an SD card into the SD Card slot.
The player will detect the media and allow you to select files for playback.

Figure 4.2: USB and SD Card Insertion
5. Operating Instructions
5.1 Basic Playback
- Power On/Off: Use the ON/OFF switch on the side of the device.
- Play/Pause: Press the Play/Pause button on the device or remote to start or pause playback.
- Stop: Press the Stop button to end playback.
- Skip: Use the Previous/Next buttons to skip tracks or chapters.
- Volume Control: Adjust the volume using the VOL+ and VOL- buttons on the device or remote.
5.2 Screen Rotation
The 10.5-inch HD screen can rotate 270° and flip 180°, allowing for multiple viewing angles or folding into a tablet-like form.

Figure 5.1: Screen Rotation Capabilities
5.3 Remote Control
The included remote control provides full functionality for convenient operation from a distance.
5.4 External Connections (SYNC Screen Playing)
- Connect to TV: Use the AV to RCA cable (3-in-1 AV Cable) to connect the AV OUT port of the DVD player to the AV IN ports of a television. This allows you to view content on a larger screen.
- Connect to Another Player: Use an AV to AV cable (not included) to connect the AV OUT of one player to the AV IN of another, enabling synchronized viewing across two devices.
5.5 Special Features
- Last Memory Function: The player automatically resumes playback from where it was last stopped, even after powering off.
- Loop Playback: Enable the repeat function to play files on a continuous loop.
- Anti-Shake Function: Designed to minimize disc skip issues during movement, ideal for car travel.
6. Media Compatibility
This portable DVD player supports a wide range of media formats and is region-free for DVD playback.

Figure 6.1: Supported Media Types
6.1 Supported Disc Formats
- CD, DVD, VCD, DVD±R, DVD±RW, CD-R, CD-RW, CVD, SVCD.
- Not compatible with Blu-ray discs.
6.2 Supported Digital Media (USB/SD Card)
Supports USB and SD cards up to 32GB.
- Video: AVI, MPG, MPVG4, VOB, FLV, RMVB (resolution within 720*576).
- Audio: MP3, WMA, OGG, AAC.
7. Troubleshooting
If you encounter issues with your ieGeek Portable DVD Player, refer to the following common solutions:
- No Power: Ensure the device is fully charged or connected to a power source. Check the ON/OFF switch.
- No Disc Detected: Verify the disc is inserted correctly and is a supported format (not Blu-ray). Clean the disc if necessary.
- No Picture/Sound on TV: Check the AV cable connections between the DVD player and the TV. Ensure the TV input is set to the correct AV channel.
- Poor Picture Quality: Ensure the disc is clean and free of scratches. Adjust screen settings if available.
- Remote Control Not Working: Check the remote's batteries. Ensure there are no obstructions between the remote and the player's sensor.
Game Functionality
The ieGeek Portable DVD Player supports game playback via the USB port. Connect a compatible game controller to the USB port to access pre-loaded games or games from a USB drive.
Video 7.1: Demonstrating game play on the ieGeek Portable DVD Player by connecting a game controller via USB and playing a classic game.
8. Specifications
| Product Dimensions | 5.5 x 10.33 x 5.5 inches |
| Item Weight | 3.25 pounds |
| Batteries | 1 Lithium Polymer batteries required (included) |
| Brand | ieGeek |
| Media Type | DVD, VCD, CD, MP3, MPEG, AVI, VOB, USB, SD |
| Color | Purple |
| Screen Size | 10.5 Inches |
| Display Type | LCD |
9. Warranty and Support
The ieGeek Portable DVD Player typically comes with a 1-year warranty from the date of purchase. For technical support, warranty claims, or any inquiries, please contact ieGeek customer service.
- Contact Email: vp-service@iegeek.com
- Support: Lifetime Technical Support is available.
- Returns/Exchanges: 24 Months Return and Exchange policy.


