1. Introduction
Thank you for purchasing the Jada Toys Transformers Bumblebee 2016 Chevy Camaro RC Car. This 1:16 scale remote control vehicle is designed for enthusiasts aged 6 to 10 years. It features authentic styling from the Transformers: The Last Knight movie and includes USB charging technology for convenience. Please read this manual thoroughly before operating the vehicle to ensure proper use and longevity.

Image 1.1: The Jada Toys Transformers Bumblebee 2016 Chevy Camaro RC Car with its remote control.
2. Safety Information
- Adult Supervision: This product is recommended for ages 6-10. Adult supervision is advised during operation.
- Battery Safety: Do not mix old and new batteries. Do not mix alkaline, standard (carbon-zinc), or rechargeable (nickel-cadmium) batteries. Insert batteries with correct polarity. Remove batteries if the product is not used for an extended period.
- Operating Environment: Operate the RC car on flat, dry surfaces. Avoid water, sand, or excessively dusty areas to prevent damage to internal components.
- Obstacles: Ensure the operating area is clear of people, pets, and obstacles to prevent collisions and injuries.
- Heat: Do not expose the vehicle or remote control to extreme temperatures or direct sunlight for prolonged periods.
- Modifications: Do not attempt to modify or disassemble the vehicle or remote control, as this may cause damage and void the warranty.
3. Package Contents
Verify that all items listed below are included in your package:
- 1 x Bumblebee 2016 Chevy Camaro RC Vehicle
- 1 x Remote Control Transmitter
- 2 x AA Batteries (for remote control)

Image 3.1: The RC vehicle and its remote control as they appear in the package.
4. Setup
4.1. Remote Control Battery Installation
- Locate the battery compartment on the back of the remote control.
- Using a small Phillips head screwdriver (not included), unscrew the battery compartment cover.
- Insert 2 AA batteries, ensuring correct polarity (+/-) as indicated inside the compartment.
- Replace the battery compartment cover and secure it with the screw.
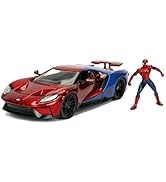
Image 4.1: The remote control, showing its buttons and antenna.
4.2. Vehicle Charging
The RC vehicle features a built-in rechargeable battery and utilizes USB charging technology.
- Locate the USB charging port on the underside or side of the vehicle.
- Connect the integrated USB charging cable from the vehicle to a standard USB power source (e.g., computer USB port, USB wall adapter, power bank).
- The charging indicator light on the vehicle will illuminate during charging and turn off or change color when fully charged. Refer to the vehicle for specific indicator behavior.
- Charging typically takes approximately 60-90 minutes for a full charge. Do not overcharge.
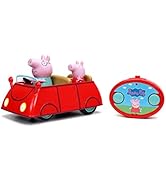
Image 4.2: Representation of USB charging capability.
4.3. Pairing the Vehicle and Remote Control
The vehicle and remote control operate on a 2.4GHz frequency, allowing for multiple RC vehicles to be operated simultaneously without interference.
- Ensure the remote control has fresh batteries installed and the vehicle is fully charged.
- Turn on the vehicle using the ON/OFF switch, usually located on the underside.
- Turn on the remote control using its ON/OFF switch.
- The remote control and vehicle should automatically pair. A light on the remote control or vehicle may stop flashing and become solid to indicate a successful connection.
- If pairing fails, turn both devices off and repeat steps 2-4.
5. Operating Instructions
5.1. Basic Controls
The remote control typically features two joysticks or buttons for movement:
- Forward/Backward: Push the left joystick/button forward to move the car forward, and backward to move it in reverse.
- Left/Right: Push the right joystick/button left to turn the car left, and right to turn it right.
- Turbo Boost: Some models may include a dedicated 'Turbo' button for increased speed. Press and hold this button while moving forward for a temporary speed boost.

Image 5.1: A child demonstrating the operation of the RC car with the remote control.
5.2. Driving Tips
- Start by practicing in an open area to get accustomed to the controls.
- Avoid driving into walls or hard objects at high speeds to prevent damage.
- For optimal performance, ensure the vehicle's battery is fully charged before each use.
- The 2.4GHz frequency allows for a good operating range, but keep the vehicle within visual sight for best control.
6. Maintenance
- Cleaning: Use a soft, dry cloth to wipe down the vehicle and remote control. Do not use water or chemical cleaners.
- Storage: Store the vehicle and remote control in a cool, dry place away from direct sunlight when not in use.
- Battery Removal: If storing for an extended period, remove the AA batteries from the remote control to prevent leakage.
- Avoid Impact: Protect the vehicle from drops and impacts to prevent damage to its electronic components and body.
7. Troubleshooting
| Problem | Possible Cause | Solution |
|---|---|---|
| Vehicle does not move. | Vehicle battery is low or depleted. Remote control batteries are low or incorrectly installed. Vehicle or remote control is off. Not paired. | Charge vehicle battery. Replace remote control batteries, ensuring correct polarity. Turn on both vehicle and remote control. Re-pair devices as per Section 4.3. |
| Poor control range or interference. | Operating too far from the vehicle. Other 2.4GHz devices nearby. Low batteries. | Operate closer to the vehicle. Move to an area with less electronic interference. Ensure batteries are fully charged. |
| Vehicle moves slowly. | Vehicle battery is low. | Recharge the vehicle battery. |
8. Specifications
- Model Number: 30332
- Scale: 1:16
- Product Dimensions: 11 x 4.75 x 3.5 inches
- Item Weight: 12.6 ounces
- Recommended Age: 6 - 10 years
- Vehicle Power: Integrated rechargeable battery (USB charging)
- Remote Control Power: 2 x AA batteries (included)
- Frequency: 2.4GHz
9. Warranty and Support
Jada Toys products are manufactured to high-quality standards. For warranty information or technical support, please refer to the contact information provided on the product packaging or visit the official Jada Toys website. Please retain your proof of purchase for any warranty claims.


