
DROK 200359
DROK Buck Converter User Manual
Model: 200359
Introduction
This manual provides essential information for the safe and effective operation of your DROK Buck Converter. Please read it thoroughly before use and retain it for future reference.
The DROK buck converter is a versatile voltage regulator board designed to step down DC voltage. It features an input voltage range of DC 6.5V-36V and an output voltage range of DC 1.2V-32V, with a factory default output of 5V. It can operate stably at 3.5A for extended periods and can reach 4.5A with proper heat dissipation. The module includes a clear LCD display for monitoring input/output voltage, current, and power, along with intuitive button controls for setting output voltage and managing power status.
Setup and Assembly
The DROK Buck Converter is shipped as parts to prevent damage during transit. Assembly of the protective case is required before use.
Package Contents
Verify that all components are present:
- Buck Converter Module with LCD
- Acrylic Protective Case (Top and Bottom Plates)
- Mounting Hardware (Screws, Standoffs)
- Heat Sink
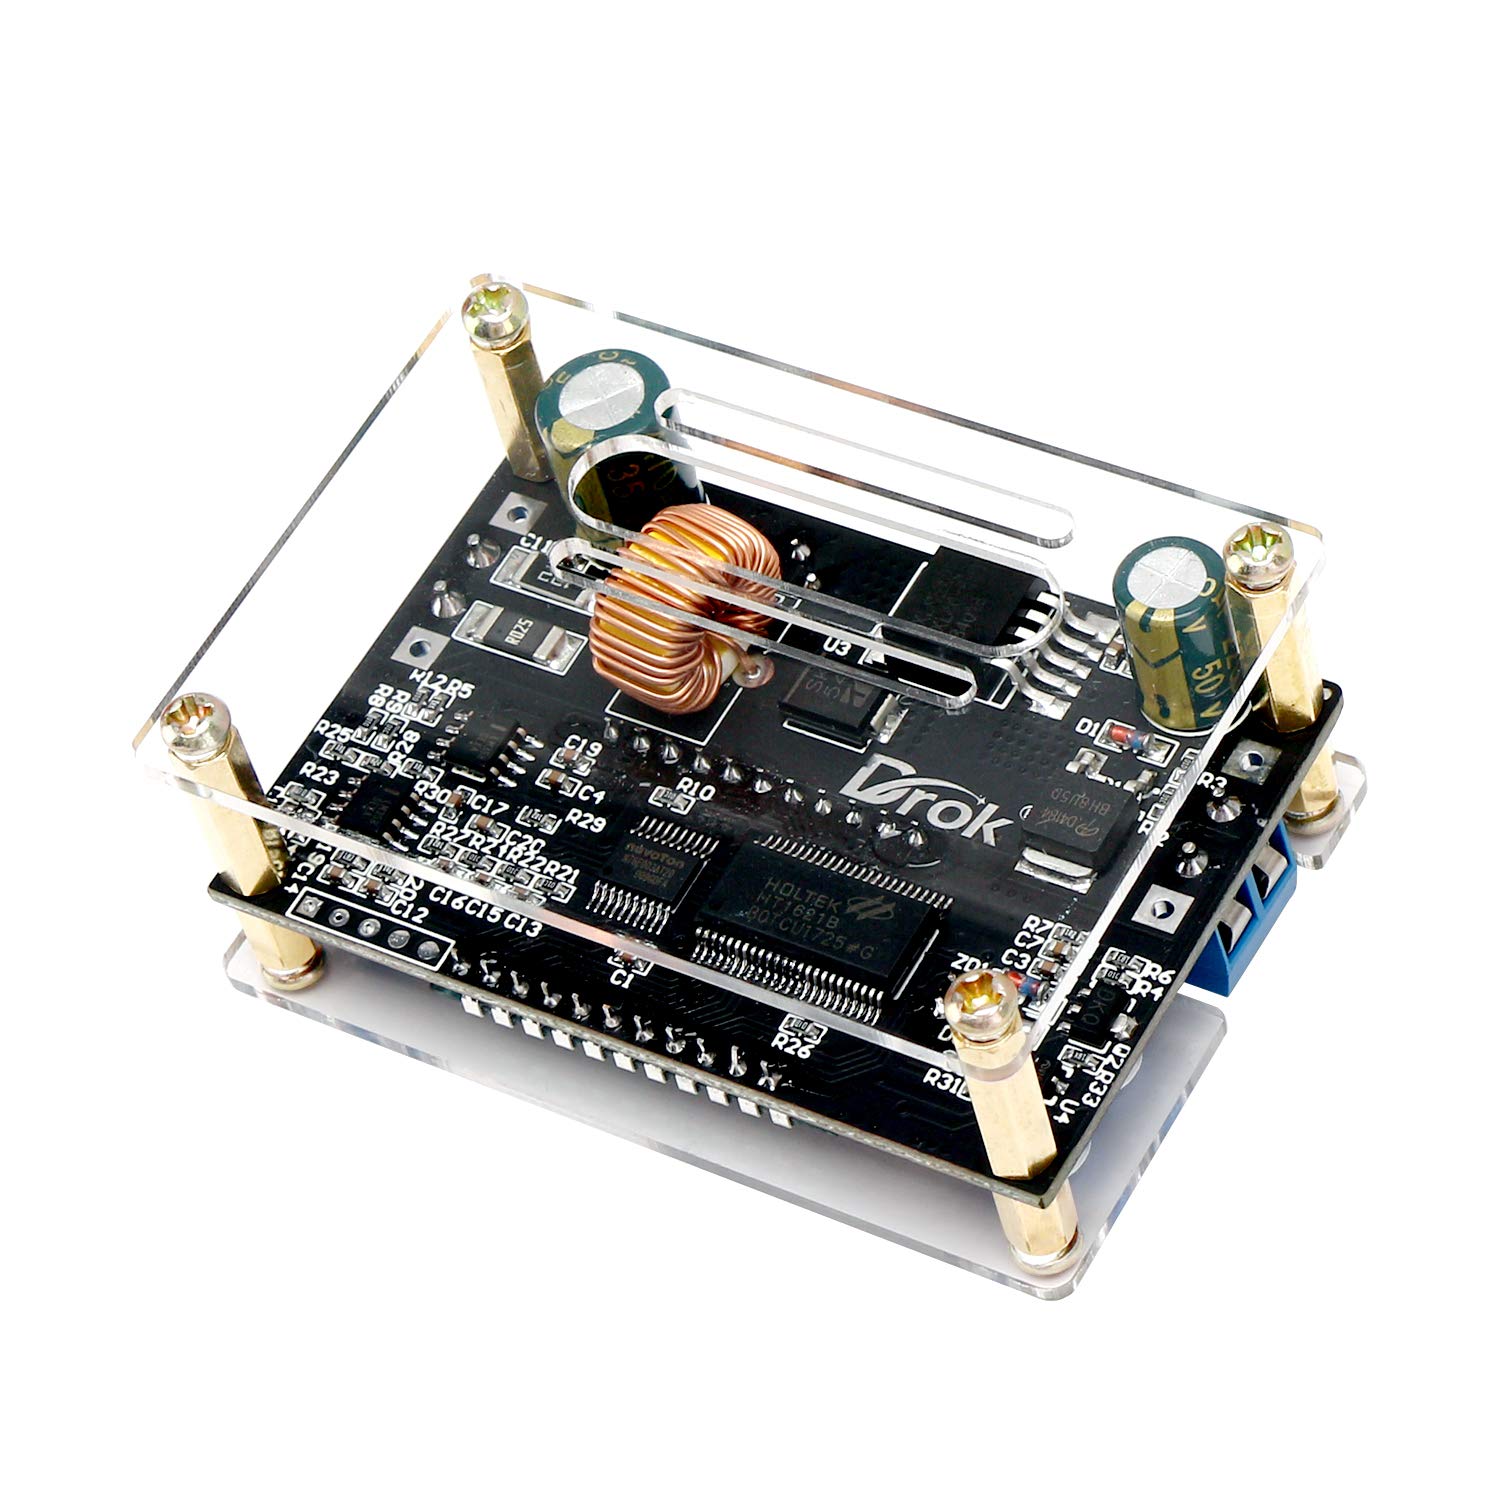
Figure 1: All components included with the DROK Buck Converter. This image shows the main circuit board, the two clear acrylic plates for the protective case, the small heat sink, and various screws and standoffs required for assembly.
Assembly Instructions
- Carefully remove all components from the packaging.
- Peel off any protective film from both sides of the acrylic case plates.
- Attach the heat sink to the designated area on the circuit board, if not already pre-installed.
- Align the bottom acrylic plate with the mounting holes on the circuit board.
- Insert the longer standoffs through the bottom plate and into the circuit board.
- Place the top acrylic plate over the circuit board, aligning it with the standoffs.
- Secure the top plate using the shorter screws into the standoffs.
- Ensure all connections are secure and the module is properly enclosed within the case.

Figure 2: The DROK Buck Converter fully assembled with its protective clear acrylic case. The blue buttons and LCD display are visible.
Installation Considerations
Consider the dimensions of the module for installation in your project:
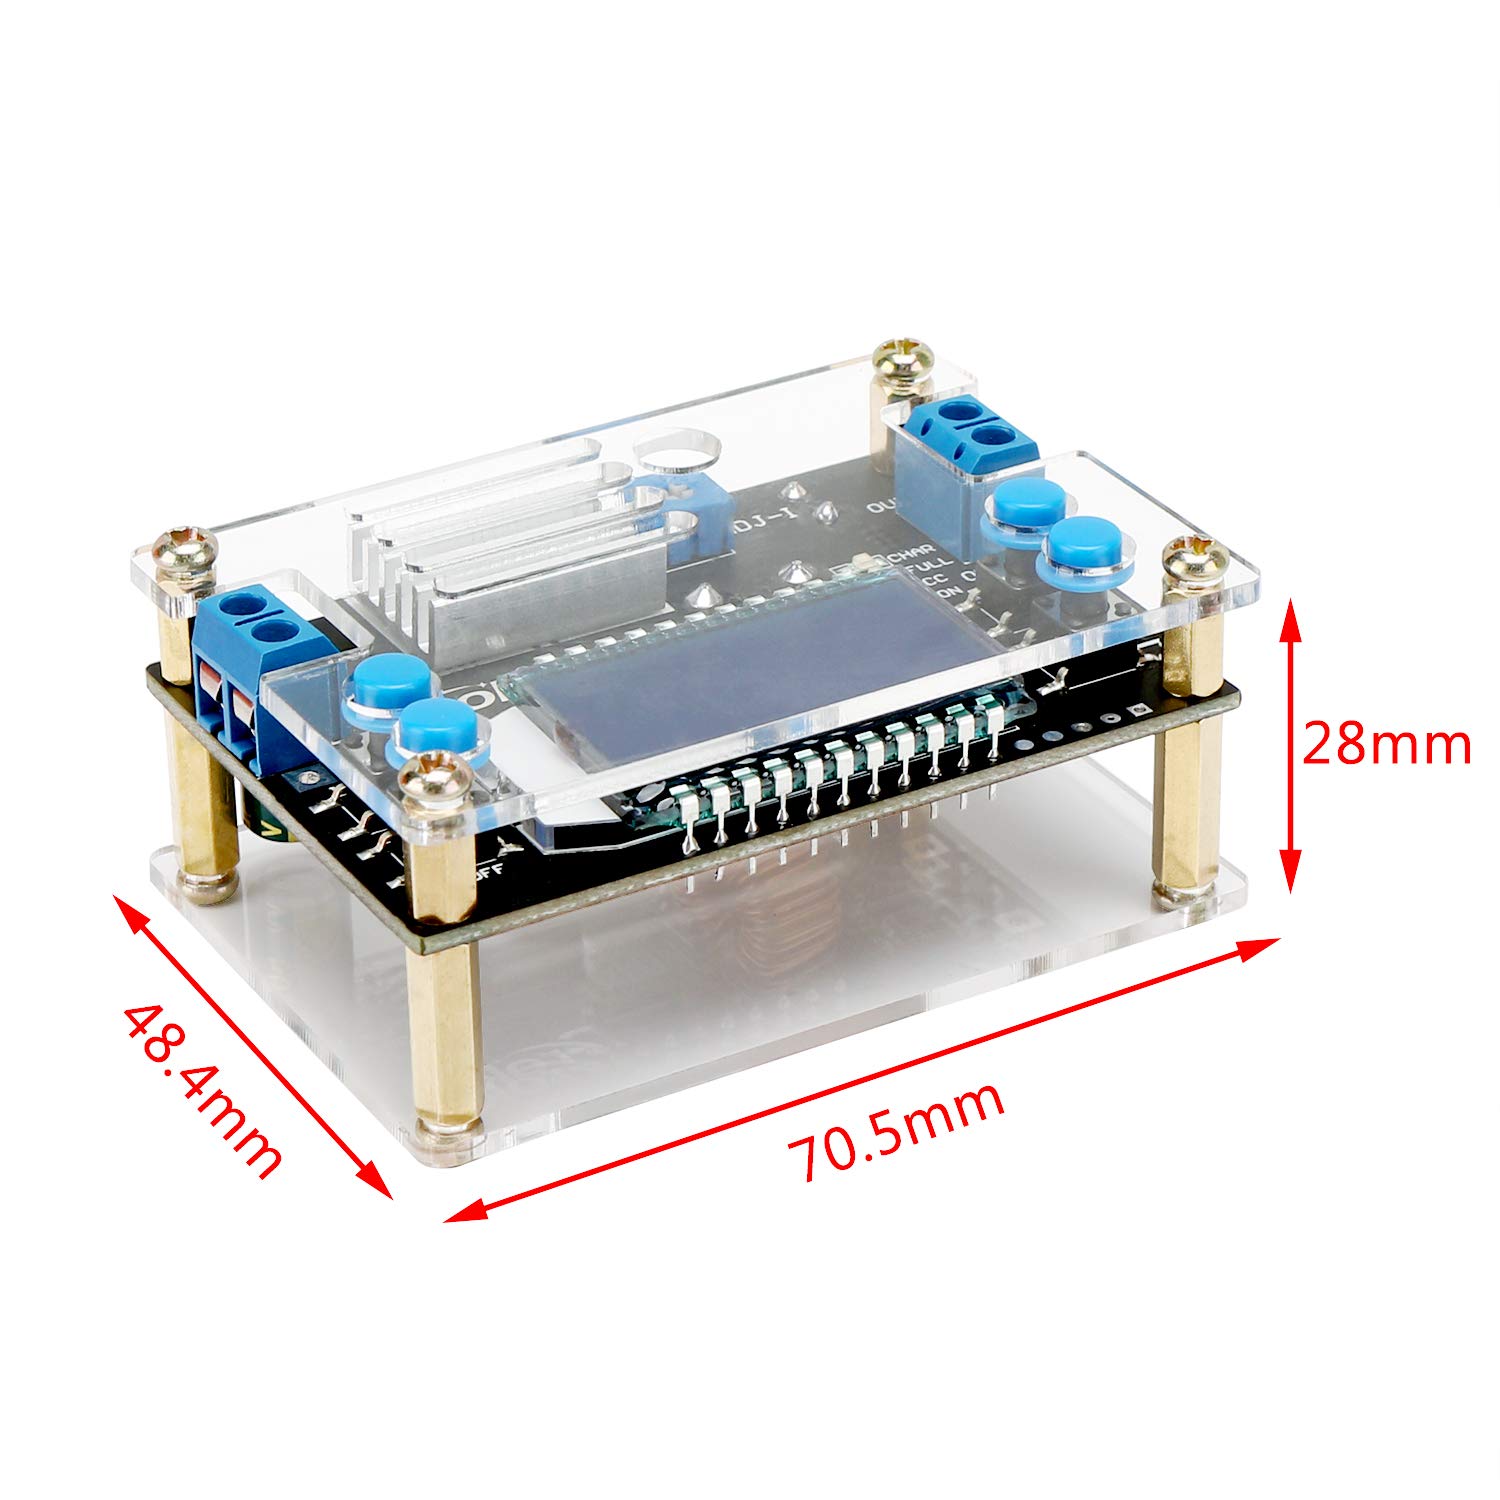
Figure 3: Dimensional drawing of the DROK Buck Converter, showing its length (70.5mm), width (48.4mm), and height (28mm). This is important for planning integration into an enclosure or system.
Operating Instructions
The DROK Buck Converter is designed for ease of use with its integrated LCD and button controls.
Connections
Identify the input and output terminals:
- IN+ / IN-: Input terminals for DC 6.5V-36V.
- OUT+ / OUT-: Output terminals for DC 1.2V-32V.
Ensure correct polarity when connecting power sources and loads. The module has reverse connection protection at the input terminal, but no anti-backflow protection at the output terminal.

Figure 4: Detailed operational diagram of the buck converter. It highlights the input (IN+) and output (OUT+) terminals, the voltage adjustment potentiometer (ADJ-I), and the functions of the control buttons for voltage adjustment, output ON/OFF, and display switching.
LCD Display Functions
The LCD displays real-time operational parameters:
- Input Voltage (V)
- Output Voltage (V)
- Output Current (A)
- Output Power (W)
The voltage display resolution is 0.05V, and current display resolution is 0.005A. Note that the volt display accuracy is ±0.1V, and the current display accuracy is ±0.05A.
Button Controls
The module features several buttons for easy configuration:
- Left Button (ON/OFF):
- Short press: Toggles output voltage ON/OFF.
- Long press: Sets the default output state (ON or OFF) for the next power-on.
- Right Buttons (Voltage Adjustment):
- "Voltage plus" button: Increases output voltage.
- "Voltage reduction" button: Decreases output voltage.
- Display Switching Button (Bottom Left):
- Short press: Switches between input/output voltage display.
- Long press: Switches between output current and output power display.
The output voltage can be precisely set using these buttons without the need for a flat screwdriver.
Current Limit Adjustment
The adjustable current limit is approximately 4.2-4.5A. This can be adjusted via the potentiometer labeled ADJ-I on the board (refer to Figure 4).
Operational Video (Example Application)
While there are no official seller videos demonstrating the specific operation of this model, customer-provided videos can sometimes offer insights into similar applications. Please note that the following video is provided by a customer and may not represent official product demonstrations or features. It shows the buck converter being used to power LED lights in a camper van, demonstrating its ability to stabilize voltage for lighting circuits.
Video 1: Customer demonstration of the DROK Buck Converter stabilizing LED lights in a camper van. This video illustrates a practical application where the converter helps maintain consistent power to lighting circuits despite fluctuations from other loads.
Maintenance
The DROK Buck Converter is designed for reliable operation with minimal maintenance. Keep the module clean and free from dust and debris. Ensure adequate ventilation, especially when operating at higher currents, to allow the heat sink to function effectively.
Regularly inspect all wiring connections to ensure they are secure and free from corrosion or damage. Do not attempt to modify the circuit board, as this may void the warranty and could lead to malfunction or damage.
Troubleshooting
This section provides solutions to common issues. If you encounter a problem not listed here, please refer to the support section.
- No Display/No Output:
- Check input power supply: Ensure the input voltage is within the specified range of DC 6.5V-36V.
- Verify input polarity: Although the module has reverse input protection, incorrect wiring can prevent operation.
- Check connections: Ensure all wires are securely connected to the input and output terminals.
- Output OFF: Short press the ON/OFF button to ensure the output is enabled.
- Incorrect Output Voltage:
- Adjust using buttons: Use the "Voltage plus" and "Voltage reduction" buttons to set the desired output voltage.
- Check load: Ensure the load is not drawing excessive current, which could cause voltage drop.
- Output Current/Power Readings are Zero or Incorrect:
- Check load connection: Ensure the load is properly connected and drawing current.
- Display mode: Long press the display switching button to cycle through current and power displays.
- Accuracy note: Remember the specified display accuracy (±0.05A for current).
- Module Overheating:
- Reduce load: Operating at or near maximum current (4.5A) without sufficient heat dissipation can cause overheating. Reduce the load if possible.
- Improve ventilation: Ensure the module is in an area with good airflow.
- Verify heat sink installation: Confirm the heat sink is properly attached.
Specifications
| Feature | Specification |
|---|---|
| Brand | DROK |
| Model Number | 200359 |
| Input Voltage Range | DC 6.5V-36V |
| Output Voltage Range | DC 1.2V-32V (Factory default 5V) |
| Continuous Output Current | 3.5A (long-term stable) |
| Maximum Output Current | 4.5A (with heat dissipation) |
| Adjustable Current Limit | Approx. 4.2-4.5A |
| Voltage Display Resolution | 0.05V |
| Current Display Resolution | 0.005A |
| Voltage Display Accuracy | ±0.1V |
| Current Display Accuracy | ±0.05A |
| Protection Features | Input reverse connection protection (No output anti-backflow protection) |
| Dimensions (L x W x H) | 70.5 x 48.4 x 28 mm (approx. 2.78 x 1.91 x 1.10 inches) |
| Item Weight | 2.82 ounces |
Warranty and Support
Warranty Information
DROK offers a one-year long period service for products purchased. If there is any quality issue with your item, you may be eligible for a brand new replacement.
Additional Resources and Support
For further assistance or detailed documentation, please refer to the following resources:
For direct support, please contact DROK customer service through the official store page or your purchase platform.
Related documents200359


Ask a question about this manual
Ask about setup, troubleshooting, compatibility, parts, safety, or missing instructions. Manuals+ will review the question and use this page’s manual context to help answer it.