
Nutritower 32 Plants (ASIN: B07FK5FZLW)
Nutritower - Indoor Hydroponic Vertical Garden User Manual
Model: 32 Plants (ASIN: B07FK5FZLW)
Introduction
Welcome to the future of home gardening with the Nutritower Indoor Hydroponic Vertical Garden. This revolutionary appliance allows you to cultivate fresh fruits, vegetables, and herbs year-round, right in your home. Utilizing advanced hydroponic technology, the Nutritower provides an efficient, soil-free growing environment with automated watering and energy-efficient lighting, ensuring healthy plant growth and consistent harvests.

Figure 1: The Nutritower fully assembled with various plants growing.
Setup
Carefully unpack all components and ensure all parts are present before beginning assembly. Refer to the included parts list for verification.
1. Base Assembly
Place the main base unit on a flat, stable surface. Ensure the area chosen has access to a power outlet and is suitable for plant growth (e.g., adequate ambient light, stable temperature).

Figure 2: Detail of the Nutritower's sturdy base and lower plant pot supports.
2. Tower and Lighting Installation
Assemble the central tower structure, which houses the LED grow lights. Connect the light fixtures securely according to the diagrams in the separate assembly guide. Ensure all electrical connections are firm.

Figure 3: The central light column of the Nutritower, providing essential light for plant growth.
3. Plant Pot Placement
Attach the plant pots to the tower structure. The Nutritower is designed for 32 plants, with pots suspended around the central light column. Ensure each pot is securely fastened and level.

Figure 4: Proper insertion of a net pot into the Nutritower's growing system.
4. Water Reservoir and Pump Setup
Fill the water reservoir located in the base with clean water and the recommended hydroponic nutrients. Install the water pump and connect the irrigation lines to each plant pot. The system uses a drip irrigation method.
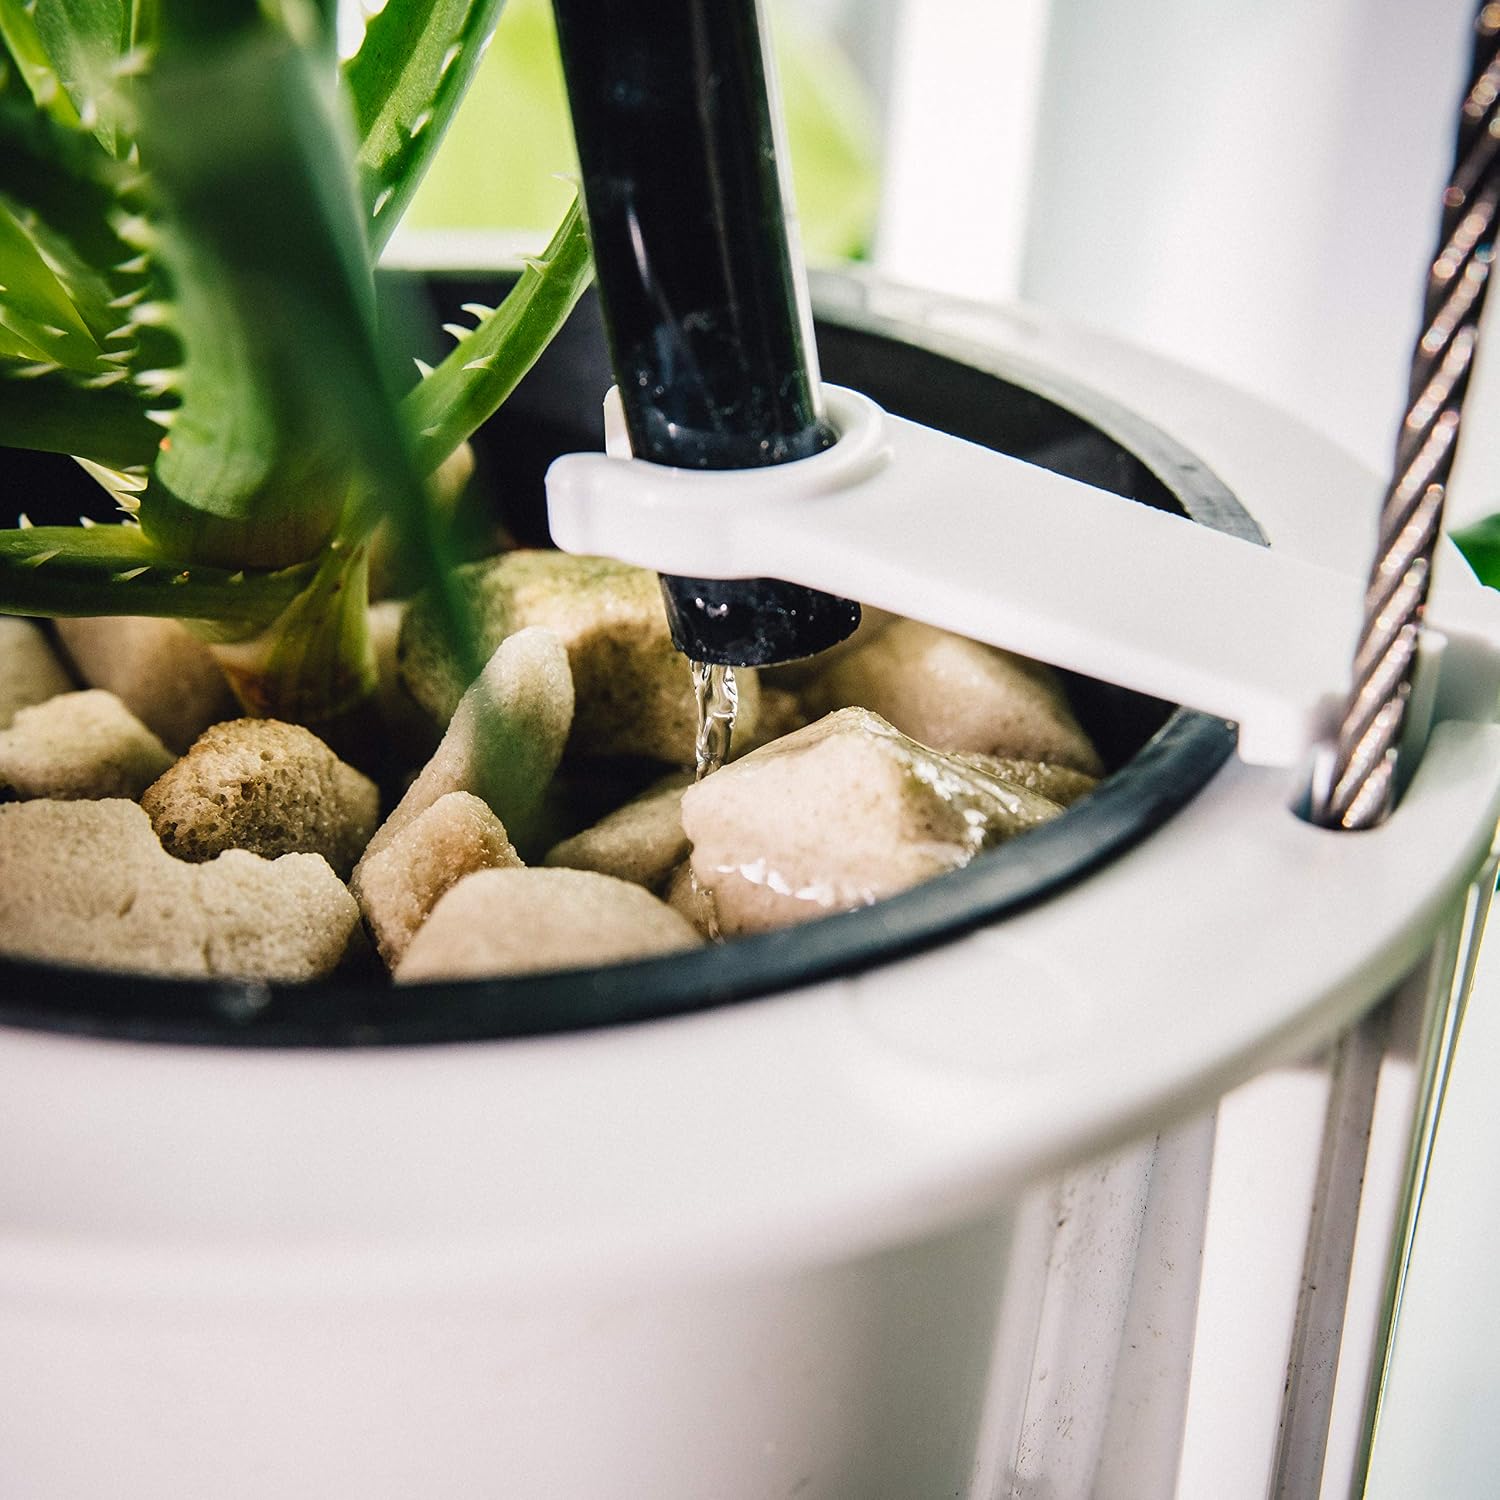
Figure 5: The drip irrigation system delivering water and nutrients directly to the plant roots.
Operating Instructions
1. Initial Power-Up and Timer Setting
Plug the Nutritower into a standard electrical outlet. The automatic timer allows for easy programming of watering cycles. Refer to the timer's specific instructions for setting desired on/off times for both watering and lighting. The system is designed for continuous operation with timed cycles.

Figure 6: Overhead view showing the efficient placement of the grow lights within the tower.
2. Planting Seedlings
The Nutritower is entirely soil-free. Seedlings should be placed in the custom-designed netting pots filled with the provided growing medium. Gently insert the net pots into the designated openings in the plant holders.

Figure 7: A view from above, showcasing the variety of plants thriving in the Nutritower.
3. Harvesting
Harvest plants as they mature. The continuous growth cycle allows for frequent harvesting, often weekly, depending on the plant type. Use clean shears or scissors for harvesting to promote continued growth.

Figure 8: Freshly harvested produce from the Nutritower, demonstrating its yield.
Maintenance
1. Water and Nutrient Management
Regularly check the water level in the reservoir and replenish as needed. It is crucial to maintain the correct balance of hydroponic nutrients. Follow the nutrient manufacturer's guidelines for dosage and frequency. Periodically, the reservoir should be drained and refilled with fresh water and nutrients to prevent nutrient buildup.
2. Cleaning
Clean the plant pots and irrigation lines periodically to prevent algae growth and mineral deposits. Use a soft brush and mild, plant-safe cleaning solution. Ensure all components are thoroughly rinsed before reassembly.
3. Plant Health Monitoring
Inspect plants regularly for signs of pests or diseases. Address any issues promptly using organic pest control methods suitable for hydroponic systems. Prune plants as necessary to encourage healthy growth and air circulation.
Troubleshooting
- Plants Wilting/Stunted Growth: Check water level and nutrient concentration. Ensure the pump is functioning and irrigation lines are not clogged. Verify light cycle settings.
- Algae Growth in Reservoir/Pots: This indicates too much light exposure to the water or nutrient solution. Ensure the reservoir is covered and clean pots regularly. Reduce light exposure to water if possible.
- Pump Not Working: Check power connection. Ensure the pump is submerged in water. Clean the pump impeller if it's clogged with debris.
- Unusual Odor: This can indicate stagnant water or bacterial growth. Drain, clean, and refill the reservoir with fresh water and nutrients.
Specifications
| Feature | Detail |
|---|---|
| Brand | Nutritower |
| Model | 32 Plants (ASIN: B07FK5FZLW) |
| Indoor/Outdoor Usage | Indoor |
| Special Feature | Soil Free Hydroponic Technology |
| Unit Count | 1 Count |
| Power Consumption | Approximately 200 watts |
| Watering System | Timed Drip Irrigation |
| Product Care Instructions | Watering, Nutrient Management, Cleaning |
Warranty and Support
For detailed warranty information and customer support, please refer to the official Nutritower website or contact Nutritower customer service directly. Keep your proof of purchase for warranty claims.
Manufacturer: Nutritower Inc
Related documents32 Plants (ASIN: B07FK5FZLW)

Ask a question about this manual
Ask about setup, troubleshooting, compatibility, parts, safety, or missing instructions. Manuals+ will review the question and use this page’s manual context to help answer it.