
1. Introduction
This manual provides essential instructions for the proper installation, maintenance, and general understanding of your Allstar Performance Roll Cage Kit Neon, model ALL22097. This roll cage is designed to enhance vehicle safety in competitive racing environments by providing structural integrity and occupant protection. Please read this manual thoroughly before attempting any installation or modification.
Proper installation is critical for the safety and performance of this product. If you are not confident in your ability to install this kit, it is recommended to seek assistance from a qualified professional.
2. Safety Information
WARNING: Failure to follow these safety instructions could result in serious injury or death.
- Always wear appropriate personal protective equipment (PPE) including safety glasses, gloves, and hearing protection during installation.
- Ensure the vehicle is securely supported on jack stands or a lift before beginning any work.
- Disconnect the vehicle's battery before welding or making any electrical modifications.
- Verify all components are present and undamaged before installation. Do not install damaged parts.
- This roll cage is intended for off-road or competition use only. Check local regulations regarding roll cage installation and use.
- Proper welding techniques are essential for structural integrity. Consult a certified welder if necessary.
3. Package Contents
Please verify that all components listed below are included in your package. If any parts are missing or damaged, contact Allstar Performance customer support immediately.
- Main Hoop
- Front Down Bars (2)
- Rear Down Bars (2)
- Door Bars (2)
- Windshield Bar
- Cross Bar (for seat/harness mounting)
- Gussets and Mounting Plates (various)
- Hardware Kit (bolts, nuts, washers - quantity may vary by kit)
Note: Specific tube lengths and bends are pre-engineered for the intended vehicle application. Do not modify without professional guidance.
4. Setup and Installation
This section outlines the general steps for installing the Allstar Performance Roll Cage Kit. Specific vehicle preparation and fitment may vary. Always refer to vehicle-specific instructions or professional guidance if available.
4.1. Preparation
- Vehicle Preparation: Remove seats, interior trim, carpet, and any other components that obstruct access to the chassis or interfere with roll cage placement.
- Clean Surface: Thoroughly clean all areas where the roll cage will be mounted or welded. Remove paint, undercoating, and rust to ensure proper weld penetration.
- Trial Fit: Carefully position the main hoop and other primary bars inside the vehicle to assess fitment and identify any necessary adjustments or minor trimming of interior panels.
4.2. Main Hoop Installation
The main hoop is the foundation of the roll cage. Ensure it is positioned correctly and securely.
- Position the main hoop behind the front seats, ensuring it is level and centered within the vehicle's chassis.
- Mark the locations for the main hoop mounting plates on the vehicle floor.
- Prepare the mounting surfaces by grinding away paint or undercoating.
- Weld the main hoop mounting plates to the chassis. Ensure full penetration welds for maximum strength.
- Temporarily secure the main hoop to the welded plates.
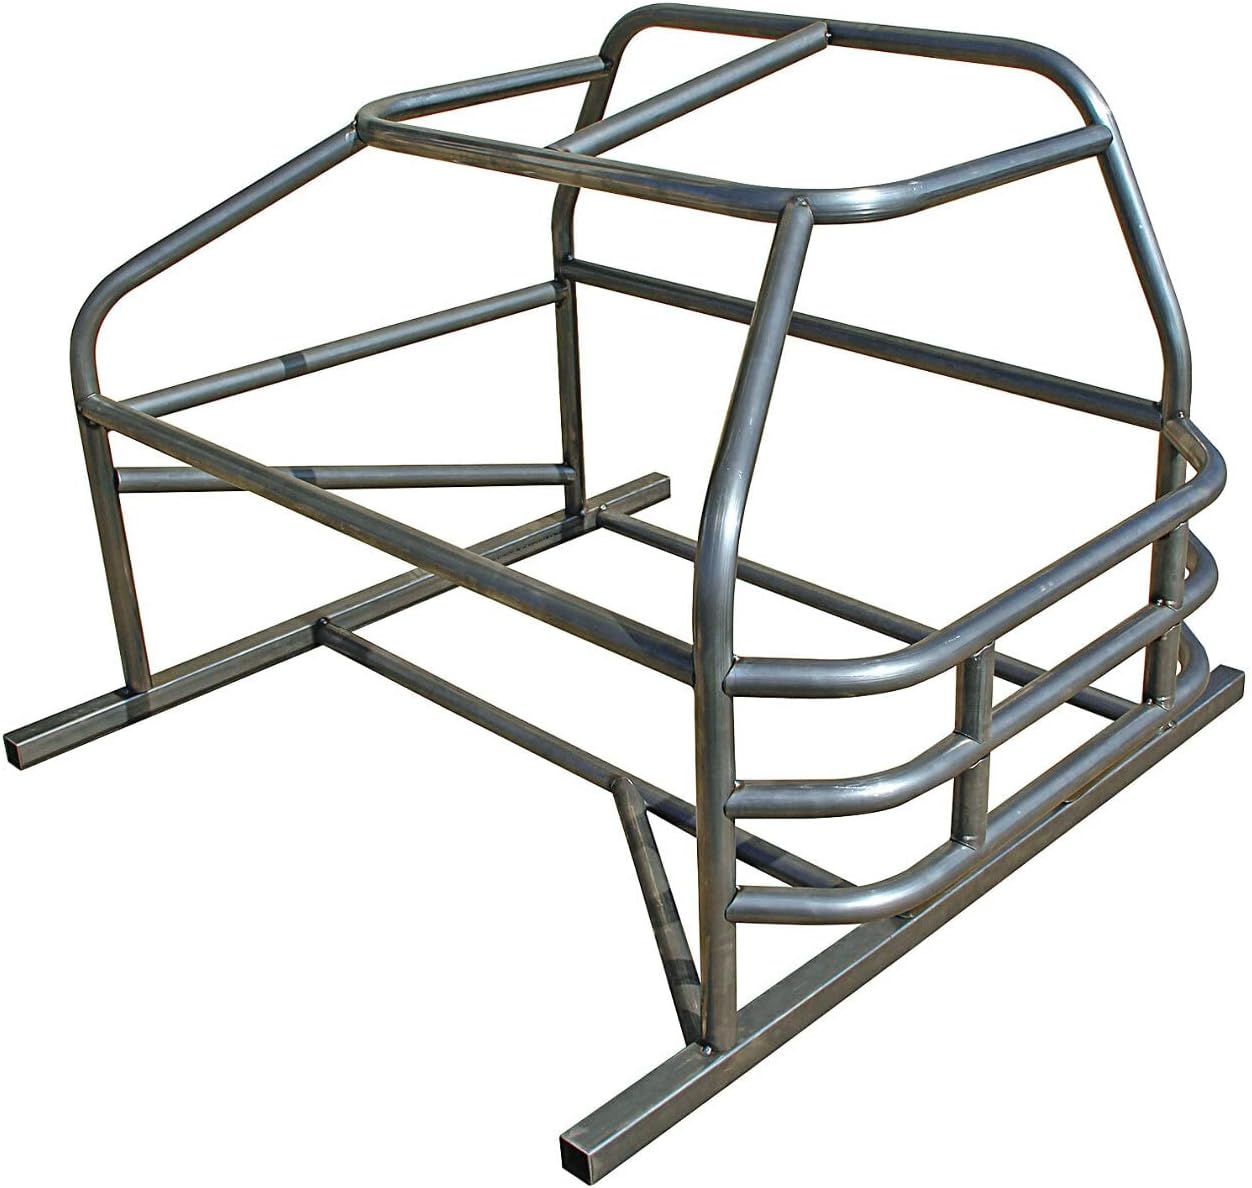
Figure 1: Assembled Allstar Performance Roll Cage Kit (Model ALL22097). This image illustrates the general structure including the main hoop, front and rear down bars, and door bars, providing a visual reference for component identification and overall assembly.
4.3. Bar Installation (Front, Rear, Door, Windshield)
Install the remaining bars, ensuring proper fitment and alignment before final welding.
- Front Down Bars: Attach the front down bars from the main hoop forward to the chassis, typically near the firewall or front frame rails. Ensure they clear all vehicle components.
- Rear Down Bars: Connect the rear down bars from the main hoop rearward to the chassis, usually over the rear axle or to the rear frame rails.
- Door Bars: Install the door bars between the main hoop and the front down bars, or directly to the chassis, depending on the kit design. These provide side impact protection.
- Windshield Bar: If included, install the windshield bar across the top of the front down bars or from the main hoop to the front chassis, above the windshield.
- Cross Bar: Install the cross bar for harness mounting at the appropriate height behind the driver's seat.
4.4. Welding and Gusseting
Once all bars are correctly positioned and tacked into place, proceed with final welding and gusset installation.
- Perform full 360-degree welds on all tube junctions and mounting plates.
- Install gussets at critical stress points, such as main hoop corners and bar intersections, as specified by racing regulations or engineering best practices.
- Allow welds to cool naturally. Do not quench.
4.5. Finishing
- Inspect all welds for quality and integrity.
- Clean and paint the roll cage to prevent rust and for aesthetic purposes.
- Reinstall interior components, ensuring they do not interfere with the roll cage.
5. Usage Considerations
The Allstar Performance Roll Cage Kit is designed to provide enhanced safety in high-performance and racing applications. Once installed, consider the following:
- Occupant Clearance: Ensure adequate head and body clearance for all occupants, especially when wearing helmets. Padding may be required on bars in contact areas.
- Harness Attachment: Always attach racing harnesses to the designated crossbar or other reinforced points on the roll cage, following harness manufacturer instructions.
- Regular Inspection: Before each use, visually inspect the roll cage for any signs of damage, cracks, or loose welds.
- Racing Regulations: Adhere to all applicable racing organization rules and regulations regarding roll cage design, materials, and installation.
6. Maintenance
Proper maintenance ensures the continued safety and integrity of your roll cage.
- Post-Impact Inspection: After any significant impact or incident, thoroughly inspect the entire roll cage structure for bends, cracks, or compromised welds. If damage is found, the roll cage should be professionally inspected and repaired or replaced.
- Corrosion Prevention: Keep the roll cage clean and dry. Touch up any chipped paint or exposed metal to prevent rust.
- Fastener Checks: If any bolted connections are used (e.g., for removable door bars), regularly check and tighten all fasteners to their specified torque.
7. Troubleshooting
This section addresses common concerns related to roll cage installation and use.
| Issue | Possible Cause | Solution |
|---|---|---|
| Poor fitment during trial assembly | Incorrect vehicle application; minor manufacturing variations; vehicle chassis deformation. | Verify kit is for correct vehicle. Minor trimming of interior panels may be required. For significant discrepancies, contact Allstar Performance. |
| Cracks appearing near welds | Improper welding technique; insufficient material preparation; excessive stress on joint. | Immediately cease vehicle use. Consult a certified welder for inspection and repair. This indicates a critical safety issue. |
| Roll cage interferes with interior components | Insufficient removal of interior trim; incorrect bar placement. | Re-evaluate bar placement. Trim interior panels as necessary to ensure clearance. |
For issues not listed here, or if you require further assistance, please contact Allstar Performance customer support.
8. Specifications
- Model: ALL22097
- Brand: Allstar Performance
- Material: Steel (specific grade may vary, refer to product packaging)
- Approximate Item Weight: 125 pounds
- Approximate Product Dimensions (packaged): 24 x 24 x 24 inches
- Intended Use: Competition/Off-road vehicle safety enhancement
Note: Specifications are subject to change without notice.
9. Warranty and Support
For specific warranty information regarding your Allstar Performance Roll Cage Kit, please refer to the documentation included with your purchase or visit the official Allstar Performance website. Warranty terms typically cover manufacturing defects.
For technical support, missing parts, or warranty claims, please contact Allstar Performance directly:
- Website: www.allstarperformance.com
- Customer Service: Refer to the website for contact numbers or email addresses.
When contacting support, please have your model number (ALL22097) and purchase date available.