
Intex 26646
Intex 26646 Krystal Clear Sand Filter Pump User Manual
Model: 26646
1. Introduction
Thank you for purchasing the Intex Krystal Clear Sand Filter Pump. This manual provides essential information for the safe operation, installation, and maintenance of your sand filter pump. This pump is designed to keep your pool water clean and sanitized throughout the swimming season, utilizing sand for excellent filtration and Hydro Aeration Technology for improved circulation and clearer water.
The Intex 26646 model features a pump flow capacity of 7.9 m³ (7900 L/h) and a system flow of 6.0 m³ (6000 L/h). It is equipped with a 6-function valve and a built-in 24-hour automatic timer for convenient operation. This filter pump is compatible with Intex Ultra XTR Frame Rectangular pools (732x366 cm) and Ultra XTR Frame Round pools (549/610 cm).

Image 1.1: Overview of the Intex Krystal Clear Sand Filter Pump.
2. Important Safety Instructions
When installing and using this electrical equipment, basic safety precautions should always be followed, including the following:
- DANGER: To reduce the risk of injury, do not permit children to use this product.
- WARNING: This appliance can be used by children aged from 8 years and above and persons with reduced physical, sensory or mental capabilities or lack of experience and knowledge if they have been given supervision or instruction concerning use of the appliance in a safe way and understand the hazards involved.
- WARNING: Always disconnect this product from the electrical outlet before removing, cleaning, servicing, or making any adjustments to the product.
- WARNING: The pump must be placed on a solid, level surface.
- WARNING: Do not bury electrical cord. Locate cord where it will not be damaged by lawn mowers, hedge trimmers, or other equipment.
- WARNING: To reduce the risk of electric shock, do not use an extension cord to connect unit to electric supply; provide a properly located outlet.
- WARNING: This pump is for use with storable pools only. Do not use with permanently-installed pools.
- WARNING: Ensure all connections are secure and leak-free before operating the pump.
3. Product Components
The Intex Krystal Clear Sand Filter Pump system consists of several key components:
- Filter Tank: Houses the filter media (sand or glass media).
- Pump Motor: Provides the power to circulate water through the system.
- 6-Function Control Valve: Allows selection of different operating modes (Filter, Backwash, Rinse, Recirculate, Drain, Stop).
- Pressure Gauge: Indicates the pressure inside the filter tank, helping to determine when backwashing is needed.
- Strainer Basket: Collects larger debris before it reaches the pump impeller.
- Timer: Built-in 24-hour timer for automated operation.
- Hoses and Connections: For connecting the pump to the pool.

Image 3.1: Detailed views of the pump's key components.
4. Setup and Installation
Proper setup is crucial for the efficient operation of your sand filter pump. Follow these general steps:
- Placement: Position the pump on a firm, level surface, at least 2 meters (6.5 feet) away from the pool. Ensure it is protected from direct sunlight and adverse weather conditions.
- Fill with Filter Media: Remove the control valve and fill the filter tank with the recommended amount of filter sand (23 kg) or glass media (16 kg). Ensure the standpipe is centered during filling.
- Install Control Valve: Carefully place the 6-function control valve onto the filter tank, ensuring a tight seal.
- Connect Hoses: Connect the pump to your pool's inlet and outlet fittings using the provided hoses. Ensure all connections are secure and use thread sealant tape if necessary. Note that plunger valves and 38mm outlet nozzle fittings are not included and may be required for your pool setup.
- Prime the Pump: Before starting, ensure the pump is primed by filling the strainer basket housing with water.
- Electrical Connection: Connect the pump to a grounded electrical outlet (220-240 V). Do not use extension cords.
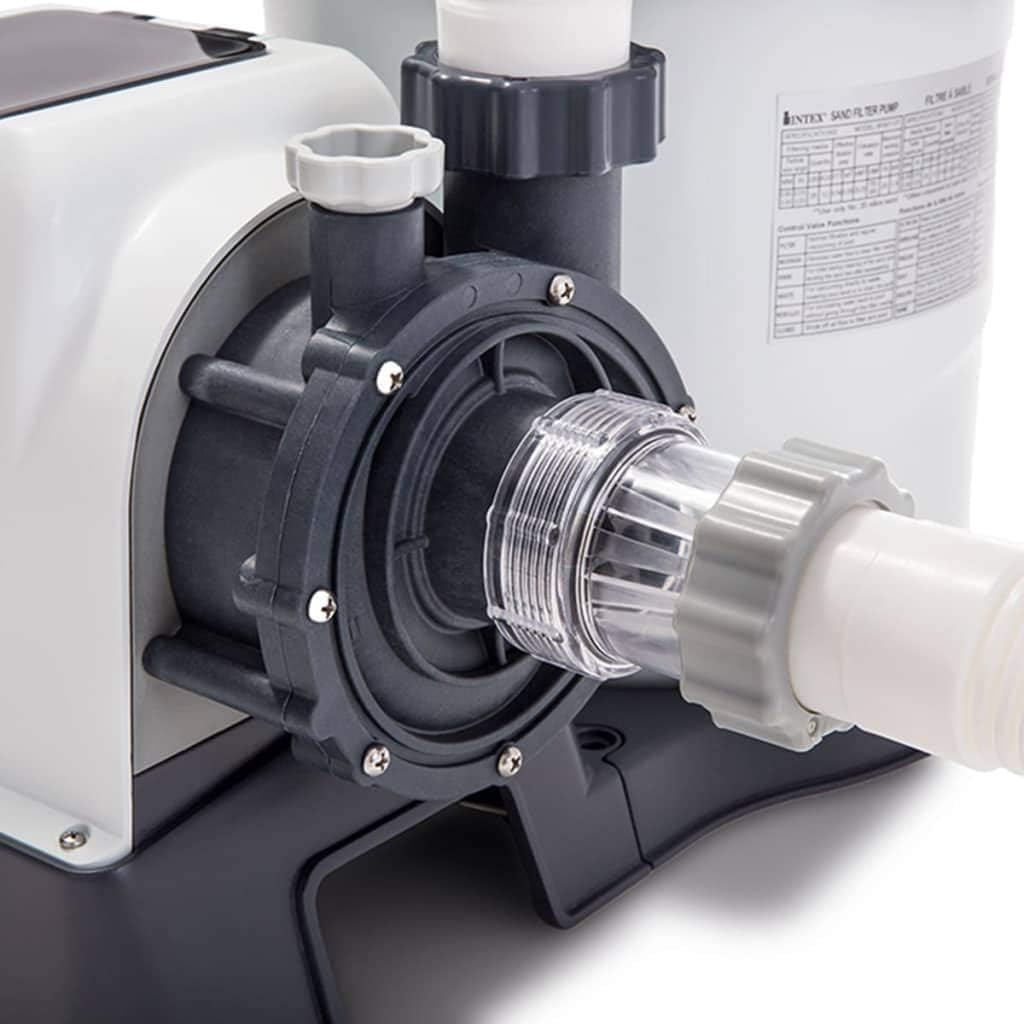
Image 4.1: Detail of the pump's connection and strainer basket.

Image 4.2: User performing an adjustment on the pump.
5. Operating Instructions
The 6-function control valve allows you to select various operating modes for your sand filter pump:
- FILTER: Normal filtering mode. Water is pumped through the sand bed, filtered, and returned to the pool.
- BACKWASH: Used to clean the filter media. Water flows in reverse through the sand bed, dislodging trapped debris, and is then discharged to waste. Perform when pressure gauge indicates high pressure.
- RINSE: Used after backwashing to flush out any remaining dirt from the sand bed and settle the sand. Water is discharged to waste.
- RECIRCULATE: Bypasses the filter. Water is circulated through the pump and returned to the pool without filtration. Useful for distributing chemicals.
- DRAIN: Drains water directly from the pool, bypassing the filter.
- STOP: Shuts off all flow to the filter and pump.
To change valve positions, always turn off the pump first. The built-in 24-hour automatic timer allows you to program the pump's operating hours for convenience.

Image 5.1: The 6-function control valve.
Official Product Video
Video 5.1: Official product video showcasing the Intex 26646 Sand Filter Pump and its flow capabilities.
6. Maintenance
Regular maintenance ensures the longevity and efficiency of your sand filter pump:
- Backwashing: Regularly backwash the filter when the pressure gauge indicates a rise of 3-5 PSI (0.2-0.34 Bar) above the clean operating pressure, or when water flow to the pool decreases significantly.
- Rinsing: Always rinse the filter after backwashing to ensure no dirty water is returned to the pool.
- Strainer Basket Cleaning: Periodically check and clean the strainer basket located at the front of the pump. This prevents debris from entering the pump impeller.
- Sand Replacement: The filter sand should be replaced approximately every five years, or as needed based on water quality and usage. Glass filter media may last longer.
- Winterization: Before winter, drain all water from the pump and filter tank. Store the unit in a dry, frost-free location. Use the drain plug at the bottom of the tank for complete drainage.

Image 6.1: Drain plug for winterization or media replacement.
7. Troubleshooting
Here are some common issues and their potential solutions:
| Problem | Possible Cause | Solution |
|---|---|---|
| Pump not starting | No power; tripped breaker; motor issue | Check power supply, reset breaker; consult qualified electrician. |
| Low water flow | Clogged strainer basket; dirty filter sand; air in system; restricted hoses | Clean strainer basket; backwash/rinse filter; check for air leaks; clear hose obstructions. |
| Water not clearing | Insufficient filtration time; improper chemical balance; dirty filter media | Increase filtration time; test and adjust pool chemicals; backwash/rinse filter. |
| Leaking connections | Loose fittings; worn O-rings/gaskets | Tighten connections; inspect and replace O-rings/gaskets as needed. |
8. Specifications
| Feature | Specification |
|---|---|
| Brand | Intex |
| Model Number | 26646 |
| Pump Flow Capacity | 7900 L/h (7.9 m³/h) |
| System Flow Capacity | 6000 L/h (6.0 m³/h) |
| Voltage | 220-240 V |
| Power Source | Corded Electric |
| Sand Capacity | 23 kg |
| Glass Media Capacity | 16 kg |
| Filter Ball Capacity | 650 g |
| Product Height (unpacked) | 39 cm |
| Product Width (unpacked) | 59 cm |
| Product Weight (unpacked) | 18.14 kg |
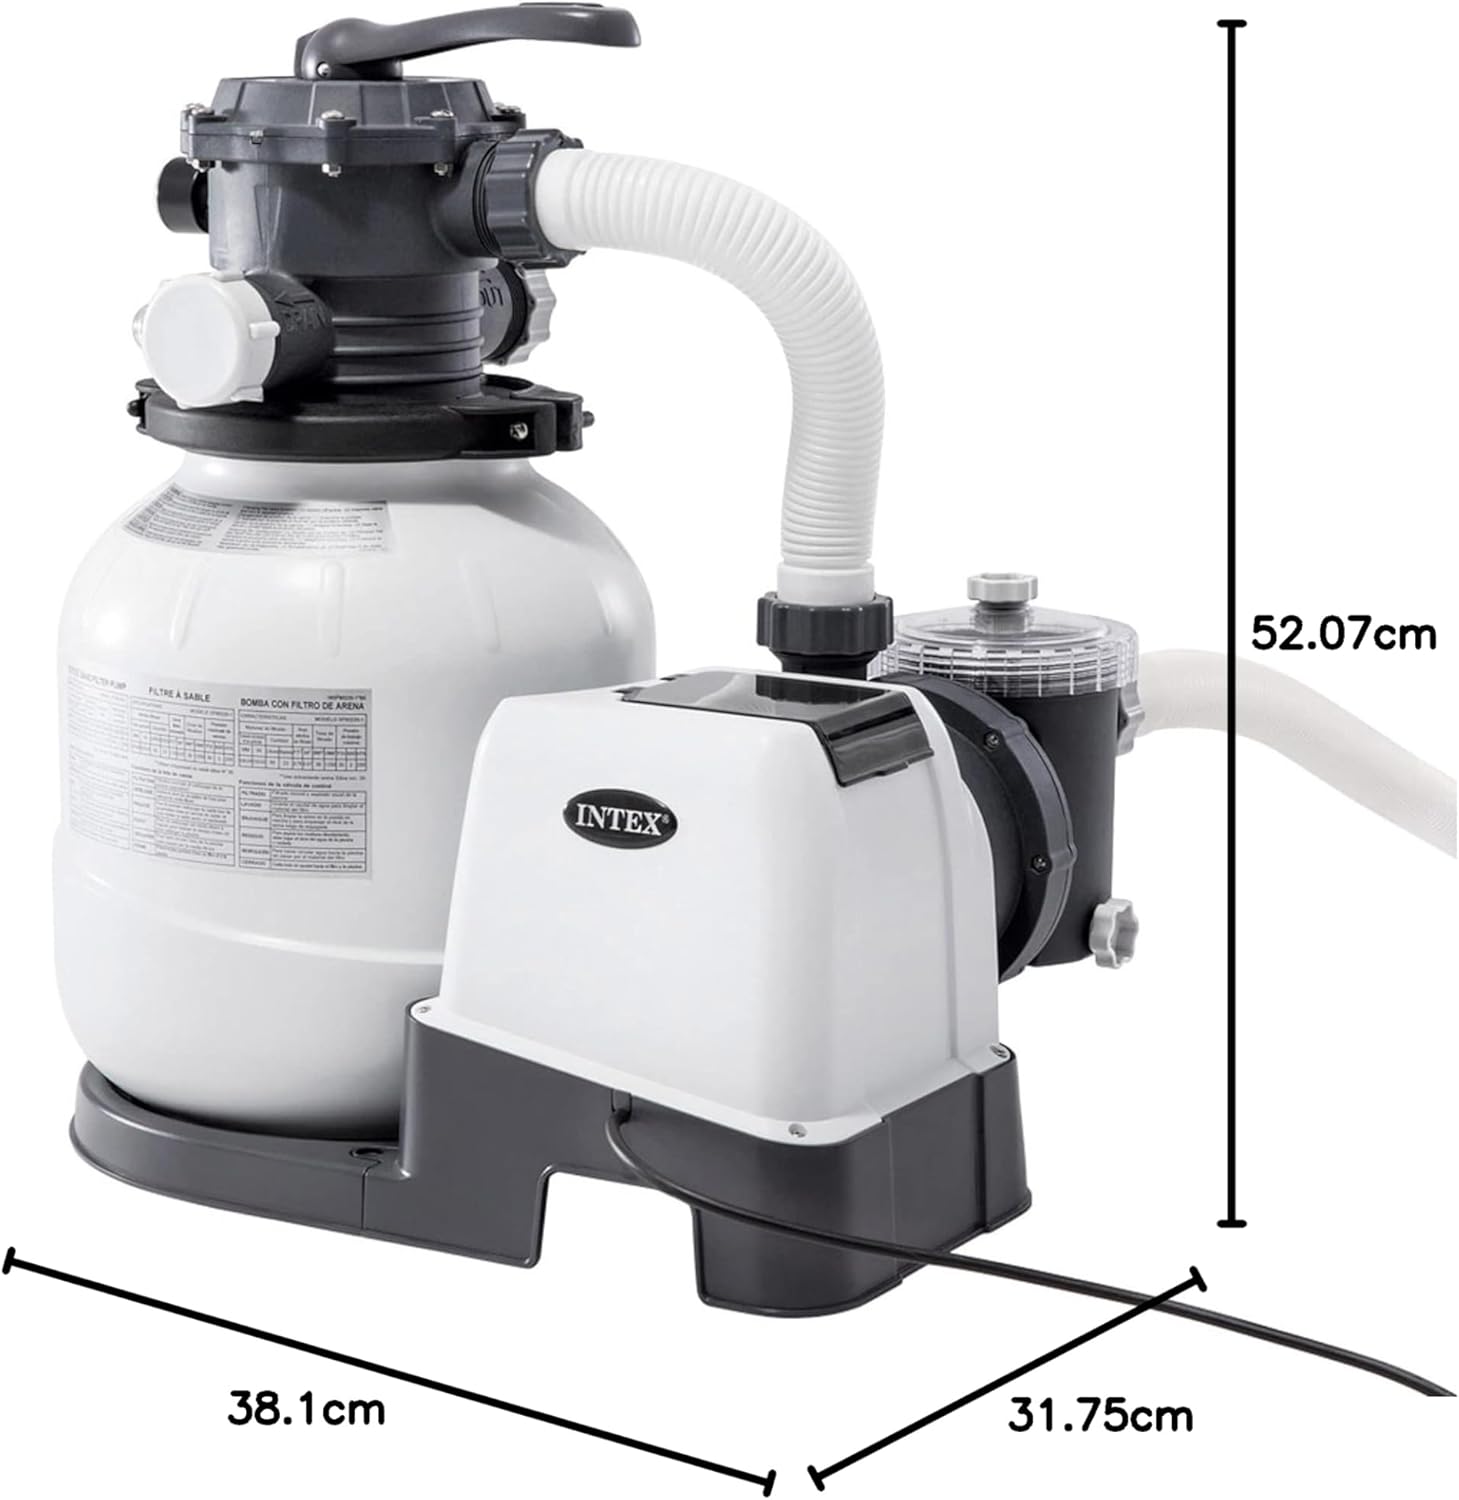
Image 8.1: Product dimensions.
9. Warranty and Support
For warranty information, technical support, or to purchase replacement parts, please refer to the contact details provided in your product packaging or visit the official Intex website. Keep your purchase receipt as proof of purchase for warranty claims.
Related documents26646


Ask a question about this manual
Ask about setup, troubleshooting, compatibility, parts, safety, or missing instructions. Manuals+ will review the question and use this page’s manual context to help answer it.