
1. Introduction
This manual provides essential information for the safe and correct operation of your Shinco SO3A 32-inch HD Ready LED TV. Please read all instructions carefully before using the television and retain this manual for future reference.
The Shinco SO3A offers a 32-inch HD Ready display with a resolution of 1366x768p, a 60Hz refresh rate, and a 178-degree viewing angle. It features an A+ Grade Panel, 16.7 million colors, noise reduction, and multiple picture modes. Connectivity options include 2 HDMI ports, 2 USB ports, and 1 VGA port. Audio is delivered through 20W speakers with surround sound capability. Additional features include USB to USB copy, Dynamic Light Control, Eco Vision, and Eye Safe Feature.
2. Safety Information
Always observe the following safety precautions to prevent electric shock, fire, or damage to the television.
- Power Source: Connect the TV only to an AC power outlet with the correct voltage as indicated on the TV's label.
- Ventilation: Ensure adequate ventilation around the TV. Do not block ventilation openings.
- Water and Moisture: Do not expose the TV to rain or moisture. Do not place objects filled with liquids, such as vases, on the TV.
- Cleaning: Unplug the TV before cleaning. Use a soft, dry cloth. Do not use liquid cleaners or aerosol cleaners.
- Placement: Place the TV on a stable, level surface or mount it securely to a wall. Avoid placing it in direct sunlight or near heat sources.
- Lightning: During lightning storms or when unused for long periods, unplug the TV from the wall outlet.
3. Package Contents
Verify that all items are present in the package:
- 1 x Shinco SO3A LED TV Unit
- 1 x Table Stand Pair
- 1 x Remote Control
- 1 x Warranty Card
- 1 x User Manual (this document)
- 1 x Wall Mount Kit (includes screws and anchors)

4. Setup
4.1 Unpacking
Carefully remove the TV from its packaging. It is recommended to keep the original packaging for future transport or service needs.
4.2 Stand Installation (Table Mount)
- Place the TV face down on a soft, clean surface to prevent screen damage.
- Align the table stand legs with the corresponding screw holes on the bottom of the TV.
- Secure the stand legs using the provided screws. Ensure they are tightened firmly.

4.3 Wall Mount Installation
If you choose to wall mount your TV, ensure you use the included wall mount kit and follow the instructions provided with the kit. Professional installation is recommended for wall mounting.

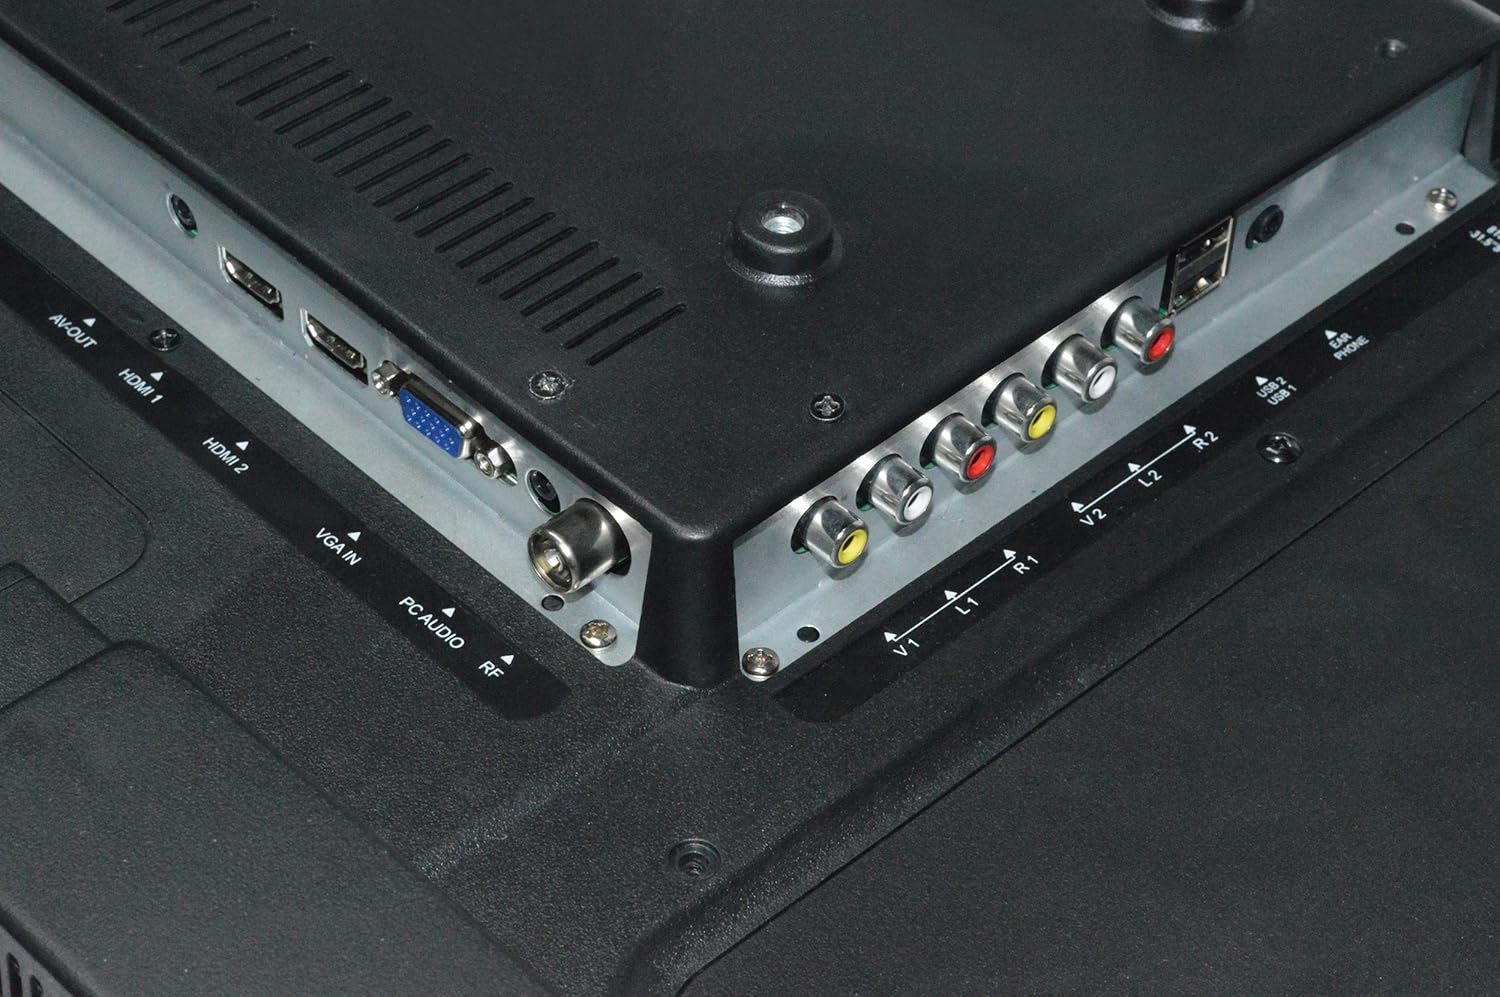
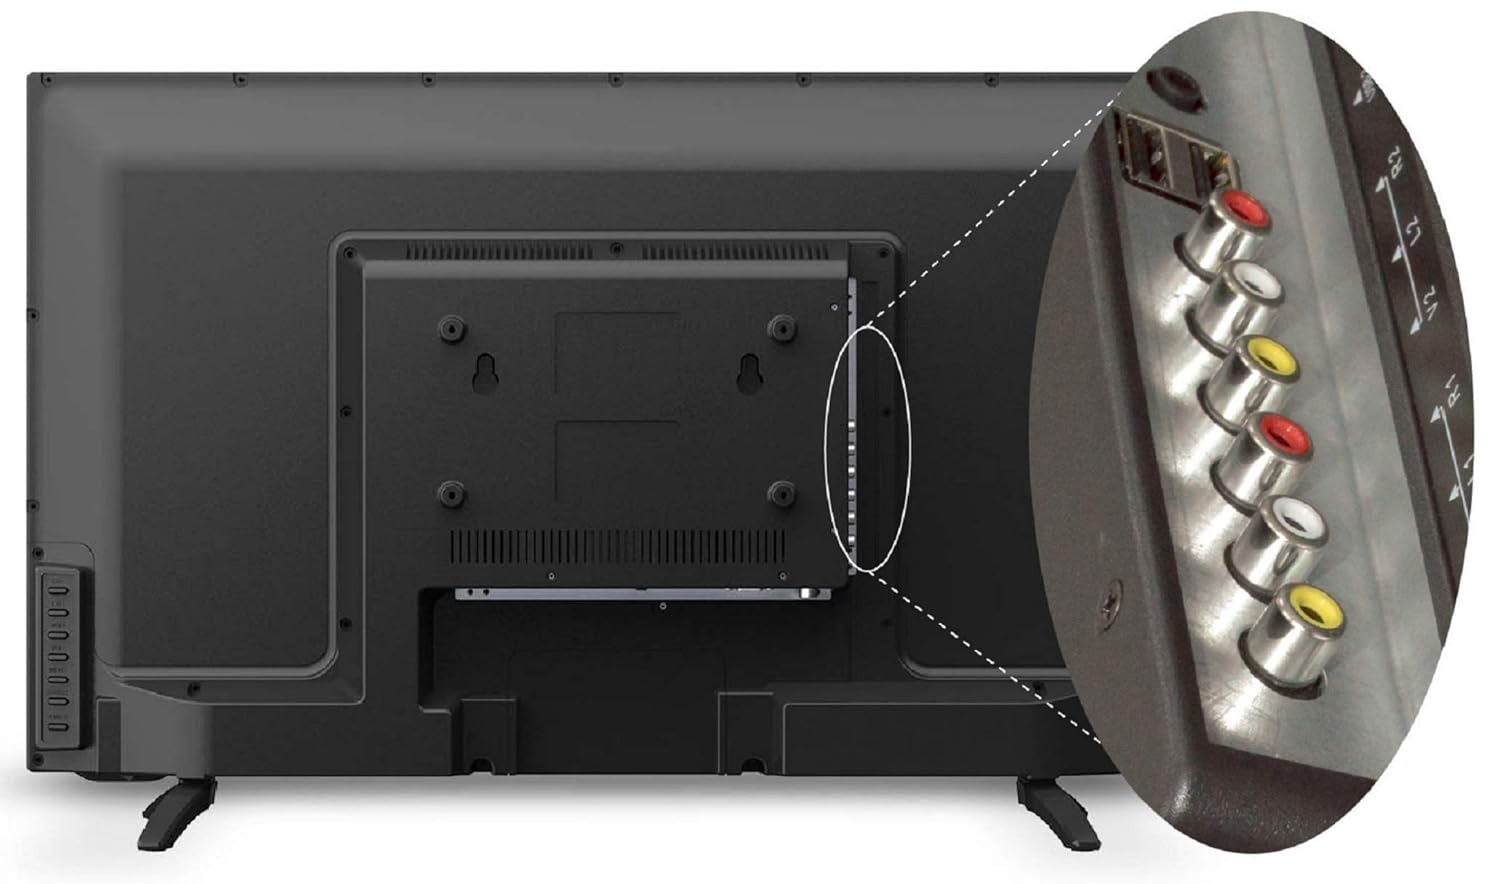
4.4 Connecting Peripherals
The TV offers various ports for connecting external devices:
- HDMI Ports (x2): Connect set-top boxes, Blu-ray players, gaming consoles, or other HDMI-enabled devices.
- USB Ports (x2): Connect USB storage devices for media playback or USB to USB copy function.
- VGA Port (x1): Connect a computer or laptop.
- AV Input: Connect older devices using composite video and stereo audio cables.
- RF Input: Connect an antenna or cable for broadcast TV.
4.5 Power Connection
After connecting all necessary cables, plug the power cord into a wall outlet. The TV will enter standby mode.
5. Operating Instructions
5.1 Remote Control Functions
The remote control allows you to operate all TV functions. Insert two AAA batteries (not included) into the remote control, ensuring correct polarity.

- POWER: Turns the TV on or off (standby mode).
- SOURCE: Selects input source (HDMI1, HDMI2, AV, VGA, USB, TV).
- VOL +/-: Adjusts volume level.
- CH +/-: Changes channels.
- MENU: Accesses the main menu.
- OK: Confirms selections in menus.
- Navigation Buttons (Up/Down/Left/Right): Navigates through menus and options.
- MUTE: Mutes or restores sound.
- ECO: Activates Eco Vision mode for power saving.
- ASPECT: Changes the screen aspect ratio.
5.2 First Time Setup
Upon first power-on, the TV will guide you through initial setup steps:
- Language Selection: Choose your preferred language.
- Country Selection: Select your region.
- Channel Scan: The TV will automatically scan for available channels if an antenna or cable is connected.
5.3 Basic TV Functions
- Power On/Off: Press the POWER button on the remote or the TV's control panel.
- Input Source Selection: Press the SOURCE button to cycle through available inputs (HDMI, AV, USB, TV, VGA).
- Volume Adjustment: Use VOL +/- buttons.
- Channel Change: Use CH +/- buttons for sequential change or number buttons for direct input.
5.4 Picture Settings
Access the Picture menu to adjust display settings:
- Picture Mode: Select from Standard, Dynamic, Mild, or User to suit your viewing preference.
- Brightness: Adjust the overall luminance of the screen.
- Contrast: Adjust the difference between light and dark areas.
- Color: Adjust color saturation.
- Sharpness: Adjust the clarity of image edges.
- Dynamic Light Control: Automatically adjusts backlight based on content.
- Noise Reduction: Reduces visual noise in the picture.
- Eye Safe Feature: Reduces blue light emission for comfortable viewing.
5.5 Sound Settings
Access the Sound menu to adjust audio settings:
- Sound Mode: Select from Standard, Music, Movie, or User.
- Equalizer: Customize audio frequencies in User mode.
- Surround Sound: Enable or disable virtual surround sound.
- Balance: Adjust the left/right speaker balance.
5.6 USB Media Playback
Insert a USB storage device into one of the USB ports. The TV will detect the device and prompt you to open the media browser. You can play supported audio (MP3), image (JPEG), and video files.
- USB to USB Copy: This feature allows direct copying of files between two USB devices connected to the TV.
6. Maintenance
6.1 Cleaning the TV
- Always unplug the TV before cleaning.
- Use a soft, dry, lint-free cloth to wipe the screen and cabinet.
- For stubborn marks, lightly dampen the cloth with water or a mild, non-abrasive screen cleaner. Do not spray liquid directly onto the TV.
- Avoid using chemical cleaners, as they may damage the TV's finish.
6.2 Remote Control Care
- Keep the remote control dry.
- Avoid dropping or subjecting it to strong impacts.
- Replace batteries when the remote's range decreases or it stops responding.
7. Troubleshooting
If you encounter issues with your TV, refer to the following common problems and solutions:
| Problem | Possible Solution |
|---|---|
| No power | Check if the power cord is securely plugged into the TV and the wall outlet. Ensure the wall outlet has power. |
| No picture, but sound is present | Check the input source. Ensure the external device (set-top box, DVD player) is turned on and connected correctly. |
| No sound, but picture is present | Check the volume level and ensure the TV is not muted. Check audio settings in the menu. |
| Remote control not working | Check and replace the batteries. Ensure there are no obstructions between the remote and the TV's IR sensor. |
| Poor picture quality | Adjust picture settings (brightness, contrast, sharpness). Check antenna connection for broadcast TV. Ensure the source device is outputting a high-quality signal. |
8. Specifications
Key technical specifications for the Shinco SO3A 32-inch HD Ready LED TV:
| Feature | Specification |
|---|---|
| Brand | Shinco |
| Model | SO3A |
| Screen Size | 32 Inches (80 cm) |
| Display Technology | LED |
| Resolution | HD Ready (1366x768 Pixels) |
| Refresh Rate | 60 Hz |
| Viewing Angle | 178 Degrees |
| Display Type | A+ Grade Panel |
| HDMI Ports | 2 |
| USB Ports | 2 |
| VGA Port | 1 |
| Audio Output | 20 Watts |
| Product Dimensions (LxWxH) | 73.6 x 19 x 47.4 cm |
| Item Weight | 6.35 kg |
| Power Source | AC |
| Model Year | 2019 |


9. Warranty Information
Your Shinco SO3A LED TV comes with a 1-year standard manufacturer warranty from the date of purchase. This warranty covers manufacturing defects under normal use.
For any product defects, damage, or features not matching the description provided, this product is eligible for replacement within 10 days of delivery. Please contact customer support for assistance.
10. Support
For technical assistance, service, or warranty claims, please contact the manufacturer:
Manufacturer: Videotex International Pvt Ltd
Address: 347-C, Ecotech-3, Udyog Kendra -2, Greater, Noida - 201306, Uttar Pradesh, India
Contact Number: 8882569569