1. Product Overview
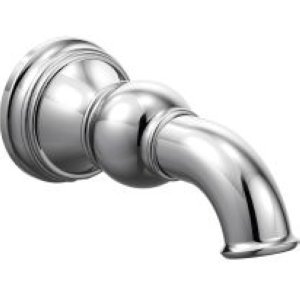
The Moen S12105 Weymouth Non-Diverting Tub Spout in Chrome is designed to complement the elegant, traditional aesthetic of the Weymouth collection. It features a highly reflective chrome finish that integrates seamlessly with various decorating styles, providing a mirror-like look. This tub spout is an authentic Moen replacement part, constructed from corrosion-resistant metal for long-lasting durability.
Key Features:
- Versatile Design: Chrome finish offers a highly reflective, mirror-like appearance suitable for any decorating style.
- Practical Design: Features a 6-3/4 inch tub spout length, ideal for standard bathtub installations.
- Longstanding Durability: Constructed with corrosion-resistant metal to ensure extended product life.
- Coordinating Collection: Designed to coordinate with other products within the Moen Weymouth Collection for a cohesive bathroom design.
- Original Equipment Manufacturer: An authentic Moen replacement part, ensuring compatibility and quality.
- Built to Last: Supported by Moen's Limited Lifetime Warranty, providing assurance of quality and performance.
2. Installation Guide
This section provides general instructions for installing the Moen S12105 Weymouth Non-Diverting Tub Spout. For detailed, model-specific instructions, always refer to the installation guide included with your product packaging or consult a qualified plumber.
Before You Begin:
- Ensure all necessary tools are available: adjustable wrench, pipe wrench, plumber's tape, and a clean cloth.
- Turn off the main water supply to the bathroom or the entire house to prevent water damage during installation.
- Clear the work area around the existing tub spout.
Installation Steps (Slip-Fit Connection):
- Remove Old Spout: If replacing an existing spout, loosen the set screw (usually located on the underside of the spout near the wall) with an Allen wrench. Pull the old spout straight off the copper pipe.
- Clean Pipe: Clean any debris or old sealant from the copper pipe extending from the wall.
- Prepare New Spout: Ensure the O-ring inside the new slip-fit spout is properly seated.
- Install New Spout: Slide the new Moen S12105 tub spout onto the copper pipe, pushing it firmly against the wall.
- Secure Spout: Tighten the set screw on the underside of the new spout until it is secure. Do not overtighten.
- Test for Leaks: Turn the main water supply back on. Run water through the tub faucet and check for any leaks around the base of the new tub spout.
3. Operation
The Moen S12105 Weymouth Tub Spout is a non-diverting model, meaning it is designed solely to deliver water into the bathtub. It does not feature a pull-up or push-down diverter mechanism to redirect water to a showerhead. Water flow is controlled by your bathtub's main faucet handles.
To operate, simply turn on the hot and/or cold water supply using your existing bathtub faucet handles. Water will flow directly from the spout into the tub. To stop the flow, turn off the faucet handles.
4. Care and Maintenance
Proper care and maintenance will help preserve the finish and functionality of your Moen Weymouth Tub Spout for years to come.
Cleaning Instructions:
- Regular Cleaning: Clean the spout regularly with a soft, damp cloth and mild soap.
- Avoid Harsh Cleaners: Do not use abrasive cleaners, scouring pads, ammonia, bleach, or cleaners containing alcohol or other harsh chemicals, as these can damage the chrome finish.
- Rinse Thoroughly: After cleaning, rinse the spout thoroughly with clean water and dry with a soft cloth to prevent water spots.
General Maintenance:
- Check for Leaks: Periodically inspect the base of the spout for any signs of leaks. If a leak is detected, ensure the set screw is tight and the O-ring is properly seated.
- Mineral Deposits: In areas with hard water, mineral deposits may accumulate. These can usually be removed with a solution of equal parts white vinegar and water, applied with a soft cloth. Rinse thoroughly afterward.
5. Troubleshooting
This section addresses common issues you might encounter with your tub spout. For problems not listed here, or if solutions do not resolve the issue, please contact Moen Customer Support.
| Problem | Possible Cause | Solution |
|---|---|---|
| Water leaking from base of spout | Loose set screw or damaged O-ring. | Ensure the set screw on the underside of the spout is tightened. If leaking persists, the internal O-ring may need replacement. |
| Low water flow from spout | Aerator (if present) is clogged with debris or mineral deposits. | Remove and clean the aerator. Soak in a vinegar solution if mineral deposits are present. |
| Spout feels loose on the wall | Set screw is loose or internal pipe connection is unstable. | Tighten the set screw. If the problem persists, the internal plumbing connection may require professional attention. |
6. Specifications
Detailed technical specifications for the Moen S12105 Weymouth Non-Diverting Tub Spout.
| Attribute | Detail |
|---|---|
| Brand | Moen |
| Model Name | Weymouth |
| Item Model Number | S12105 |
| Color | Chrome |
| Finish Type | Chrome |
| Material | Metal |
| Spout Design | Non-Diverter |
| Mounting Type | Deck Mount |
| Installation Type | Single Hole (Slip-Fit Connection) |
| Item Weight | 2.36 Pounds |
| Product Dimensions | 6.75 x 3.75 x 3.75 inches |
| Included Components | Tub Spout |
| Country of Origin | China |
| UPC | 026508281246 |
7. Warranty and Customer Support
Warranty Information:
The Moen S12105 Weymouth Non-Diverting Tub Spout is backed by Moen's Limited Lifetime Warranty. This warranty covers defects in material and manufacturing workmanship for the original consumer purchaser. Please retain your proof of purchase for warranty claims.
Customer Support:
For technical assistance, replacement parts, or warranty inquiries, please contact Moen Customer Support directly. You can find contact information and additional resources on the official Moen website: www.moen.com.


