
1. Introduction
This manual provides detailed instructions for the installation, operation, and maintenance of your Gardenreet Landscape Spotlight Model 2105. This low-voltage outdoor spotlight is constructed from solid brass, designed for durability and resistance to various weather conditions. It is intended for accent lighting in gardens, yards, and other outdoor spaces.
The spotlight is designed to use an MR16 LED bulb (sold separately) and operates on a 12V low-voltage system. Its IP65 waterproof rating ensures reliable performance in wet environments.
2. Safety Information
- Low Voltage System: This product operates on a safe 12V low-voltage system. It requires a compatible low-voltage transformer (not included) for operation. Do not connect directly to 120V AC power.
- Professional Installation Recommended: While designed for DIY, if you are unfamiliar with low-voltage landscape lighting wiring, consult a qualified electrician.
- Waterproof Rating: The fixture is IP65 rated for protection against water jets. Ensure all connections are properly sealed to maintain waterproof integrity.
- Bulb Type: Use only MR16 LED bulbs up to 50W. Ensure the bulb is correctly seated before sealing the fixture.
- ETL Certified: This product is ETL certified, indicating compliance with North American safety standards.
3. Package Contents
Verify that all components are present before beginning installation:
- 1 x Gardenreet Landscape Spotlight Fixture (Model 2105)
- 1 x ABS Ground Stake (9 inches)
- 2 x Quick Wire Connectors
- Pre-wired SPT-2 20AWG leads (3ft length)
Note: MR16 LED bulb, low-voltage transformer, and main landscape wire are sold separately.

Image: The package contents including the spotlight fixture, ground stake, and quick wire connectors.
4. Specifications
| Feature | Detail |
|---|---|
| Brand | Gardenreet |
| Model Name | Spotlight (Model 2105) |
| Color | Bronze (Wiring Required) |
| Material | Cast Brass, Glass, Polyvinyl Chloride |
| Product Dimensions | 2.5"L x 2.5"W x 7.25"H |
| Item Weight | 1.7 Pounds |
| Voltage | 12 Volts (Low Voltage) |
| Maximum Compatible Wattage | 50 Watts |
| Bulb Base | GU5.3 (for MR16 bulbs) |
| Water Resistance Level | IP65 Waterproof |
| Special Features | 360-degree Rotatable Glare Guard, Double O-ring Waterproof design, All-brass Construction |
| Installation Type | Stake-in-the-ground |
| Certification | ETL |

Image: Detailed view of the spotlight's professional design, highlighting features such as the GU5.3 base, shockproof glass lens, 360-degree waterproof protection, and 180-degree adjustability.
5. Setup
The Gardenreet Landscape Spotlight requires a low-voltage transformer and main landscape wire (both sold separately) for installation. It is not a plug-and-play device.
5.1 Required Tools and Materials (Not Included)
- Low-voltage transformer
- Main landscape wire (appropriate gauge for total wattage and length)
- MR16 LED bulb (up to 50W)
- Wire cutters/strippers
- Screwdriver (for transformer connections)
- Silicone-based lubricant (optional, for O-rings)
5.2 Installation Steps
- Install the Transformer: Mount your low-voltage transformer in a suitable outdoor location, following the manufacturer's instructions. Ensure it is protected from direct weather exposure if not rated for it.
- Insert the Bulb:
- Twist the shield portion of the spotlight counter-clockwise approximately half an inch from the base.
- Gently pull the shield portion straight off. This may require some effort.
- Visually align the pins of the MR16 bulb with the GU5.3 socket holes.
- Push the bulb firmly into the socket until it clicks into place. Do not force it if there is resistance; realign and try again to avoid bending the pins.
- Optional: Apply a thin layer of silicone-based lubricant to the O-rings for easier reassembly and enhanced seal.
- Slide the shield portion back onto the fixture, ensuring it is flush, then twist clockwise until it stops to secure and seal.
- Lay Out Main Wire and Connect:
- Lay out your main landscape wire from the transformer to the desired location of your first spotlight. Allow extra length for flexibility.
- At the desired connection point for each spotlight, carefully cut the main wire.
- Using a wire stripper or box cutter, split the main wire insulation approximately 3-4 inches to separate the two conductors. Be careful not to cut into the copper strands.
- Strip about 3/4 inch of insulation from each end of the main wire conductors and from the pre-wired leads of the spotlight.
- Use the provided quick wire connectors to splice the spotlight's leads into the main line. Ensure all exposed copper is fully enclosed within the connector and twisted tightly to prevent moisture ingress and short circuits.
- Repeat for all spotlights.
- Stake and Aim:
- Attach the ground stake to the bottom of the spotlight fixture.
- Insert the ground stake firmly into the soil at your desired location.
- Adjust the spotlight's angle up to 180 degrees to illuminate the desired area (e.g., trees, walls, flags, fences).
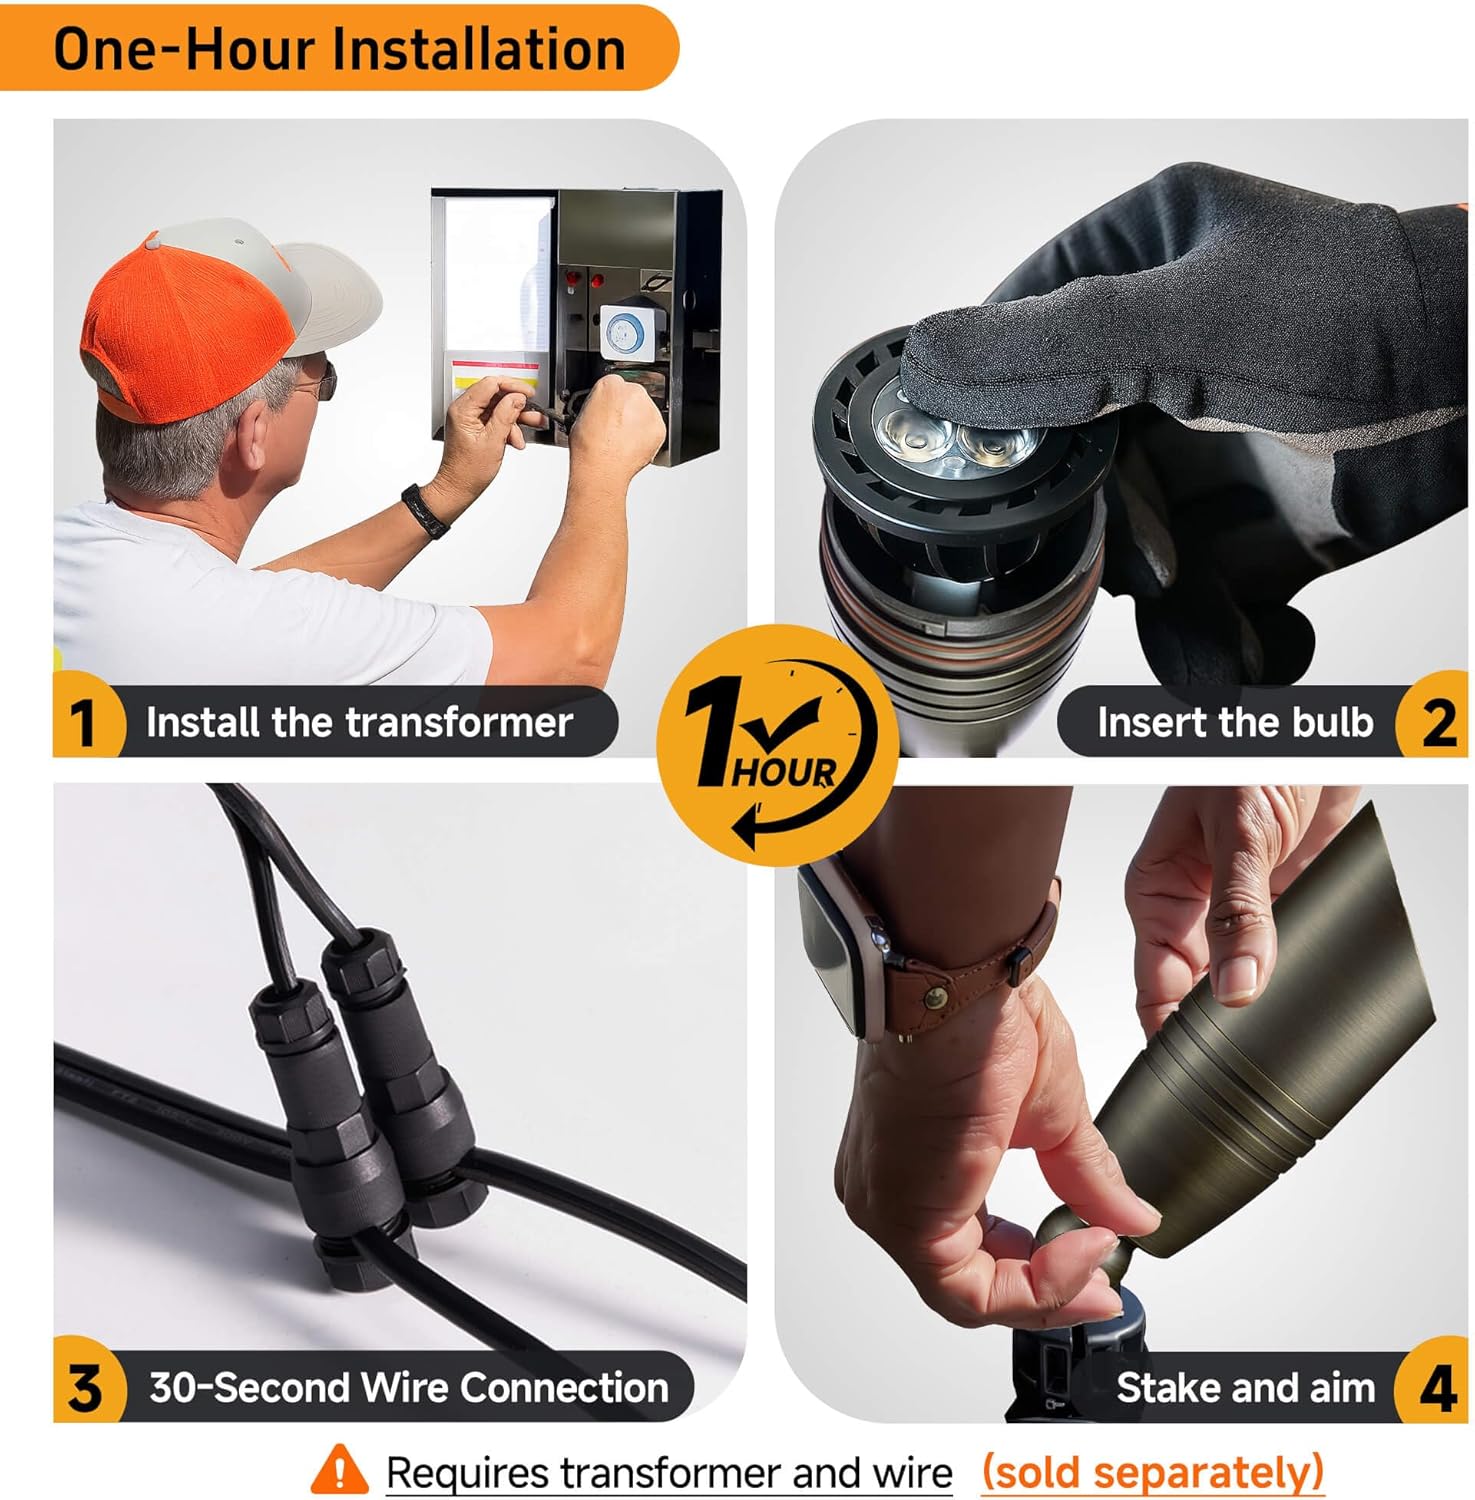
Image: A visual guide illustrating the four main steps for installation: installing the transformer, inserting the bulb, making the wire connection, and staking/aiming the light.
5.3 Transformer and Cable Selection
To select a suitable transformer, ensure its wattage rating is at least 20% higher than the total wattage of all connected lights. For example, for 6 lights using 5W bulbs each (30W total), a transformer with at least 37.5W capacity is recommended (30W / 0.80 = 37.5W).
Choose the appropriate cable gauge based on the total wattage of your lights and the length of the wire run:
| Total Wattage x Length of Wire (A) | Recommended Wire Gauge |
|---|---|
| A < 5,000 | 16/2 |
| 5,001 < A < 7,500 | 14/2 |
| 7,501 < A < 10,000 | 12/2 |

Image: Charts detailing how to calculate required transformer wattage and select the correct wire gauge for your landscape lighting system.
6. Operating Instructions
Once installed, the operation of your Gardenreet Landscape Spotlight is controlled by the low-voltage transformer it is connected to. Most transformers feature a push-button control or a timer function.
- Power On/Off: Use the switch or controls on your low-voltage transformer to turn the lights on or off.
- Timer Settings: If your transformer has a timer, set it according to your desired operating schedule.
- Adjusting Light Direction: The spotlight fixture can be rotated up to 180 degrees. Loosen the adjustment screw on the side of the fixture, pivot the light head to the desired angle, and then tighten the screw to secure its position.

Image: Various applications of the spotlight, demonstrating its use for illuminating trees, house walls, flags, and garden fences, with an inset showing 180-degree adjustability.
7. Maintenance
The Gardenreet Landscape Spotlight is designed for minimal maintenance due to its durable brass construction and waterproof design. Regular checks and bulb replacement are the primary maintenance tasks.
- Bulb Replacement: To replace the MR16 bulb, follow the same steps as outlined in Section 5.2 "Insert the Bulb". Ensure the replacement bulb is an MR16 LED type and does not exceed 50W.
- Cleaning: Periodically clean the exterior of the fixture and the glass lens with a soft, damp cloth to remove dirt and debris that may obstruct light output. Avoid abrasive cleaners.
- Connection Check: Annually inspect all wire connections for tightness and ensure no copper is exposed. Re-seal or re-connect as necessary to prevent moisture-related issues.

Image: Visuals highlighting the solid brass construction, the ease of swapping the LED bulb, the IP65 waterproof rating, and the safety of the 12V low voltage system.
8. Troubleshooting
If your Gardenreet Landscape Spotlight is not functioning correctly, refer to the following common issues and solutions:
| Problem | Possible Cause | Solution |
|---|---|---|
| Light does not turn on | No power to transformer Loose or faulty wire connection Faulty bulb Transformer timer setting | Check the outlet with another appliance. Ensure transformer is plugged in and receiving power. Inspect all wire connections, ensuring they are tight and copper is not exposed. Re-splice if necessary. Replace the MR16 bulb. Verify the transformer's timer settings are correct. |
| Light flickers or is dim | Loose wire connection Incompatible bulb Voltage drop due to long wire run or incorrect gauge | Check and tighten all wire connections. Ensure the MR16 bulb is compatible and correctly inserted. Consult the cable selection guide in Section 5.3. Consider shortening the wire run or using a thicker gauge wire. |
| Water inside the fixture | Improperly sealed fixture Damaged O-rings | Ensure the shield portion is twisted tightly and flush with the base after bulb insertion. Apply silicone lubricant to O-rings. Inspect O-rings for damage and replace if necessary. |
9. Warranty and Support
Gardenreet stands behind the quality of its products.
- Lifetime Fixture Coverage: The Gardenreet Landscape Spotlight fixture is covered for life against manufacturing defects and rust.
- Extended Return Window: Enjoy a 60-day extended return window for your purchase.
- Customer Support: Our team of lighting experts is available daily to assist with any questions regarding installation, operation, or troubleshooting. For support, please visit the Gardenreet Store on Amazon or contact us through the platform.
For more information or to browse other Gardenreet products, visit our official store: Gardenreet Store


