
1. Important Safety Instructions
Please read these instructions carefully before using the device and keep them for future reference. Failure to follow these instructions may result in electric shock, fire, or other hazards.
- Do not expose the device to rain, moisture, or extreme temperatures.
- Do not disassemble or modify the device. Refer all servicing to qualified personnel.
- Keep the device away from heat sources such as radiators, heat registers, stoves, or other apparatus (including amplifiers) that produce heat.
- Use only attachments/accessories specified by the manufacturer.
- Clean only with a dry cloth.
- Ensure proper ventilation and do not block any ventilation openings.
- Protect the power cord from being walked on or pinched.
2. Product Overview
The Mac Audio BT Tec 3000 is a versatile mobile stereo Bluetooth speaker featuring an alarm function and an FM tuner. It is designed for portable audio playback and includes a digital display.
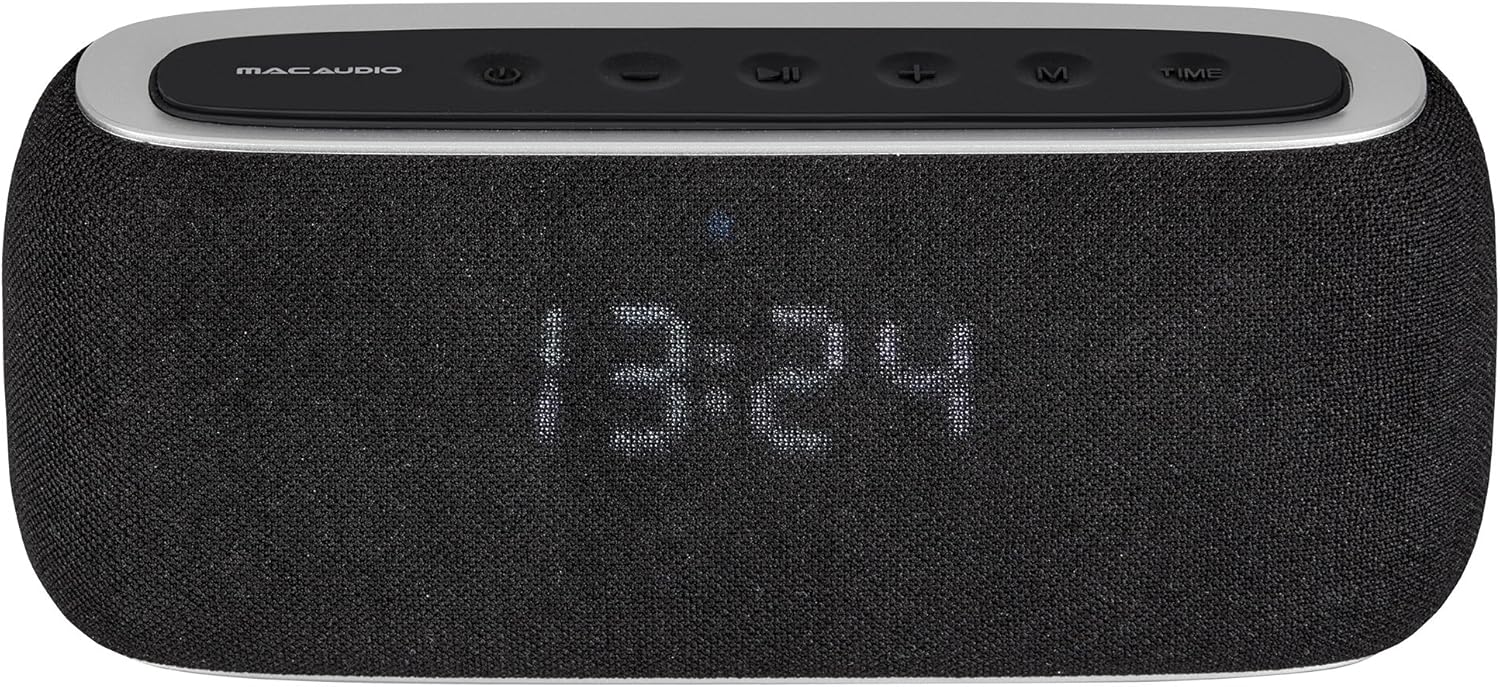
Figure 2.1: Front view of the BT Tec 3000 speaker. It features a black fabric grille covering the speakers and a digital display showing the time. The top panel has control buttons.
2.1 Top Panel Controls

Figure 2.2: Angled top view of the BT Tec 3000, highlighting the control buttons. From left to right: Power, Mode, Previous Track/Volume Down, Play/Pause, Next Track/Volume Up, M (Menu/Memory), Time.
- Power Button: Turns the device on/off.
- Mode Button: Switches between Bluetooth, FM Radio, and AUX modes.
- Previous Track / Volume Down Button: Short press for previous track (Bluetooth), long press for volume down.
- Play/Pause Button: Plays or pauses audio.
- Next Track / Volume Up Button: Short press for next track (Bluetooth), long press for volume up.
- M (Menu/Memory) Button: Used for menu navigation or saving FM stations.
- Time Button: Used for setting the clock and alarm.
2.2 Rear Panel Connections

Figure 2.3: Rear view of the BT Tec 3000 with the protective cover open, revealing the connectivity ports. These include an AUX input, a USB port, and a charging port.
- AUX Input: For connecting external audio devices via a 3.5mm audio cable.
- USB Port: For charging or playing audio from USB drives (if supported).
- Charging Port: For connecting the power adapter to charge the internal battery.
3. Package Contents
Please check that all items are present and in good condition upon opening the package:
- Mac Audio BT Tec 3000 Speaker
- USB Charging Cable
- 3.5mm AUX Audio Cable
- User Manual (this document)
4. Setup
4.1 Charging the Device
Before first use, fully charge the BT Tec 3000. Connect the supplied USB charging cable to the charging port on the rear of the speaker and the other end to a USB power adapter (not included) or a computer USB port. The charging indicator will illuminate during charging and turn off when fully charged.
4.2 Powering On/Off
Press and hold the Power Button on the top panel for approximately 3 seconds to turn the speaker on or off. The display will light up when the device is powered on.
4.3 Bluetooth Pairing
- Ensure the speaker is powered on and in Bluetooth mode. If not, press the Mode Button until "BT" or a Bluetooth icon appears on the display. The speaker will enter pairing mode automatically, indicated by a flashing Bluetooth icon.
- On your mobile device (smartphone, tablet, etc.), enable Bluetooth and search for available devices.
- Select "BT Tec 3000" from the list of found devices.
- Once paired, the speaker will emit a confirmation sound, and the Bluetooth icon on the display will stop flashing.
- The speaker will automatically reconnect to the last paired device when in range and Bluetooth is enabled on both devices.
4.4 FM Radio Setup
- Press the Mode Button to switch to FM Radio mode. The display will show the current frequency.
- For automatic station scanning, long press the Play/Pause Button. The speaker will scan and save available FM stations.
- To manually tune, short press the Previous Track or Next Track buttons to adjust the frequency.
4.5 Setting the Clock and Alarm
- Setting the Clock:
- Press and hold the Time Button until the hour digits flash.
- Use the Previous Track and Next Track buttons to adjust the hour.
- Press the Time Button again to confirm the hour and move to minutes.
- Adjust minutes using the Previous Track and Next Track buttons.
- Press the Time Button one more time to save the time.
- Setting the Alarm:
- Short press the Time Button to enter alarm setting mode (display will show "AL").
- Press and hold the Time Button until the alarm hour digits flash.
- Adjust the alarm hour using the Previous Track and Next Track buttons.
- Press the Time Button to confirm and move to alarm minutes.
- Adjust alarm minutes using the Previous Track and Next Track buttons.
- Press the Time Button to save the alarm time.
- To activate/deactivate the alarm, short press the Time Button when the alarm time is displayed. An alarm icon will appear/disappear on the display.
5. Operating Instructions
5.1 Volume Control
Long press the Next Track / Volume Up Button to increase volume. Long press the Previous Track / Volume Down Button to decrease volume.
5.2 Bluetooth Playback
Once paired with your device (see Section 4.3), you can control playback:
- Short press Play/Pause Button to play or pause audio.
- Short press Next Track Button for the next song.
- Short press Previous Track Button for the previous song.
5.3 FM Radio Operation
After scanning for stations (see Section 4.4):
- Short press Previous Track or Next Track buttons to navigate through saved stations.
- To manually tune, long press the Previous Track or Next Track buttons.
5.4 AUX Input
Connect an external audio device (e.g., MP3 player) to the AUX input port on the rear of the speaker using the supplied 3.5mm audio cable. Press the Mode Button until "AUX" appears on the display. Audio will now play through the speaker from your connected device.
5.5 App Control
The BT Tec 3000 supports app control. Download the official Mac Audio app from your device's app store (iOS/Android) to access additional features and control options. Ensure your speaker is connected via Bluetooth to your mobile device for app functionality.
6. Maintenance
- Cleaning: Use a soft, dry cloth to clean the surface of the speaker. Do not use liquid cleaners or abrasive materials.
- Storage: When not in use for extended periods, store the speaker in a cool, dry place, away from direct sunlight and extreme temperatures.
- Battery Care: To prolong battery life, avoid fully discharging the battery frequently. Charge the device regularly, even if not in use.
7. Troubleshooting
| Problem | Possible Cause | Solution |
|---|---|---|
| No power | Battery is depleted. | Charge the speaker using the supplied USB cable. |
| Cannot pair via Bluetooth | Speaker is not in pairing mode; Bluetooth is off on device; Speaker is already connected to another device. | Ensure speaker is in BT mode and flashing; Enable Bluetooth on your device; Disconnect from other devices. |
| No sound | Volume is too low; Incorrect mode selected; Device not connected properly. | Increase volume; Press Mode button to select correct input (BT, FM, AUX); Reconnect device. |
| Poor FM reception | Weak signal; Interference. | Relocate the speaker to an area with better reception; Rescan for stations. |
8. Specifications
| Feature | Detail |
|---|---|
| Model Name | BT Tec 3000 |
| Model Number | 4023037753004 |
| Brand | Mac Audio |
| Connectivity Technology | Bluetooth |
| Audio Output Mode | Stereo |
| Mounting Type | Tabletop |
| Special Feature | Bluetooth, Alarm Function, FM Tuner |
| Controller Type | App Control |
9. Support and Warranty
For technical support, warranty information, or further assistance, please visit the official Mac Audio website or contact their customer service. Keep your proof of purchase for warranty claims.
Note: Warranty terms and conditions may vary by region. Please refer to the warranty card included with your product or the manufacturer's website for detailed information.


