
1. Introduction
Thank you for choosing the Pro Breeze 2500W Digital Oil-Filled Radiator. This manual provides essential information for the safe and efficient operation of your new heater. Please read all instructions carefully before use and retain this manual for future reference.

Image: Pro Breeze 2500W Digital Oil-Filled Radiator, showcasing its modern design and digital display.
2. Important Safety Instructions
When using electrical appliances, basic safety precautions should always be followed to reduce the risk of fire, electric shock, and injury to persons, including the following:
- Read all instructions before using this heater.
- This heater is hot when in use. To avoid burns, do not let bare skin touch hot surfaces.
- Extreme caution is necessary when any heater is used by or near children or invalids and whenever the heater is left operating unattended.
- Always unplug the heater when not in use.
- Do not operate any heater with a damaged cord or plug or after the heater malfunctions, has been dropped or damaged in any manner.
- Do not use outdoors.
- To disconnect heater, turn controls to off, then remove plug from outlet.
- Do not insert or allow foreign objects to enter any ventilation or exhaust opening as this may cause an electric shock or fire, or damage the heater.
- To prevent a possible fire, do not block air intakes or exhaust in any manner. Do not use on soft surfaces, like a bed, where openings may become blocked.
- A heater has hot and arcing or sparking parts inside. Do not use it in areas where gasoline, paint, or flammable vapors or liquids are used or stored.
- Use this heater only as described in this manual. Any other use not recommended by the manufacturer may cause fire, electric shock, or injury to persons.
- This heater includes an Overheat Protection feature and an Anti Tip-Over Switch for enhanced safety. The unit will automatically shut off if it overheats or tips over.

Image: The radiator features advanced safety functions including overheat protection and an anti-tip over switch, ensuring safe use around children and pets.
3. Product Components
Familiarize yourself with the main parts of your Pro Breeze Digital Oil-Filled Radiator:
- Digital Control Panel: For setting temperature, mode, and timer.
- LED Display: Shows current temperature, timer settings, and mode.
- 10 Oil-Filled Elements: Efficiently heat the surrounding air.
- Carry Handles: Integrated for easy portability.
- Caster Wheels: Allow for smooth movement between rooms.
- Remote Control: Wireless control of all functions.
- On/Off Power Switch: Located on the side of the unit.

Image: The digital control panel and remote control offer convenient operation of the radiator.
4. Setup
Before first use, ensure the radiator is placed on a stable, level surface and is at least 1 meter away from any walls, furniture, or curtains. The caster wheels should be attached if not already installed. Simply push the wheel assemblies into the designated slots at the base of the radiator until they click securely into place.
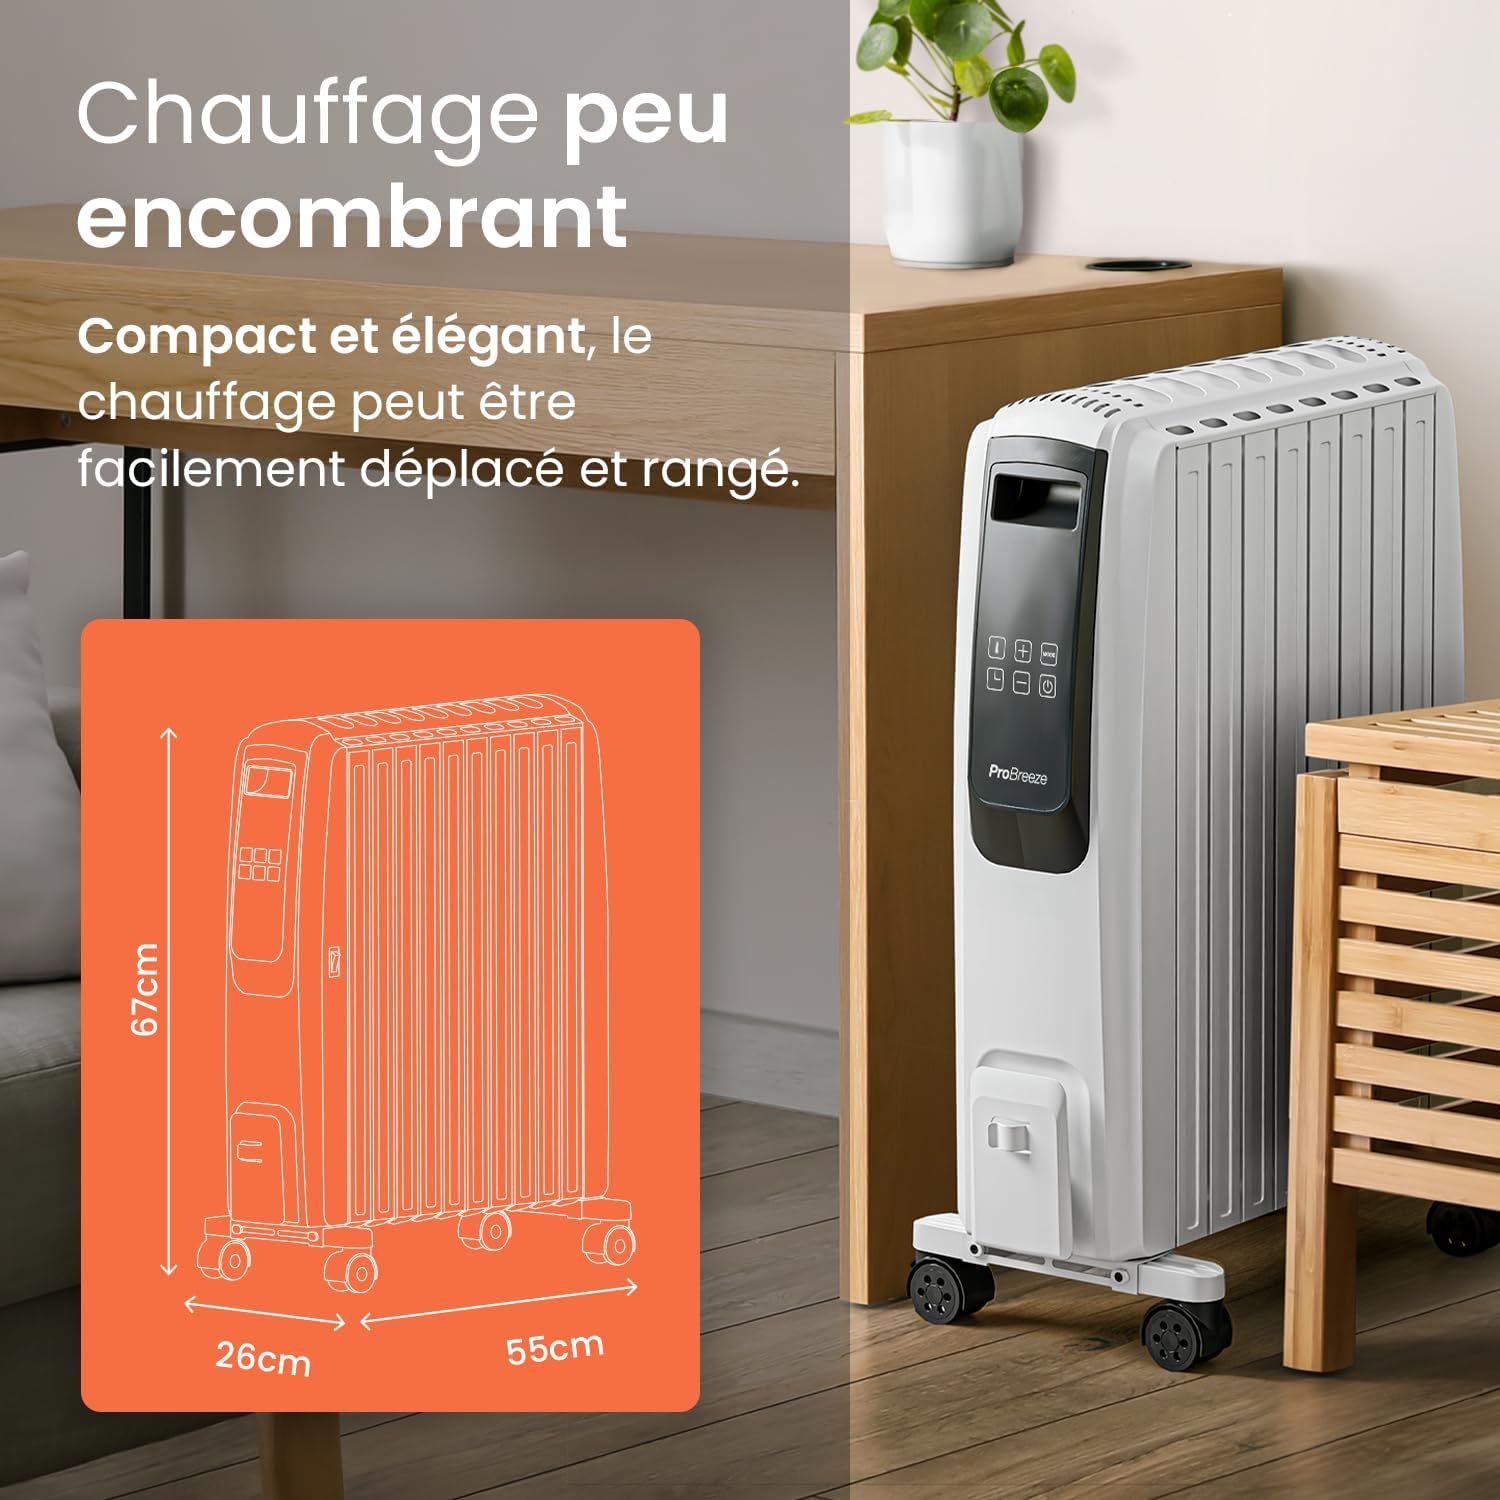
Image: The compact design, integrated carry handles, and caster wheels make the radiator easy to move and store.
5. Operating Instructions
5.1 Power On/Off
- Plug the radiator into a suitable power outlet.
- Turn on the main power switch located on the side of the unit.
- Press the Standby button (
 ) on the control panel or remote control to activate the display and turn on the heater.
 - To turn off, press the Standby button again. For complete power off, switch off the main power switch and unplug the unit.
5.2 Setting Temperature
The desired temperature can be set between 5°C and 35°C.
- With the heater on, press the Temperature button () on the control panel. The temperature digits will blink.
- Use the + and - buttons to adjust the desired temperature.
- The display will stop blinking after a few seconds, and the new temperature setting will be saved.
5.3 Power Modes
The radiator offers 4 power settings: Eco, Low, Medium, and High.
- Press the Mode button (
 ) repeatedly to cycle through the available power modes.
 - The selected mode will be indicated on the LED display.

Image: Choose from 4 power levels for a customized heating experience.
5.4 Timer Function (Auto-On / Auto-Off)
The integrated 24-hour timer allows you to program the radiator to turn on or off automatically.
Setting the Auto-On Timer:
- Ensure the radiator is plugged in and the main power switch is ON, but do not press the standby button.
- Press the Timer button (). The time digits (H) will begin to blink.
- Use the + and - buttons to set how much time you would like to elapse (1-24 hours) before the radiator automatically turns on. Time increments are 30 minutes for the first 5 hours, then 1 hour up to 24 hours.
- The time digits will stop blinking after a few seconds and show the remaining time until auto-on.
- Immediately after the time digits stop blinking, set the desired temperature and mode you would like the radiator to turn on in by pressing the Mode button. If no mode or temperature is set, the radiator will start on the 'low' power setting.
Video: Detailed instructions on how to set the auto-on timer for the Pro Breeze 2500W Oil-Filled Radiator.
Setting the Auto-Off Timer:
- Ensure the radiator is switched on and operating in your desired mode and temperature.
- Press the Timer button (). The time digits (H) will begin to blink.
- Use the + and - buttons to set how much time you would like to elapse (1-24 hours) before the radiator automatically turns off. Time increments are 30 minutes for the first 5 hours, then 1 hour up to 24 hours.
- The time digits will stop blinking after a few seconds and show the remaining time until auto-off. The radiator will automatically shut off when the set time elapses.
Video: Detailed instructions on how to set the auto-off timer for the Pro Breeze 2500W Oil-Filled Radiator.

Image: Program the 24-hour timer to suit your schedule for convenient heating.
5.5 Remote Control
The included remote control allows you to operate all functions of the radiator from a distance. Ensure the remote control has a working battery (1 CR5 battery required, not included) and is pointed towards the radiator's control panel.
6. Maintenance
6.1 Cleaning
Always unplug the heater from the wall outlet and allow it to cool down completely before cleaning. Use a soft, damp cloth to wipe the exterior surfaces of the heater. Do not use harsh detergents or abrasive cleaners. Do not immerse the heater in water or allow water to drip into the interior of the heater.
6.2 Storage
When storing the heater, ensure it is cool and dry. Wrap the power cord neatly and store the heater in a cool, dry place. It is recommended to store the heater in its original packaging to protect it from dust and damage.
7. Troubleshooting
If your radiator is not functioning correctly, please refer to the following common issues and solutions:
| Problem | Possible Cause | Solution |
|---|---|---|
| Heater does not turn on. | No power supply. | Check if the power cord is securely plugged in and the main power switch is ON. Test the outlet with another device. |
| Heater stops working unexpectedly. | Overheat protection activated. | Unplug the heater, let it cool down for 30 minutes, and clear any obstructions from air vents. Plug it back in and restart. |
| Heater tips over. | Anti Tip-Over Switch activated. | Place the heater on a stable, level surface. The unit will resume operation once upright. |
| Remote control not working. | Battery low or incorrectly inserted. | Replace the CR5 battery. Ensure it is inserted with correct polarity. Point the remote directly at the control panel. |
| Temperature display is inaccurate. | Sensor reading ambient temperature. | The internal sensor measures the temperature near the unit. For precise room temperature, use an external thermometer. Adjust the heater's set temperature accordingly. |
8. Specifications
- Brand: Pro Breeze
- Model Number: PB-H06
- Power: 2500 Watts
- Voltage: 240 Volts
- Number of Speeds/Power Levels: 4
- Product Dimensions (L x W x H): 50 x 24.5 x 66 cm (16 kg)
- Special Features: Rapid heating, Portable, Adjustable temperature, Electronic thermostat, Remote control
- Heating Method: Convection
- Recommended Use: Indoor, Home
- Battery for Remote: 1 CR5 (not included)
9. Warranty and Support
For warranty information or technical support, please refer to the contact details provided with your purchase or visit the official Pro Breeze website. Keep your proof of purchase for any warranty claims.


