
HD Switch Standard 5-pin Ignition Key Switch Wiring Harness
HD Switch Ignition Key Switch Wiring Harness User Manual
Model: Standard 5-pin Ignition Key Switch Wiring Harness
1. Introduction
Thank you for choosing the HD Switch Ignition Key Switch Wiring Harness. This product is designed and manufactured in the USA to the highest quality standards, providing a reliable and durable solution for your lawn and garden equipment's ignition system. This harness features premium heavy-duty corrugate for comprehensive wire protection and includes five insulated butt connectors for a complete installation.
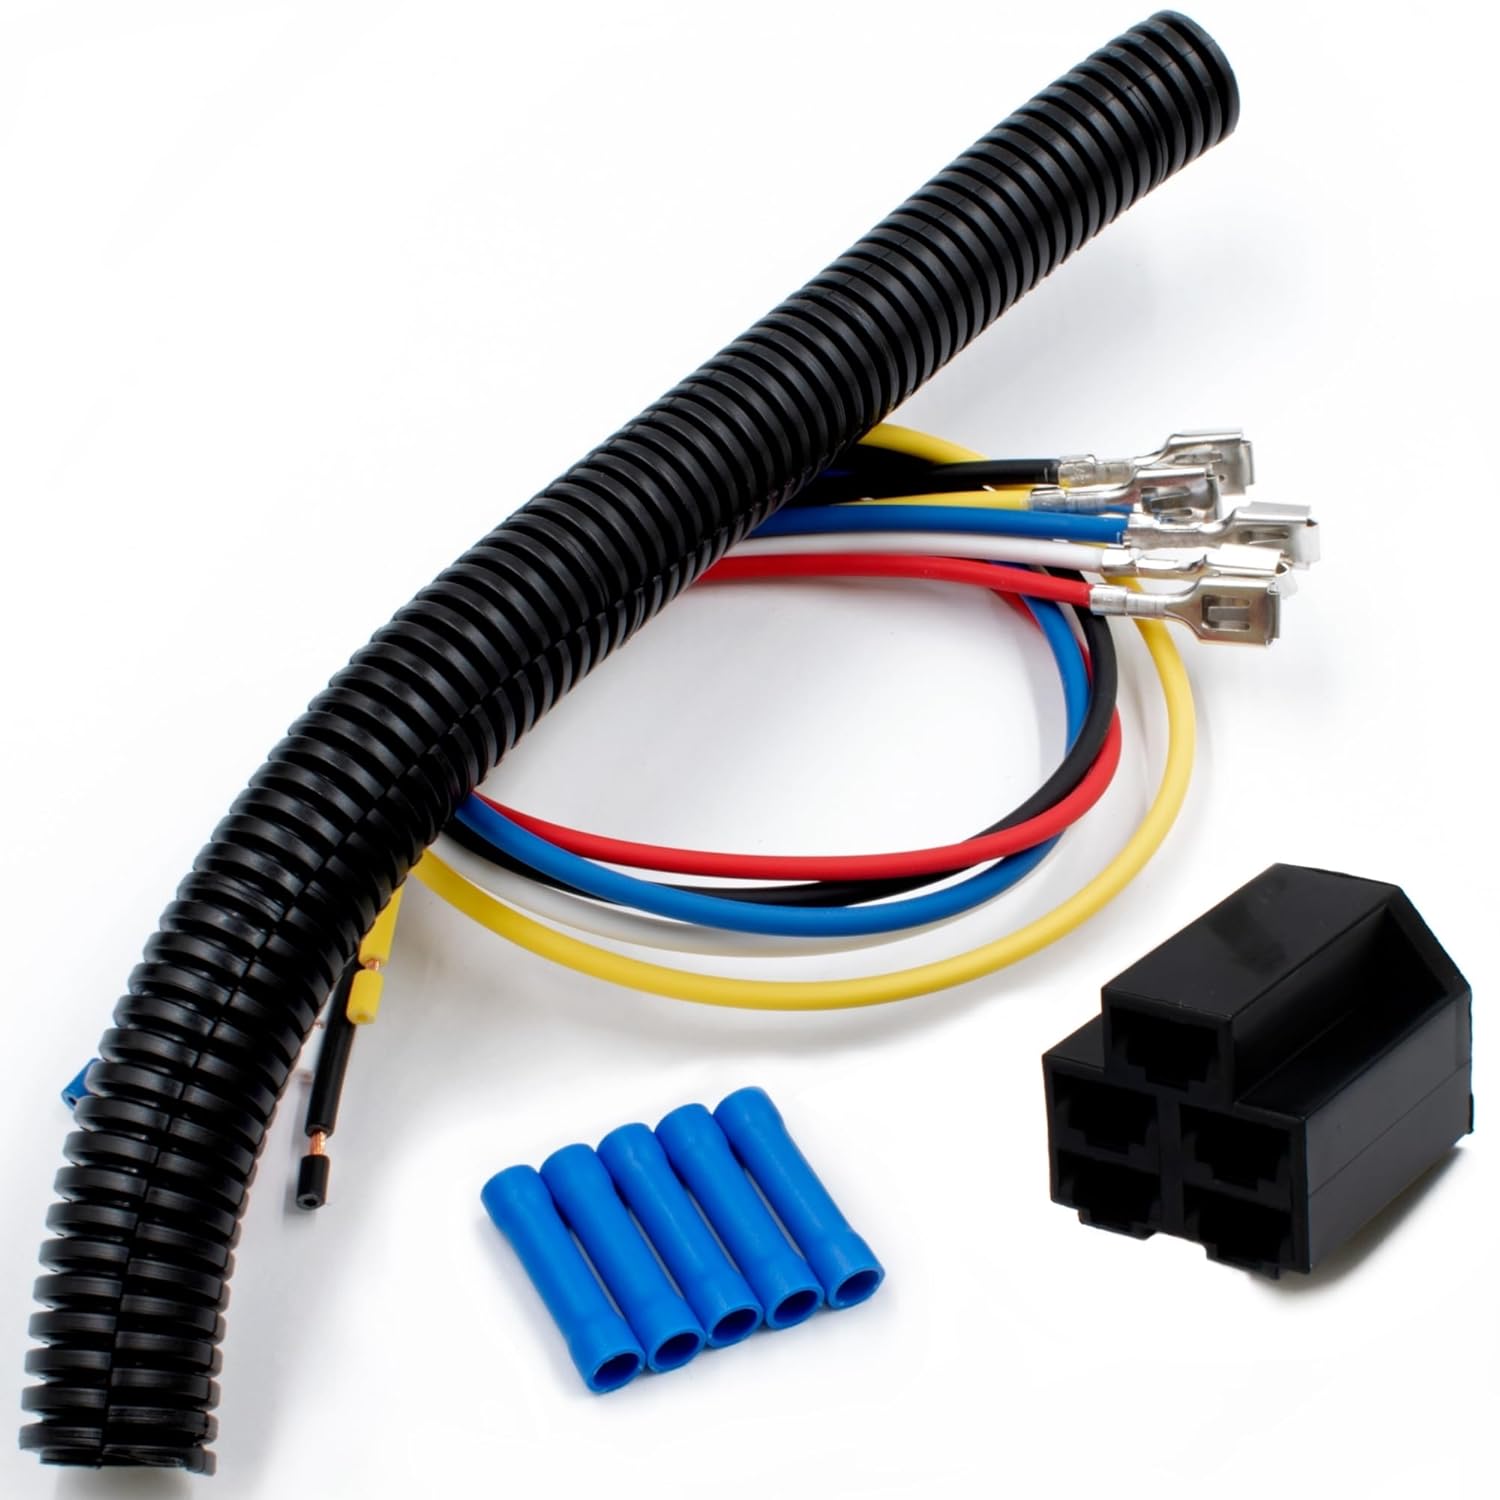
Image: The HD Switch Ignition Key Switch Wiring Harness, showing the black corrugated tubing, multi-colored wires, the 5-pin connector, and the included blue insulated butt connectors.
Key Features:
- Engineered Performance: Designed for optimal functionality in demanding environments.
- Superior Quality: Built to rigorous standards for long-lasting durability.
- Enhanced Protection: Features heavy-duty corrugated tubing to protect wires from damage and exposure.
- Complete Kit: Includes five free insulated butt connectors for convenient installation.
2. Compatibility
This HD Switch wiring harness is designed for specific ignition switch configurations. Please verify your existing ignition switch matches the following criteria for proper function and fit.
Ignition Switch Position Compatibility:
This wire harness repair kit ONLY works with 3 Position Ignition Switches. It is not compatible with 4-position ignition switches.

Image: A visual guide illustrating that the harness is compatible with 3-position ignition switches (indicated by a thumbs-up) and incompatible with 4-position ignition switches (indicated by a thumbs-down).
Terminal (Pin) Compatibility:
This wire harness repair kit ONLY works with 5 Terminal (Pin) Delta Ignition Switches. It is not compatible with 7 Terminal Delta Switches.

Image: A visual guide illustrating that the harness is compatible with 5-terminal (pin) Delta ignition switches (indicated by a thumbs-up) and incompatible with 7-terminal Delta switches (indicated by a thumbs-down).
The harness is designed to work with standard 5-pin ignition switch configurations, including many models from Toro, Exmark, Hustler, John Deere, Cub Cadet, Troy-Bilt, Ariens, Gravely, Simplicity, Snapper, and Murray that utilize a 3-position, 5-terminal switch.

Image: A close-up view of an ignition switch, indicating compatibility with "All Indak Ignition Switches" that meet the specified pin and position requirements.
3. Package Contents
Upon opening your package, please ensure all the following components are present:
- 1x HD Switch Ignition Key Switch Wiring Harness (18 inches)
- 5x Insulated Butt Connectors (blue)
Note: The ignition switch and key are NOT included with this wiring harness. This product is a replacement or repair kit for the wiring harness only.

Image: A clear view of the five blue insulated butt connectors that are included with the wiring harness.

Image: The wiring harness shown connected to an ignition switch, emphasizing that the ignition switch itself is not part of the package.
4. Setup and Installation
Safety First: Always disconnect the battery and ensure the equipment is turned off before performing any electrical work. Wear appropriate personal protective equipment (PPE) such as safety glasses.
- Prepare the Equipment: Ensure the engine is cool and the ignition is off. Disconnect the negative terminal of the battery to prevent accidental starts or electrical shorts.
- Access the Existing Harness: Locate the current ignition switch wiring harness. This may require removing panels or covers on your equipment.
- Document Wiring: Before disconnecting, carefully note or photograph the existing wire connections to the ignition switch. Pay close attention to the color and position of each wire on the switch terminals.
- Remove Old Harness: Disconnect the old wiring harness from the ignition switch and any other connected components.
- Prepare New Harness Wires: The new HD Switch harness comes with pre-crimped terminals. If you need to shorten the wires or re-crimp, use the included insulated butt connectors to join wires securely. Ensure all connections are tight and properly insulated.
- Inspect Spade Connectors (Important): Some spade connectors may have a small raised dot designed to latch onto switch tabs. If you anticipate needing to disconnect the harness in the future, it is advisable to use needle-nose pliers to gently flatten this raised dot before connecting to the ignition switch. This will allow for easier removal without damaging the switch or connector.
- Connect New Harness: Based on your documentation, connect the wires of the new HD Switch harness to the corresponding terminals on your ignition switch. Ensure each wire is securely fastened to its correct terminal.
- Secure Wiring: Route the new harness through the corrugated tubing provided, ensuring all wires are protected. Secure the harness to prevent it from rubbing against moving parts or hot surfaces.
- Reconnect Battery: Once all connections are secure and verified, reconnect the negative terminal of the battery.
- Test Functionality: Turn the ignition key to test the various positions (OFF, RUN, START) to ensure the equipment functions correctly. Check for proper engine cranking and shutdown.

Image: A close-up of the 5-pin connector, highlighting its robust construction and "Made in the USA" origin.
5. Operating Considerations
The HD Switch wiring harness is a passive component that facilitates the electrical connection between your ignition switch and the equipment's electrical system. Its operation is directly tied to the proper functioning of your ignition switch and the overall electrical system of your lawn and garden equipment.
- Ensure the ignition switch is correctly installed and functioning as per your equipment's manufacturer guidelines.
- Always use the correct key for your ignition switch.
- Avoid forcing the key or switch, as this can damage the switch or the harness connections.
- If the equipment fails to start or experiences intermittent power, refer to the troubleshooting section and your equipment's primary user manual.
6. Maintenance
Regular inspection and minimal maintenance can extend the life of your wiring harness and ensure reliable performance.
- Periodic Inspection: Annually, or more frequently if used in harsh conditions, inspect the wiring harness for any signs of wear, fraying, cracks in the insulation, or damage to the corrugated tubing.
- Connection Check: Ensure all connections to the ignition switch and other components remain tight and free of corrosion. Loose connections can lead to intermittent electrical issues or overheating.
- Cleanliness: Keep the harness and its connections free from dirt, debris, moisture, and corrosive substances. Use a clean, dry cloth to wipe down the harness if necessary.
- Protection: Ensure the corrugated tubing remains intact and provides full protection to the wires. If damaged, consider replacing the harness or reinforcing the damaged section with electrical tape or new tubing.
7. Troubleshooting
If you encounter issues after installing the HD Switch wiring harness, consider the following common problems and solutions:
| Problem | Possible Cause | Solution |
|---|---|---|
| Engine does not crank or start. |
|
|
| Intermittent power or flickering lights. |
|
|
| Harness connector difficult to remove from switch. |
|
|
If problems persist, consult a qualified technician or refer to your equipment's specific service manual.
8. Specifications
| Product Type | Ignition Key Switch Wiring Harness |
| Brand | HD Switch |
| Cable Type | Ignition Key Switch Wiring |
| Connector Type | 5-pin (Partial Ignition Key Switch) |
| Material | Corrugate (for wire protection) |
| Length | 18 inches (approx.) |
| Item Weight | 0.15 Kilograms (approx. 5.29 ounces) |
| Included Accessories | 5 Insulated Butt Connectors |
9. Warranty and Support
HD Switch products are manufactured to high standards. For specific warranty information or technical support, please contact HD Switch directly through their official channels or the retailer from whom you purchased the product. Keep your proof of purchase for any warranty claims.
For further assistance, please visit the HD Switch website or contact their customer service department.
Ask a question about this manual
Ask about setup, troubleshooting, compatibility, parts, safety, or missing instructions. Manuals+ will review the question and use this page’s manual context to help answer it.