Introduction
The Stanley TM262 DIGISLIM Daily Digital Timer is designed to automate the control of indoor lighting and electronics. Its slim design ensures it does not obstruct the second outlet when plugged in. This timer allows for easy programming of daily schedules, including a security mode that randomizes ON/OFF times when you are away. A built-in backup battery maintains programming settings during power outages.
- Features one polarized outlet.
- Easy-to-set digital timer for various indoor applications.
- Compatible with CFL, LED, incandescent, and halogen light sources.
- Equipped with a large, easy-to-read LCD screen.
Product Overview
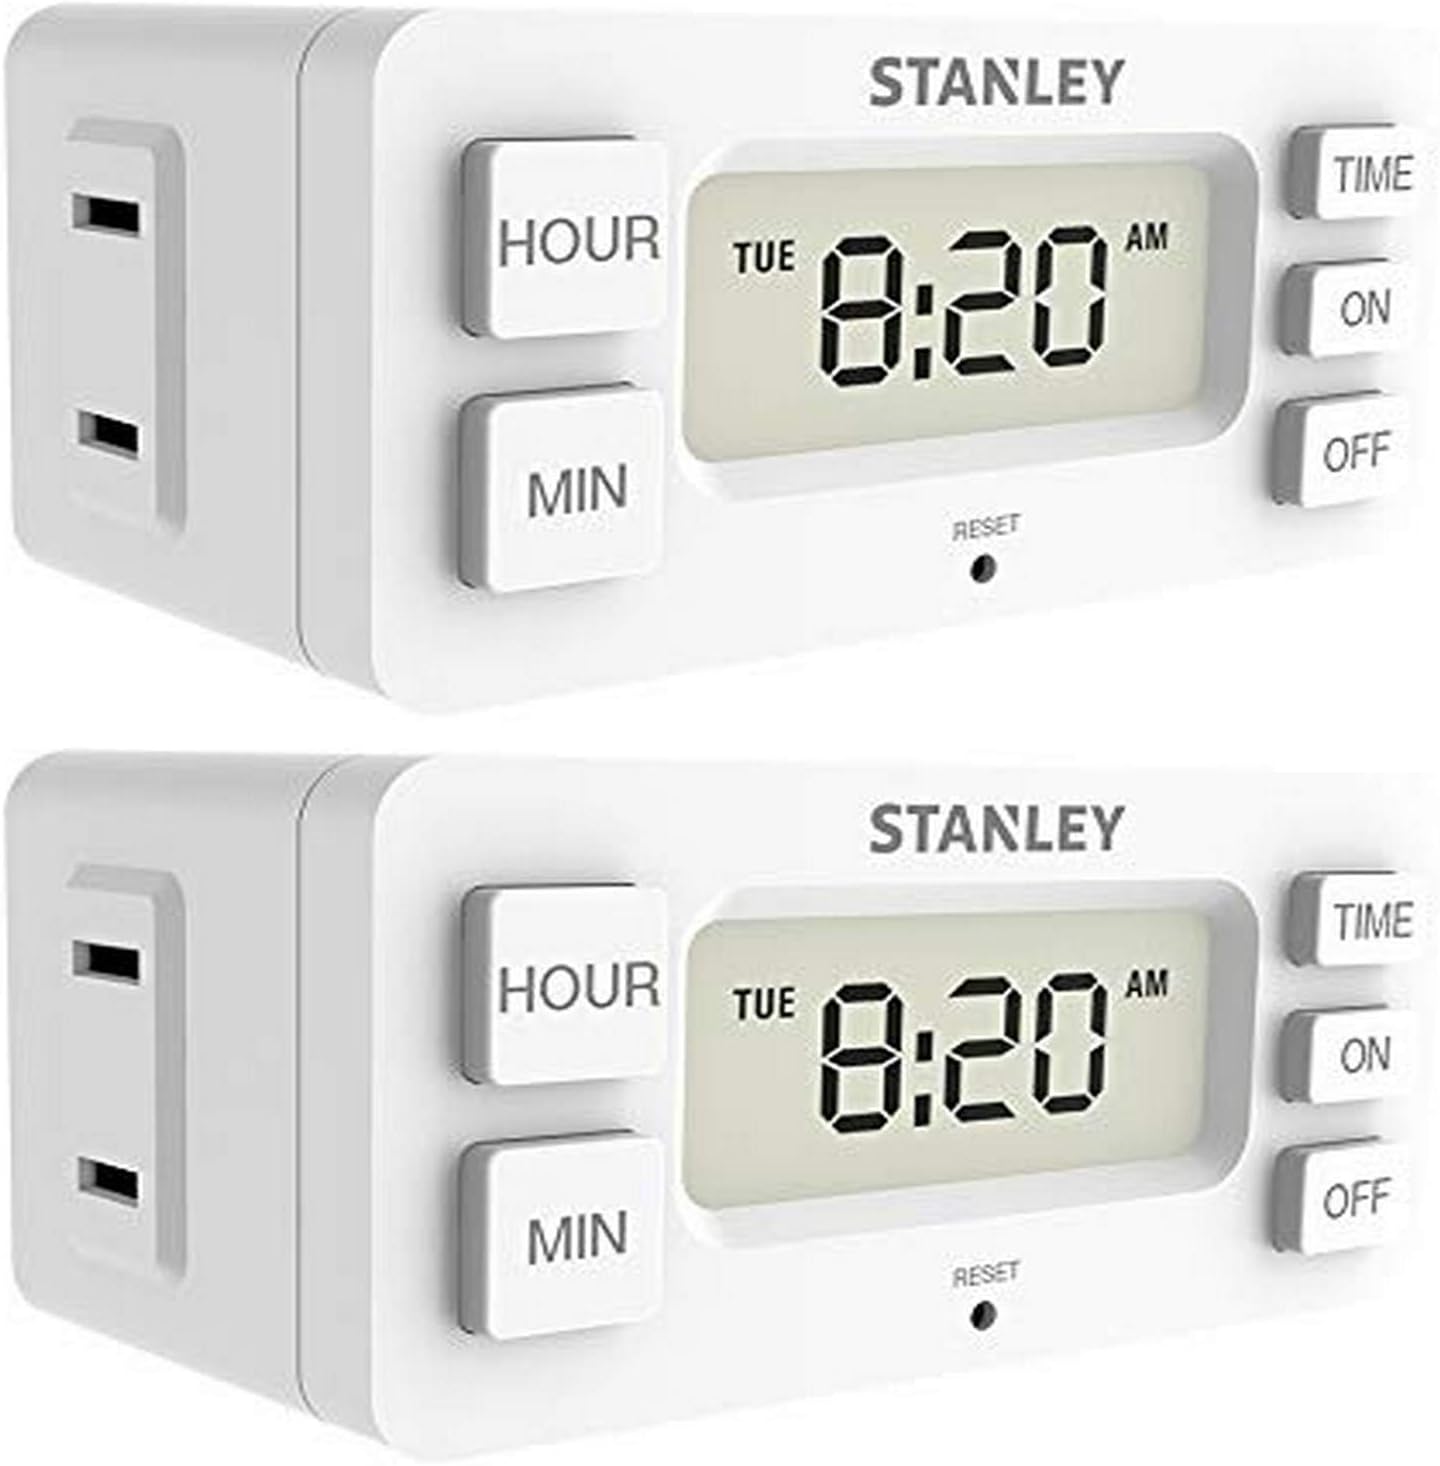
Image: Front view of the Stanley TM262 DIGISLIM Daily Digital Timer. The timer is white with a large LCD screen displaying "TUE 8:20 AM". To the left of the screen are "HOUR" and "MIN" buttons. To the right are "TIME", "ON", and "OFF" buttons. Below the screen is a small "RESET" pinhole. The left side of the timer features a polarized electrical outlet.
Setup Instructions
- Unpacking: Carefully remove the timer from its packaging.
- Initial Power-Up: Plug the timer into a standard 120V AC wall outlet. The LCD screen should illuminate.
- Setting Current Time:
- Press the TIME button. The hour display will flash.
- Use the HOUR button to adjust the hour. Press repeatedly to cycle through hours, including AM/PM.
- Use the MIN button to adjust the minutes.
- Press the TIME button again to confirm the time. The day of the week will flash.
- Use the HOUR button to select the current day of the week (e.g., MON, TUE, WED).
- Press the TIME button one last time to save the current time and day.
Operating Instructions
Programming ON/OFF Times
The timer allows you to set up to 20 ON/OFF programs. Each program consists of an ON time and an OFF time.
- Press the ON button to enter program mode. "1 ON" will appear on the screen, and the hour will flash.
- Use the HOUR and MIN buttons to set the desired ON time for Program 1.
- Press the ON button again. The day(s) of the week will flash. Use the HOUR button to select the desired day(s) for this program (e.g., everyday, weekdays, weekends, specific day).
- Press the OFF button. "1 OFF" will appear, and the hour will flash.
- Use the HOUR and MIN buttons to set the desired OFF time for Program 1.
- Press the OFF button again. The day(s) of the week will flash. Use the HOUR button to select the desired day(s) for this program. Ensure it matches the ON program's days.
- To set additional programs, repeat steps 1-6, pressing ON or OFF to cycle through program numbers (2 ON, 2 OFF, etc.).
- To exit program mode and return to the current time display, press the TIME button.
Security Mode (Random ON/OFF)
This mode provides a random delay to your programmed ON/OFF times, giving the appearance of someone being home.
- To activate: While in normal time display, press and hold the ON button for 3 seconds. "RND" will appear on the screen.
- To deactivate: Press and hold the ON button for 3 seconds again. "RND" will disappear.
Manual Override
You can manually turn the connected device ON or OFF at any time without affecting the programmed schedule.
- To manually turn ON: Press the ON button once while in normal time display. The outlet will turn ON.
- To manually turn OFF: Press the OFF button once while in normal time display. The outlet will turn OFF.
- The timer will resume its programmed schedule at the next scheduled ON or OFF event.
Maintenance
- Cleaning: Disconnect the timer from the power outlet before cleaning. Wipe the exterior with a soft, dry cloth. Do not use liquid cleaners or abrasive materials.
- Battery Backup: The timer includes a built-in backup battery (Silver Oxide) to retain settings during power outages. This battery is typically long-lasting and not user-replaceable. If settings are consistently lost during power interruptions, the internal battery may need servicing by a qualified technician.
Troubleshooting
| Problem | Possible Cause | Solution |
|---|---|---|
| Timer display is blank or not responding. | No power to the outlet; internal battery depleted. | Check the wall outlet with another device. If power is present, the internal battery may be fully discharged. Leave plugged in for several hours to charge. If still blank, contact support. |
| Programs are not activating at set times. | Incorrect time/day setting; program not saved correctly; manual override active. | Verify current time and day are set accurately. Re-enter and save programs carefully. Ensure manual override is not active. |
| Settings are lost after a power outage. | Internal backup battery is no longer holding a charge. | The internal battery may need replacement. This is not user-serviceable. Contact manufacturer support. |
| Device plugged into timer does not turn ON/OFF. | Device is faulty; timer is faulty; timer is in OFF state. | Test the device directly in the wall outlet. Ensure the timer is in the correct ON/OFF state or programmed correctly. |
Resetting the Timer
If the timer is behaving erratically or you wish to clear all settings, you can perform a factory reset.
- Locate the small RESET pinhole below the LCD screen.
- Using a paperclip or similar pointed object, gently press and hold the button inside the pinhole for approximately 3 seconds.
- The display will clear, and the timer will return to its default factory settings. You will need to re-set the current time and all programs.
Specifications
| Model Number | TM262 |
| Brand | STANLEY |
| Color | White |
| Material | Plastic |
| Product Dimensions | 2.45 x 4 x 1.5 inches |
| Item Weight | 6.4 ounces |
| Outlet Type | 1 Polarized Outlet |
| Compatible Light Sources | CFL, LED, Incandescent, Halogen |
| Battery Type (Backup) | Silver Oxide (Internal) |
| UPC | 686140312519 |
Warranty and Support
This Stanley TM262 DIGISLIM Daily Digital Timer comes with a 3-year warranty from the date of purchase.
For technical assistance, troubleshooting beyond this manual, or warranty claims, please contact STANLEY customer support. Refer to the product packaging or the official STANLEY website for the most current contact information.
Visit the STANLEY Store on Amazon for more information.


