
1. Introduction
This manual provides essential information for the safe and correct installation, operation, and maintenance of your KSP 1.25-inch (32mm) Hubcentric Wheel Spacers. These spacers are designed to widen your vehicle's track, improve tire clearance, and enhance the vehicle's stance. Please read these instructions thoroughly before installation.
2. Safety Information
WARNING: Improper installation or maintenance can lead to wheel detachment, serious injury, or death. Professional installation is highly recommended.
- Always use a torque wrench to tighten lug nuts to the manufacturer's specifications.
- Regularly inspect and re-torque lug nuts, especially after the first 50-100 miles of driving and periodically thereafter.
- Ensure the wheel spacers are hubcentric to your vehicle to prevent vibrations.
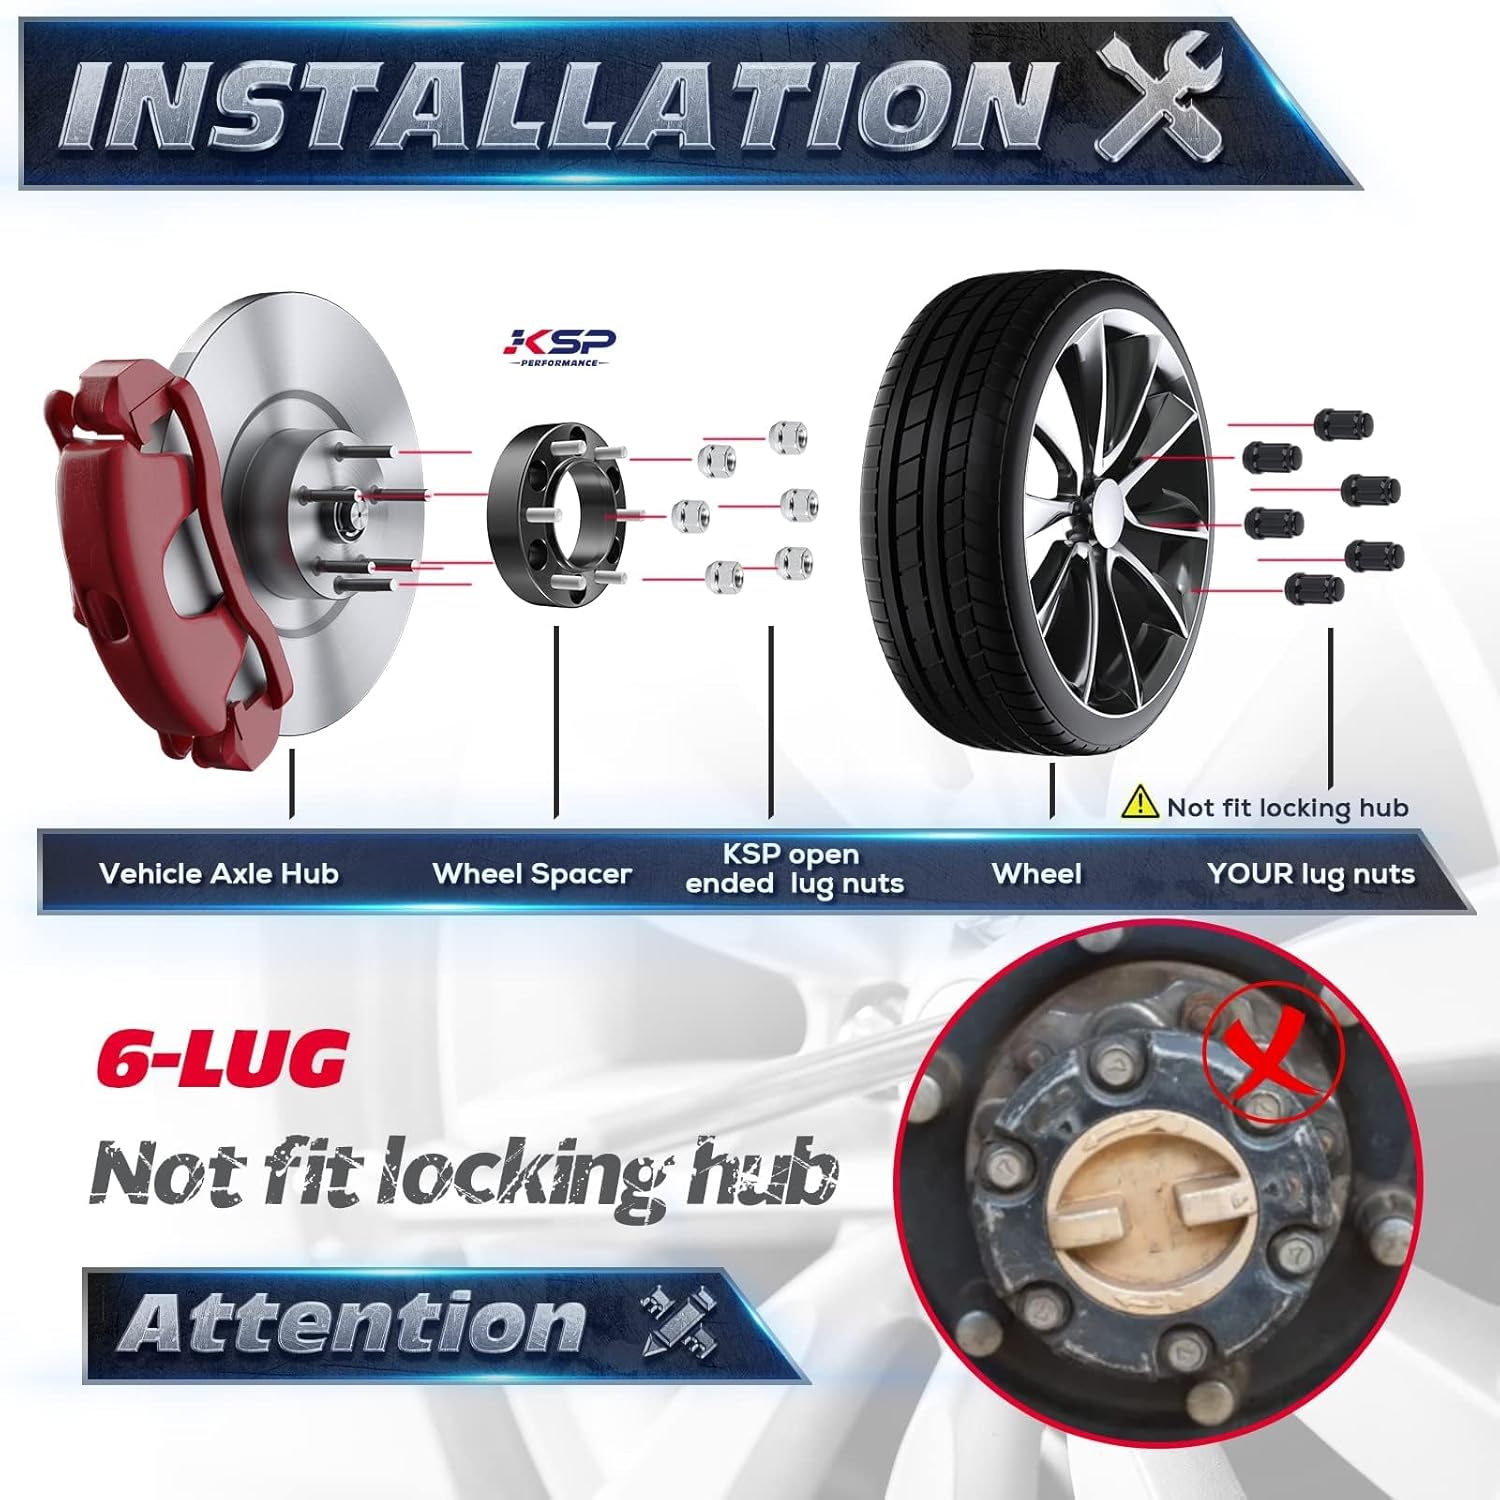
- Do not install these spacers on vehicles with front locking hubs (e.g., some Land Cruiser or Pickup models), as they are not compatible.
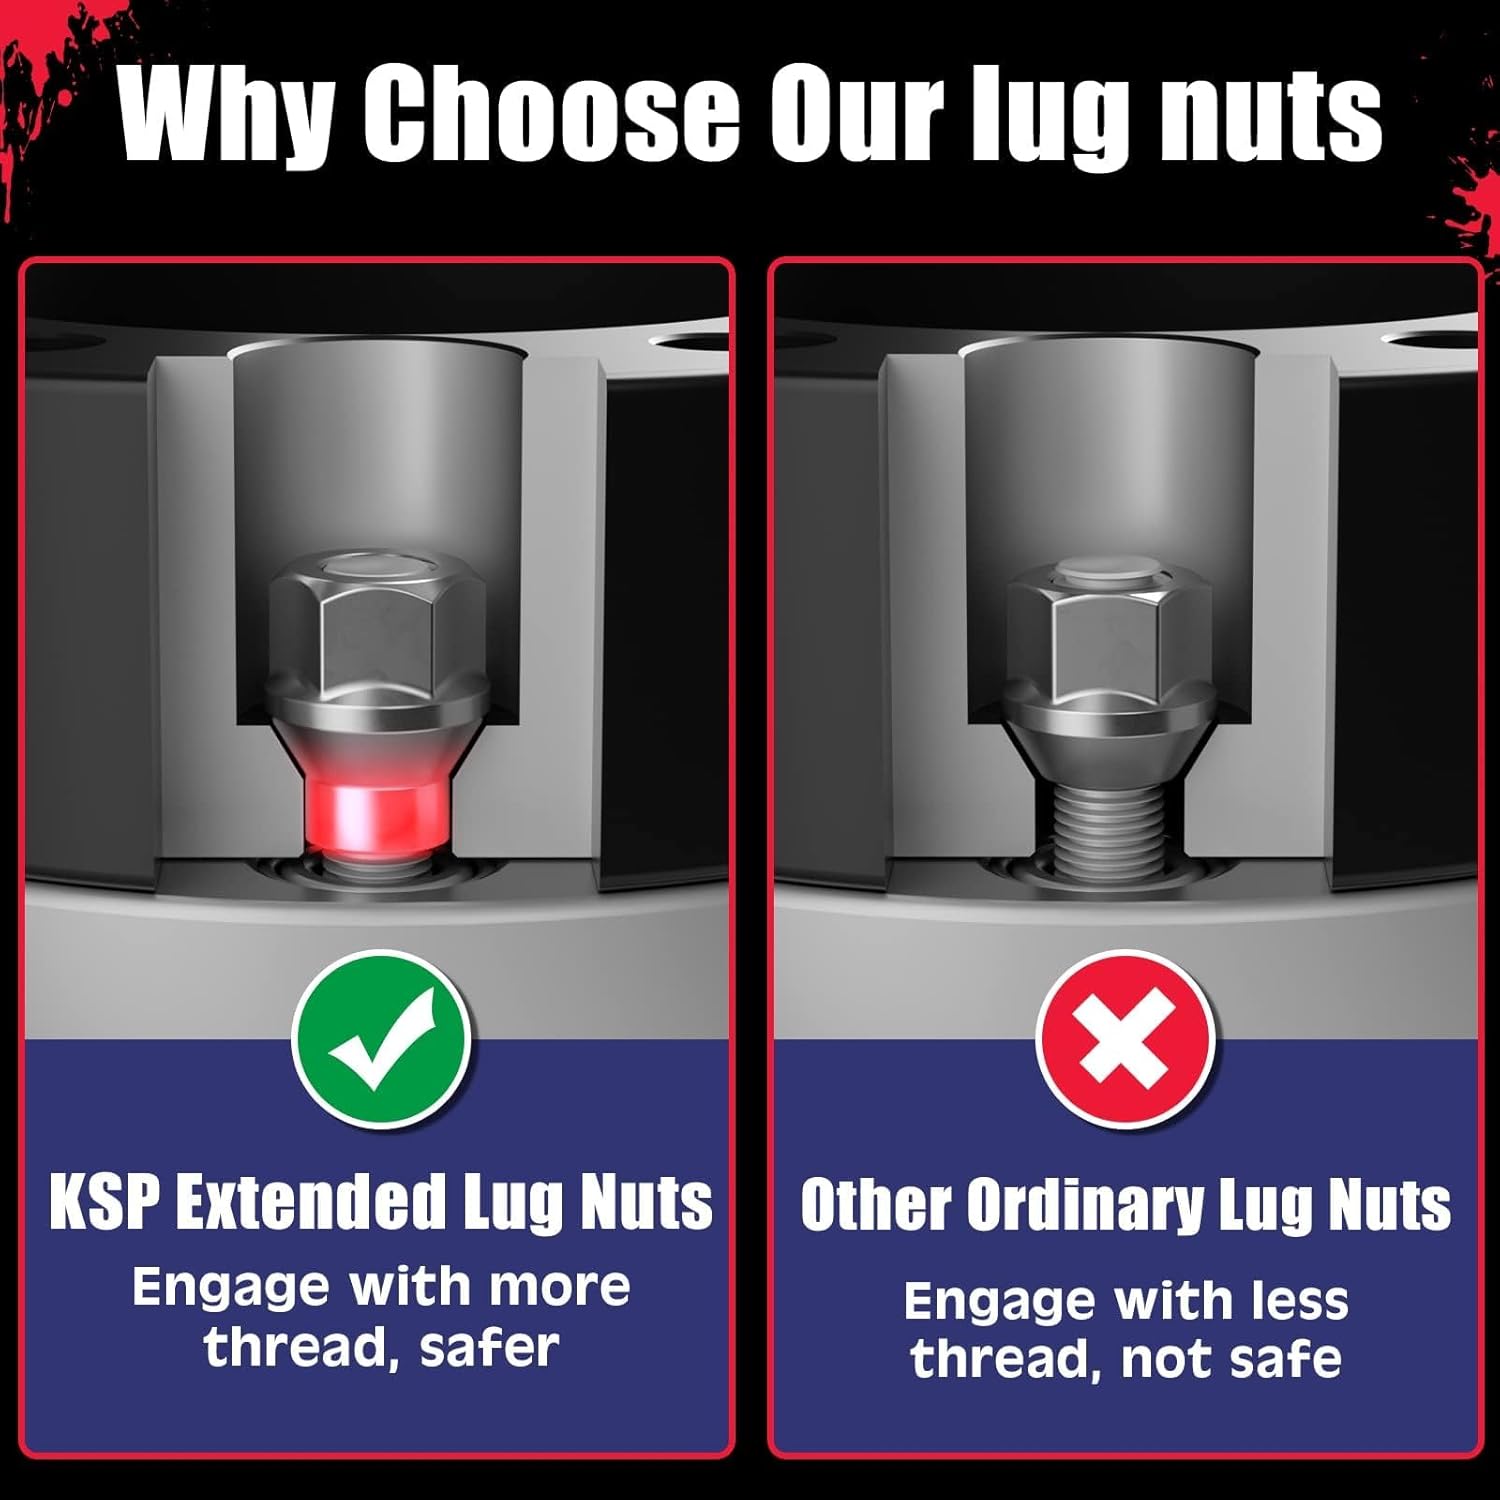
- If your vehicle's original studs are too short after installing the wheel spacers, use KSP Extended Thread (ET) lug nuts (e.g., B07DLX519N) to ensure adequate thread engagement.
3. Package Contents
Each package includes:
- 4x KSP 1.25-inch (32mm) Hubcentric Wheel Spacers
- 24x 12.9 Grade Open-Ended Lug Nuts (for attaching spacers to vehicle hub)
- 1x Instruction Manual
- Thread Locker (for fastening)
4. Specifications
| Specification | Value |
|---|---|
| Thickness | 1.25 inches (32mm) |
| Vehicle Bolt Pattern | 6x5.5 inches (6x139.7mm) |
| Wheel Bolt Pattern | 6x5.5 inches (6x139.7mm) |
| Center Bore | 106mm (Hubcentric with lip) |
| Threaded Studs/Nuts | 12x1.5mm |
| Recommended Torque | 72-80 FT/LBS |
| Material | Forged 6061-T6 Aluminum |
| Stud Grade | 10.9 Grade Geomet Bolts |
Exact Fitment for Toyota Trucks:
- 1995-2023 Tacoma (6-lug models only)
- 1996-2023 4Runner
- 2001-2007 Sequoia
- 2007-2021 FJ Cruiser
- 2002-2022 GX460
Note: For Tacoma and 4Runner models 2023+, please refer to specific product variants B0DSL446SL or B0DSL28MTZ if applicable.
5. Setup and Installation
Follow these steps for proper installation:
- Prepare Vehicle: Park the vehicle on a flat, stable surface. Engage the parking brake. Loosen the lug nuts on the wheel you intend to remove, then lift the vehicle with a jack and secure it with jack stands. Remove the wheel.
- Clean Hub Surface: Thoroughly clean the vehicle's hub surface to ensure it is free of rust, dirt, or debris. A clean surface is crucial for proper seating of the spacer.
- Apply Thread Locker: Apply a small amount of the provided thread locker to the vehicle's original wheel studs.
- Install Wheel Spacer: Place the KSP wheel spacer onto the vehicle's hub, aligning the holes with the vehicle's studs. Ensure the spacer sits flush against the hub.
- Secure Spacer: Use the provided open-ended lug nuts to secure the wheel spacer to the vehicle's hub. Tighten these lug nuts in a star pattern to the recommended torque of 72-80 FT/LBS.
- Reinstall Wheel: Place your vehicle's wheel onto the newly installed wheel spacer, aligning the wheel's bolt pattern with the studs on the spacer.
- Secure Wheel: Use your vehicle's original lug nuts (or appropriate aftermarket lug nuts if required for proper engagement) to secure the wheel to the spacer. Tighten these lug nuts in a star pattern to your vehicle manufacturer's recommended torque specifications.
- Lower Vehicle: Carefully lower the vehicle and remove the jack stands.
- Final Torque Check: After driving 50-100 miles, re-check the torque of all lug nuts (both those securing the spacer to the hub and the wheel to the spacer) to ensure they remain properly tightened.
Installation Visual Aids
Refer to the following images and videos for visual guidance during installation.
Installation Videos
Video 5.3: KSP Forged Wheel Spacers Installation Guide. This video demonstrates the step-by-step process of installing KSP forged wheel spacers on a vehicle.
Video 5.4: Toyota Hubcentric Wheel Spacers Overview. This video provides an overview of KSP hubcentric wheel spacers designed for Toyota vehicles, highlighting their features and benefits.
6. Operating Considerations
Once installed, KSP wheel spacers provide an aggressive stance and can resolve clearance issues with larger tires or suspension components. The hubcentric design ensures that the wheel is centered correctly on the hub, minimizing the risk of vibrations during driving, thereby retaining stock driving performance.
7. Maintenance
Regular maintenance is crucial for the safety and longevity of your wheel spacers:
- Initial Re-torque: Re-torque all lug nuts (both spacer-to-hub and wheel-to-spacer) after the first 50-100 miles of driving.
- Periodic Checks: Periodically check the torque of all lug nuts, especially after off-road use or heavy loads, or at every tire rotation.
- Visual Inspection: Regularly inspect the wheel spacers for any signs of damage, cracks, or corrosion. Ensure all studs are intact and not stripped.
8. Troubleshooting
- Vibrations After Installation:
- Ensure the wheel spacers are properly seated flush against the vehicle's hub. Any debris or unevenness can cause vibrations.
- Verify that all lug nuts are torqued correctly to specifications in a star pattern.
- Confirm that the wheel spacers are hubcentric to your vehicle's hub and your wheels are hubcentric to the spacers.
- Check for adequate thread engagement. If vehicle studs are too short, use KSP Extended Thread (ET) lug nuts.
- Spacer Not Fitting:
- Double-check your vehicle's bolt pattern and hub bore against the spacer specifications.
- Ensure your vehicle does not have front locking hubs, as these spacers are not compatible.
9. Warranty and Support
KSP Performance offers a 2-year warranty on these wheel spacers. If you have any questions or encounter issues, please contact KSP Performance customer service. We are committed to providing support and will reply within 24 hours.

