
MEDION MD 18600
MEDION MD 18600 Robot Vacuum Cleaner User Manual
Model: MD 18600
1. Introduction
Thank you for choosing the MEDION MD 18600 Robot Vacuum Cleaner. This manual provides essential information for the safe operation, maintenance, and troubleshooting of your new appliance. Please read this manual thoroughly before using the device and keep it for future reference.
2. Safety Information
Always observe the following safety precautions to reduce the risk of fire, electric shock, or injury:
- Do not operate the robot vacuum cleaner in wet environments or on wet surfaces.
- Keep hair, loose clothing, fingers, and all parts of the body away from openings and moving parts.
- Do not pick up anything that is burning or smoking, such as cigarettes, matches, or hot ashes.
- Do not use without the dustbin and filter in place.
- Ensure the charging station is placed on a level surface against a wall, with adequate clear space around it.
- Only use the original charging adapter and charging station provided with the device.
- Supervise children and pets when the robot vacuum is operating.
3. Package Contents
Verify that all items are present in the packaging:
- MEDION MD 18600 Robot Vacuum Cleaner
- Charging Station
- Power Adapter
- Side Brushes (2 pairs)
- HEPA Filter (pre-installed)
- Cleaning Brush
- User Manual (this document)
4. Product Overview
Familiarize yourself with the components of your MEDION MD 18600 robot vacuum cleaner.
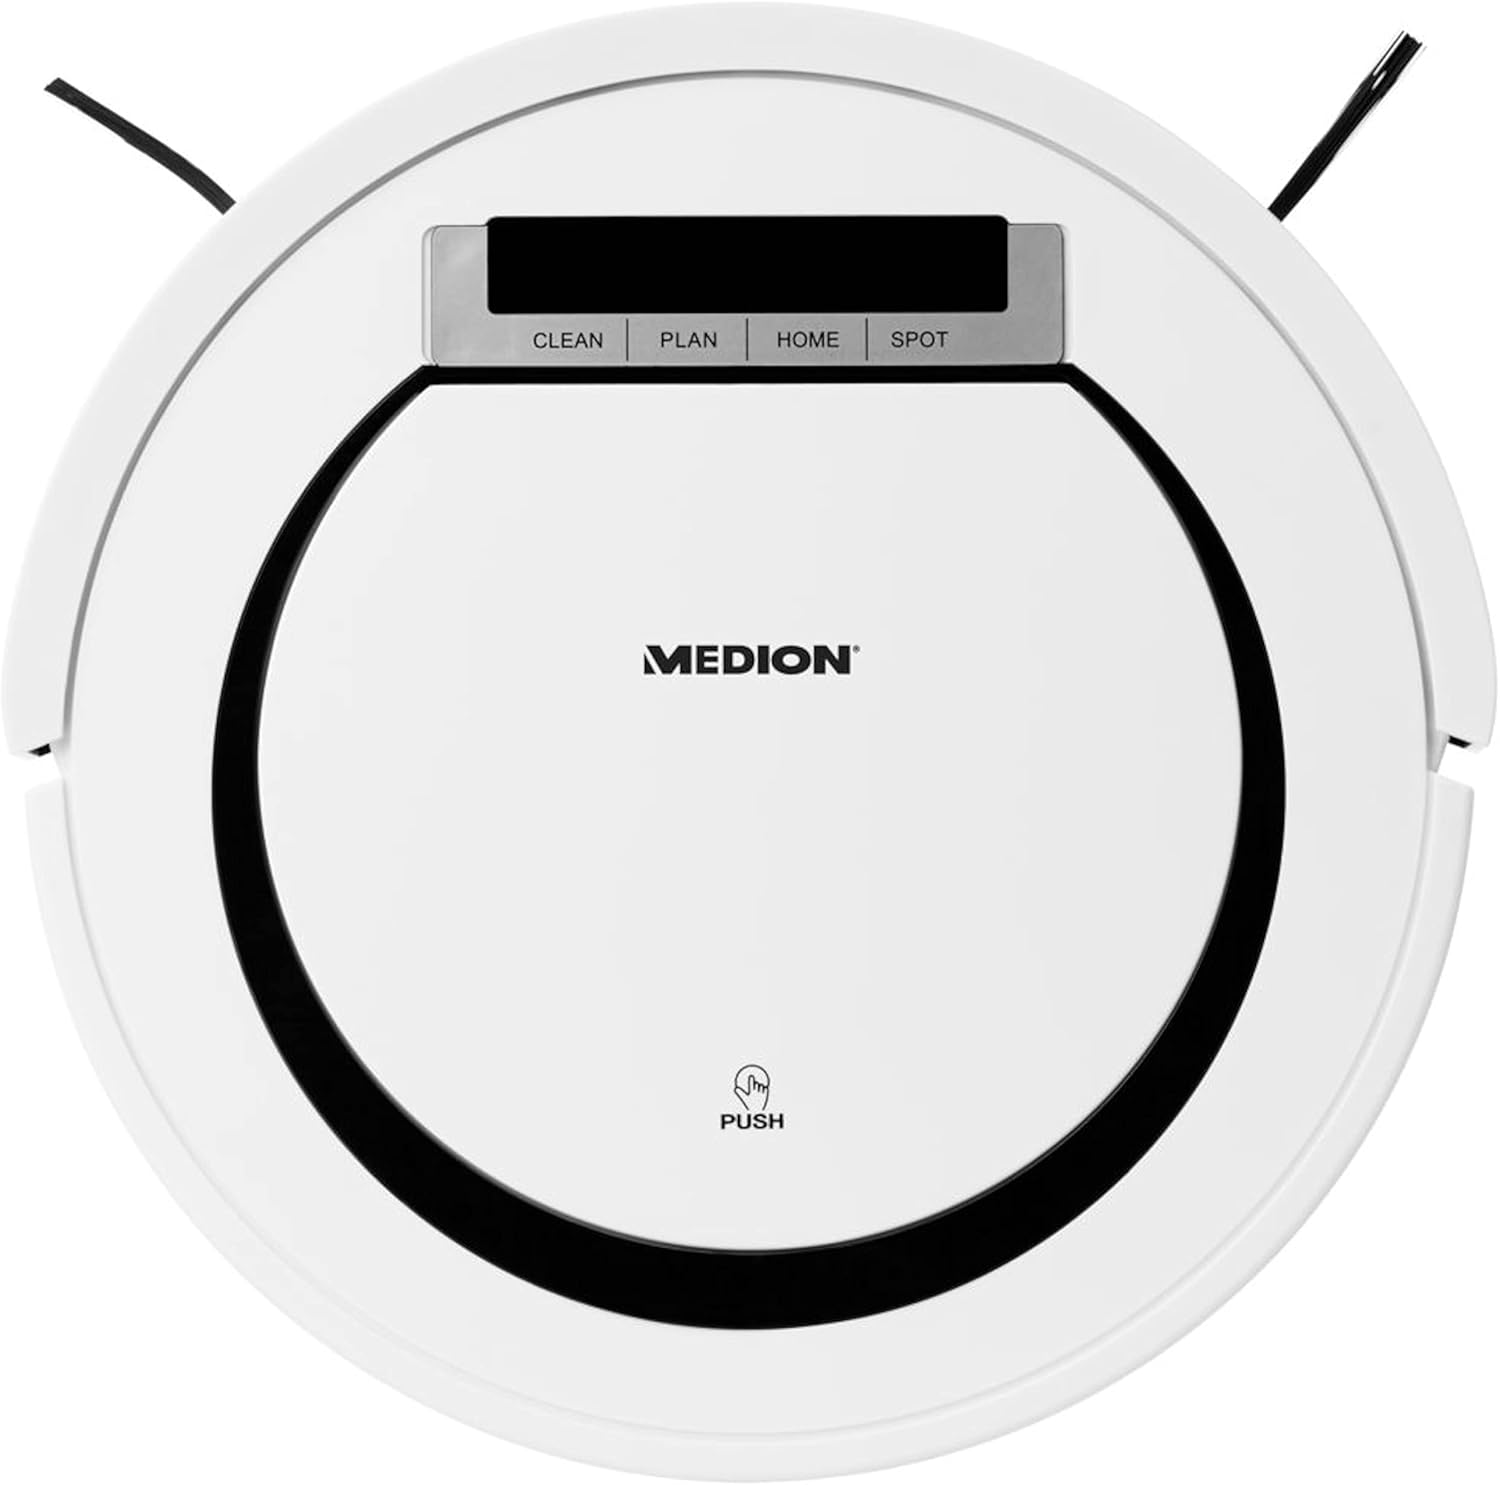
Figure 4.1: Top view of the MEDION MD 18600 Robot Vacuum Cleaner, showing the control panel with 'CLEAN', 'PLAN', 'HOME', and 'SPOT' buttons, and the 'PUSH' button for opening the dustbin compartment.

Figure 4.2: Side view of the robot vacuum, illustrating its flat design (7.8 cm height), 90-minute runtime, automatic return to charging station, and suitability for pet hair.
5. Setup
5.1 Charging Station Placement
Place the charging station on a hard, level surface against a wall. Ensure there is at least 1 meter (3 feet) of clear space to the front and 0.5 meters (1.5 feet) to each side of the charging station to allow the robot to dock properly.

Figure 5.1: The robot vacuum positioned next to its charging station, illustrating the connection point for charging.
5.2 Initial Charging
Before first use, fully charge the robot vacuum. Connect the power adapter to the charging station and plug it into a wall outlet. Place the robot onto the charging station, ensuring the charging contacts align. The charging indicator light will illuminate. A full charge takes approximately 4.5 hours.
6. Operating Instructions
6.1 Starting a Cleaning Cycle
Press the 'CLEAN' button on the robot's control panel or the remote control (if included) to start a cleaning cycle. The robot will automatically select a cleaning path based on its environment.

Figure 6.1: The robot vacuum cleaning a hard floor area near a sleeping dog, demonstrating its ability to clean around obstacles and handle pet hair.
6.2 Cleaning Modes
The robot vacuum features various cleaning modes:
- Auto Clean: The robot cleans automatically until the battery is low or the cycle is complete.
- Spot Clean: For concentrated cleaning of a small area. Place the robot in the center of the area and press 'SPOT'.
- Edge Clean: The robot cleans along walls and furniture edges.
- Scheduled Cleaning: Set a specific time for the robot to start cleaning daily (refer to the full manual for detailed scheduling instructions).
6.3 Automatic Return to Charging Station
When the battery level is low, the robot will automatically return to its charging station to recharge. You can also manually send the robot back to the charging station by pressing the 'HOME' button on the control panel or remote control.
7. Maintenance
Regular maintenance ensures optimal performance and extends the lifespan of your robot vacuum cleaner.
7.1 Emptying the Dustbin
It is recommended to empty the dustbin after each cleaning cycle.
- Press the 'PUSH' button on the top cover to open the dustbin compartment.
- Lift out the dustbin.
- Open the dustbin lid and empty the contents into a trash can.
- Close the dustbin lid and reinsert it into the robot until it clicks into place.

Figure 7.1: The robot vacuum with its top cover and dustbin compartment open, showing the removable dustbin for easy emptying.
7.2 Cleaning the Filters
The HEPA filter and sponge filter should be cleaned regularly. Tap them gently to remove dust. Do not wash the HEPA filter with water. The sponge filter can be rinsed with water and air-dried completely before reinstallation.
7.3 Cleaning the Side Brushes and Main Brush
Remove any hair or debris tangled around the side brushes and main brush. Use the provided cleaning tool for easier removal. Replace worn brushes as needed.
7.4 Cleaning Sensors and Charging Contacts
Wipe the anti-drop sensors (located on the bottom of the robot) and the charging contacts (on the robot and charging station) with a clean, dry cloth to ensure proper function.
8. Troubleshooting
If you encounter issues with your robot vacuum, refer to the following common problems and solutions:
| Problem | Possible Cause | Solution |
|---|---|---|
| Robot does not start | Low battery; Power switch off; Obstruction | Charge the robot; Turn on the power switch; Remove any obstructions. |
| Robot gets stuck frequently | Too many obstacles; Dark surfaces | Clear the area of loose cables, rugs, etc.; Sensors may misinterpret dark surfaces as cliffs. |
| Poor cleaning performance | Full dustbin; Clogged filter; Worn brushes | Empty dustbin; Clean/replace filter; Clean/replace brushes. |
| Robot does not return to charging station | Charging station blocked; Charging contacts dirty | Ensure clear path to station; Clean charging contacts. |
If the problem persists, please contact customer support.
9. Specifications
| Feature | Specification |
|---|---|
| Model Number | MD 18600 |
| Dust Container Type | Bagless |
| Product Color | White |
| Shape | Round |
| Dust Capacity (Total) | 0.3 L |
| Noise Level | 65 dB |
| Battery Technology | Lithium-Ion (Li-Ion) |
| Battery Capacity | 2600 mAh |
| Runtime | 90 minutes (1.5 hours) |
| Charging Time | 4.5 hours |
| Diameter | 30 cm |
| Height | 80 mm (8 cm) |
| Weight | 2.05 kg (2.2 Kilograms) |
| HEPA Filtration System | Yes |
| Automatic Return to Base | Yes |
10. Warranty and Support
MEDION products are designed for reliability and performance. For warranty information and customer support, please refer to the warranty card included in your product packaging or visit the official MEDION website. Our customer service team is available to assist with any questions or issues you may have.
Manufacturer: Medion
Customer Service: Please refer to the contact information provided in your product's warranty documentation or the official MEDION website for support.
Related documentsMD 18600


Ask a question about this manual
Ask about setup, troubleshooting, compatibility, parts, safety, or missing instructions. Manuals+ will review the question and use this page’s manual context to help answer it.