
DigiTech XC0225
DigiTech Multi-Function LCD Wall Clock User Manual
Model: XC0225
Introduction
The DigiTech Multi-Function LCD Wall Clock (Model XC0225) is a versatile device designed to provide convenient time display along with additional environmental information. This clock features a large LCD screen displaying time, date, day of the week, indoor temperature, and humidity. It also includes alarm and snooze functions, making it suitable for various settings, whether mounted on a wall or placed on a desktop.
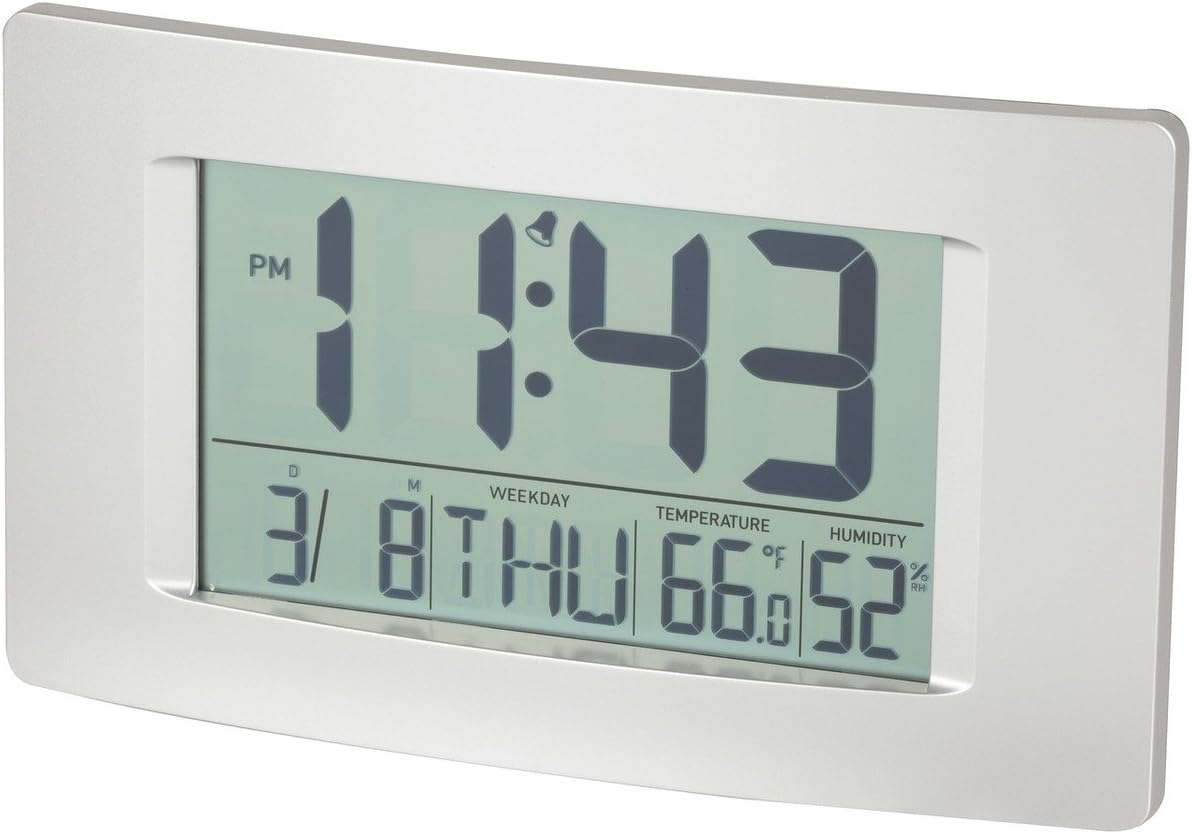
Figure 1: Front view of the Multi-Function LCD Wall Clock.
Package Contents
- DigiTech Multi-Function LCD Wall Clock (Model XC0225)
- User Manual (this document)
Note: 3 x AA batteries are required for operation and are not included in the package.

Figure 2: Product packaging illustrating the clock and its features.
Setup
1. Battery Installation
- Locate the battery compartment on the back of the clock.
- Open the battery compartment cover.
- Insert 3 x AA batteries, ensuring correct polarity (+ and -) as indicated inside the compartment.
- Close the battery compartment cover securely.
2. Initial Power-On
Upon battery installation, the clock will power on automatically and display default settings. You may need to adjust the time, date, and other settings as described in the "Operating Instructions" section.
3. Mounting Options
- Desktop Placement: Utilize the integrated stand on the back of the clock to place it on any flat surface.
- Wall Mounting: Use the integrated hang-hole on the back of the clock to mount it securely on a wall using a suitable screw or hook (not included).
Operating Instructions
The clock features several buttons on the back for setting and adjusting functions. Refer to the labels next to each button for their specific functions (e.g., MODE, UP, DOWN, ALARM, SNOOZE/LIGHT).
1. Setting Time and Date
- Press the MODE button repeatedly until the time display starts flashing.
- Use the UP or DOWN buttons to adjust the hour.
- Press MODE again to move to minutes, then use UP or DOWN to adjust.
- Continue pressing MODE to cycle through year, month, and day settings, adjusting each with UP or DOWN.
- Press MODE one last time to exit setting mode.
2. Setting Alarm
- Press the ALARM button once to display the current alarm time.
- Press and hold the ALARM button until the alarm hour starts flashing.
- Use the UP or DOWN buttons to adjust the alarm hour.
- Press ALARM again to move to alarm minutes, then use UP or DOWN to adjust.
- Press ALARM one last time to confirm and exit alarm setting mode.
- To activate/deactivate the alarm, press the ALARM button briefly when not in setting mode. An alarm icon will appear/disappear on the display.
3. Snooze Function
When the alarm sounds, press the SNOOZE/LIGHT button to activate the snooze function. The alarm will temporarily stop and sound again after the set snooze interval (1-60 minutes, adjustable in settings).
4. Temperature Unit Selection (°C/°F)
Briefly press the UP button (or a dedicated °C/°F button if present) to toggle between Celsius (°C) and Fahrenheit (°F) temperature display.
5. 12/24 Hour Format
Briefly press the DOWN button (or a dedicated 12/24H button if present) to switch between 12-hour and 24-hour time formats.
Maintenance
1. Cleaning
- Wipe the clock's surface with a soft, dry cloth.
- Do not use abrasive cleaners, solvents, or chemical sprays, as these may damage the display or casing.
2. Battery Replacement
When the display becomes dim or functions become erratic, it is time to replace the batteries. Follow the "Battery Installation" steps in the Setup section to replace the 3 x AA batteries. Always replace all batteries at the same time with new ones.
Troubleshooting
| Problem | Possible Cause | Solution |
|---|---|---|
| Display is blank or dim. | Batteries are dead or incorrectly installed. | Replace batteries with new 3 x AA batteries, ensuring correct polarity. |
| Time/Date is incorrect. | Not set correctly after battery installation or power interruption. | Follow the "Setting Time and Date" instructions to reset. |
| Alarm does not sound. | Alarm is not activated or alarm time is incorrect. | Ensure the alarm icon is displayed. Verify the alarm time setting. |
| Temperature/Humidity readings seem inaccurate. | Clock placed near heat sources, vents, or in direct sunlight. | Relocate the clock to an area with stable ambient temperature and humidity. Allow time for readings to stabilize. |
Specifications
| Feature | Detail |
|---|---|
| Model | XC0225 |
| Display Type | Digital LCD |
| LCD Size | 194mm (W) x 110mm (H) |
| Functions | Time, Date, Day of Week, Alarm, Snooze, Indoor Temperature, Indoor Humidity |
| Time Format | 12 Hour / 24 Hour selectable |
| Temperature Range | -9.9°C to +50°C (14.1°F to 122.0°F) |
| Humidity Range | 20% to 95% Relative Humidity (RH) |
| Snooze Duration | 1 - 60 minutes (adjustable) |
| Power Source | 3 x AA Batteries (not included) |
| Dimensions (Overall, W x H x D) | 306mm x 176mm x 36mm (approx.) |
| Weight | 540g (without batteries) / 660g (shipping weight) |
| Mounting Options | Integrated Stand, Wall Hang-hole |

Figure 3: Main display area dimensions of the clock for reference.
Warranty and Support
This DigiTech product comes with a 1-Year Warranty from the date of purchase. This warranty covers defects in materials and workmanship under normal use.
For technical support, warranty claims, or further assistance, please contact your retailer or the DigiTech customer service department. Please have your model number (XC0225) and proof of purchase ready when contacting support.
Related documentsXC0225

Ask a question about this manual
Ask about setup, troubleshooting, compatibility, parts, safety, or missing instructions. Manuals+ will review the question and use this page’s manual context to help answer it.