
1. Introduction
This manual provides comprehensive instructions for the installation, operation, and maintenance of your Wet Sounds Sinister SDX6 6-Channel Marine Amplifier and the accompanying Stinger 3-Meter 4-Gauge Amplifier Wiring Kit with RCA Cables. This bundle is designed to provide high-quality audio amplification in marine environments, with the wiring kit facilitating installation near the battery, away from the receiver.
The Sinister SDX6 amplifier utilizes advanced Class D power supplies and Wet Sounds' exclusive MAXED Power supply technology, ensuring high efficiency, reduced current draw, and minimal heat generation for extended performance.
2. Safety Information
Please read all safety instructions carefully before installing or operating this equipment. Failure to follow these guidelines may result in injury, damage to the product, or damage to your vehicle/vessel.
- Always disconnect the vehicle/vessel battery's negative terminal before beginning any electrical work.
- Ensure all wiring is properly routed and secured to prevent damage from sharp edges or moving parts.
- Use appropriate gauge wiring as specified in the installation section to prevent overheating and potential fire hazards. The included Stinger 4-gauge wiring kit is designed for this purpose.
- Install the fuse holder as close to the battery as possible, typically within 18 inches, to protect the power cable.
- Avoid mounting the amplifier in areas exposed to direct water spray or excessive heat.
- Consult a professional installer if you are unsure about any part of the installation process.
3. Package Contents
Verify that all items are present in your package:
- Wet Sounds Sinister SDX6 6-Channel Marine Amplifier
- Stinger 3-Meter 4-Gauge Marine Grade Power Cable (Yellow)
- Stinger 3-Meter 4-Gauge Marine Grade Ground Cable (Blue)
- Stinger ANL Fuse Holder with Fuse
- Stinger 6-Meter RCA Cables (White)
- Assorted Wiring Terminals and Connectors
- Allen Wrench for terminals

Image: Top view of the Wet Sounds Sinister SDX6 amplifier, showcasing its sleek black chassis and Wet Sounds logo.

Image: Components of the Stinger 4-Gauge Marine Grade Amplifier Wiring Kit, including yellow power cable, blue ground cable, fuse holder, and various terminals.
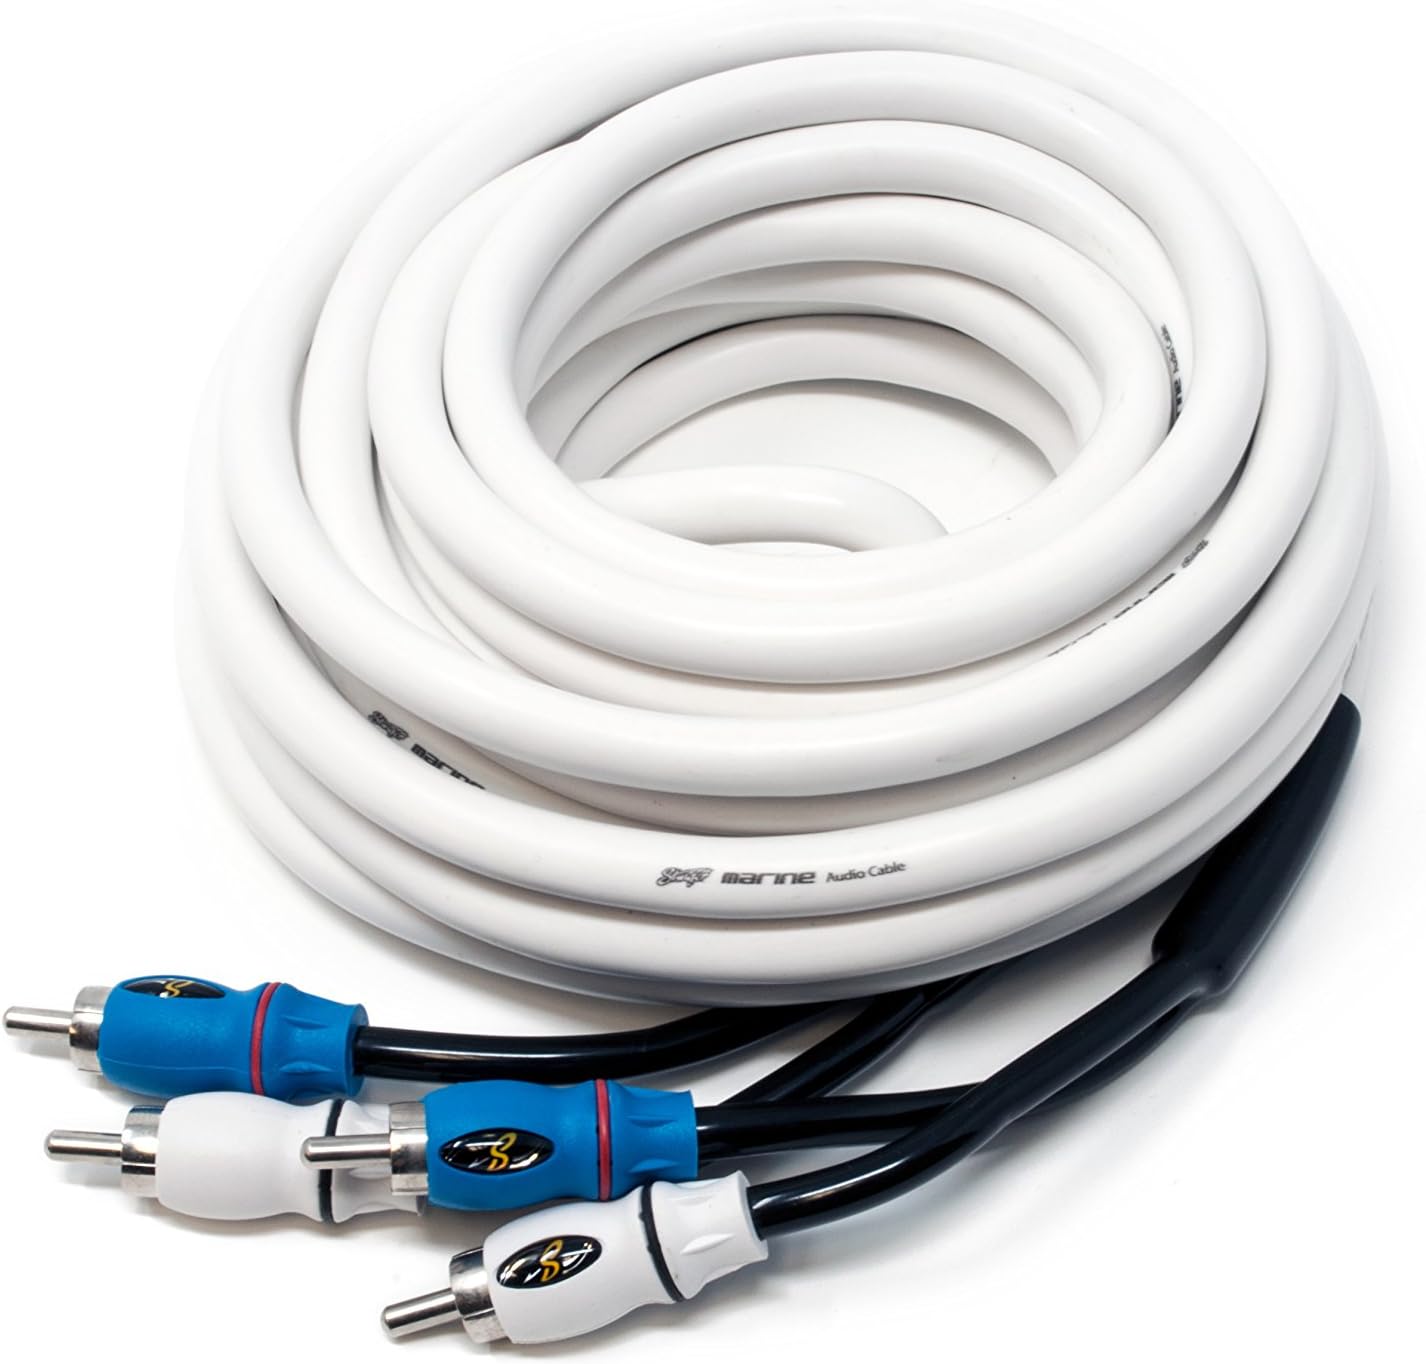
Image: Stinger 6-Meter Marine Grade RCA Cables, typically used for audio signal transmission.
4. Product Features
- Full Range Class D Amplifier: Efficient power delivery across the entire audio spectrum.
- 6-Channel Output: Versatile configuration for multiple speakers or speaker/subwoofer combinations.
- High Power Output:
- 185 Watts x 6 @ 4 Ohms (Stereo)
- 290 Watts x 6 @ 2 Ohms (Stereo)
- 585 Watts x 3 @ 4 Ohms (Bridged)
- MAXED Power Supply: Patent-pending technology for high efficiency, reduced current draw, and less heat.
- Robust Construction: Full cast aluminum chassis for durability and clean installation.
- Adjustable Crossovers: High and Low Pass filters (30Hz - 300Hz, 12dB/Octave) for precise sound tuning.
- Bass Boost: Adjustable 0-12.5dB @ 27Hz - 110Hz.
- Overvolt Protection: Integrated protection for system longevity.
- Stinger Marine Grade Wiring Kit: 100% OFC (Oxygen-Free Copper) wiring for optimal power delivery and corrosion resistance.
5. Installation Guide
Proper installation is crucial for optimal performance and safety. This section outlines the steps for installing your amplifier and wiring kit.
5.1 Mounting the Amplifier
Choose a mounting location that is dry, well-ventilated, and protected from direct sunlight or excessive heat. Ensure there is sufficient space around the amplifier for air circulation. The amplifier's compact design allows for flexible placement. Secure the amplifier firmly using appropriate hardware.
5.2 Wiring Connections
Before making any connections, ensure the vehicle/vessel battery's negative terminal is disconnected.
5.2.1 Power and Ground Connections

Image: Rear view of the Wet Sounds Sinister SDX6 amplifier, showing the power, ground, remote, and speaker output terminals on the left and right sides.
- Power Cable (+12V): Connect the yellow 4-gauge power cable from the Stinger kit to the amplifier's "+12V" terminal. Route this cable directly to the positive terminal of the battery.
- Fuse Holder: Install the ANL fuse holder within 18 inches (45 cm) of the battery's positive terminal. Connect the power cable from the battery to one side of the fuse holder, and the power cable running to the amplifier to the other side. Ensure the fuse is securely installed.
- Ground Cable (GND): Connect the blue 4-gauge ground cable from the Stinger kit to the amplifier's "GND" terminal. Route this cable to a clean, solid metal chassis ground point on the vehicle/vessel. Ensure the connection point is free of paint, rust, or dirt for optimal conductivity. The ground cable should be as short as possible, ideally less than 3 feet (1 meter).
- Remote Turn-On (REM): Connect a remote turn-on wire (typically a smaller gauge, not included in this specific kit but usually part of head unit wiring) from your head unit's remote output to the amplifier's "TURN ON" terminal. This wire signals the amplifier to turn on and off with your audio system.
5.2.2 Input Connections (RCA)

Image: Top view of the Wet Sounds Sinister SDX6 amplifier's control panel, showing RCA input jacks (CH1-CH6), crossover settings, gain controls, and remote level input.
Use the included Stinger 6-meter RCA cables to connect the audio signal from your head unit or source to the amplifier's "INPUT" RCA jacks. The SDX6 has 6 input channels (CH1-CH6). Match the output channels from your source to the corresponding input channels on the amplifier.
- For a 6-channel setup, connect all six RCA inputs.
- If your source has fewer RCA outputs (e.g., 2-channel or 4-channel), you may need Y-adapters (not included) or utilize the amplifier's internal signal routing capabilities if available (refer to the "Source" switch on the amplifier for Channel 3-4 and Channel 5-6).
5.2.3 Speaker Connections
Connect your speakers to the amplifier's "CH1" through "CH6" speaker output terminals. Observe correct polarity (+ to + and - to -) for each speaker. The amplifier supports both stereo and bridged configurations.
- Stereo Mode: Connect one speaker per channel. The amplifier can drive 6 speakers at 4 or 2 ohms.
- Bridged Mode: For higher power output to subwoofers or larger speakers, channels can be bridged. The SDX6 can be bridged to 3 channels (e.g., CH1+CH2, CH3+CH4, CH5+CH6) at 4 ohms. Refer to the amplifier's terminal markings for correct bridged connections (typically using the + terminal of one channel and the - terminal of the adjacent channel).
After all connections are made, double-check all wiring for proper polarity, secure connections, and absence of short circuits. Reconnect the battery's negative terminal.
6. Operating Instructions
Once installed, the amplifier requires initial setup and tuning for optimal audio performance. Refer to the control panel image for reference.
Image: Close-up of the Wet Sounds Sinister SDX6 amplifier's control panel, detailing the adjustable gain, crossover frequency, and bass boost settings for each channel pair.
6.1 Gain Adjustment (Input Sensitivity)
The "GAIN" controls (0.2V - 6.1V) adjust the input sensitivity of the amplifier to match the output voltage of your head unit. Start with the gain set to minimum. Play a familiar piece of music at about 75% of your head unit's maximum volume. Slowly increase the amplifier's gain until you hear distortion, then back off slightly. This ensures maximum clean output from the amplifier.
6.2 Crossover Settings
The SDX6 features adjustable high-pass (HPF) and low-pass (LPF) filters (30Hz - 300Hz, 12dB/Octave) for each channel pair. These filters direct specific frequency ranges to your speakers or subwoofers.
- FULL: No filter applied.
- HPF (High Pass Filter): Allows frequencies above the set point to pass, blocking lower frequencies. Use for full-range speakers to prevent distortion from bass frequencies.
- LPF (Low Pass Filter): Allows frequencies below the set point to pass, blocking higher frequencies. Use for subwoofers.
Adjust the crossover points based on the frequency response of your speakers and subwoofers. Consult your speaker's specifications for recommended crossover frequencies.
6.3 Bass Boost
The "BASS BOOST" control (0-12.5dB @ 27Hz - 110Hz) allows you to enhance low frequencies. Use this sparingly, as excessive bass boost can lead to distortion and potential speaker damage. Adjust to taste, ensuring the sound remains clear.
6.4 Remote Level Control
The "REMOTE LEVEL" port allows connection of an optional wired remote level control (not included) for convenient adjustment of the amplifier's output from the driver's seat.
7. Maintenance
The Wet Sounds Sinister SDX6 amplifier is designed for durability and requires minimal maintenance. Follow these guidelines to ensure long-lasting performance:
- Cleaning: Periodically wipe the amplifier's exterior with a soft, dry cloth to remove dust and dirt. Do not use harsh chemicals or abrasive cleaners.
- Ventilation: Ensure that the amplifier's cooling fins are free from obstructions to allow for proper heat dissipation.
- Connections: Occasionally check all wiring connections for tightness and corrosion, especially in marine environments. Loose connections can lead to poor performance or damage.
- Fuse Replacement: If the fuse blows, replace it only with a fuse of the same type and rating (e.g., 30 Amp ANL). Using an incorrect fuse can cause serious damage or fire.
8. Troubleshooting
If you experience issues with your amplifier, refer to the following common problems and solutions:
| Problem | Possible Cause | Solution |
|---|---|---|
| No Power / Amplifier Not Turning On |
|
|
| No Sound Output |
|
|
| Distorted Sound |
|
|
| Amplifier Overheating |
|
|
9. Specifications
| Feature | Detail |
|---|---|
| Model | Wet Sounds Sinister SDX6 |
| Type | Full Range Class D Amplifier |
| Number of Channels | 6 |
| RMS Power @ 4 Ohms Stereo | 6 x 185 Watts @ 95A (CEA 2006) |
| RMS Power @ 2 Ohms Stereo | 6 x 290 Watts @ 168A |
| RMS Power @ 4 Ohms Mono (Bridged) | 3 x 585 Watts @ 168A |
| Frequency Response | 8 Hz - 35 kHz (-3dB) |
| Crossover Range (HPF/LPF) | 30Hz - 300Hz, 12dB/Octave |
| Bass Boost | 0-12.5dB @ 27Hz - 110Hz |
| Signal-to-Noise Ratio (A wtg) | >87dB (Low Level), >109dB (High Level) |
| Input Sensitivity (Low Level) | 0.2V - 6.1V |
| Overvolt Protection | 15.6V |
| Item Weight | 25.5 pounds (Amplifier and Kit) |
| Package Dimensions | 19 x 13 x 5 inches |
| UPC | 841992121331 |
10. Warranty and Support
Wet Sounds products are manufactured to high-quality standards. For specific warranty information, please refer to the warranty card included with your product or visit the official Wet Sounds website. For technical support or service inquiries, please contact Wet Sounds customer service or your authorized dealer.
Wet Sounds Contact Information: Please refer to the official Wet Sounds website or product packaging for the most current contact details.


