
Introduction
This manual provides instructions for the proper installation, operation, and maintenance of your Highwild 12-Volt Solar Panel Charger. Please read this manual thoroughly before use to ensure optimal performance and longevity of the product.
Safety Information
- Ensure the solar panel is installed in a location with adequate sunlight exposure.
- Do not attempt to modify or disassemble the solar panel. This may void the warranty and cause damage.
- Keep the solar panel and wiring away from flammable materials.
- Always connect the solar panel to a compatible 12V battery. Connecting to incompatible voltages may cause damage.
- Handle the solar panel with care to avoid damage to the solar cells.
Product Features
- 12-Volt Solar Panel: Designed for energy efficiency and environmental friendliness.
- Polycarbonate Front Cover: Provides durability and high light transmittance for effective charging.
- Sturdy Aluminum Mounting Bracket: Pre-tilted to a 45-degree angle for optimal sun orientation.
- Stainless Steel Flex-conduit: Offers robust protection for internal wiring.
- Easy Installation: Includes all necessary mounting hardware.
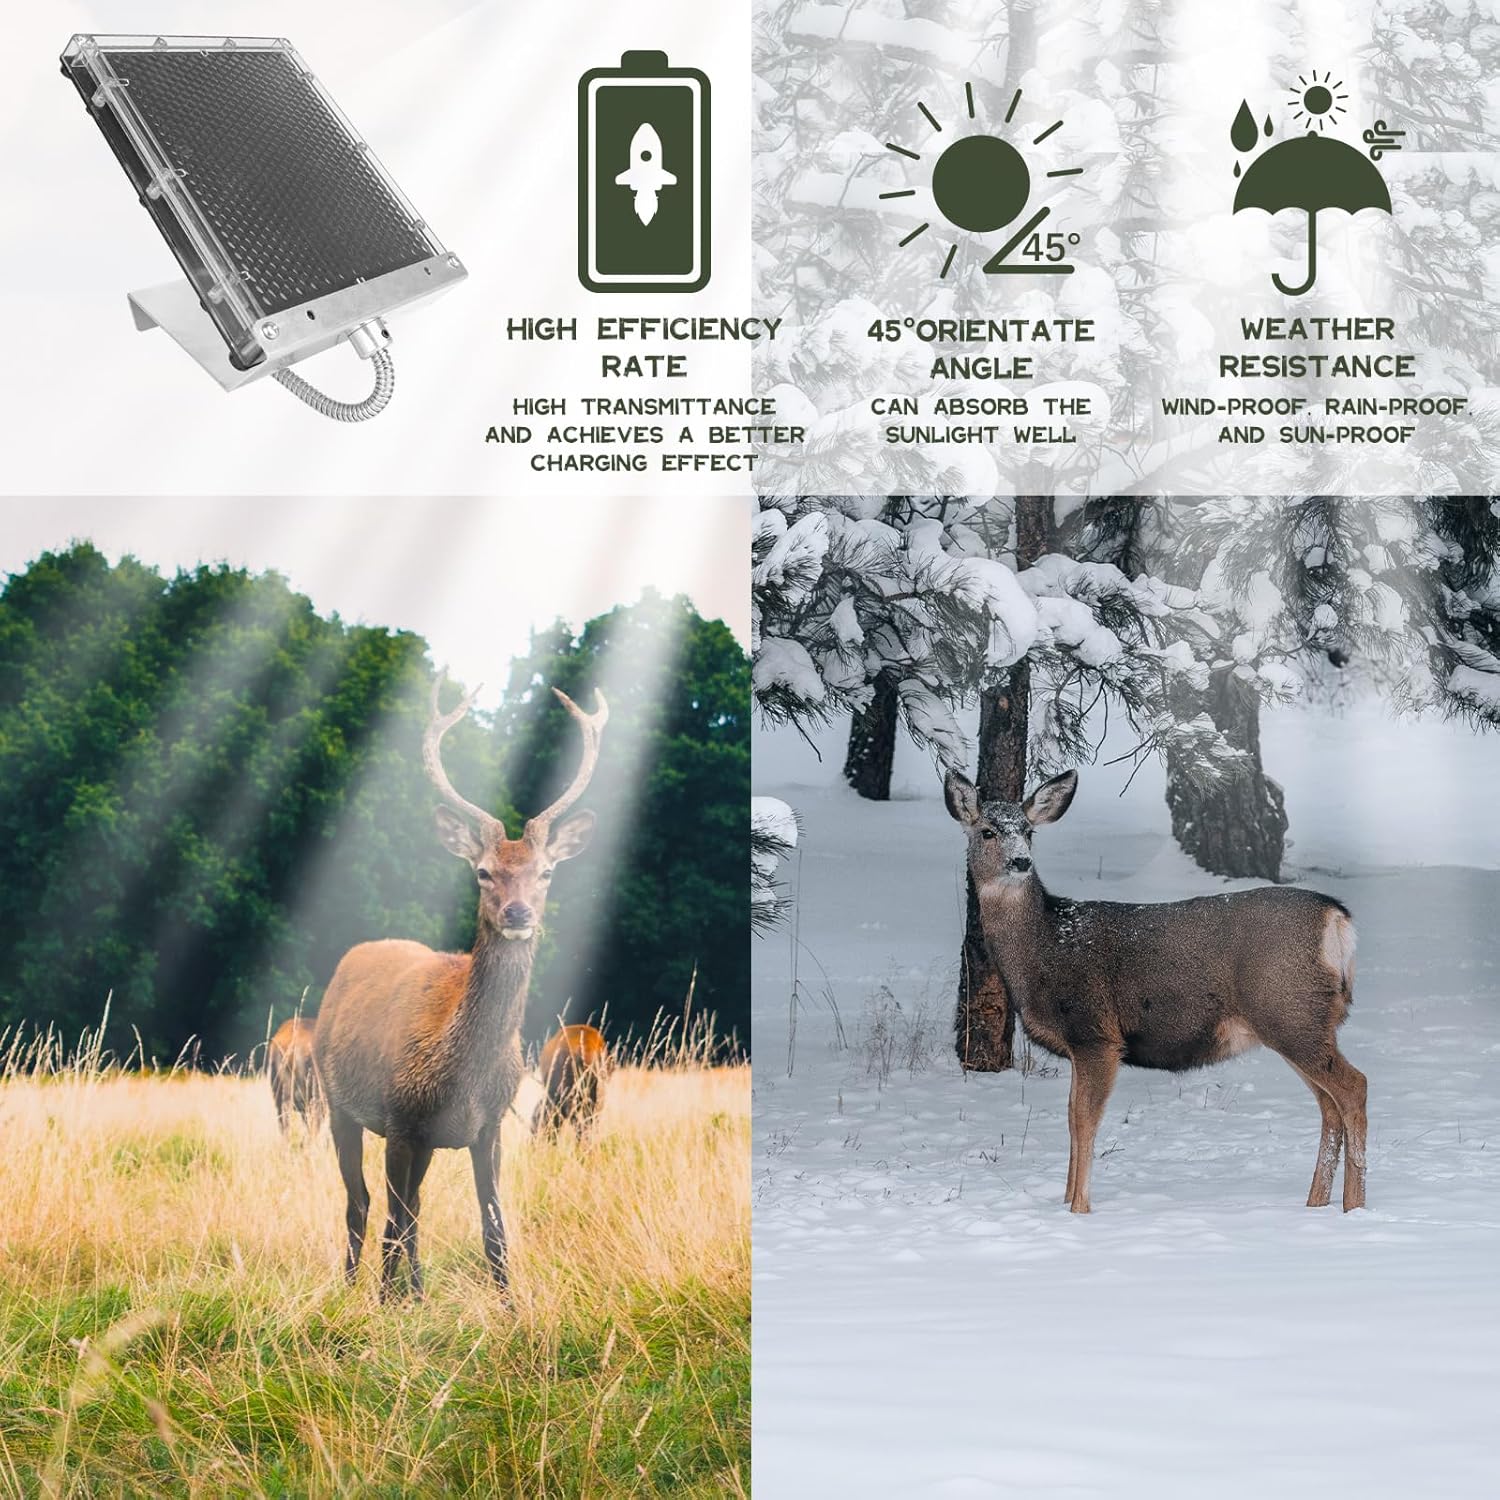
Image: The solar panel charger with icons indicating high efficiency, optimal 45-degree orientation for sunlight absorption, and weather resistance (wind-proof, rain-proof, sun-proof).

Image: The solar panel charger being exposed to rain, illustrating its IP65 waterproof rating.
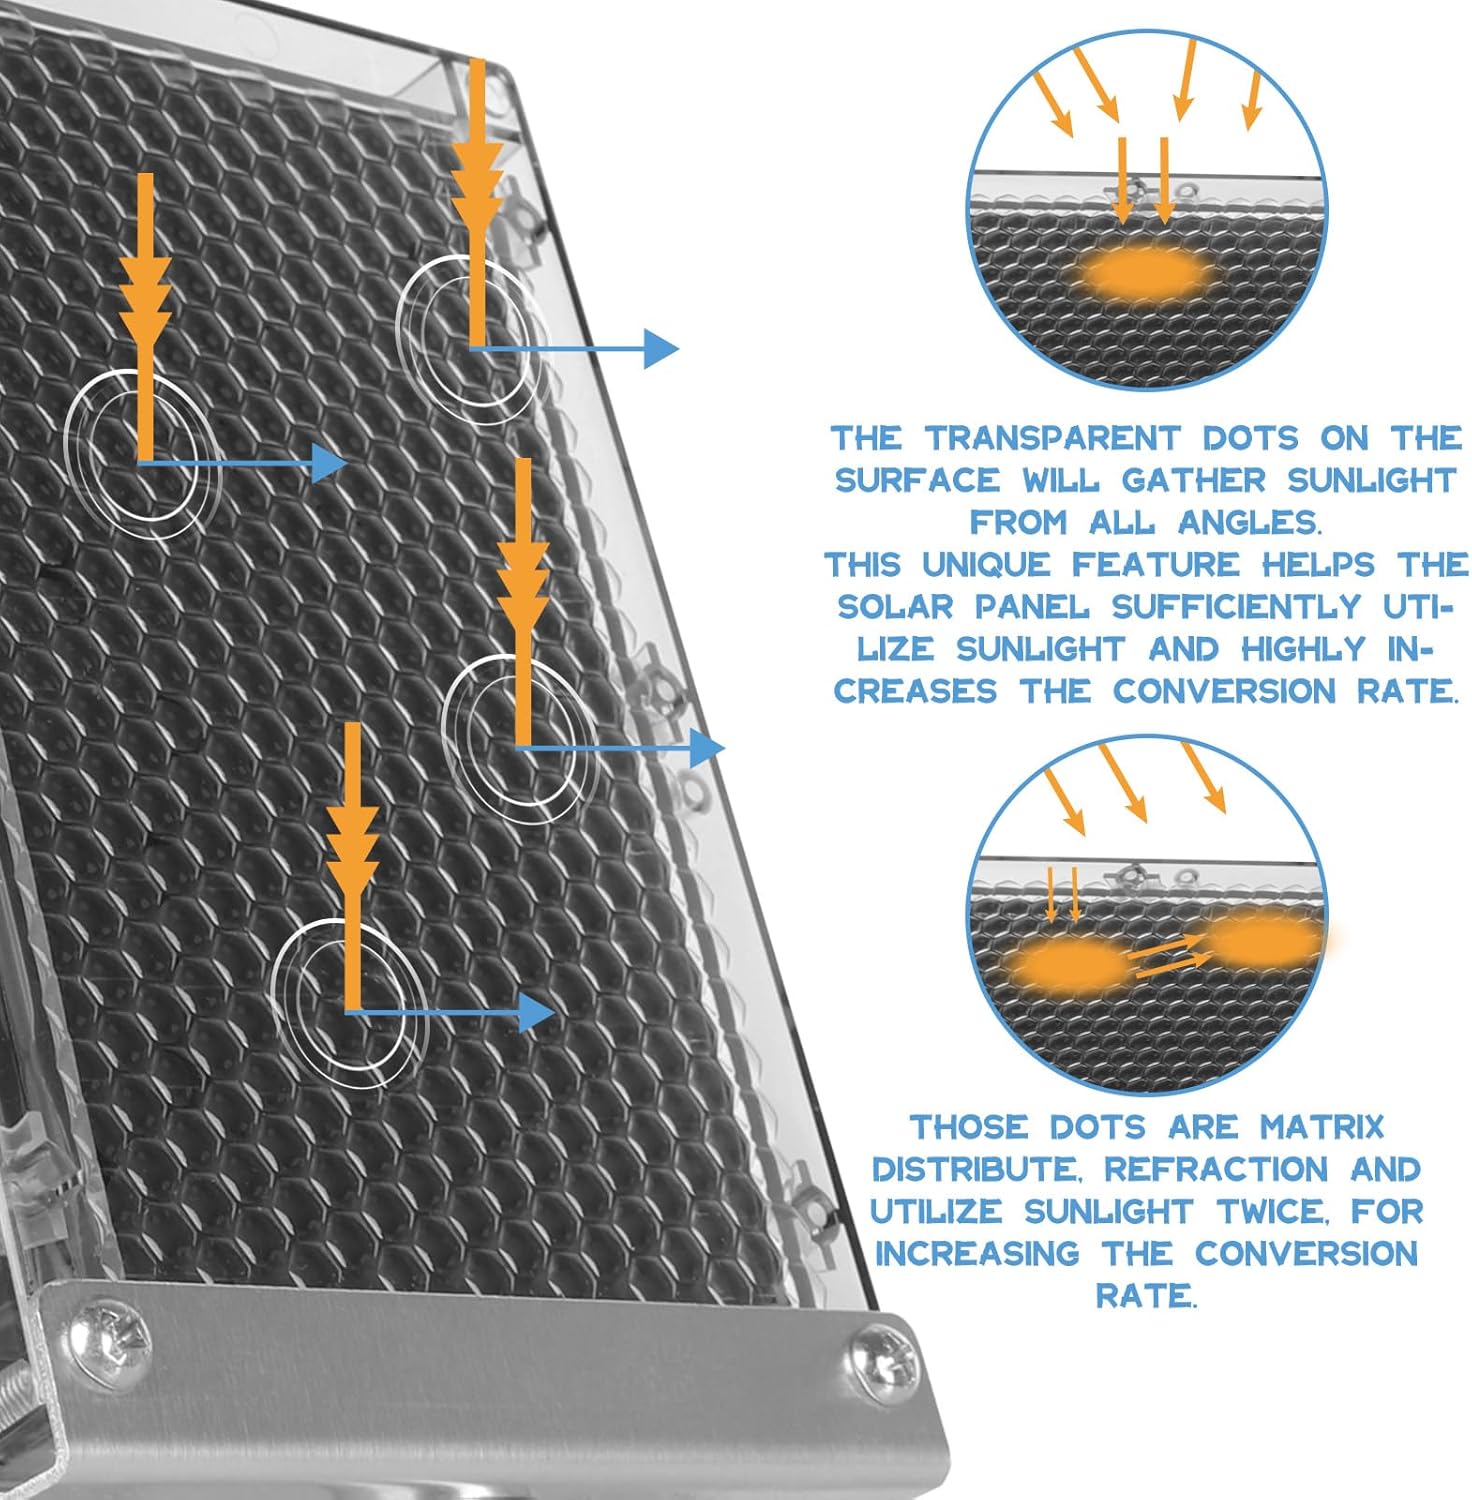
Image: A detailed diagram explaining how transparent dots on the solar panel surface gather sunlight from all angles and utilize it twice to increase the conversion rate.
Package Contents
Verify that all components are present before proceeding with installation:
- Highwild 12-Volt Solar Panel Charger
- Aluminum Mounting Bracket (pre-attached)
- Stainless Steel Flex-conduit with wiring
- Mounting Hardware (screws, washers, nuts)

Image: The solar panel charger showing its dimensions (5 1/2" width, 6 3/8" height) and a cable length of 60 inches, along with the flexible conduit and wiring.
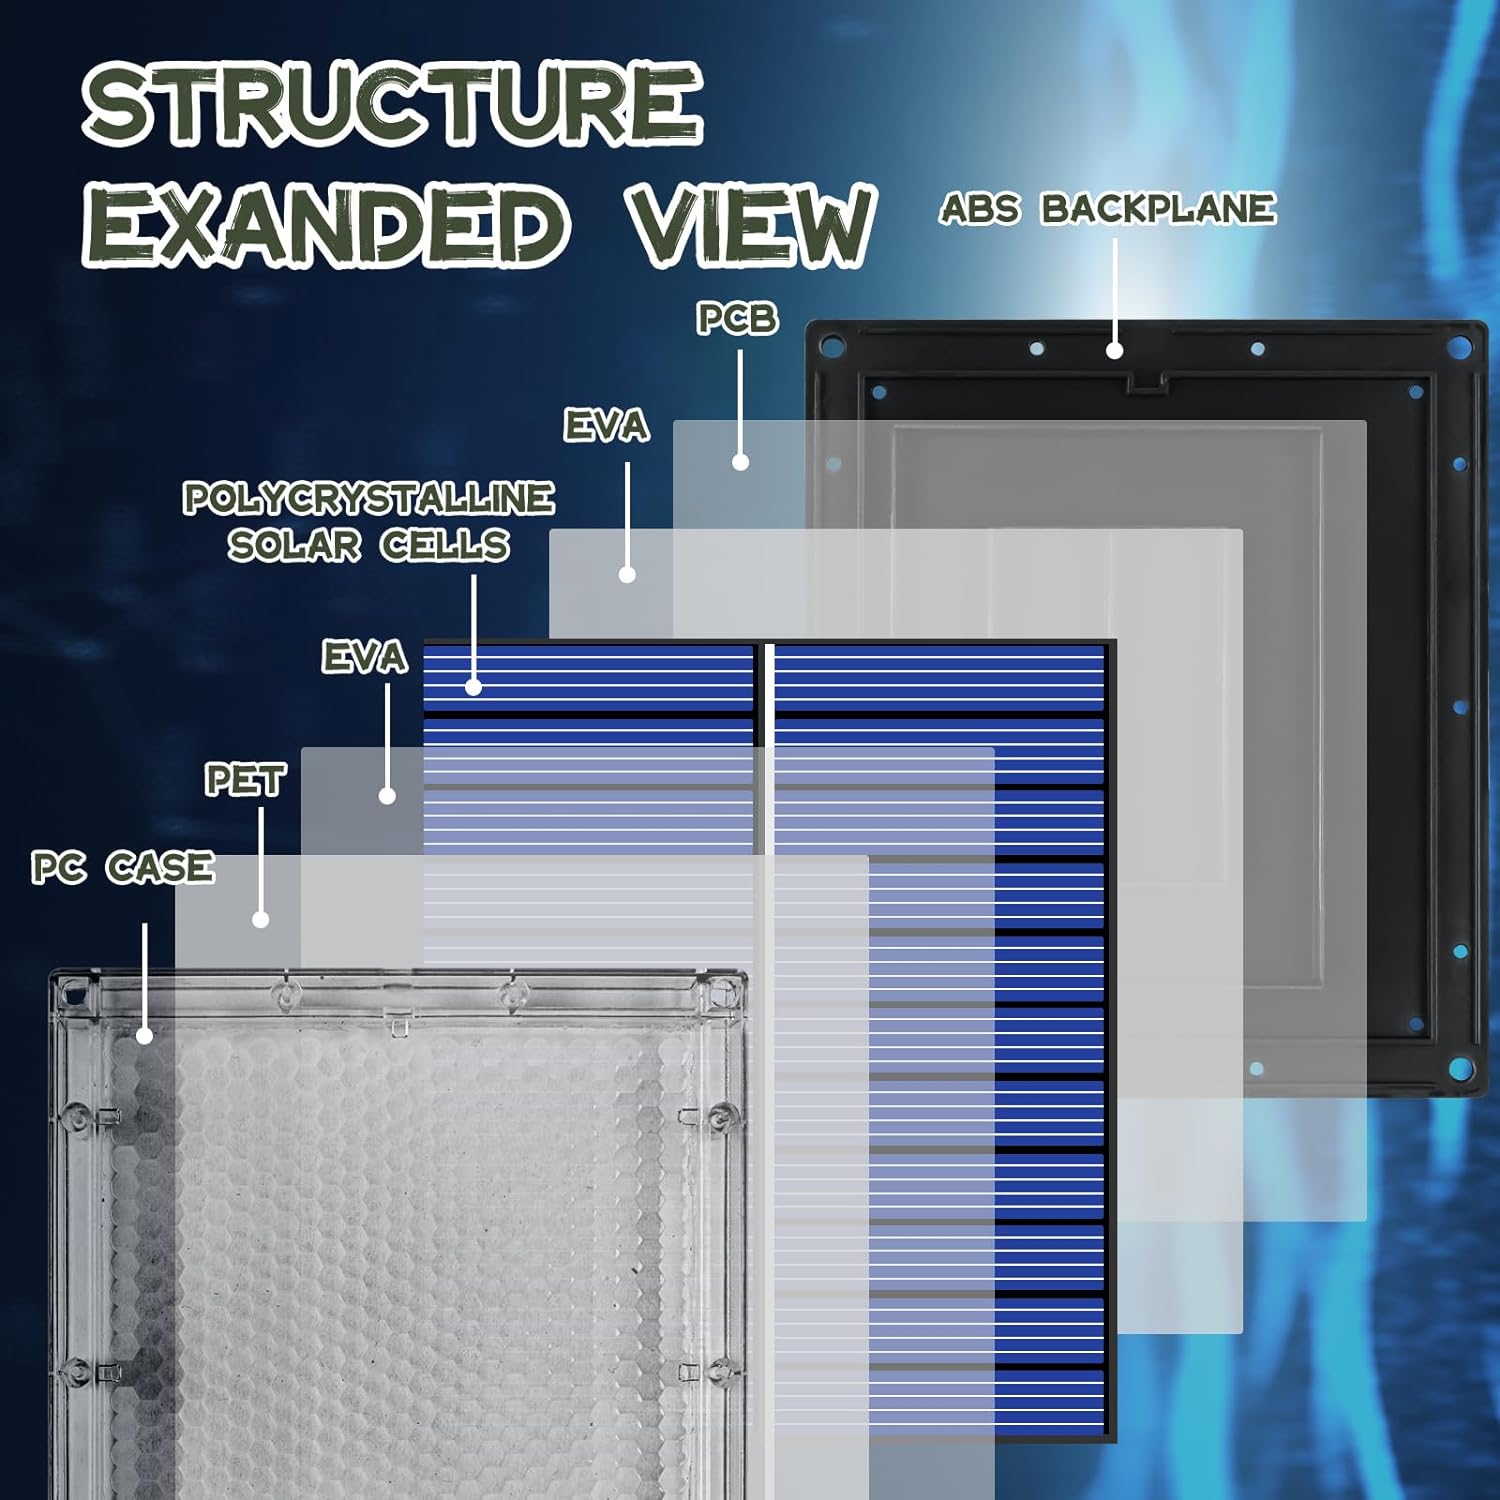
Image: An exploded diagram illustrating the internal layers of the solar panel, including the PC case, PET layer, EVA layers, polycrystalline solar cells, PCB, and ABS backplane.
Setup and Installation
- Choose a Location: Select an outdoor location that receives direct sunlight for the majority of the day. The pre-tilted 45-degree bracket is optimized for sun exposure.
- Mount the Solar Panel: Use the provided mounting hardware to securely attach the solar panel to your deer feeder or other suitable structure. Ensure the panel is stable and cannot be easily dislodged.
- Connect to Battery: Connect the wiring from the solar panel's flex-conduit to your 12V feeder battery. Ensure correct polarity (red to positive, black to negative). The USB connector type is specified for the cable.
- Secure Wiring: Use the included clips or ties to secure the flex-conduit and wiring, preventing damage from movement or environmental factors.

Image: The solar panel charger mounted on the side of a green deer feeder, demonstrating a typical installation scenario in a grassy, wooded area.
Installation Video
Video: An unboxing and assembly guide for the Highwild 12-Volt Solar Panel Charger, demonstrating how to put together and install the unit.
Operating Instructions
The Highwild 12-Volt Solar Panel Charger operates automatically. Once properly installed and connected to a 12V battery, it will begin charging the battery when exposed to sunlight.
- Ensure the solar panel surface is clean and free from obstructions (e.g., leaves, dirt, snow) to maximize charging efficiency.
- The panel is designed to provide a continuous trickle charge to maintain your 12V battery.
- Regularly check the battery charge level to confirm proper operation, especially during periods of low sunlight.
Maintenance
- Cleaning: Periodically clean the surface of the solar panel with a soft, damp cloth to remove dust, dirt, or debris. Avoid abrasive cleaners or harsh chemicals.
- Inspection: Regularly inspect the wiring and connections for any signs of wear, corrosion, or damage. Ensure all connections remain secure.
- Bracket Check: Verify that the mounting bracket is still securely fastened and the panel's orientation remains optimal for sunlight exposure.
- Environmental Factors: In areas with heavy snowfall, clear snow from the panel surface to allow for charging.
Troubleshooting
| Problem | Possible Cause | Solution |
|---|---|---|
| Battery not charging |
|
|
| Low charging efficiency |
|
|
Specifications
| Attribute | Value |
|---|---|
| Brand | Highwild |
| Model Number | 759981102271 |
| Output Voltage | 12 Volts (DC) |
| Input Voltage | 12 Volts |
| Amperage | 80 Milliamps |
| Compatible Devices | 12V batteries |
| Connector Type | USB |
| Item Weight | 0.49 Kilograms |
| Unit Count | 1.0 Count |
| UPC | 759981102271 |
Warranty and Support
Specific warranty information and detailed support contacts are not available in the provided product data. For warranty claims or technical assistance, please refer to the product packaging or contact Highwild customer service directly through their official website or the retailer where the product was purchased.
You can visit the Highwild store for more products and information: Highwild Store