
Behringer XENYX X2222USB
Behringer XENYX X2222USB Premium Mixer
User Manual
Introduction
This manual provides comprehensive instructions for the setup, operation, maintenance, and troubleshooting of your Behringer XENYX X2222USB Premium 22-Input 2/2-Bus Mixer. Please read this manual thoroughly before operating the device to ensure proper use and to maximize its performance and longevity.
The Behringer XENYX X2222USB is a high-performance audio mixer designed for professional audio applications. It features an integrated USB computer audio interface, allowing for seamless blending and shaping of multiple audio signals and distribution to various outputs. Key features include eight top-tier XENYX microphone preamps, British-style EQs, eight user-friendly one-knob compressors, and a built-in 24-bit dual engine effects processor.
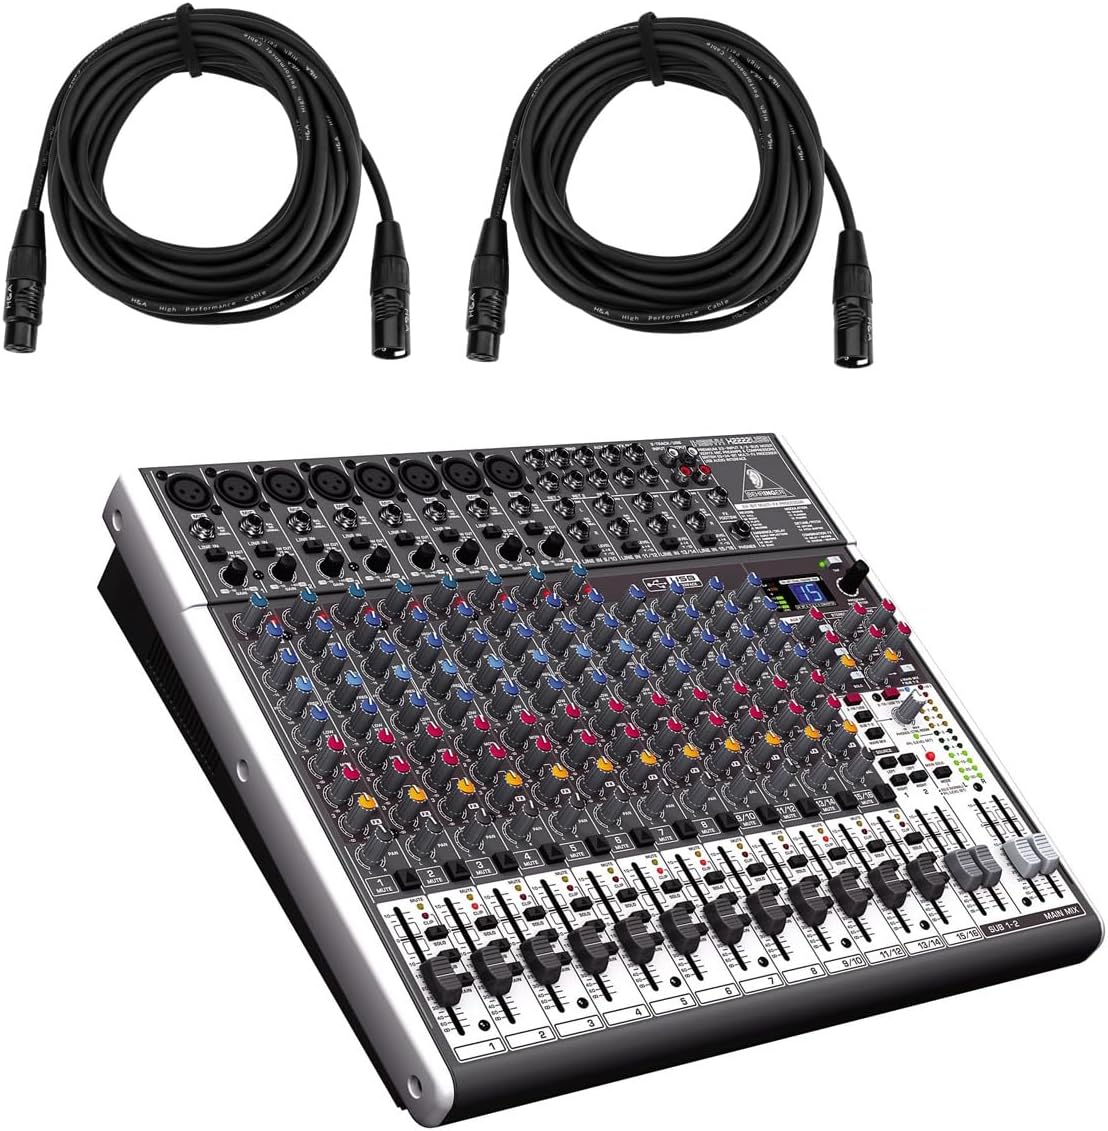
Figure 1: Behringer XENYX X2222USB Mixer with included XLR cables. This image shows the mixer from an angled top-front view, alongside two coiled XLR microphone cables.
Important Safety Instructions
- Read these instructions.
- Keep these instructions.
- Heed all warnings.
- Follow all instructions.
- Do not use this apparatus near water.
- Clean only with dry cloth.
- Do not block any ventilation openings. Install in accordance with the manufacturer’s instructions.
- Do not install near any heat sources such as radiators, heat registers, stoves, or other apparatus (including amplifiers) that produce heat.
- Do not defeat the safety purpose of the polarized or grounding-type plug. A polarized plug has two blades with one wider than the other. A grounding type plug has two blades and a third grounding prong. The wide blade or the third prong are provided for your safety. If the provided plug does not fit into your outlet, consult an electrician for replacement of the obsolete outlet.
- Protect the power cord from being walked on or pinched particularly at plugs, convenience receptacles, and the point where they exit from the apparatus.
- Only use attachments/accessories specified by the manufacturer.
- Use only with the cart, stand, tripod, bracket, or table specified by the manufacturer, or sold with the apparatus. When a cart is used, use caution when moving the cart/apparatus combination to avoid injury from tip-over.
- Unplug this apparatus during lightning storms or when unused for long periods of time.
- Refer all servicing to qualified service personnel. Servicing is required when the apparatus has been damaged in any way, such as power-supply cord or plug is damaged, liquid has been spilled or objects have fallen into the apparatus, the apparatus has been exposed to rain or moisture, does not operate normally, or has been dropped.
Package Contents
Please verify that all items listed below are included in your package:
- Behringer XENYX X2222USB Mixer
- Rack Mounts
- EnergyXT2.5 Software (download/license information)
- 2 x H&A XLR Cables (15' 8mm)
- Power Cord
- User Manual (this document)
Setup
Follow these steps to set up your Behringer XENYX X2222USB mixer for initial use.
1. Power Connection
Connect the supplied power cord to the mixer's power input on the rear panel and then to a suitable AC power outlet. Ensure the power switch is in the OFF position before connecting.

Figure 2: Rear panel of the XENYX X2222USB mixer, highlighting power input, main outputs, sub outputs, control room out, and channel inserts.
2. Audio Input Connections
The mixer features 8 XLR mic inputs with XENYX preamps and 12 line inputs (8 mono, 4 stereo). Connect your microphones, instruments, and other audio sources to the appropriate input jacks.
- Microphones: Use XLR cables (like the included H&A cables) to connect microphones to the XLR inputs (1-8).
- Line-Level Devices: Use 1/4" TRS or TS cables for line-level instruments or devices to the 1/4" line inputs.
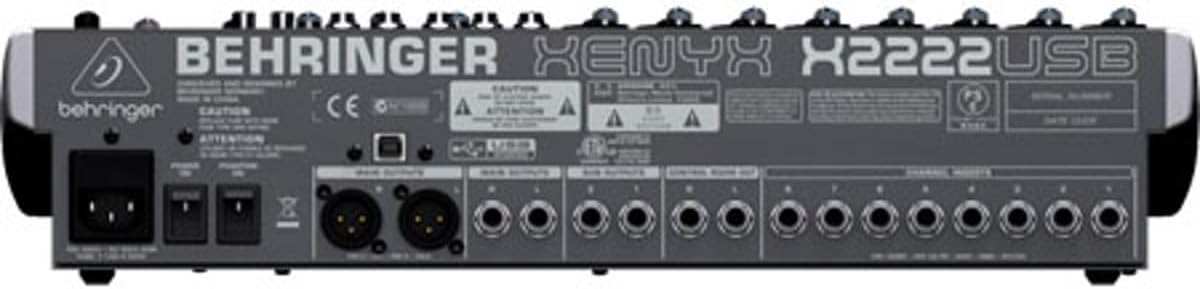
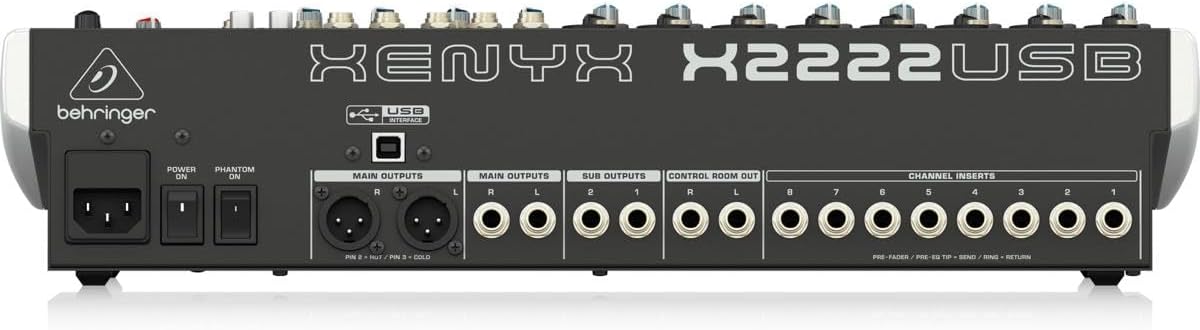
Figure 3: Examples of XLR male (left) and female (right) connectors, commonly used for microphone connections.
3. Audio Output Connections
Connect your main speakers, monitors, or recording devices to the mixer's output jacks.
- Main Outputs: Use XLR or 1/4" TRS cables for your main stereo speakers.
- Control Room Out: For connecting studio monitors.
- Sub Outputs: For routing specific groups of channels.
4. USB Connection (for Computer Audio Interface)
Connect the mixer to your computer using a standard USB cable. This enables bi-directional audio transfer for recording and playback.
- Ensure your computer meets the system requirements for the EnergyXT2.5 software.
- Install any necessary drivers (usually automatically detected by modern operating systems, but check Behringer's website if issues arise).
- Install the included EnergyXT2.5 software for advanced recording and production capabilities.
Operating the Mixer
This section provides an overview of the mixer's controls and basic operation.

Figure 4: Front panel overview of the XENYX X2222USB mixer, displaying all channels, faders, knobs, and the effects section.
Channel Strips (Mono Channels 1-8)
- Gain Control: Adjusts the input sensitivity for microphones and line-level signals. Set this to achieve a healthy signal level without clipping.
- Compressor: One-knob compressor for dynamic range control. Turn clockwise to increase compression.
- EQ (Equalizer): 3-band British-style EQ with swept mid.
- HIGH: Adjusts treble frequencies.
- MID: Adjusts mid-range frequencies. The FREQ knob selects the specific mid-frequency to be adjusted.
- LOW: Adjusts bass frequencies.
- AUX Sends: Three auxiliary sends per channel (FX1, MON1, MON2) for routing signals to external effects processors or stage monitors.
- PAN: Positions the channel's signal in the stereo field (left to right).
- MUTE: Mutes the channel's output.
- SOLO: Isolates the channel for monitoring.
- Channel Fader: Controls the output level of the individual channel.
Stereo Channels (9/10, 11/12, 13/14, 15/16)
These channels are designed for stereo line-level inputs and feature simplified controls compared to mono channels.
Effects Processor
The built-in 24-bit dual engine effects processor offers 16 editable presets including reverb, chorus, flanger, delay, and pitch shifter. Use the PROGRAM knob to select an effect and the FX SEND controls to apply it to channels.
USB Audio Interface
The integrated USB interface allows for bi-directional audio streaming with your computer. This enables direct recording of your mix and playback of audio from your computer through the mixer.
- Recording: The main stereo mix can be sent to your computer for recording in a DAW (Digital Audio Workstation) like EnergyXT2.5.
- Playback: Audio from your computer can be routed back into the mixer for monitoring or integration into your live mix.
Main Mix Section
- Main Mix Faders: Control the overall output level of the stereo main mix.
- Level Meters: Provide visual indication of the main mix output level. Aim for levels around 0 dB to avoid clipping.
- Phantom Power (+48V): Activates phantom power for condenser microphones connected to XLR inputs. Ensure microphones requiring phantom power are connected before activating.
Maintenance
Proper maintenance ensures the longevity and optimal performance of your mixer.
- Cleaning: Use a soft, dry cloth to clean the exterior of the mixer. Avoid using abrasive cleaners, solvents, or waxes. Do not spray liquids directly onto the mixer.
- Ventilation: Ensure that the ventilation openings are not blocked. Adequate airflow is crucial to prevent overheating.
- Storage: When not in use for extended periods, store the mixer in a cool, dry place, away from direct sunlight and extreme temperatures. If possible, use the original packaging or a protective case.
- Cable Management: Regularly check all cables for damage. Replace frayed or damaged cables immediately to prevent signal loss or electrical hazards.
Troubleshooting
This section addresses common issues you might encounter and provides solutions.
| Problem | Possible Cause | Solution |
|---|---|---|
| No sound output from main mix. |
|
|
| Distorted sound. |
|
|
| USB audio not working. |
|
|
Specifications
| Feature | Detail |
|---|---|
| Brand | Behringer |
| Model | XENYX X2222USB |
| Number of Channels | 22 (8 mono, 4 stereo) |
| Microphone Preamps | 8 x XENYX Mic Preamps |
| Compressors | 8 x One-knob Compressors |
| Equalizer | British-style 3-band EQ with swept mid on mono channels |
| Effects Processor | 24-bit dual engine with 16 presets |
| Connectivity Technology | USB (bi-directional audio interface) |
| Output Connector Type | XLR, 1/4" TRS |
| Power Source | Corded Electric |
| Product Dimensions | 20.75 x 15.8 x 6 inches (52.7 x 40.1 x 15.2 cm) |
| Item Weight | 15.22 pounds (6.9 kg) |
Warranty Information
The Behringer XENYX X2222USB Mixer bundle includes Adorama's 1-year warranty. For specific terms, conditions, and to register your product, please refer to the warranty documentation provided with your purchase or visit the official Behringer or Adorama support websites.
Please retain your proof of purchase for warranty claims.
Support
For further assistance, technical support, or to download the latest drivers and software, please visit the official Behringer website:
You may also refer to the Behringer Store on Amazon for product information and related accessories: Behringer Amazon Store
Related documentsXENYX X2222USB


Ask a question about this manual
Ask about setup, troubleshooting, compatibility, parts, safety, or missing instructions. Manuals+ will review the question and use this page’s manual context to help answer it.