Introduction
Thank you for choosing the Nikai NWD2000BL Bottom Loading Water Dispenser. This manual provides essential information for the safe and efficient operation, installation, and maintenance of your appliance. Please read these instructions thoroughly before use and retain them for future reference.
Important Safety Instructions
To reduce the risk of injury or property damage, always follow basic safety precautions when using electrical appliances. This includes, but is not limited to:
- Read all instructions before operating the dispenser.
- Ensure the power supply matches the rating label on the appliance.
- Do not immerse the dispenser, cord, or plug in water or other liquids.
- Keep children away from the hot water faucet, which features a child safety lock.
- Unplug the dispenser before cleaning or performing any maintenance.
- Do not operate the dispenser with a damaged cord or plug.
- Place the dispenser on a firm, level surface in a well-ventilated area.
- Do not block ventilation openings.
- This appliance is intended for household use only.
Product Overview
The Nikai NWD2000BL is a floor-standing, bottom-loading water dispenser designed to provide hot, normal, and cold water. It features a stainless steel tank for water purity and a compressor cooling system.

Figure 1: Front view of the Nikai NWD2000BL Water Dispenser, showing its sleek design and the bottom loading compartment both closed and open, revealing the water bottle.
Components

Figure 2: Detailed diagram illustrating the key components of the Nikai NWD2000BL Water Dispenser, including the control panel, faucets, drip tray, power switches, and condenser.
- Control Panel: Features indicator lights for Cooling (Blue), Heating (Red), and Water Lock.
- Faucets: Separate outlets for Hot, Normal, and Cold water. The hot water faucet includes a child safety lock.
- Water Receiving Tray: Collects spills and drips.
- Bottom Loading Compartment: Houses the water bottle for easy replacement.
- Heating Power Switch: Controls the heating function (located at the back).
- Cooling Power Switch: Controls the cooling function (located at the back).
- Condenser: Located at the back for heat dissipation.
- Drainage Valve Turn Cap: For draining water from the dispenser.
- Power Cable: Connects the dispenser to an electrical outlet.
Setup Instructions
- Unpacking: Carefully remove the dispenser from its packaging. Inspect for any damage. Retain packaging for future transport if needed.
- Placement:
- Place the dispenser on a flat, stable, and level surface.
- Ensure there is at least 10-15 cm (4-6 inches) of space from the back and sides to allow for proper ventilation.
- Avoid direct sunlight or heat sources.
- Do not place in areas where the ambient temperature is below 10°C (50°F) or above 38°C (100°F).
- Initial Cleaning and Flushing:
- Before first use, clean the exterior with a soft, damp cloth.
- To flush the internal system, place an empty water bottle into the bottom loading compartment.
- Dispense water from all three faucets (hot, normal, cold) until water flows continuously. This helps remove any dust or residue from manufacturing.
- Water Bottle Installation (Bottom Loading):
- Open the bottom compartment door.
- Remove the cap from a standard 3 or 5-gallon water bottle.
- Insert the water probe into the bottle opening.
- Slide the water bottle into the compartment and close the door securely.
- The dispenser will automatically pump water into the internal tanks.
- Power Connection:
- Plug the power cord into a grounded electrical outlet.
- Ensure the power switches for heating and cooling (located at the back) are in the "OFF" position before plugging in.
- Wait at least 5 minutes after plugging in before turning on the heating or cooling functions to allow the compressor oil to settle.
Operating Instructions
Initial Operation
- After setup, turn on the Cooling Power Switch (green) and Heating Power Switch (red) located on the back of the unit.
- The corresponding indicator lights on the front panel will illuminate (Blue for Cooling, Red for Heating).
- Allow approximately 15-30 minutes for the water to reach optimal hot and cold temperatures.
Dispensing Water

Figure 3: Close-up of the dispenser's front panel, highlighting the three faucets for hot, normal, and cold water, along with the child safety lock on the hot water tap.
- Cold Water: Place a cup under the cold water faucet (rightmost). Push the lever to dispense cold water.
- Normal Water: Place a cup under the normal water faucet (middle). Push the lever to dispense normal temperature water.
- Hot Water (with Child Safety Lock): Place a cup under the hot water faucet (leftmost). Simultaneously push the child safety lock button and the lever to dispense hot water. Release the button and lever to stop.
Indicator Lights
- Cooling (Blue): Illuminates when the cooling system is active. Turns off when cold water reaches the desired temperature.
- Heating (Red): Illuminates when the heating system is active. Turns off when hot water reaches the desired temperature.
- Water Lock: Indicates when the water bottle in the bottom compartment is empty or needs replacement.
Maintenance and Cleaning
Regular cleaning ensures optimal performance and hygiene of your water dispenser.
- Exterior Cleaning:
- Unplug the dispenser from the power outlet.
- Wipe the exterior surfaces with a soft, damp cloth and mild soap. Avoid abrasive cleaners or solvents.
- Dry thoroughly with a clean cloth.
- Drip Tray Cleaning:
- The drip tray should be emptied and cleaned regularly to prevent overflow and bacterial growth.
- Remove the drip tray, empty any collected water, wash with mild soap and water, rinse, and dry before replacing.
- Condenser Cleaning:
- Periodically clean the condenser coils located at the back of the dispenser using a soft brush or vacuum cleaner. This improves cooling efficiency.
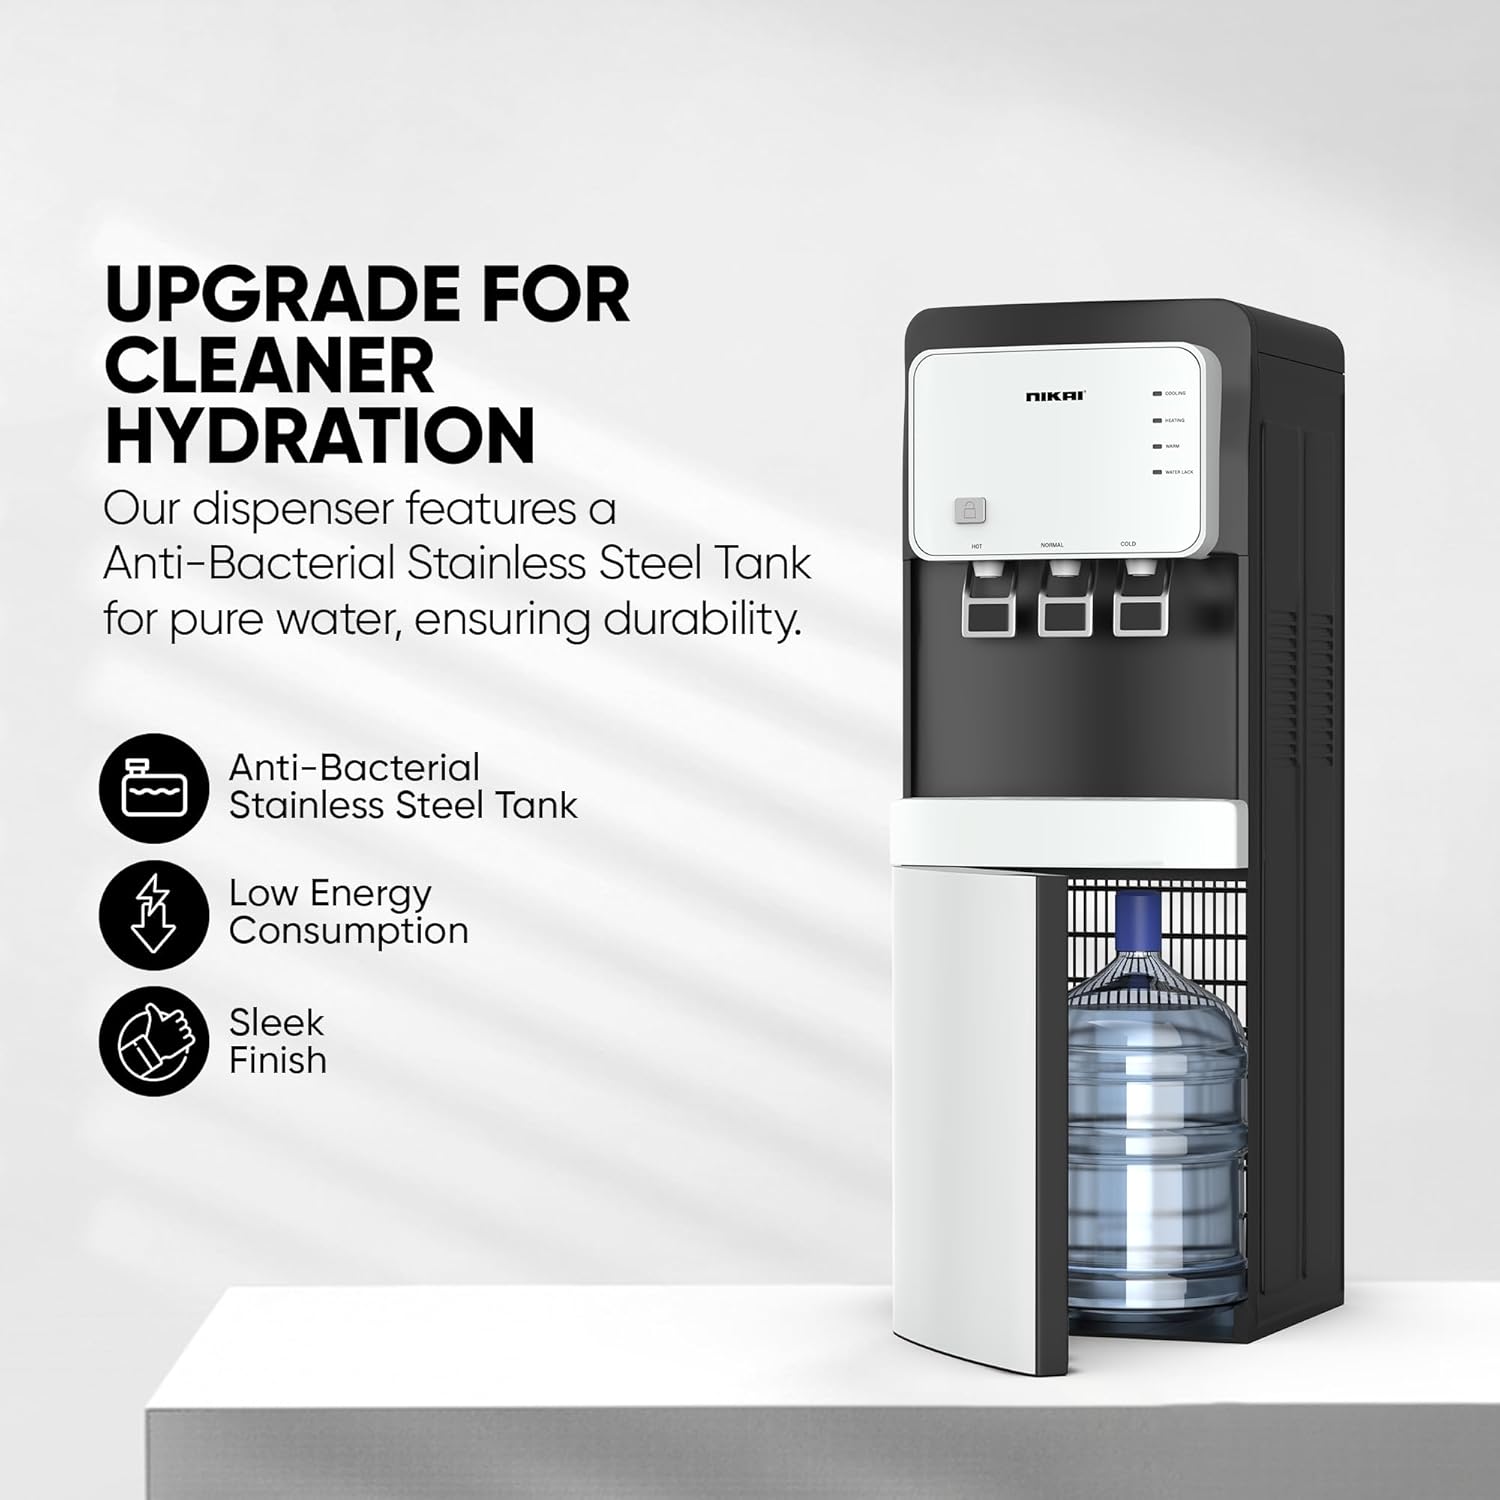
Figure 4: Rear view of the Nikai NWD2000BL Water Dispenser, illustrating the location of the condenser coils and the heating/cooling power switches.
- Draining the Dispenser:
- If the dispenser will not be used for an extended period or for deep cleaning, it should be drained.
- Unplug the unit and allow it to cool down completely.
- Place a bucket under the drainage valve located at the back.
- Unscrew the drainage valve turn cap to allow water to flow out.
- Once drained, replace the cap securely.
Troubleshooting Guide
Before contacting customer service, please refer to the following common issues and solutions:
| Problem | Possible Cause | Solution |
|---|---|---|
| No hot or cold water |
|
|
| Water is leaking |
|
|
| Unusual noise during operation |
|
|
| Water Lock indicator is on |
|
|
Specifications
| Feature | Detail |
|---|---|
| Brand | Nikai |
| Model Number | NWD2000BL |
| Product Dimensions (D x W x H) | 5 x 5 x 5 cm |
| Item Weight | 2.2 Kilograms |
| Capacity | 7 Liters |
| Installation Type | Freestanding |
| Color | Silver |
| Access Location | Bottom |
| Material Type | Stainless Steel |
| Included Components | Tray |
| Power Source | Corded Electric |
| Temperature Settings | Hot, Cold, Normal (ambient) |
Warranty Information
This Nikai NWD2000BL Water Dispenser comes with a 2-year warranty from the date of purchase. Please retain your proof of purchase for warranty claims. The warranty covers manufacturing defects and malfunctions under normal use. It does not cover damage caused by misuse, accident, unauthorized repair, or normal wear and tear.
For specific warranty terms and conditions, please refer to the warranty card included with your product or contact Nikai customer support.
Customer Support
If you encounter any issues not covered in the troubleshooting guide or require further assistance, please contact Nikai customer support. Have your model number (NWD2000BL) and proof of purchase ready when contacting support.
Contact details can typically be found on the Nikai official website or on the product packaging.


