
1. Introduction
The Fat Shark HDO FPV Goggles represent a significant advancement in FPV technology, utilizing a patented OLED display architecture. This design delivers superior, high-speed images with deeper blacks and more vibrant colors, enhancing the FPV experience. The HDO’s OLED display stack provides vivid colors and higher contrast ratios, allowing pilots to discern better detail in various lighting conditions. Fast-moving visuals are rendered smoothly due to reduced image retention artifacts. Furthermore, Fat Shark’s patented optics ensure crisp images from edge to edge, eliminating blurriness.
Key features include:
- 37-degree diagonal field of view: Provides an immersive viewing experience.
- HDMI 1080p support: Allows connection to high-definition digital video sources.
- 720p XGA Display: Offers clear and detailed visuals.
- Updated, integrated analog DVR: For recording your flight footage directly.
- 59-69mm IPD range (adjustable): Ensures comfortable viewing for a wide range of users.
2. What's in the Box
Carefully unpack your Fat Shark HDO FPV Goggles and verify that all components are present:
- HDO Headset
- Zipper Case
- 1800 mAh USB-charging battery

Image 2.1: Contents of the Fat Shark HDO FPV Goggles package, including the headset, protective zipper case, and the rechargeable 1800 mAh battery.
3. Setup
3.1. Battery Charging and Installation
- Charge the Battery: Connect the provided 1800 mAh Lithium Polymer battery to a USB power source using the included USB charging cable. The battery features a push-button meter to check its charge level. Ensure the battery is fully charged before first use.
- Install the Battery: Connect the charged battery to the power input port on the goggles. Secure the battery in the designated compartment or strap it to the head strap as preferred.
3.2. Goggle Adjustment
- Head Strap Adjustment: Place the goggles on your head and adjust the elastic head strap for a comfortable and secure fit. The goggles should sit snugly without applying excessive pressure.
- Interpupillary Distance (IPD) Adjustment: Use the IPD sliders on the bottom of the goggles to adjust the distance between the lenses. Look through the displays and move the sliders until the image appears clear and merged into a single, comfortable view. The adjustable range is 59-69mm.
3.3. Connecting Video Sources
- Analog Video Input: Connect your FPV receiver module (not included) to the module bay on the goggles. Ensure the module is correctly seated.
- HDMI Input: For digital video sources, connect an HDMI cable (not included) from your source device to the HDMI input port on the goggles. The goggles support HDMI 1080p input.
4. Operating Instructions
4.1. Powering On/Off
- Power On: Ensure the battery is connected. Press and hold the power button located on the goggles until the displays illuminate.
- Power Off: Press and hold the power button again until the displays turn off.
4.2. Display Adjustments
- Brightness/Contrast: Use the dedicated buttons or menu options on the goggles to adjust display brightness and contrast to your preference.
- Mode Selection: Switch between analog and HDMI input modes using the input selection button.
4.3. DVR Operation
The Fat Shark HDO Goggles feature an integrated analog DVR for recording your FPV flights.
- Insert SD Card: Insert a compatible MicroSD card (not included) into the DVR slot.
- Record: Press the DVR record button to start recording. Press it again to stop.
- Playback: Access the DVR menu to browse and play back recorded footage.
4.4. Channel Selection (Analog)
If using an analog FPV receiver module, use the channel selection buttons on the goggles to tune into the correct frequency of your FPV transmitter.
5. Maintenance
5.1. Cleaning
- Lenses: Use a soft, lint-free microfiber cloth specifically designed for optics to gently clean the goggle lenses. Do not use abrasive materials or harsh chemicals.
- Exterior: Wipe the exterior of the goggles with a slightly damp, soft cloth. Avoid getting moisture into ports or openings.
5.2. Battery Care
- Storage: For long-term storage, charge the Lithium Polymer battery to approximately 50% capacity. Store in a cool, dry place.
- Avoid Over-Discharge/Over-Charge: Always use the recommended charging methods and avoid completely draining the battery to prolong its lifespan.
5.3. Storage
When not in use, store the goggles in their protective zipper case to prevent dust accumulation and physical damage.
6. Troubleshooting
- No Image on Display:
- Ensure the battery is charged and properly connected.
- Verify the video source (analog module or HDMI) is correctly connected and powered on.
- Check that the correct input mode (analog/HDMI) is selected on the goggles.
- For analog, confirm the FPV transmitter and receiver are on the same channel and frequency.
- Blurry or Distorted Image:
- Adjust the Interpupillary Distance (IPD) sliders until the image is clear and comfortable.
- Ensure the goggle lenses are clean and free of smudges or dust.
- Check the video signal quality from your FPV system or HDMI source.
- HDMI Input Not Working:
- Confirm the HDMI cable is securely connected at both ends.
- Ensure the HDMI source device is outputting a compatible resolution (up to 1080p).
- Try a different HDMI cable or source device to rule out cable or source issues.
- DVR Not Recording:
- Verify a compatible MicroSD card is inserted and has sufficient free space.
- Ensure the SD card is formatted correctly (FAT32 is typically recommended).
7. Specifications
| Model Number | FS-HDO |
| Display Type | OLED |
| Display Resolution | 720p XGA |
| Field of View (FOV) | 37 degrees diagonal |
| Interpupillary Distance (IPD) | 59-69mm (adjustable) |
| HDMI Support | Up to 1080p |
| Integrated DVR | Analog, with MicroSD card support |
| Product Dimensions | 6.5 x 3 x 3 inches (16.5 x 7.6 x 7.6 cm) |
| Item Weight | 6.6 ounces (187 grams) |
| Battery | 1800 mAh USB-charging Lithium Polymer (included) |
| Manufacturer Recommended Age | 14 years and up |
| Date First Available | November 4, 2016 |
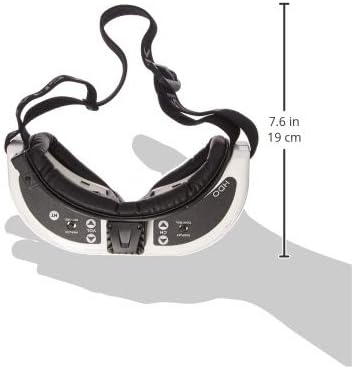
Image 7.1: Side view of the Fat Shark HDO FPV Goggles illustrating their approximate dimensions.
8. Warranty and Support
Fat Shark products are designed for reliability and performance. For specific warranty details, please refer to the official Fat Shark website or the warranty card included with your product. In case of technical issues or support inquiries, please contact Fat Shark customer service through their official channels.
Always ensure you are using genuine Fat Shark accessories and following recommended operating procedures to maintain warranty validity and ensure optimal performance.


