
POLAR light POLAR LED light rgb P10 40x8 OUT model 2
POLAR light LED Sign User Manual
Model: POLAR LED light rgb P10 40x8 OUT model 2
Product Overview
The POLAR light LED Sign is a versatile, full-color display designed for both outdoor and indoor applications. Featuring SMD technology and P10 resolution, it delivers bright and clear visuals. This sign supports USB programming for easy content management, allowing display of text, dates, times, and custom logos.
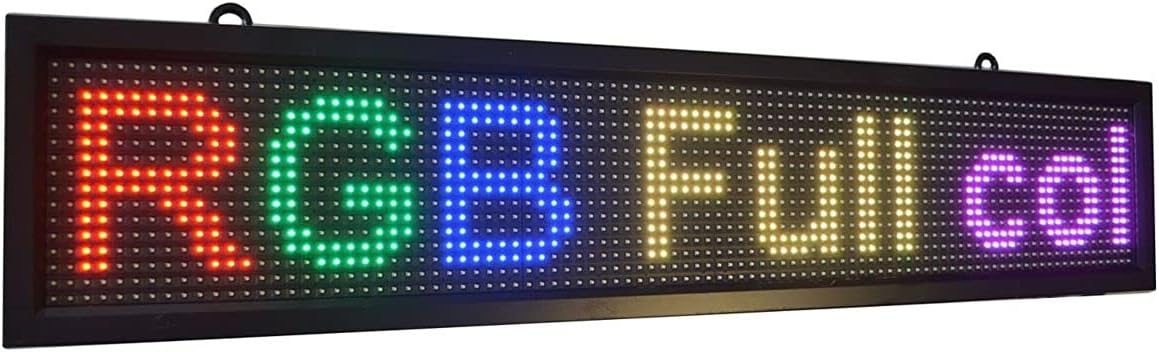
Image: The POLAR light LED sign, showcasing its full RGB color capabilities with the text "RGB Full col" illuminated brightly.
Package Contents
- POLAR light LED Sign (40" x 8")
- Integrated UL Certified Power Adapter
- USB Flash Memory with Programming Software
- Mounting Chain (for chain mount installation)
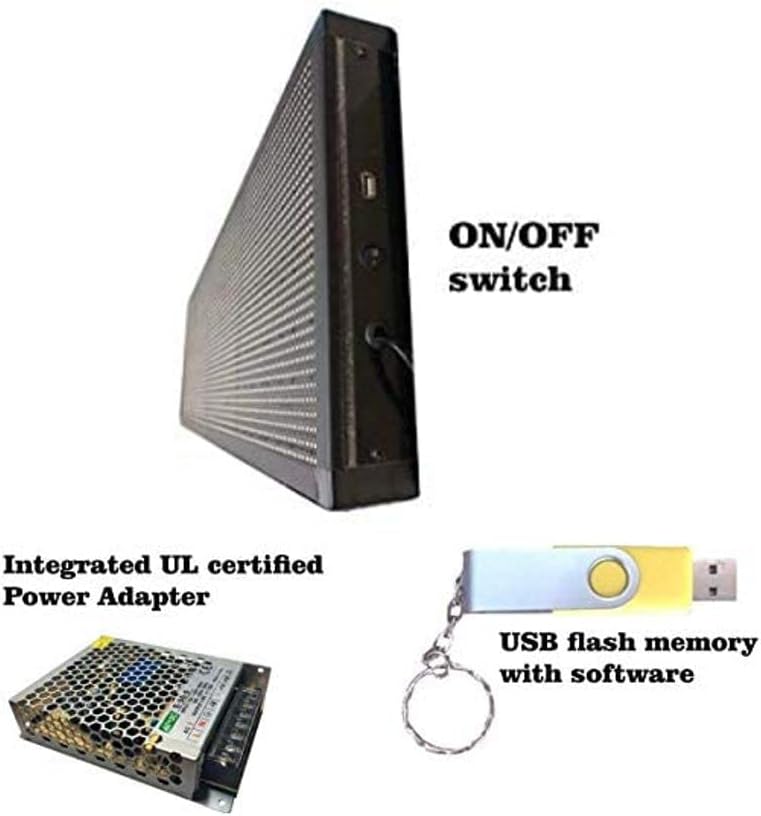
Image: Key components of the LED sign package, including the sign's side view showing the ON/OFF switch, the integrated UL certified power adapter, and the USB flash memory stick containing the programming software.
Specifications
| Feature | Detail |
|---|---|
| Model Number | POLAR LED light rgb P10 40x8 OUT model 2 |
| Dimensions | 39.87 x 1.99 x 7.99 inches (40"L x 8"W) |
| Weight | 7.93 pounds |
| Material | Aluminum |
| Light Type | LED (SMD Technology, P10 Resolution) |
| Color Capability | RGB Full Color |
| Connectivity | USB for programming |
| Power Supply | UL Certified Integrated Power Adapter |
| Usage Environment | Outdoor and Indoor |
Setup and Installation
1. Unpacking
Carefully remove the LED sign and all accessories from the packaging. Inspect for any visible damage. Retain packaging for future transport or storage.
2. Mounting
The sign is designed for chain mount installation. Ensure the mounting location is secure and can support the sign's weight (approximately 7.93 pounds). Use appropriate hardware (not included) for your specific wall or ceiling type.
- Identify suitable mounting points on the sign's frame.
- Attach the provided chain to these points.
- Securely hang the sign in the desired location, ensuring it is level and stable.
3. Power Connection
Connect the integrated power adapter to a standard electrical outlet. The sign features an ON/OFF switch located on its side for convenient power control.
Operating Instructions
1. Software Installation
The programming software is provided on the included USB flash memory drive. This software is compatible with Microsoft Windows computers.
- Insert the USB flash drive into your Windows computer.
- Locate and run the installer file for the LED sign programming software.
- Follow the on-screen prompts to complete the installation.

Image: A screenshot illustrating the user interface of the LED sign programming software, showing options for text, date, time, and other display settings. The software runs on MS Windows computers and facilitates content transfer via USB flash drive.
2. Programming Content
Use the installed software to create and customize your display content. The sign supports various content types including text, date, time, and company logos.
- Launch the LED sign programming software.
- Utilize the software's tools to input text, select fonts, colors, and effects.
- You can also import images for company logos or other graphics.
- Arrange content into sequences or programs as desired.
- Save your completed program to the USB flash drive.

Image: The LED sign demonstrating its capability to display different content types, including dynamic text, current date, time, and a custom company logo.
3. Transferring Content to the Sign
Once your content is saved on the USB flash drive, transfer it to the LED sign.
- Ensure the LED sign is powered on.
- Insert the USB flash drive containing your program into the USB port on the side of the LED sign.
- The sign will automatically detect the new program and begin displaying it.
- Once the content is loaded, you can remove the USB flash drive.
Maintenance
- Cleaning: Gently wipe the display surface with a soft, dry, lint-free cloth. For stubborn dirt, slightly dampen the cloth with water. Avoid abrasive cleaners or solvents.
- Power: Disconnect power before cleaning or performing any maintenance.
- Environmental Conditions: While designed for outdoor use, protect the sign from extreme weather conditions where possible to prolong its lifespan.
- Heat Management: The sign utilizes new SMD light sources designed for less heat generation and lower power consumption, contributing to its longevity.

Image: A detailed view of the LED sign's display surface, highlighting the clear and bright SMD light sources. Text overlays indicate "NEW SMD light source with less heat and low power consumption" and "UL certified power supply," emphasizing the sign's efficient design.
Troubleshooting
- Sign does not power on:
- Ensure the power adapter is securely plugged into both the sign and a working electrical outlet.
- Check the ON/OFF switch on the side of the sign to ensure it is in the 'ON' position.
- Verify the electrical outlet is functional by plugging in another device.
- Content does not display after USB transfer:
- Ensure the USB flash drive contains the correct program file and is properly formatted.
- Verify the program was saved correctly from the software to the USB drive.
- Insert the USB drive firmly into the sign's USB port.
- Try restarting the sign by cycling the power switch.
- Display appears dim or inconsistent:
- Check for any obstructions on the display surface.
- Ensure the sign is receiving stable power.
- If specific LEDs are out, contact customer support.
Warranty and Support
For warranty information and technical support, please refer to the documentation included with your purchase or contact POLAR light customer service directly. Contact details may be available on the official POLAR light website or through your point of purchase.
For further assistance, you may visit the POLAR light Store on Amazon.
Ask a question about this manual
Ask about setup, troubleshooting, compatibility, parts, safety, or missing instructions. Manuals+ will review the question and use this page’s manual context to help answer it.