Introduction
This manual provides detailed instructions for assembling and finishing your Italeri 1:35 scale M978 Fuel Servicing Truck model kit. Please read all instructions carefully before beginning assembly. This kit is designed for experienced modelers aged 14 and up due to the complexity and small parts involved.
Safety Information
Warning: This kit contains small parts and is not suitable for children under 14 years of age. Adult supervision is recommended. Always use tools and adhesives in a well-ventilated area. Avoid inhaling paint fumes. Keep all modeling supplies out of reach of small children and pets. Exercise caution when using sharp tools such as hobby knives and tweezers.
- Always cut parts from sprues carefully to avoid injury.
- Use appropriate safety gear, such as safety glasses, when cutting or sanding.
- Dispose of waste materials responsibly.
Package Contents
Your Italeri M978 Fuel Servicing Truck model kit includes:
- Plastic sprues containing all model components.
- Rubber tires (if applicable).
- Decal sheet.
- Instruction booklet (this document serves as a general guide; refer to the kit's specific booklet for detailed step-by-step assembly).

Image: Example of a plastic sprue containing various model components.

Image: Another view of plastic sprues with different model parts.
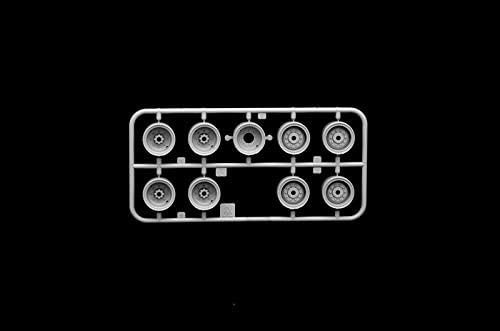
Image: Plastic sprue containing the model's wheel components.

Image: Plastic sprue containing chassis and frame components.
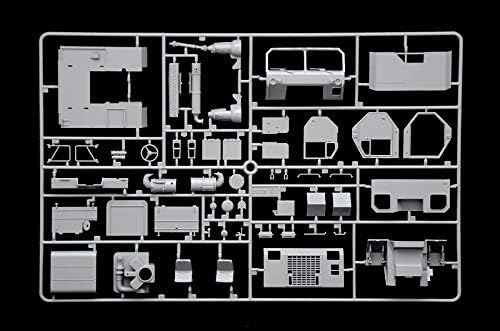
Image: Plastic sprue containing cab and interior parts for the model.
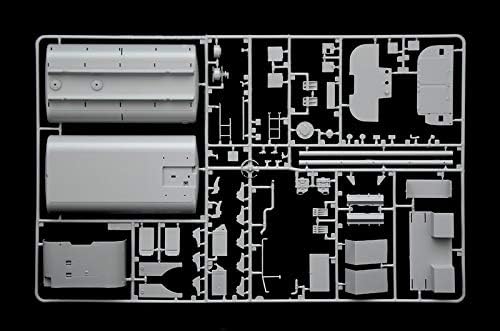
Image: Plastic sprue containing fuel tank and main body components.
Recommended Tools
The following tools are recommended for assembling your model kit:

Image: A visual guide to recommended tools for model assembly, including nippers, tweezers, and a hobby knife.
| Art. Nr. | Description |
|---|---|
| 510003990 | ITALERI Plastic Cement with Brush 15ml |
| 510005814 | Italeri Precision Tweezers, straight (1) |
| 510005815 | Italeri Tool Set Plastic Model Building |
| 510005822 | Professional Cutter with Blades (6) |
| 510005825 | Replacement Blades pointed (5) #50822 |
| 510005826 | Masking Film Roll 3mm x 18m (2) |
| 510005827 | Masking Film Roll 6mm x 18m (2) |
| 510005829 | Cutting Mat A 230x160mm |
| 510005831 | Hand Drill with 5 Drills |
Adhesive: Liquid cement for plastic models is required for assembly. Refer to the table above for Italeri's recommended plastic cement.
Setup and Preparation
- Workspace: Prepare a clean, well-lit, and well-ventilated workspace. Protect your work surface with a cutting mat or newspaper.
- Review Instructions: Carefully read through the entire instruction booklet provided with your kit before starting. Familiarize yourself with the parts and assembly sequence.
- Part Identification: Identify all sprues and parts. Compare them with the parts diagram in your kit's instruction booklet to ensure all components are present.
- Tools Ready: Gather all necessary tools and adhesives.
Assembly Instructions
Follow the step-by-step diagrams in your kit's specific instruction booklet. The general process involves:
- Cutting Parts: Carefully cut each part from its sprue using a hobby knife or nippers. Be gentle to avoid damaging the part.
- Cleaning Parts: Remove any excess plastic (flash) from the parts using a hobby knife or fine-grit sandpaper.
- Test Fitting: Before applying adhesive, test fit parts together to ensure a proper fit. Trim or sand as needed.
- Adhering Parts: Apply a small amount of plastic cement to the joining surfaces. Hold the parts together firmly until the adhesive sets. Allow sufficient drying time before proceeding.
- Sub-Assemblies: Assemble smaller sections (e.g., engine, chassis, cab interior) first, then combine them into larger assemblies.
- Painting (Optional): Some parts may be easier to paint before full assembly. Refer to the painting guide section.
- Decals: Apply decals according to the kit's instructions after painting and a clear gloss coat.
Note: This manual provides general guidance. Always refer to the specific assembly diagrams and instructions included in your Italeri kit for precise steps and part numbers.
Painting Guide
The M978 Fuel Servicing Truck can be finished in various authentic color schemes. Refer to the images below for recommended paint colors and camouflage patterns.

Image: Table showing required acrylic paints and optional aging washes with their corresponding Italeri article numbers.
| Art. Nr. | Description |
|---|---|
| 510004679 | IT Acrylfarbe Stahl matt 20ml (Steel matte) |
| 510004606 | IT Acrylfarbe Rot matt 20ml (Red matte) |
| 510004768 | IT Acrylfarbe Schwarz matt 20ml (Black matte) |
| 510004739 | IT Acrylfarbe Blassgrün matt 20ml (Pale Green matte) |
| 510004857 | IT Acrylfarbe Grün 383 matt 20ml (Green 383 matte) |
| 510004682 | IT Acrylfarbe Orange glänzend 20ml (Orange glossy) |
| 510004678 | IT Acrylfarbe Silber glänzend 20ml (Silver glossy) |
| 510004859 | IT Acrylfarbe Wüstenbraun matt 20ml (Desert Brown matte) |
| 510004858 | IT Acrylfarbe Braun 383 matt 20ml (Brown 383 matte) |
Optional Aging Washes:
| Art. Nr. | Description |
|---|---|
| 510004951 | IT Dunkelbraun (Acryl Model Wash) (Dark Brown) |
| 510004952 | IT Schwarz (Acryl Model Wash) (Black) |
| 510004953 | IT Oiled Earth (Acryl Model Wash) |
| 510004954 | IT Rost (Acryl Model Wash) (Rust) |
| 510004955 | IT Grau (Acryl Model Wash) (Grey) |
| 510004956 | IT Dunkelgrün (Acryl Model Wash) (Dark Green) |
Color Schemes
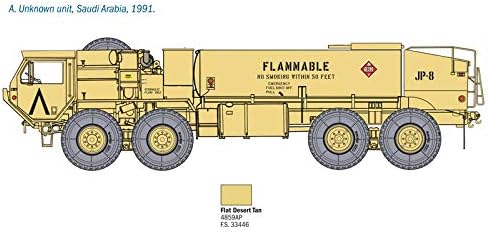
Image: Color scheme A - M978 Fuel Servicing Truck in a Flat Desert Tan finish, typical for operations in arid regions like Saudi Arabia, 1991.
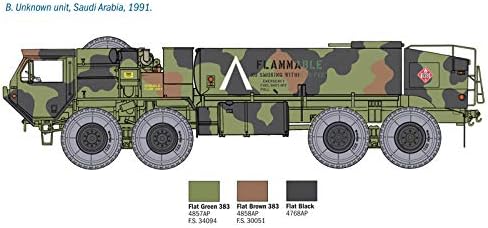
Image: Color scheme B - M978 Fuel Servicing Truck in a three-color Woodland camouflage pattern (Flat Green 383, Flat Brown 383, Flat Black), also seen in Saudi Arabia, 1991.
Apply paint in thin, even coats. Allow each coat to dry thoroughly before applying the next. Use masking tape for sharp lines between camouflage colors.
Maintenance and Care
To ensure the longevity and appearance of your finished model:
- Cleaning: Dust your model regularly with a soft brush or a can of compressed air. Avoid using harsh chemicals or abrasive materials.
- Storage: Store your model in a cool, dry place away from direct sunlight and extreme temperature fluctuations. Display cases can protect against dust and accidental damage.
- Handling: Handle the model by its sturdy parts, such as the base or main body, to avoid breaking delicate components.
Troubleshooting Common Issues
- Parts not fitting:
Ensure you are using the correct parts as indicated in the kit's instruction diagrams. Carefully trim any excess plastic (flash) or gently sand the mating surfaces for a better fit. Do not force parts together.
- Adhesive not holding:
Ensure surfaces are clean and free of paint or grease. Apply a sufficient, but not excessive, amount of plastic cement. Hold parts firmly until the bond begins to set. Allow ample drying time.
- Paint issues (e.g., uneven coat, brush strokes):
Ensure paint is properly thinned for application. Apply multiple thin coats rather than one thick coat. Allow each coat to dry completely. For smoother finishes, consider airbrushing.
- Decal silvering:
Apply decals over a glossy surface. Use a decal setting solution to help the decal conform to surface details and eliminate air bubbles underneath. Finish with a clear matte or satin coat.
Specifications
| Feature | Detail |
|---|---|
| Brand | Italeri |
| Model Name | 1:35 M978 FUEL SERV TRUCK |
| Model Number | 510006554 |
| Scale | 1:35 |
| Material | Plastic |
| Color | Unpainted |
| Recommended Age | 14 years and up |
| Product Dimensions | 37.3 x 24.1 x 6 inches (package) |
| Item Weight | 11.1 ounces |
| Special Feature | Upgraded moulds, color instructions sheet, new rims and rubber tyres |
Warranty and Support
For specific warranty information or technical support regarding missing parts or manufacturing defects, please contact Italeri directly through their official website or customer service channels. This instruction manual does not constitute a warranty document.


