
LASER X 88053
LASER X Micro Blasters Instruction Manual
Model: 88053
Introduction
The LASER X Two Player Laser Gaming Set provides a real-life laser gaming experience. This set includes two compact laser units with two arm receivers, allowing for exciting laser tag battles with a range of up to 100 feet. The blasters feature full-color lighting effects to track shots and hits, and an interactive voice coach provides tips and feedback during gameplay. For an immersive experience, you can plug in headphones to hear the Laser X Soundtrack and Sound Effects. This set is compatible with all other Laser X equipment, expanding your play possibilities.

Image: The product packaging for the LASER X Two Player Laser Gaming Set, featuring two individuals holding the micro blasters.
What's Included
Your LASER X Two Player Laser Gaming Set includes the following components:
- Two (2) LASER X Micro Blasters
- Two (2) Arm Receivers (one for each player)

Image: A close-up view of the two white LASER X Micro Blasters and their corresponding arm receivers.
Setup
Battery Installation
Each LASER X Micro Blaster requires three (3) AAA batteries. A total of six (6) AAA batteries are needed for the complete two-player set. Batteries are not included.
- Locate the battery compartment on the underside of each Micro Blaster.
- Using a Phillips head screwdriver, open the battery compartment cover.
- Insert three (3) AAA batteries into each blaster, ensuring correct polarity (+/-).
- Replace the battery compartment cover and secure it with the screw.
- Repeat for the second Micro Blaster.
Wearing the Arm Receiver
The arm receiver is designed to be worn on your upper arm. It features an elastic band for a secure and comfortable fit. Ensure the receiver is positioned so that the target area is clearly visible to other players.
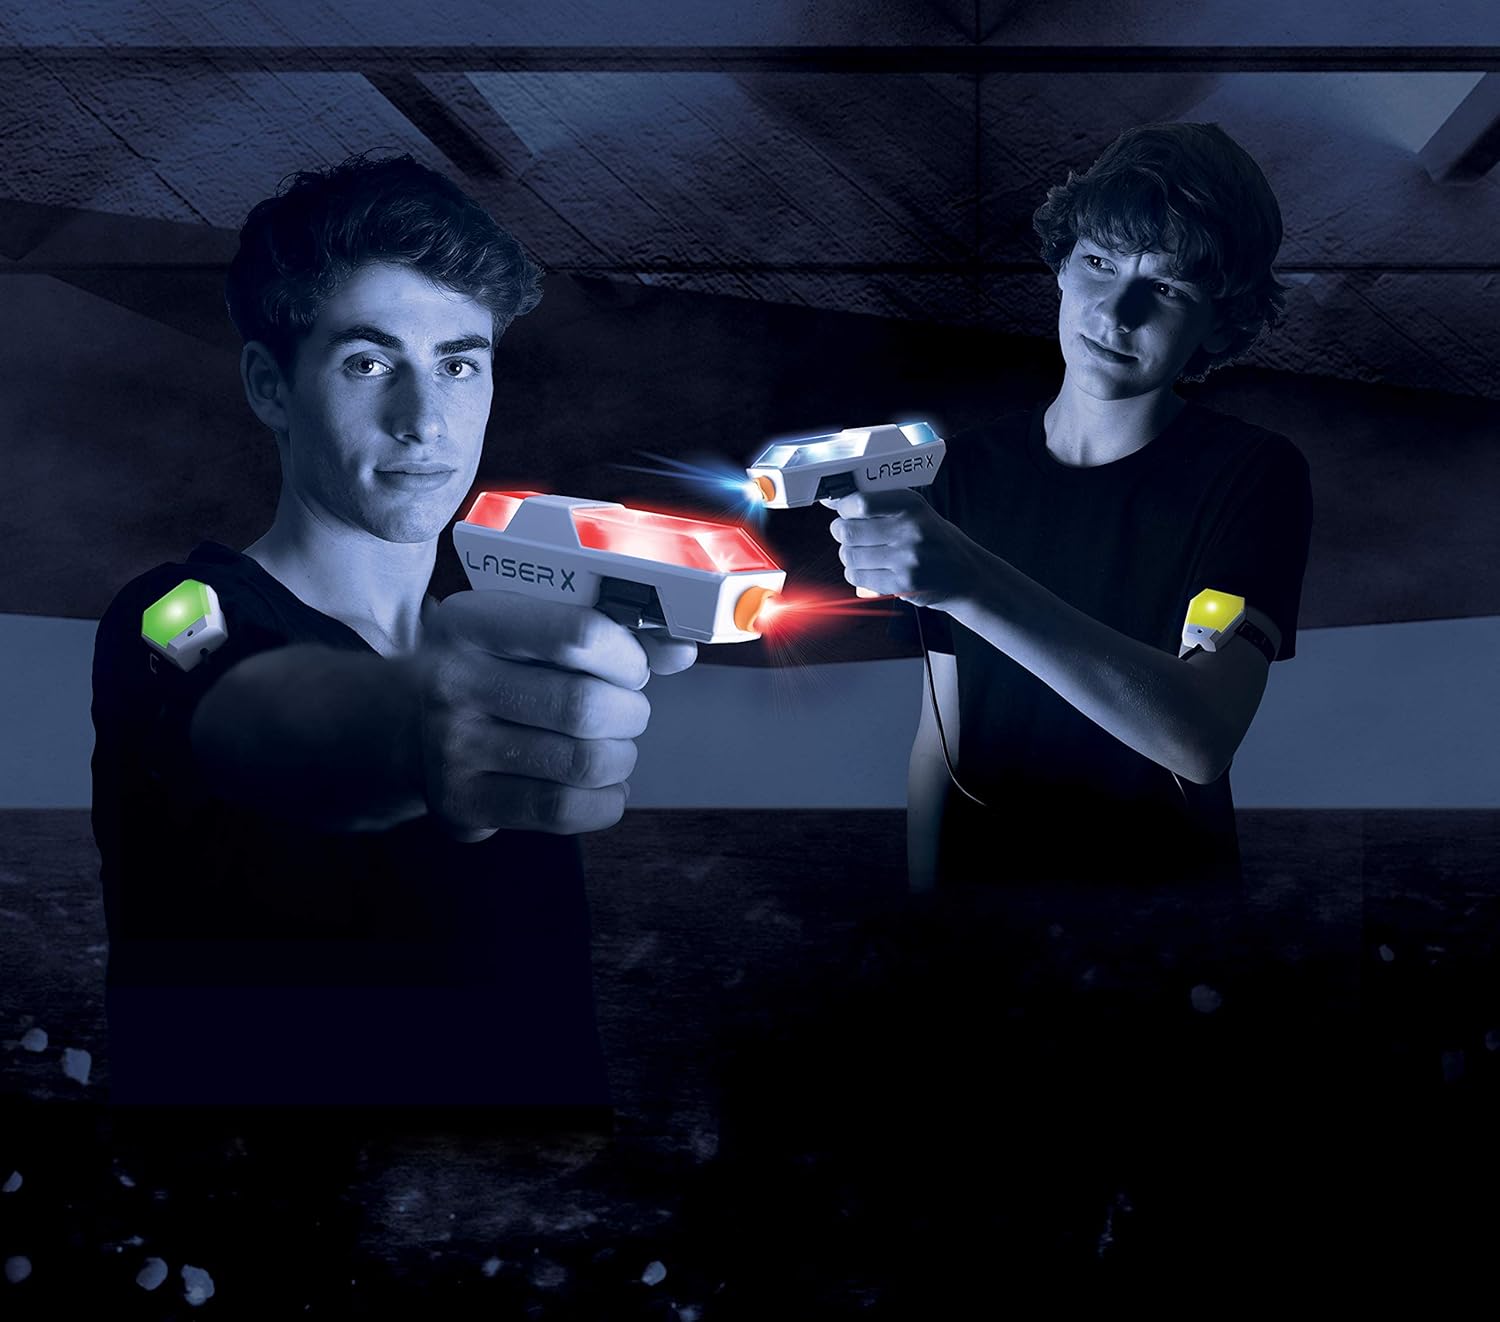
Image: Two players engaged in a laser tag game, demonstrating how the arm receivers are worn.
Operating Instructions
Powering On and Team Selection
Each arm receiver has a power switch and a team selection switch. To begin playing:
- Turn on the power switch on each arm receiver. The receiver will light up green, indicating it's ready.
- Select your team using the team selection switch:
- Red Team: Your blaster and receiver will glow red.
- Blue Team: Your blaster and receiver will glow blue.
- Free-for-All: Your blaster and receiver will blink between red and blue, indicating no teams.
Gameplay Basics
The LASER X Micro Blasters allow you to blast opponents' receiver vests from up to 100 feet away. The blasters and receivers provide real-time feedback through lights and sounds.
- Shooting: Aim your blaster at an opponent's arm receiver and press the trigger to fire.
- Hit Feedback: When hit, your arm receiver will change color from green to yellow, then to red, indicating your remaining "lives."
- Reloading: To reload your blaster, simply press and hold the trigger. You will hear a sound indicating a successful reload.
- Out of Game: When your receiver turns solid red, you are out of the game. To rejoin, turn the receiver off and then back on.

Image: A close-up of the LASER X Micro Blasters showing their illuminated sections, indicating active play.
Maintenance
Cleaning
To clean your LASER X Micro Blasters and arm receivers, wipe them with a soft, dry cloth. Do not submerge the units in water or use harsh chemicals, as this may damage the electronics.
Battery Care
To prolong battery life and prevent leakage, always remove batteries from the blasters and receivers when not in use for extended periods.
Troubleshooting
- Blaster not firing or receiver not responding:
- Check if batteries are correctly installed and not depleted. Replace if necessary.
- Ensure the power switch on both the blaster and receiver is in the "ON" position.
- Verify that there is a clear line of sight between the blaster and the receiver. Obstacles can block the infrared signal.
- Limited range:
- Ensure you are within the advertised 100-foot range.
- Bright sunlight can sometimes interfere with infrared signals. Try playing in shaded areas or indoors for optimal performance.
- Voice coach or sound effects not working:
- Check battery levels.
- If using headphones, ensure they are properly plugged in and functioning.
Specifications
| Feature | Detail |
|---|---|
| Product Dimensions | 5.72 x 30.48 x 25.4 inches |
| Item Weight | 12.8 ounces |
| Item Model Number | 88053 |
| Manufacturer Recommended Age | 12 years and up |
| Batteries Required | 6 AAA batteries (3 per unit, not included) |
| Max Range | 100 feet |

Image: A visual representation of the compact size of the LASER X Micro Blaster compared to a human hand.
Important Safety Information
WARNING: CHOKING HAZARD - Small Parts.
Not suitable for children under 3 years of age due to small parts which may present a choking hazard.
- Do not aim at eyes or face.
- Use only as directed in this manual.
- Adult supervision is recommended during play.
Warranty and Support
For warranty information, technical support, or any questions regarding your LASER X product, please refer to the manufacturer's official website or contact their customer service department. Contact details are typically found on the product packaging or the manufacturer's website.
Manufacturer: Laser X
Ask a question about this manual
Ask about setup, troubleshooting, compatibility, parts, safety, or missing instructions. Manuals+ will review the question and use this page’s manual context to help answer it.