
Cloudray MYJG-100W MONITOR 110V
Cloudray 100 Watt Laser Power Supply User Manual
Model: MYJG-100W MONITOR 110V
1. Introduction
This manual provides detailed instructions for the safe and efficient use of your Cloudray 100 Watt Laser Power Supply. Designed for 80-100W laser tubes, this power supply offers versatile compatibility and high performance for various laser engraving and cutting applications. Please read this manual thoroughly before installation and operation to ensure optimal performance and safety.

Image: Cloudray 100W CO2 Laser Power Supply shown with compatible laser engravers and cutters, highlighting its application areas.
2. Safety Information
Always prioritize safety when working with laser equipment and power supplies. Failure to follow these guidelines may result in serious injury or damage to equipment.
- Electrical Safety: Ensure the power supply is properly grounded. Do not operate with wet hands or in damp environments. Disconnect power before performing any maintenance or connection changes.
- High Voltage: This device operates at high voltages. Only qualified personnel should attempt installation, maintenance, or troubleshooting.
- Ventilation: Ensure adequate ventilation around the power supply to prevent overheating.
- Laser Safety: Always wear appropriate laser safety glasses when operating laser equipment. Never look directly into the laser beam.
- Emergency Stop: Familiarize yourself with the emergency stop procedures for your laser system.
3. Product Overview
The Cloudray 100 Watt Laser Power Supply is designed for reliability and performance, featuring quick response speed and robust protection mechanisms.

Image: Top-down view of the Cloudray 100 Watt Laser Power Supply, showcasing its compact design and connection ports.
Key Features:
- Versatile Compatibility: Works seamlessly with 80-100W laser tubes from various manufacturers.
- Effortless Control: Features TTL level start and stop functionality for easy laser operation.
- Comprehensive Protection: Includes output open circuit protection, TTL signal indication, water through signal indication, and laser output indication.
- Manual Output Check: A convenient button allows for manual checking of the output laser.
- Real-time Monitoring: Equipped with an External Ammeter featuring an LCD screen for monitoring processing current and status.
- Precise Adjustments: The LCD screen includes a trimmer potentiometer for fine-tuning current.

Image: Diagram highlighting key features such as simple control, open circuit protection, factory aging test, laser power adjustment, laser light test function, and high efficiency.

Image: Close-up view of the power supply's adjustable LCD display and connection ports, showing the current output and status indicators.
Video: An official product video from Cloudray Laser demonstrating the 80-100W CO2 Laser Power Supply, showcasing its physical appearance and features.
4. Setup and Installation
Proper installation is crucial for the safe and effective operation of your laser power supply. Refer to the wiring diagrams and ensure all connections are secure.
Connection Points:
- High Voltage Output: Connects to the laser tube.
- AC Input (115V L, N): Connects to the main power source.
- FG (Frame Ground): Essential for safety grounding.
- Control Signals (H, L, P, G, IN, 5V): For TTL level control, water protection, signal ground, input control, and 5V output.
- Laser Signal Input (L): For laser signal input.

Image: Detailed diagram illustrating the various connection points on the Cloudray laser power supply, including AC input, high voltage output, and control signal terminals.

Image: The Cloudray power supply shown connected to a laser tube, demonstrating a typical setup configuration.
5. Operating Instructions
Once properly installed, the Cloudray 100 Watt Laser Power Supply offers intuitive control for your laser operations.
Basic Operation:
- Power On: Ensure all connections are secure and the laser tube is properly cooled. Turn on the main power to the power supply.
- TTL Control: Use TTL-level signals from your laser controller to initiate and stop laser firing. The power supply supports both active-high and active-low devices.
- Current Adjustment: If your model includes an external ammeter with an LCD screen, use the trimmer potentiometer to precisely adjust the output current as needed for your application.
- Test Function: Press the 'TEST' button on the power supply to manually check the laser output. This is useful for quick verification of laser functionality.
Monitoring Status:
The external ammeter's LCD screen provides real-time feedback:
- Current Output: Displays the actual processing current in mA.
- Water Protection: Indicates if the water protection system is active (ON/OFF).
- Laser Signal: Shows the status of the laser signal (ON/OFF).
6. Maintenance
Regular maintenance ensures the longevity and optimal performance of your Cloudray Laser Power Supply.
- Cleaning: Periodically clean the exterior of the power supply and ensure ventilation grilles are free from dust and debris. Use a soft, dry cloth. Do not use liquid cleaners.
- Fan Check: Ensure the cooling fan operates freely and is not obstructed. A well-functioning fan is critical for heat dissipation.
- Connection Integrity: Regularly inspect all electrical connections for tightness and signs of wear or corrosion. Loose connections can lead to arcing and damage.
- Environmental Conditions: Maintain the operating environment within specified temperature and humidity ranges to prevent premature component failure.
7. Troubleshooting
This section addresses common issues you might encounter with your laser power supply.
| Problem | Possible Cause | Solution |
|---|---|---|
| No laser output | No power to PSU, faulty laser tube, water protection active, control signal issue. | Check power connections, verify water flow, inspect laser tube, check control signals (TTL). Use the 'TEST' button to isolate the issue. |
| Low laser power | Incorrect current setting, aging laser tube, dirty optics. | Adjust current using the potentiometer. Consider laser tube replacement if it's old. Clean laser optics. |
| PSU overheating | Poor ventilation, fan malfunction, excessive load. | Ensure clear airflow around the unit. Check if the fan is spinning freely. Reduce operating load if consistently overheating. |
| LCD display not working | Loose connection, damaged display unit. | Check the cable connecting the LCD to the power supply. If still not working, the display unit may need replacement. |
If you encounter issues not listed here or if the suggested solutions do not resolve the problem, please contact Cloudray customer support.
8. Specifications
Detailed technical specifications for the Cloudray 100 Watt Laser Power Supply (Model MYJG-100W MONITOR 110V).
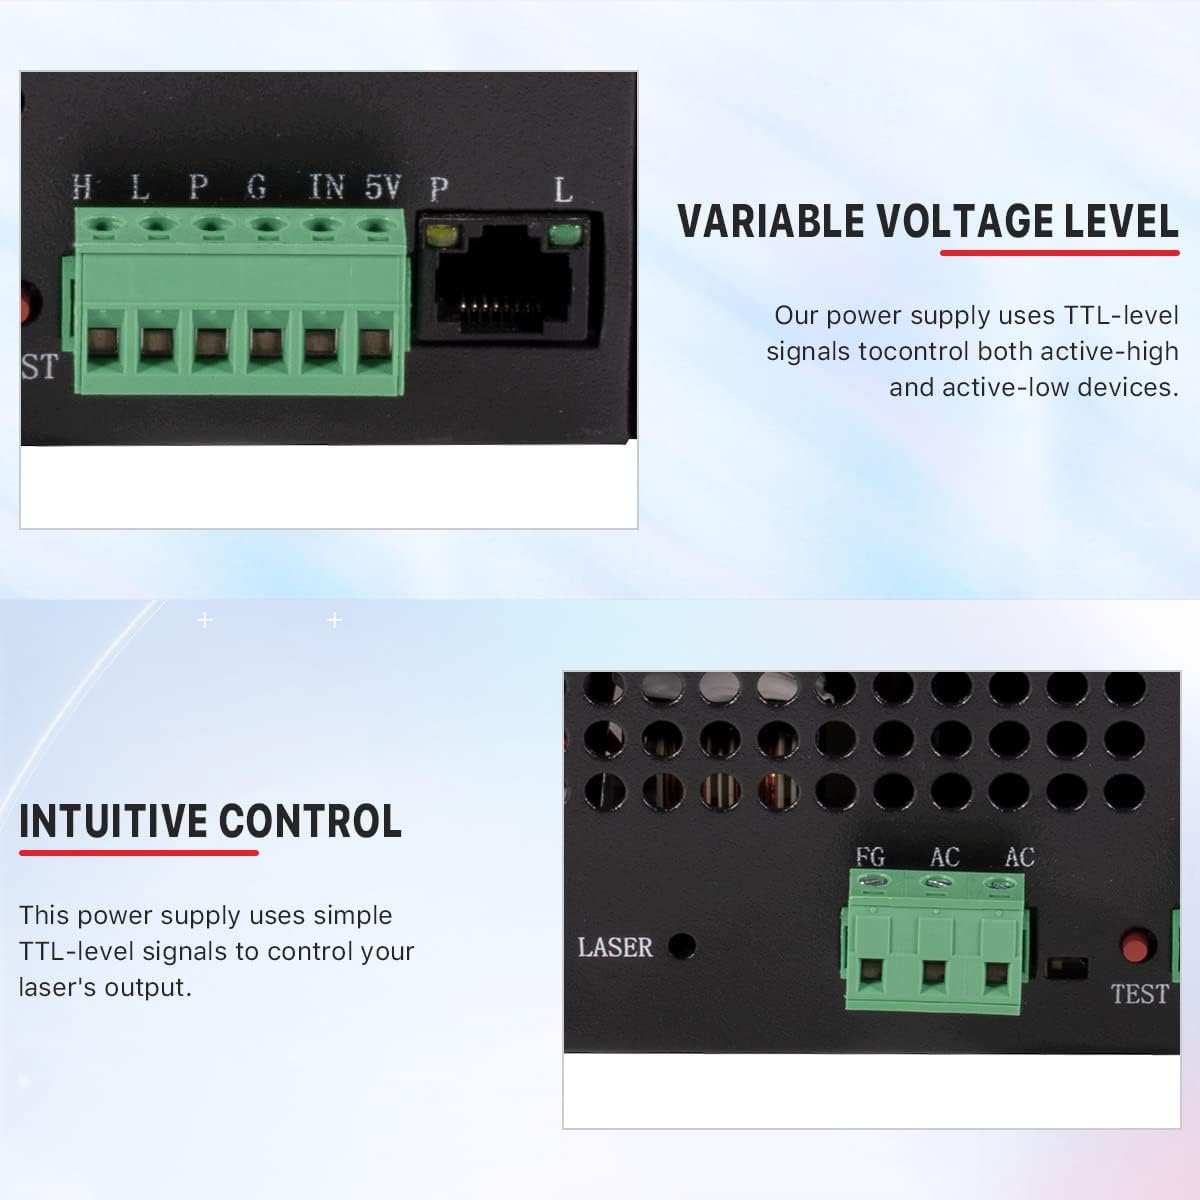
Image: Dimensional drawing of the Cloudray 100W CO2 Power Supply, showing its length, width, and height.
| Feature | Specification |
|---|---|
| Model Name | MYJG-100W MONITOR 110V |
| Input Voltage | AC 115V |
| AC Frequency | 47 - 440Hz |
| Max Output Voltage | 28KV |
| Max Output Current | 30mA |
| Output Wattage | 100 watts |
| Product Dimensions (L x W x H) | 12.6 x 7.87 x 5.91 inches (320 x 200 x 150 mm approx.) |
| Item Weight | 7.26 pounds (3.3 Kilograms) |
| Efficiency | 91% |
| MTBF (Mean Time Between Failures) | ≥ 30000 hours |
| Response Speed | ≤ 1ms |
| Voltage Range (High-Level) | ≥ 3V |
| Voltage Range (Low-Level) | ≤ 0.7V |
| Environment Temperature | -30°C ~ +65°C |
| Cooling Method | Forced air cooling (fan cooling) |
| High Temperature Test | Full Load / 60°C / 12 hours |
| Start / Stop Test | 500 times 7 seconds |
| Manufacturer | Cloudray |
| Country of Origin | China |
9. Warranty and Support
For warranty information and technical support, please refer to the official Cloudray website or contact your point of purchase. Keep your purchase receipt as proof of purchase for any warranty claims.
Cloudray is committed to providing high-quality laser accessories and support to its customers worldwide.
Related documentsMYJG-100W MONITOR 110V


Ask a question about this manual
Ask about setup, troubleshooting, compatibility, parts, safety, or missing instructions. Manuals+ will review the question and use this page’s manual context to help answer it.