
ORIA WA50
ORIA WA50 Wireless Digital Refrigerator Thermometer User Manual
Model: WA50
1. Product Overview
The ORIA WA50 Wireless Digital Refrigerator Thermometer is designed to monitor temperatures in refrigerators, freezers, and ambient environments. It includes a main display unit and two wireless remote sensors, providing accurate temperature readings and an audible alarm for temperature deviations. This device helps ensure food safety and optimal storage conditions.

Image 1.1: The main display unit and two wireless remote sensors.
2. Package Contents
- 1 x Main Display Unit
- 2 x Wireless Remote Sensors
- 1 x User Manual
3. Product Features
- Accurate Temperature Recording: Displays temperatures with one decimal point precision.
- Wide Temperature Range: Indoor range: -10 °C to 60 °C (14 °F to 140 °F); Outdoor/Sensor range: -40 °C to 60 °C (-40 °F to 140 °F).
- Long Transmission Range: Up to 100 meters (328 feet) in open air. Actual range may vary due to environmental interference.
- Min/Max Temperature Record: Automatically records the highest and lowest temperatures detected.
- Temperature Trend Indicator: Arrows indicate whether the temperature is rising, falling, or stable.
- Audible Alarm: Manually set high and low temperature alarm thresholds. An alarm sounds when temperatures exceed or fall below these preset values.
- Dual Wireless Sensors: Simultaneously displays indoor temperature (from main unit) and two remote sensor temperatures.
- Easy to Use: Six function buttons for alarm control, C/F switching, and clearing min/max values.
- Multiple Installation Options: Main unit features integrated magnets, a hanging hole, and a kickstand. Sensors include clips and hanging holes.
4. Specifications
| Feature | Specification |
|---|---|
| Indoor Temperature Range | -10 °C ~ 60 °C (14 °F ~ 140 °F) |
| Outdoor/Sensor Temperature Range | -40 °C ~ 60 °C (-40 °F ~ 140 °F) |
| Transmission Range | Up to 100m (328ft) in open air |
| Temperature Test Rate | 10 seconds |
| Sensor 1 Refresh Rate | 57 seconds |
| Sensor 2 Refresh Rate | 67 seconds |
| Main Unit Power | 2 x AAA batteries (not included) |
| Main Unit Dimensions (L x W x H) | 9.5 x 8 x 2 cm (3.7 x 3.1 x 0.8 inches) |
| Main Unit Weight | 100 g (3.5 oz) |
| Transmitter Power (each) | 2 x AA batteries (not included) |
| Transmitter Dimensions (L x W x H) | 10.5 x 3.5 x 1.5 cm (4.1 x 1.4 x 0.6 inches) |
| Transmitter Weight (each) | 38 g (1.3 oz) |
| Display Type | LCD Screen |
| Material | Plastic |
| Color | White |
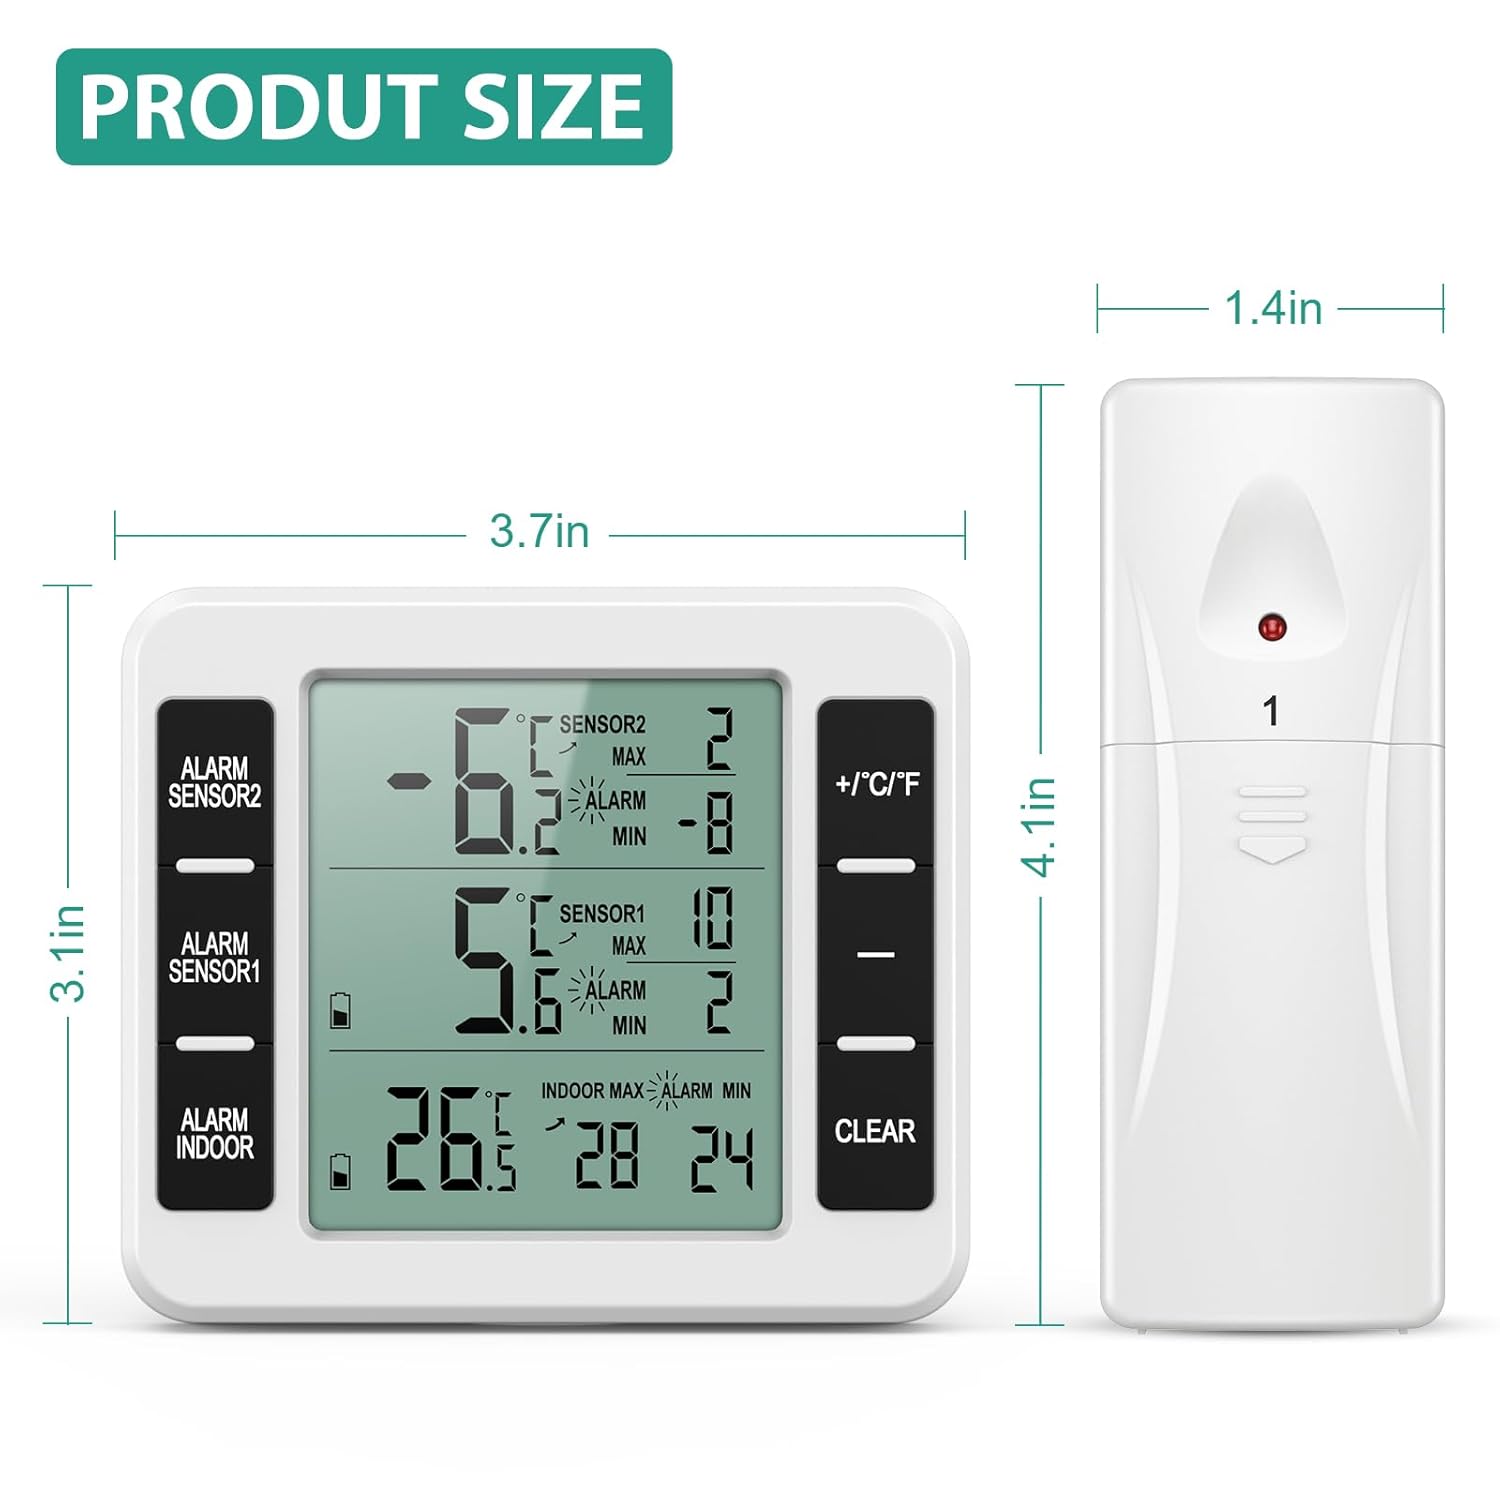
Image 4.1: Product dimensions for the main unit and remote sensor.
5. Safety Information and Precautions
- If the display indication becomes blurry, replace the batteries promptly.
- Do not place this product in hot, humid, dusty environments, or areas with corrosive gases, as this may damage its electronic components.
- The temperature alarm will not activate immediately upon exceeding a preset value. It will compare the temperature after a 10-minute interval. If the temperature remains outside the set range after this period, the alarm will sound. This delay prevents false alarms from brief door openings.
6. Setup
6.1 Battery Installation
Main Unit: Open the battery compartment on the back of the main unit. Insert 2 x AAA batteries, ensuring correct polarity (+/-). Close the compartment.
Remote Sensors: Open the battery compartment on the back of each remote sensor. Insert 2 x AA batteries into each sensor, ensuring correct polarity (+/-). Close the compartment.
6.2 Sensor Placement
Place the remote sensors in your desired monitoring locations, such as inside a refrigerator, freezer, or outdoors. The sensors can be attached using their integrated clips or hanging holes.

Image 6.1: Example placement of remote sensors inside a refrigerator and freezer.
6.3 Main Unit Placement
Position the main display unit in a convenient location within its transmission range (up to 100m in open air). It can be:
- Standing: Use the integrated kickstand to place it on a table or countertop.
- Hanging: Use the hanging hole to mount it on a wall.
- Magnetic: Attach it to a metallic surface, such as a refrigerator door, using the built-in magnets.
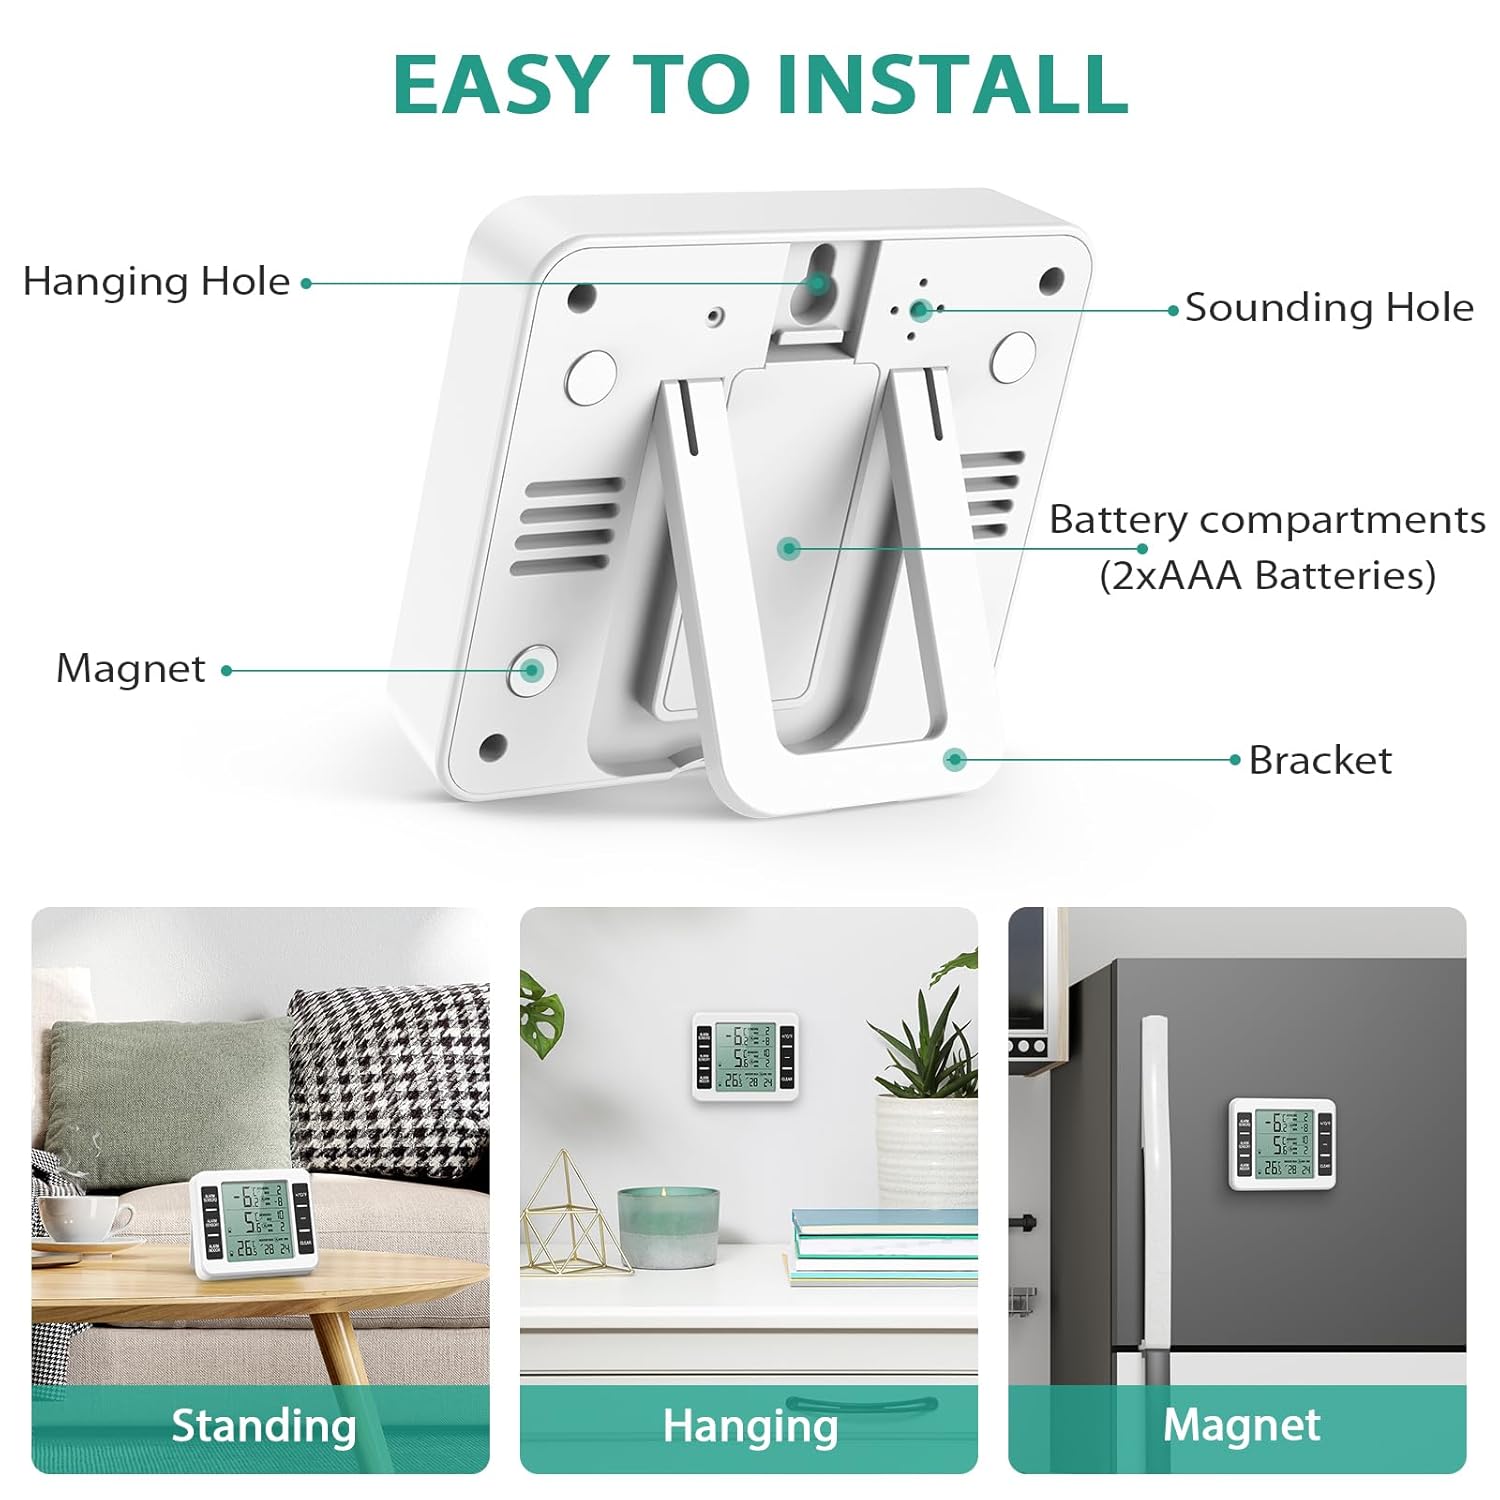
Image 6.2: Installation options for the main display unit.
7. Operating Instructions
7.1 Display Overview
The main unit's LCD screen displays indoor temperature, two remote sensor temperatures, min/max records, and alarm indicators.

Image 7.1: Detailed view of the main unit's display and control buttons.
7.2 Basic Operation
- Temperature Unit Selection: Press the "+/°C/°F" button to switch between Celsius (°C) and Fahrenheit (°F).
- View Min/Max Records: The display automatically cycles through current, maximum (MAX), and minimum (MIN) temperatures for each channel.
- Clear Min/Max Records: Press the "CLEAR" button to reset the recorded maximum and minimum temperatures for all channels.
7.3 Setting Temperature Alarms
The device allows you to set high and low temperature alarms for each sensor channel (Sensor 1, Sensor 2, and Indoor).
- Press the corresponding "ALARM SENSOR1", "ALARM SENSOR2", or "ALARM INDOOR" button to select the channel you wish to set an alarm for.
- While the alarm setting is active for a channel, use the "+/°C/°F" and "-" buttons to adjust the desired high and low temperature thresholds.
- Press the alarm button again to confirm the settings and activate the alarm for that channel. The alarm icon will appear on the display.
- To deactivate an alarm, press the corresponding alarm button until the alarm icon disappears.

Image 7.2: Setting maximum and minimum alarm values manually.
8. Maintenance
- Cleaning: Wipe the device and sensors with a soft, damp cloth. Do not use abrasive cleaners or immerse in water.
- Battery Replacement: Replace batteries when the low battery indicator appears on the display or if the display becomes blurry. Ensure to use the correct battery types (AAA for main unit, AA for sensors).
- Storage: If storing the device for an extended period, remove all batteries to prevent leakage.
9. Troubleshooting
| Problem | Possible Cause | Solution |
|---|---|---|
| No display or blurry display | Low or dead batteries; incorrect battery installation. | Replace batteries with new ones, ensuring correct polarity. |
| No temperature reading from a sensor | Sensor out of range; sensor batteries low/dead; interference. | Move sensor closer to the main unit; replace sensor batteries; reduce sources of interference (e.g., large metal objects). |
| Inaccurate temperature readings | Sensor exposed to direct heat/cold; sensor not properly calibrated (unlikely for this type of device). | Ensure sensors are placed in a representative area; compare with another known accurate thermometer. |
| Alarm not sounding | Alarm not activated; alarm thresholds set too wide; 10-minute delay not passed. | Ensure alarm is activated for the specific channel; adjust alarm thresholds; wait for the 10-minute delay to pass. |
10. Warranty and Support
ORIA provides the following warranty and support for this product:
- 45-Day Money-Back Guarantee: If you are not satisfied with your purchase, you may return it for a full refund within 45 days.
- 12-Month Replacement Warranty: The product is covered by a 12-month warranty for manufacturing defects.
- 24/7 Online Customer Service: Access to customer support for any inquiries or issues.
- Lifetime Warranty: Specific details regarding the lifetime warranty should be obtained from the manufacturer's official support channels.
For further assistance or support, please refer to the contact information provided with your product packaging or visit the official ORIA website.
Ask a question about this manual
Ask about setup, troubleshooting, compatibility, parts, safety, or missing instructions. Manuals+ will review the question and use this page’s manual context to help answer it.