
1. Introduction
This manual provides essential information for the proper installation, operation, and maintenance of your AKKON Projector Headlights and LED Tail Lights. Please read these instructions thoroughly before beginning installation to ensure safe and correct usage. Professional installation is highly recommended.
2. Compatibility
This product is designed for direct replacement on the following vehicle models:
- Nissan Titan: All models from 2004 to 2015.
Ensure your vehicle matches these specifications for proper fitment and function.
3. Package Contents
Your package should contain the following items:
- One (1) Pair of Projector Headlights (Driver and Passenger Side)
- One (1) Pair of LED Tail Lights (Driver and Passenger Side)
Note: Light bulbs for the projector headlights are not included and must be purchased separately. The LED tail lights feature integrated LEDs.
4. Safety Information
Always prioritize safety during installation. Failure to follow safety guidelines may result in injury or damage to the product or vehicle.
- Disconnect the vehicle's battery before beginning any electrical work.
- Wear appropriate personal protective equipment, such as gloves and eye protection.
- Ensure the vehicle is parked on a level surface and the parking brake is engaged.
- If you are unsure about any step, consult a qualified automotive technician.
5. Installation Instructions
5.1. Headlight Installation
- Preparation: Open the hood and locate the existing headlight assemblies.
- Remove Old Headlights: Carefully remove any retaining clips, bolts, or screws securing the factory headlights. Disconnect the electrical connectors from the bulbs and the main harness. Gently pull the old headlight assembly out of its housing.
- Install Bulbs (if applicable): Insert your chosen headlight bulbs into the new AKKON projector headlight assemblies. Ensure they are seated correctly and securely.
- Connect Wiring: Connect the electrical harness of the new projector headlights to the vehicle's wiring. Ensure all connections are secure.
- Mount New Headlights: Carefully slide the new AKKON projector headlight assembly into the vehicle's housing. Secure it using the factory retaining clips, bolts, or screws.
- Test Functionality: Reconnect the vehicle battery. Turn on the headlights (low beam, high beam, parking lights, turn signals) to verify proper operation before fully closing the hood.

Figure 1: Rear view of the projector headlight assembly, illustrating the wiring connections for installation.
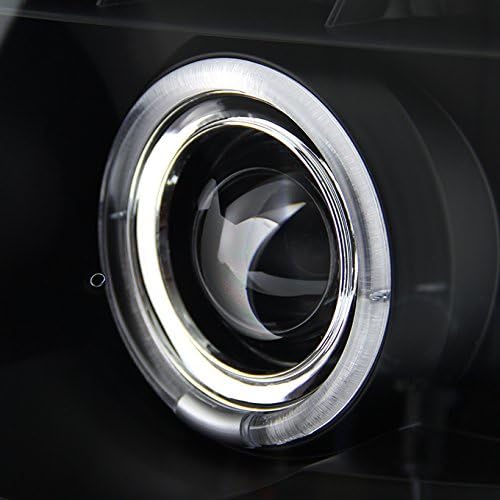
Figure 2: Close-up view of the projector lens, featuring the integrated halo ring design.

Figure 3: Detailed view of the turn signal and parking light section within the headlight assembly.
5.2. Tail Light Installation
- Preparation: Access the rear of the vehicle to locate the existing tail light assemblies.
- Remove Old Tail Lights: Remove any screws or fasteners holding the factory tail lights in place. Disconnect the electrical connectors. Carefully remove the old tail light assembly.
- Connect Wiring: Connect the electrical harness of the new AKKON LED tail lights to the vehicle's wiring. These are designed for direct bolt-on replacement.
- Mount New Tail Lights: Position the new AKKON LED tail light assembly into the vehicle's housing. Secure it using the factory screws or fasteners.
- Test Functionality: Reconnect the vehicle battery. Activate the brake lights, parking lights, and turn signals to confirm proper operation of the new LED tail lights.
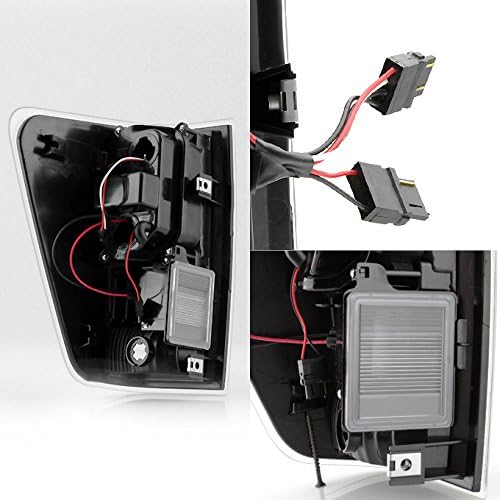
Figure 4: Rear view of the LED tail light assembly, showing the wiring and connectors for installation.
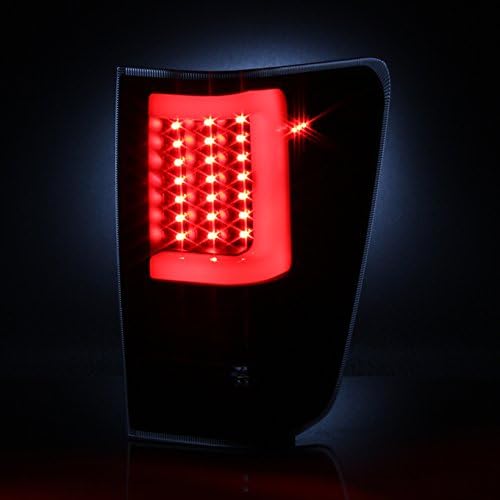
Figure 5: The LED tail light illuminated, showcasing the distinct red LED pattern.

Figure 6: Detailed close-up of the individual LED elements forming the tail light pattern.
6. Operating Instructions
Once installed, the AKKON headlights and tail lights operate in conjunction with your vehicle's existing lighting controls.
- Headlights: Use your vehicle's headlight switch to activate low beams, high beams, and parking lights. The projector design provides a focused light pattern.
- Tail Lights: The integrated LEDs will illuminate when parking lights or headlights are on, and brighten when the brake pedal is pressed. Turn signals will flash as controlled by your vehicle's stalk.
7. Maintenance
Regular maintenance helps ensure the longevity and performance of your lighting system.
- Cleaning: Clean the outer lenses with a soft cloth and mild automotive soap or glass cleaner. Avoid abrasive materials that could scratch the lens.
- Inspection: Periodically check all lights for proper function. Ensure no moisture has accumulated inside the housing.
- Wiring: Inspect wiring connections for any signs of wear, corrosion, or looseness.
The units are designed to be waterproof, but proper sealing during installation is crucial to maintain this feature.
8. Troubleshooting
If you encounter issues with your AKKON lighting system, consider the following:
| Problem | Possible Cause | Solution |
|---|---|---|
| Lights not illuminating | Loose electrical connection, blown fuse, incorrect bulb installation (headlights) | Check all wiring connections. Inspect vehicle fuses. Ensure headlight bulbs are correctly seated. |
| Flickering lights | Loose connection, voltage fluctuation | Secure all connections. Consult an automotive electrician if problem persists. |
| Moisture inside lens | Improper seal during installation, damaged housing | Ensure all seals are properly seated. If damage is present, contact support. |
For persistent issues, professional diagnosis is recommended.
9. Specifications
- Brand: AKKON
- Model Number: 5-444-NTI04-HL-BK-ALT-ON-NTI04-LBLED-BK
- Vehicle Compatibility: 2004-2015 Nissan Titan (Truck)
- Light Source Type: Projector (Headlights), LED (Tail Lights)
- Color: Black Housing
- Special Features: Waterproof design
- Power (Headlights): 220 W (Note: This refers to the maximum wattage the assembly can handle, not necessarily the bulb wattage)
- Placement: Right (This specification likely refers to a single unit, but the product is sold as a pair for both left and right sides)
- UPC: 840960109340
10. Warranty and Support
This AKKON product comes with a 90-day limited warranty from the date of purchase. This warranty covers manufacturing defects. It does not cover damage due to improper installation, accident, misuse, or normal wear and tear.
For warranty claims or technical support, please contact your retailer or the AKKON customer service department with your proof of purchase and product model number.