
NUX B-8
NUX B-8 Wireless System User Manual
For Guitar, Bass, and Various Instruments with Electronic Pickups
Introduction
The NUX B-8 Wireless System is a professional-grade wireless solution designed for guitar, bass, and other instruments equipped with electronic pickups. It offers high-resolution audio, ultra-low latency, and a robust 2.4GHz signal for reliable performance on stage or at home. Featuring a built-in booster and tuner, along with multiple channels, the B-8 provides a comprehensive and convenient wireless experience.
What's in the Box

This image displays the complete NUX B-8 Wireless System package. It includes the main receiver unit with an LCD screen, the compact transmitter unit, and a short instrument cable designed for connecting the transmitter to your instrument.
- NUX B-8 Receiver Unit
- NUX B-8 Transmitter Unit
- Instrument Cable (for transmitter connection)
- USB Charging Cable
- User Manual (this document)
Setup
1. Charging the Units
Before first use, ensure both the receiver and transmitter are fully charged. The transmitter can be charged by docking it onto the receiver unit or via its dedicated USB-C port. The receiver is powered by a standard 9V DC power supply (not included) or can be charged via USB-C.

This image shows the NUX B-8 transmitter unit securely docked into the top of the receiver unit, illustrating the convenient method for charging the transmitter directly from the receiver.
2. Connecting the Transmitter to Your Instrument
Connect the included short instrument cable from your instrument's output jack to the input jack on the NUX B-8 transmitter. The transmitter is designed to clip onto your guitar strap or be placed discreetly.
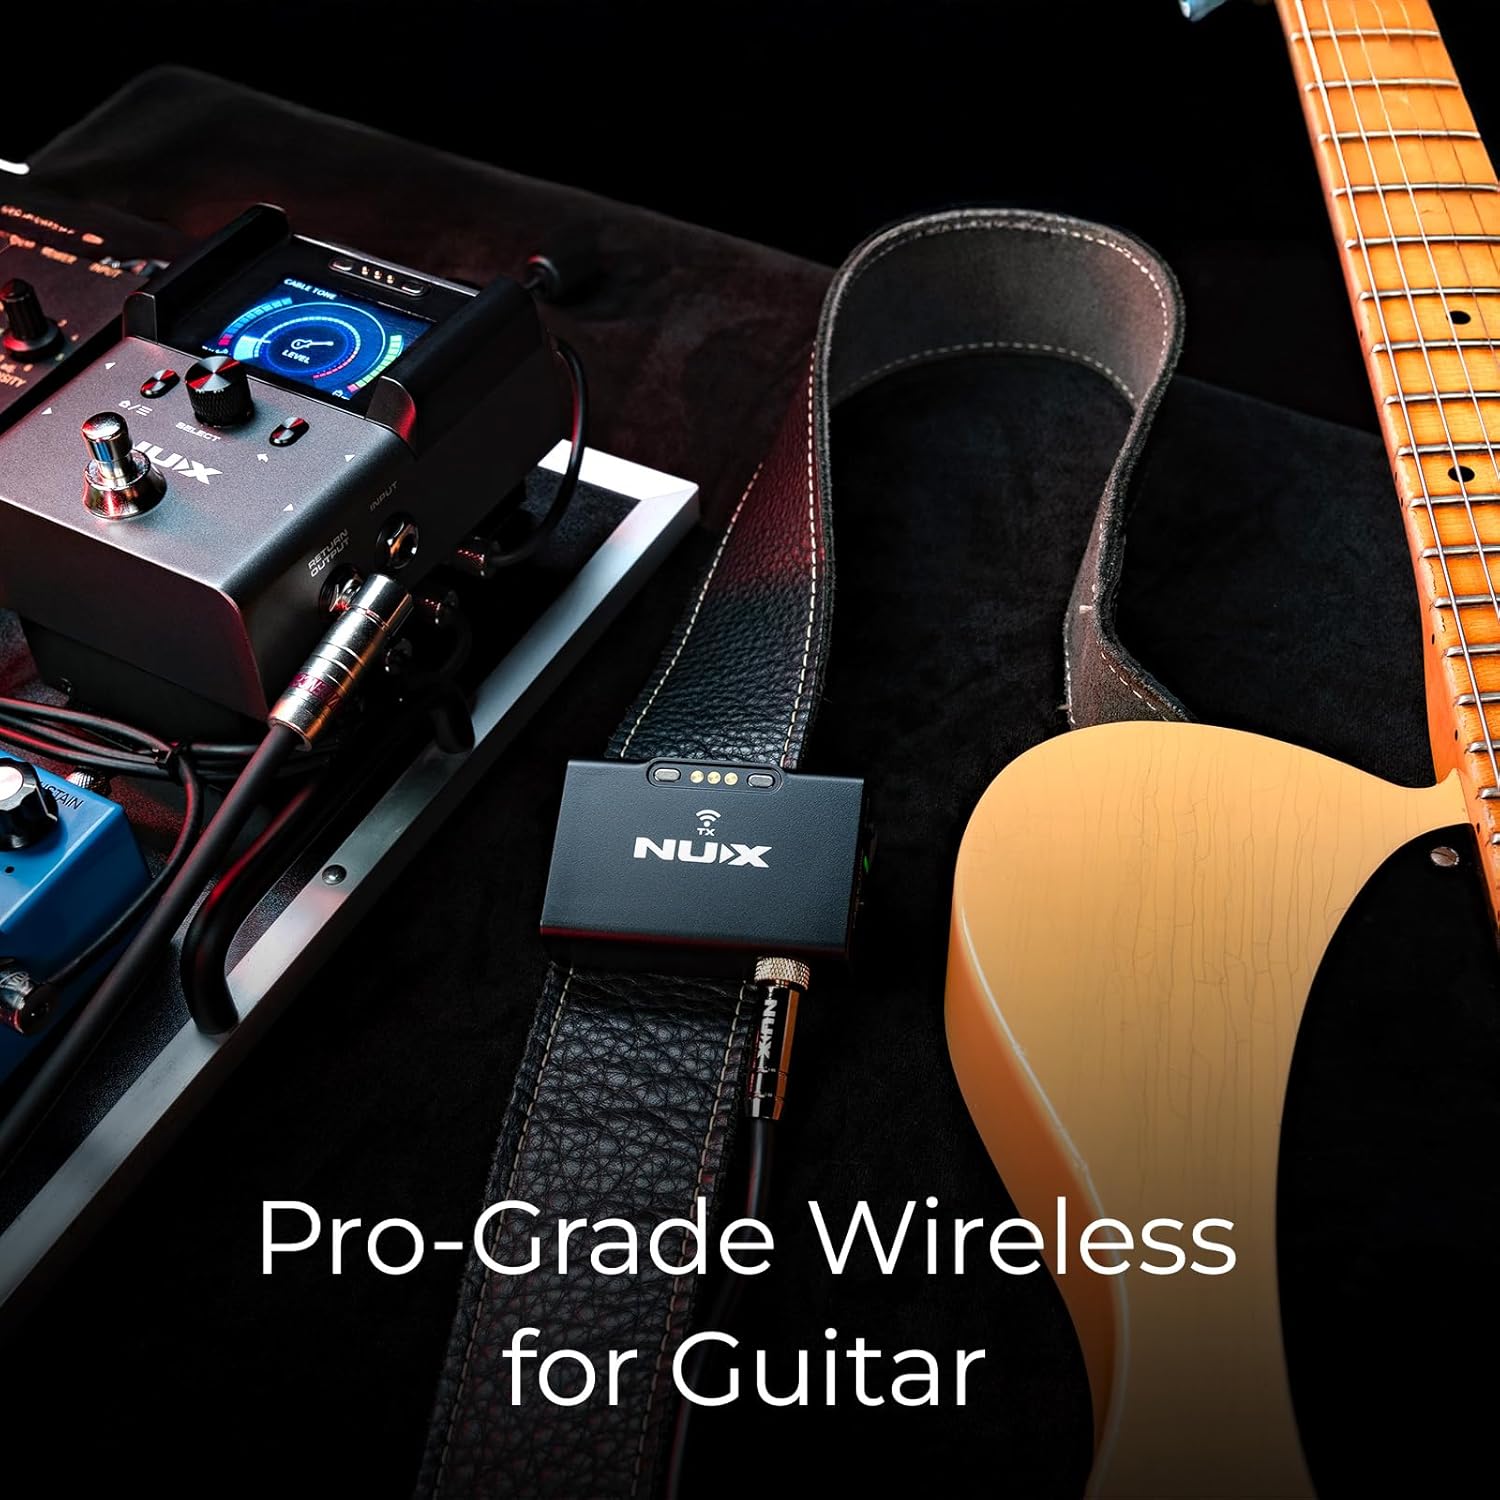
This image demonstrates the NUX B-8 transmitter connected to an electric guitar. The transmitter is attached to the guitar strap, and a short cable connects it to the guitar's output jack, providing a clean and secure wireless setup.

A detailed view of the NUX B-8 transmitter, highlighting its compact design and how it securely clips onto a guitar strap, ensuring it stays in place during performance.
3. Connecting the Receiver to Your Amplifier/Pedalboard
The receiver unit can be integrated into your pedalboard setup or connected directly to your amplifier. Use a standard instrument cable to connect the receiver's output to your amplifier's input or the first pedal in your chain. The B-8 also features an XLR DI output for direct connection to a mixing console.

This image shows the NUX B-8 receiver unit positioned on a pedalboard, demonstrating its compact size and how it can seamlessly fit alongside other effects pedals. Cables are connected to its input and output jacks.

A close-up view of the rear panel of the NUX B-8 receiver, clearly showing the various connection ports including the DC 9V power input, USB port, XLR DI output, and the main input/output jacks for instrument connection.
Operating Instructions
1. Powering On/Off
Press and hold the power button on both the receiver and transmitter to turn them on or off. The LCD screen on the receiver will illuminate upon power-on.
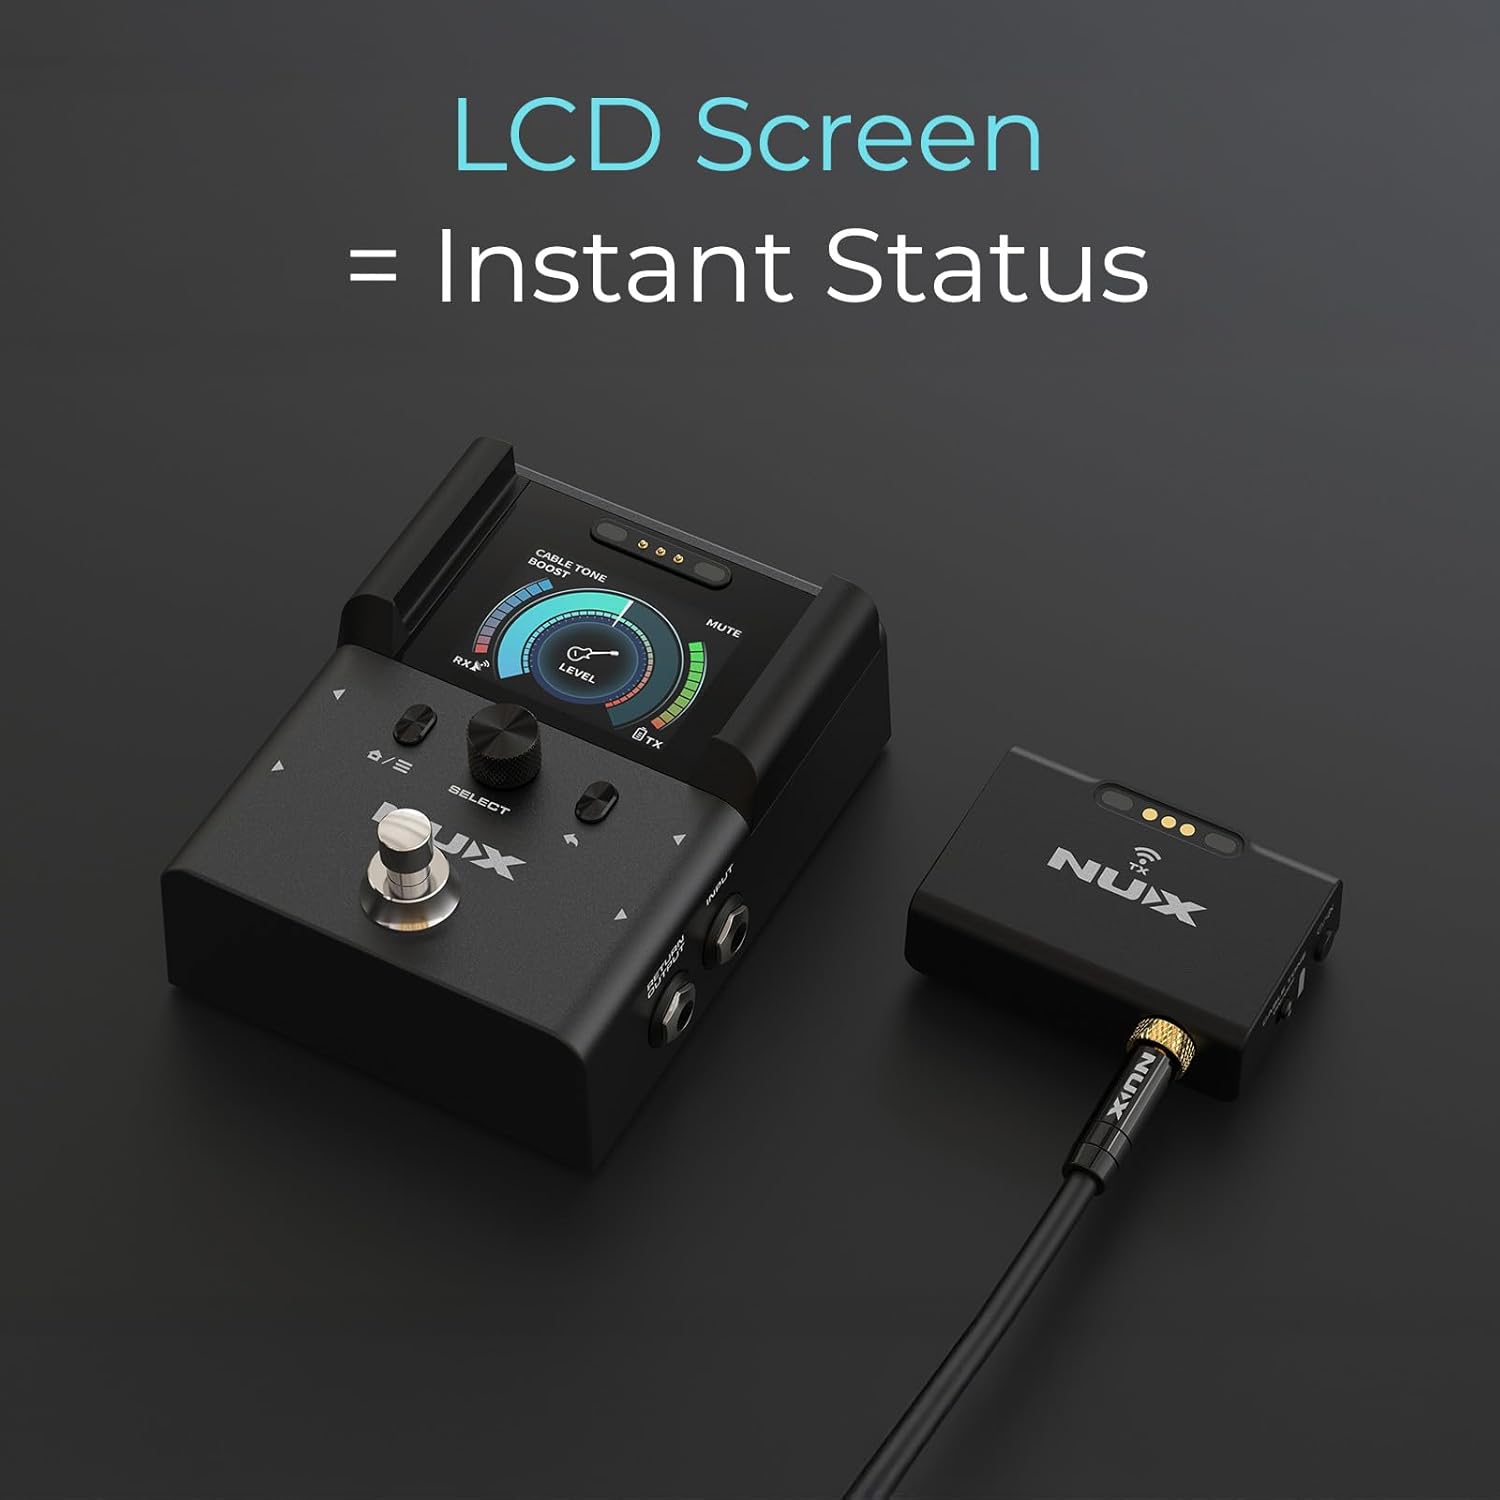
This image highlights the NUX B-8 receiver's clear LCD screen, which provides instant visual feedback on signal status, battery levels for both receiver and transmitter, and the active channel.
2. Channel Selection and Pairing
The B-8 system offers 6 channels to avoid interference. To select a channel, use the navigation buttons on the receiver. The transmitter will automatically pair with the receiver on the selected channel. For optimal performance, choose a channel with minimal interference, especially when using multiple wireless systems.

This image focuses on the NUX B-8 receiver's LCD screen, displaying the current channel selection and real-time signal strength indicators for both the receiver (RX) and transmitter (TX), ensuring a stable connection.
3. Using the Built-in Tuner
Activate the built-in tuner by pressing the dedicated tuner footswitch. The LCD screen will switch to tuner mode, offering Chromatic, Guitar, Bass, and Compensated tuning options. Tune your instrument accurately using the visual feedback on the screen.

This composite image illustrates the versatility of the NUX B-8's built-in tuner, showcasing different tuning modes such as Chromatic, Guitar Standard, and Bass Standard, along with the adjustable boost level setting.
4. Activating the Booster
The B-8 features a clean signal boost function. This can be engaged to provide an additional volume lift for solos or to drive your amplifier harder. Refer to the on-screen display for boost level indication.
5. Cable Tone Simulation
The B-8 includes a cable tone simulation feature that emulates the natural capacitance and tone roll-off of a traditional instrument cable. This can be toggled on or off via a switch on the transmitter unit to suit your preference.

A detailed view of the NUX B-8 transmitter, clearly showing the "CABLE TONE ON/OFF" switch and the power/mute button, allowing users to easily adjust these settings.
6. Latency Settings
The system offers adjustable latency settings to balance between ultra-low latency and maximum signal stability. You can select the desired setting through the receiver's menu to optimize for your playing environment.
Maintenance
- Cleaning: Use a soft, dry cloth to clean the units. Avoid abrasive cleaners or solvents.
- Storage: Store the system in a cool, dry place away from direct sunlight and extreme temperatures when not in use.
- Battery Care: For optimal battery life, avoid fully discharging the units frequently. Recharge regularly.
Troubleshooting
| Problem | Possible Cause | Solution |
|---|---|---|
| No Sound / Intermittent Signal |
|
|
| Tuner not responding |
|
|
| Short Battery Life |
|
|
Specifications
- Operating Frequency: 2.4 GHz
- Audio Quality: 24-bit / 44.1 kHz
- Latency: Ultra-low (adjustable)
- Range: Up to 164 feet (line-of-sight)
- Channels: 6 selectable channels
- Tuner Modes: Chromatic, Guitar, Bass, Compensated
- Booster: Built-in clean boost function
- Connectivity: 1/4" Instrument Input/Output, XLR DI Output, USB-C (for charging/firmware)
- Power: Internal rechargeable Lithium Polymer batteries (included)
- Dimensions (Receiver): Approximately 10.39 x 3.46 x 6.73 inches
- Weight: 2.4 pounds
Warranty and Support
NUX products are designed and manufactured to the highest quality standards. For warranty information and technical support, please refer to the official NUX website or contact your local distributor. Keep your proof of purchase for warranty claims.
Official NUX Website: www.nuxefx.com
Related documentsB-8


Ask a question about this manual
Ask about setup, troubleshooting, compatibility, parts, safety, or missing instructions. Manuals+ will review the question and use this page’s manual context to help answer it.