
1. Introduction
Thank you for choosing the TOOLPORT Party Gazebo 3x2m. This manual provides essential information for the safe and correct assembly, operation, and maintenance of your gazebo. Please read all instructions carefully before use and retain this manual for future reference.
2. Safety Information
- Snow and wind loads have not been tested for this marquee.
- Always install the marquee strictly according to the assembly instructions.
- Regularly remove any snow accumulation from the roof to prevent structural damage.
- In case of wind, it is highly recommended to use a storm kit (not included) for additional stability.
- During strong winds or heavy snowfall, temporarily remove the tarpaulin to prevent damage to the structure and fabric.
- This tent is designed for short-term use. It is not intended as a permanent structure.
- Do not place the tent in areas prone to strong winds or other severe weather conditions.
- Always use the supplied guy ropes and ground pegs to securely fasten the tent to the ground. Failure to do so may result in the tent blowing away and causing injury or damage.
3. Components List
Before assembly, ensure all components listed below are present and undamaged:
- Galvanized Steel Frame (tubes and connectors, approx. 38mm and 42mm diameter)
- Roof Tarpaulin (one piece, PE 350 N, 100% waterproof, UV 20+ protection)
- Side Tarpaulins (continuous pieces, PE 350 N)
- Front Tarpaulins with Zip Entrances
- Guy Ropes
- Ground Pegs
- Assembly Instructions (this manual)

Figure 3.1: Detailed view of roof and frame construction components.
4. Setup Instructions
Assembly is designed to be quick and easy, requiring no special tools thanks to the high-quality click system.
- Preparation: Choose a flat, level surface for your gazebo. Unpack all components and verify against the components list.
- Assemble the Frame: Connect the galvanized steel tubes using the provided connectors and the click system. Ensure all connections are secure. Refer to the included diagram for the correct frame structure.
- Attach the Roof Tarpaulin: Carefully place the one-piece roof tarpaulin over the assembled frame. Ensure it is centered and evenly distributed.
- Install Side and Front Tarpaulins: Attach the continuous side tarpaulins and the front tarpaulins with zip entrances to the frame. Use the integrated fastening mechanisms (e.g., Velcro straps, elastic loops) to secure them.
- Secure to the Ground: Use the provided ground pegs to anchor the base plates of the frame securely into the ground. Attach the guy ropes to the designated points on the frame and peg them firmly into the ground at an angle to provide additional stability.

Figure 4.1: Fully assembled gazebo in an outdoor environment.

Figure 4.2: Detail of the frame's click-system connection.
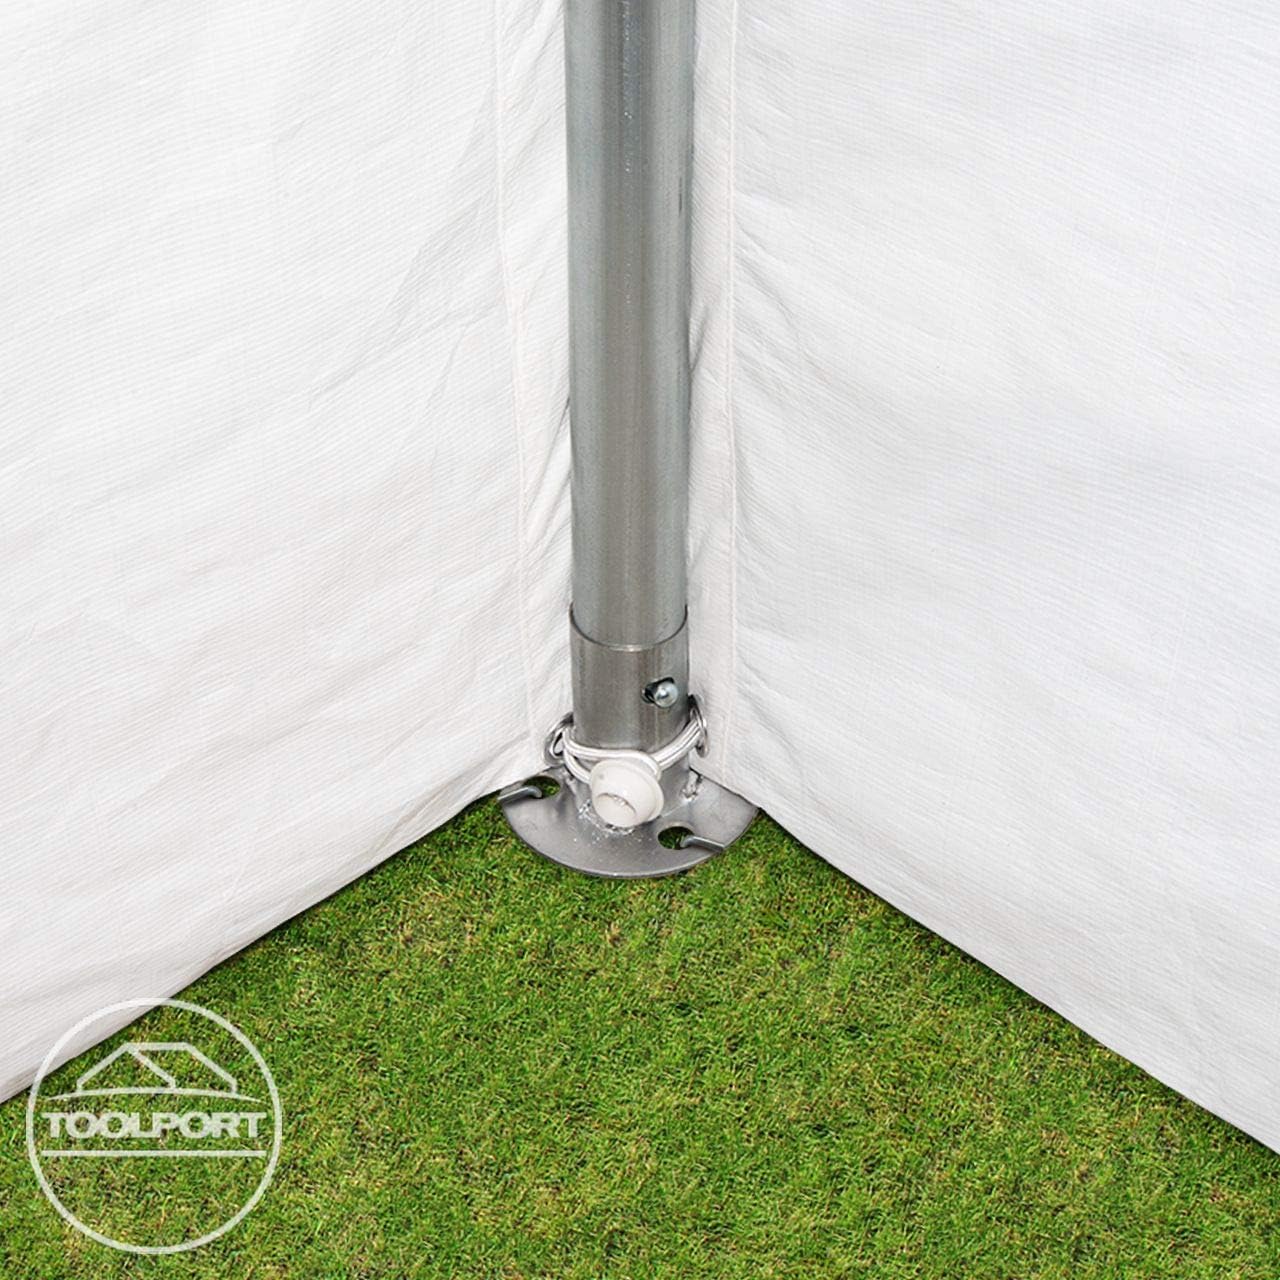
Figure 4.3: Detail of the base plate and ground securing.
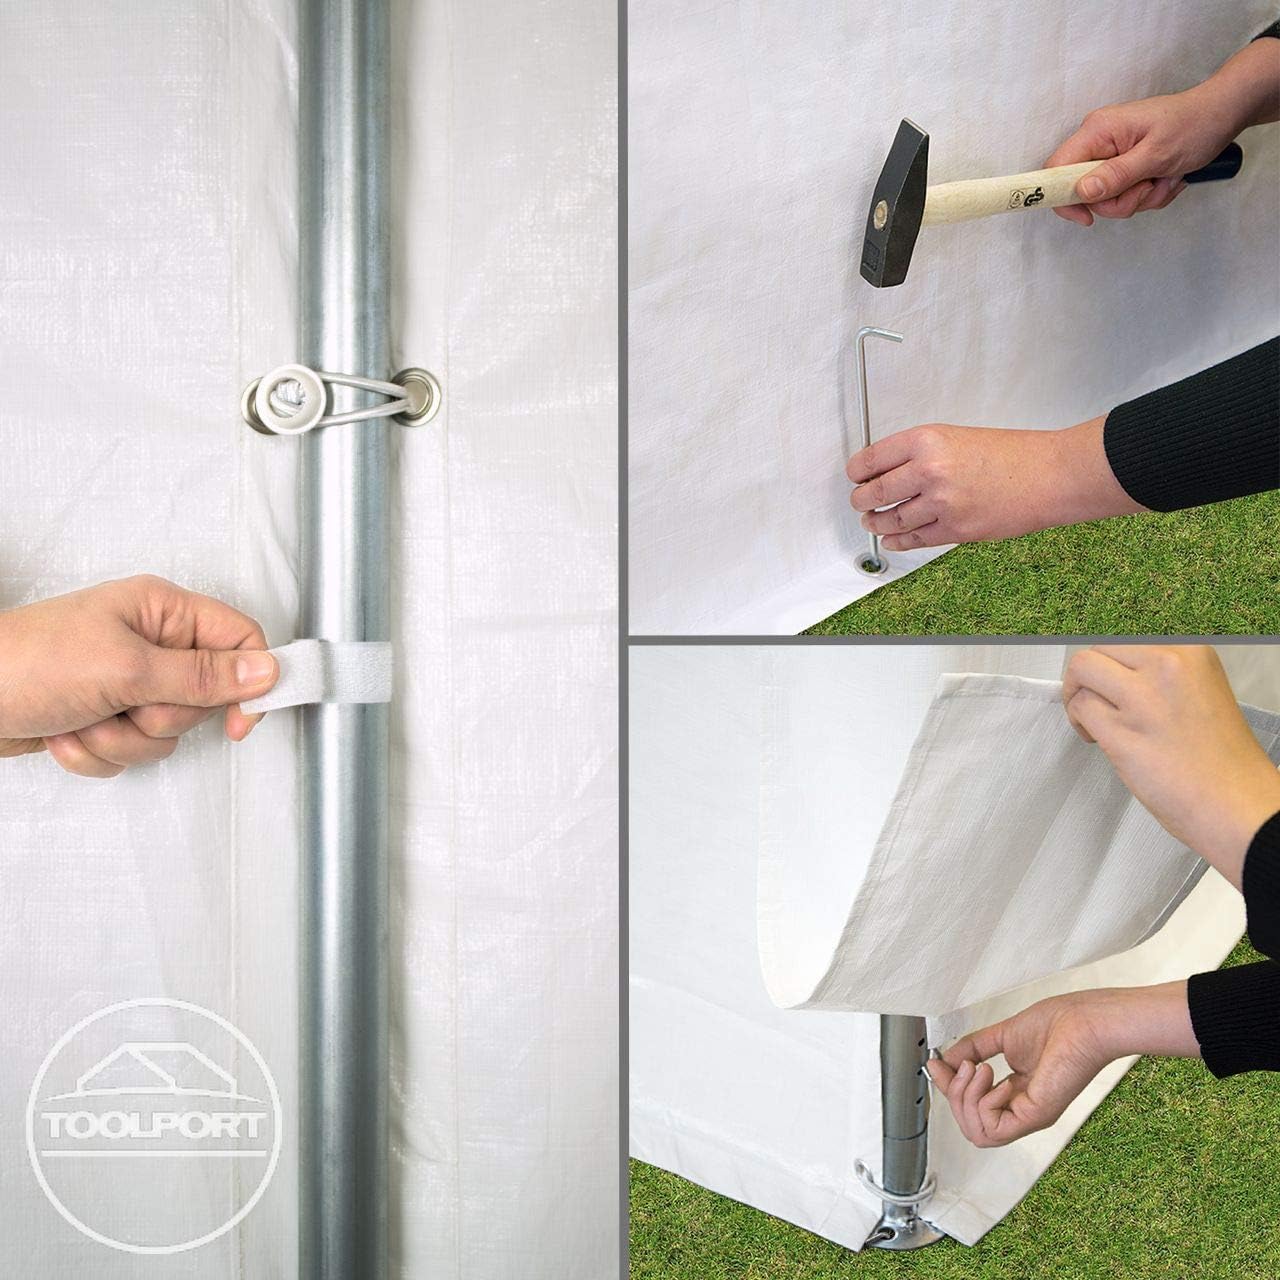
Figure 4.4: Methods for securing tarpaulins and side panels.
5. Operating Instructions
- The gazebo is designed to provide temporary shelter for outdoor events, parties, or as a temporary storage solution.
- Utilize the zip entrances on the front tarpaulins for easy access.
- Side panels can be rolled up and secured to allow for open-air use or increased ventilation.
- Always monitor weather conditions. Disassemble or secure the gazebo appropriately if strong winds, heavy rain, or snow are forecast.

Figure 5.1: Interior space of the gazebo.
6. Maintenance
- Cleaning: Clean the tarpaulins with mild soap and water. Do not use harsh chemicals or abrasive cleaners, as these can damage the PE material and UV coating. Rinse thoroughly and allow to air dry completely before storage.
- Frame Care: Inspect the steel frame periodically for any signs of rust or damage. Clean any dirt or debris from the frame.
- Storage: When not in use, especially during off-season or adverse weather, disassemble the gazebo and store all components in a dry, cool place, away from direct sunlight and extreme temperatures. Ensure tarpaulins are completely dry to prevent mold and mildew.
- Inspection: Before each setup, inspect all components for wear and tear, especially the tarpaulins for rips or holes, and the frame for bent or broken parts. Replace damaged parts immediately.
7. Troubleshooting
- Gazebo unstable: Ensure all frame connections are secure. Verify that ground pegs and guy ropes are properly installed and taut. Consider purchasing a storm kit for enhanced stability in windy conditions.
- Water leakage: Check the roof tarpaulin for any tears or improper installation. Ensure the tarpaulin is stretched tightly and evenly over the frame to prevent water pooling.
- Missing or damaged parts: If you find any parts missing or damaged upon unpacking, please contact TOOLPORT customer service for assistance.
8. Specifications
| Model Number | FLEX Light |
| Dimensions (L x W x H) | 300 cm x 200 cm x 200 cm (approx. 9.84 ft x 6.56 ft x 6.56 ft) |
| Weight | 35.5 kg |
| Frame Material | Galvanized Steel |
| Frame Tube Diameter | Approx. 38 mm - 42 mm |
| Tarpaulin Material | PE 350 N Polyethylene |
| Color | White |
| Waterproof | 100% Waterproof |
| UV Protection | UV 20+ |
| Temperature Resistance | From +50°C to -20°C |

Figure 8.1: Gazebo dimensions diagram.
9. Warranty and Support
This product is subject to a 30-day return policy for refund or replacement. For any inquiries regarding missing parts, damaged components, or general product support, please contact TOOLPORT customer service. Refer to your purchase documentation for specific contact details.


