

1. Introduction
This manual provides essential information for the safe and efficient operation, maintenance, and troubleshooting of your Stanley HY227/10/50V Air Compressor. This compact electric compressor is designed for domestic use, offering a 2 HP motor and a 50-liter tank. It is suitable for various applications including inflation, painting, and spraying. Its ergonomic handle and wheels ensure easy portability.
Please read this manual thoroughly before operating the compressor and keep it for future reference.
2. Safety Instructions
Always observe basic safety precautions to reduce the risk of fire, electric shock, and personal injury.
- Electrical Safety: Ensure the power supply matches the compressor's voltage. Use a grounded outlet and avoid using extension cords unless absolutely necessary and rated for the compressor's power.
- Personal Protective Equipment (PPE): Always wear safety glasses or goggles to protect against airborne particles. Hearing protection is recommended due to noise levels.
- Ventilation: Operate the compressor in a well-ventilated area to prevent overheating and ensure proper air intake.
- Pressure Safety: Never exceed the maximum operating pressure of the compressor or the accessory being used. Do not tamper with safety valves.
- Stability: Ensure the compressor is placed on a stable, level surface to prevent tipping during operation.
- Maintenance: Disconnect the compressor from the power source and release all air pressure before performing any maintenance or adjustments.
- Children and Bystanders: Keep children and bystanders away from the operating compressor.
- Flammable Materials: Do not operate the compressor near flammable liquids, gases, or dust.
3. Package Contents
Upon unpacking, verify that all components are present and undamaged. The package should contain:
- Stanley HY227/10/50V Air Compressor Unit
- Wheels (for assembly)
- Ergonomic Handle (for assembly)
- Air Filter
- User Manual (this document)
- Any additional accessories or fittings (check packaging for specifics)
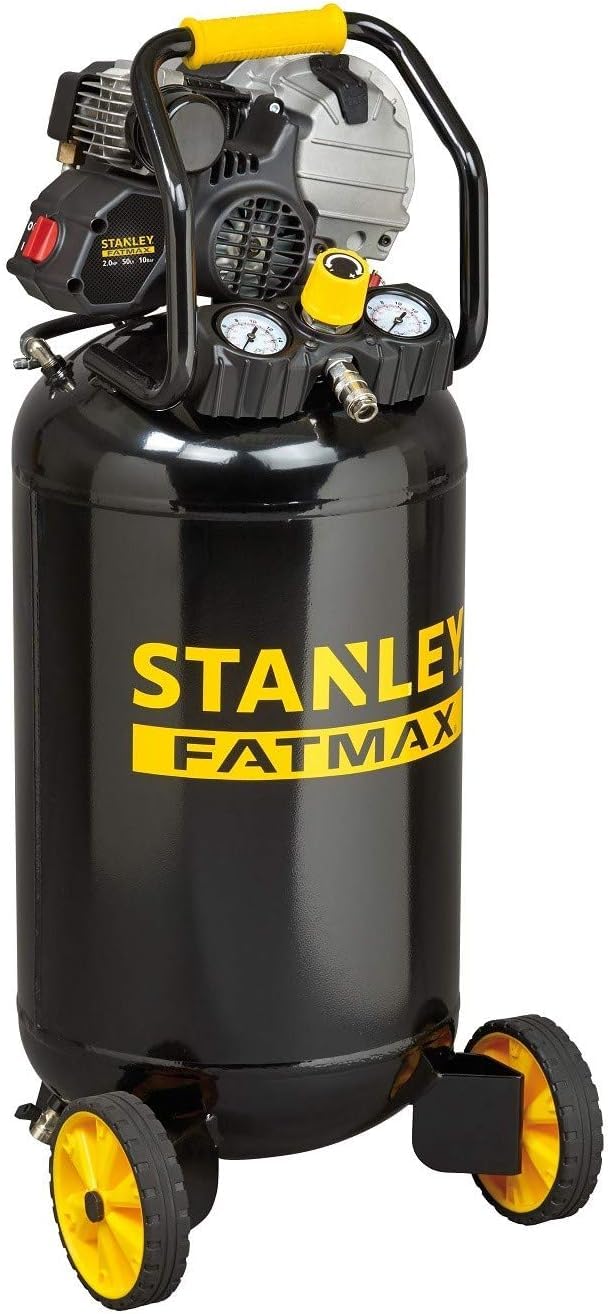
Figure 3.1: Overview of the Stanley HY227/10/50V Air Compressor. This image shows the main compressor unit with its black tank, yellow Stanley Fatmax branding, pressure gauges, and wheels.
4. Setup
Follow these steps to prepare your compressor for first use:
- Attach Wheels: Securely attach the wheels to the compressor base using the provided hardware. Ensure they are firmly in place for stability and mobility.
- Install Handle: Mount the ergonomic handle to the designated points on the compressor. This handle aids in moving the unit.
- Install Air Filter: Screw the air filter into the air intake port. This protects the pump from dust and debris.
- Check Oil Level: This compressor is likely oil-lubricated. Before first use, check the oil level using the dipstick or sight glass. If low, fill with appropriate compressor oil to the recommended level. Note: Some units may arrive with oil already in the pump, but it's crucial to verify. If oil has leaked during transit, clean thoroughly and refill.
- Positioning: Place the compressor on a firm, level surface in a well-ventilated area, away from walls or obstructions to allow for proper airflow around the motor.
- Electrical Connection: Connect the compressor to a suitable grounded electrical outlet. Ensure the circuit can handle the compressor's power requirements.

Figure 4.1: Close-up view of the compressor's control panel, showing the pressure gauges and regulator.
5. Operating Instructions
- Initial Start-up: With the air outlet valve closed and no tools connected, turn on the compressor. Allow it to build pressure until it reaches its maximum operating pressure (10 bar) and the motor automatically shuts off. This process may take several minutes for the 50-liter tank.
- Check for Leaks: After the tank is fully pressurized, turn off the compressor and observe the pressure gauges. A slight pressure drop over time is normal, but a rapid drop indicates a leak. Check all connections and fittings, tightening them if necessary. Soapy water can be used to identify leaks.
- Connecting Air Tools: Attach your desired air tool or accessory to the quick-connect coupler. Ensure the connection is secure.
- Adjusting Output Pressure: Use the pressure regulator knob to set the desired output pressure for your tool. Monitor the regulated pressure gauge.
- Operation: Turn on the compressor. When the tank pressure drops below a certain threshold, the motor will automatically restart to replenish the air supply.
- Shutting Down: When finished, turn off the compressor. Disconnect the air tool. Slowly open the drain valve or use an air gun to release all remaining air pressure from the tank. This is crucial for safety and to prevent moisture buildup.
6. Maintenance
Regular maintenance ensures the longevity and safe operation of your compressor. Always disconnect power and release tank pressure before maintenance.
- Drain Condensation (Daily/After Each Use): Open the drain valve located at the bottom of the air tank to release accumulated moisture. This prevents rust and corrosion inside the tank.
- Check Oil Level (Before Each Use): For oil-lubricated models, regularly check the oil level and top up if necessary with recommended compressor oil. Refer to the oil sight glass or dipstick.
- Change Oil (Periodically): Replace the compressor oil according to the manufacturer's recommendations (typically every 50-100 operating hours or annually).
- Clean/Replace Air Filter (Monthly/As Needed): Inspect the air filter for dirt and debris. Clean it if possible or replace it if heavily soiled to ensure proper air intake and prevent pump damage.
- Inspect Hoses and Fittings (Regularly): Check all air hoses, connections, and fittings for wear, damage, or leaks. Replace damaged components immediately.
- Clean Exterior: Keep the exterior of the compressor clean and free of dust and debris to ensure proper cooling.
7. Troubleshooting
Refer to this section for common issues and their solutions.
| Problem | Possible Cause | Solution |
|---|---|---|
| Compressor does not start. | No power, tripped circuit breaker, faulty switch. | Check power connection, reset breaker, inspect switch. |
| Compressor runs continuously or cycles frequently. | Air leak in system, faulty pressure switch, excessive air demand. | Check all connections for leaks (use soapy water), consult service for pressure switch, reduce air tool usage. |
| Pressure builds slowly or not to maximum. | Air leak, clogged air filter, worn pump components. | Check for leaks, clean/replace air filter, consult service for pump inspection. |
| Excessive noise or vibration. | Loose components, worn bearings, insufficient oil. | Tighten all fasteners, check oil level, consult service for internal issues. |
| Motor overheats and shuts off. | Poor ventilation, prolonged heavy use, low oil level. | Ensure adequate ventilation, allow cool-down periods, check oil level. |
8. Specifications

Figure 8.1: Dimensions of the Stanley HY227/10/50V Air Compressor, showing approximate measurements of 50cm (Length) x 28cm (Width) x 50cm (Height).
| Feature | Detail |
|---|---|
| Brand | STANLEY |
| Model Number | HY227/10/50V |
| Part Number | 2017208 |
| Voltage | 50 Volts |
| Power Source | Corded Electric |
| Maximum Power | 2 Horsepower (HP) |
| Tank Volume | 50 Liters |
| Maximum Operating Pressure | 10 Bars |
| Air Flow | 222 Liters per minute |
| Noise Level | 20 Decibels (Note: User reviews suggest actual noise levels may be higher.) |
| Item Weight | 24 Kilograms |
| Item Dimensions (L x W x H) | 50 cm x 28 cm x 50 cm |
| Material Type | Alloy Steel |
| Color | Black |
| Special Feature | Ergonomic handle |
| Recommended Uses | Tire inflation, Painting, Spraying |
9. Warranty and Support
For warranty information, technical support, or to purchase replacement parts, please refer to the warranty card included with your product or visit the official STANLEY website. You may also contact your retailer for assistance.
Online Resources:


