Introduction
This manual provides instructions for the safe and efficient assembly, operation, and maintenance of your TOOLPORT FLEX Light Marquee Garden Tent. This PE party tent features a quick click system for easy setup, is 100% waterproof, and designed for transportability. Please read all instructions carefully before beginning assembly or use.
Safety Instructions
- Ensure all components are present and undamaged before assembly.
- Assemble the tent on a level, stable surface.
- Securely anchor the tent using all provided pegs and guy ropes to prevent movement in windy conditions.
- Do not use the tent near open flames or heat sources.
- In severe weather conditions (strong winds, heavy snow, thunderstorms), disassemble the tent to prevent damage or injury.
- Keep children and pets away from the assembly area.
- Regularly inspect the tent for wear and tear, especially the tarpaulin and frame connections.
Package Contents
Verify that all the following components are included in your package:
- Galvanized Steel Frame components (poles and connectors)
- Roof Tarpaulin (approx. 180 g/m² PE material)
- Side Panels
- Gable End Panels (with entrances)
- Foot Plates
- Guy Ropes (3m long)
- Pegs
- Assembly Instructions (this manual)
Setup and Assembly
The TOOLPORT FLEX Light Marquee Garden Tent features a click system for straightforward assembly. It is recommended that at least two people assemble the tent.
1. Prepare the Area
Choose a flat, clear area for assembly. Ensure sufficient space for the tent's dimensions (6m x 4m, 24 square meters floor area).
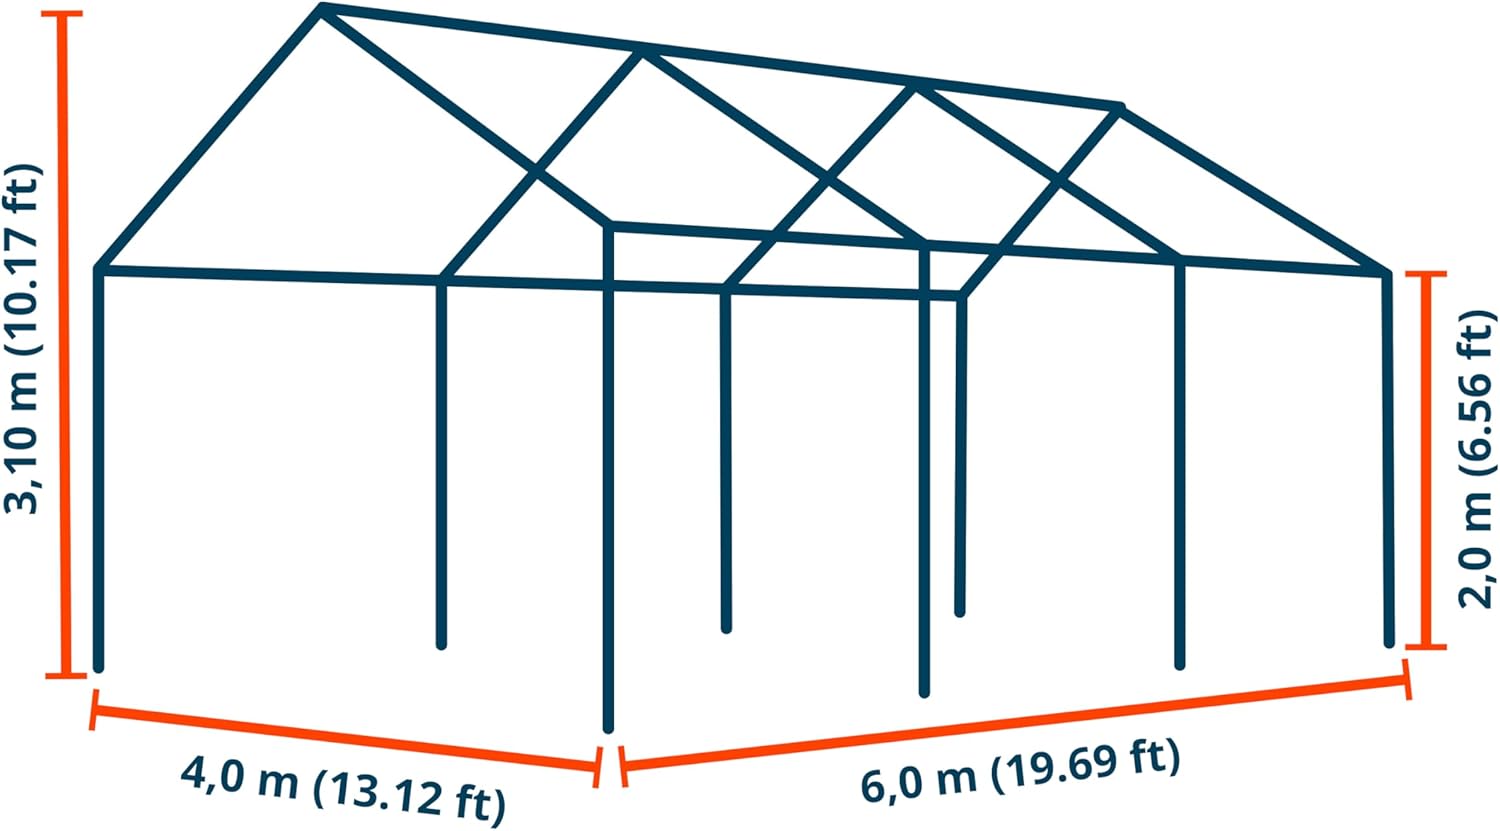
Figure 1: Tent Dimensions. The tent measures 6 meters in length, 4 meters in width, with an eave height of 2 meters and a peak height of 3.1 meters.
2. Assemble the Frame
Connect the galvanized steel poles using the click system. The poles have a diameter of approximately 38mm, and the connectors are approximately 42mm. Ensure each connection clicks securely into place.

Figure 2: Steel Pole Click System. Poles connect easily and securely without tools.
Attach the foot plates to the bottom of each leg pole. These plates provide stability and a point for anchoring.
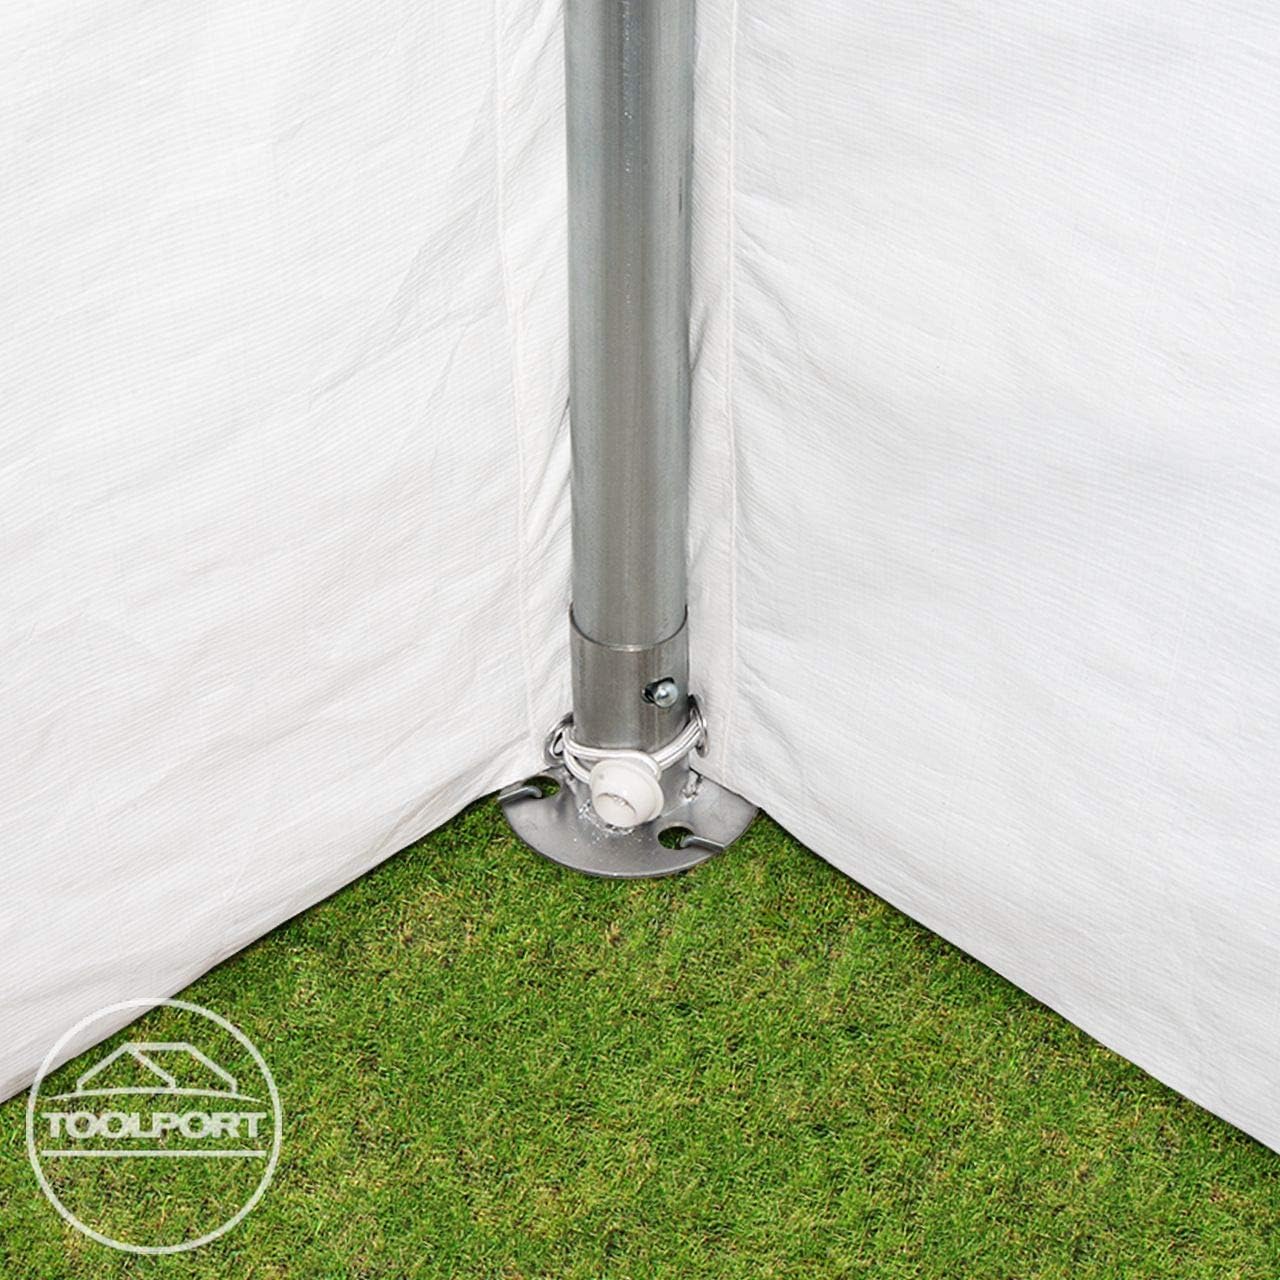
Figure 3: Foot Plate. Each leg is equipped with a foot plate for secure ground contact.
3. Attach the Tarpaulin and Side Panels
Drape the roof tarpaulin over the assembled frame. Ensure it is centered and evenly distributed. The tarpaulin is made from approximately 180 g/m² PE material and is 100% waterproof.
Attach the full-length side panels and gable end panels to the frame. Use the provided fasteners (e.g., elastic loops, ties) to secure them firmly to the frame poles. The side panels are designed for quick installation.
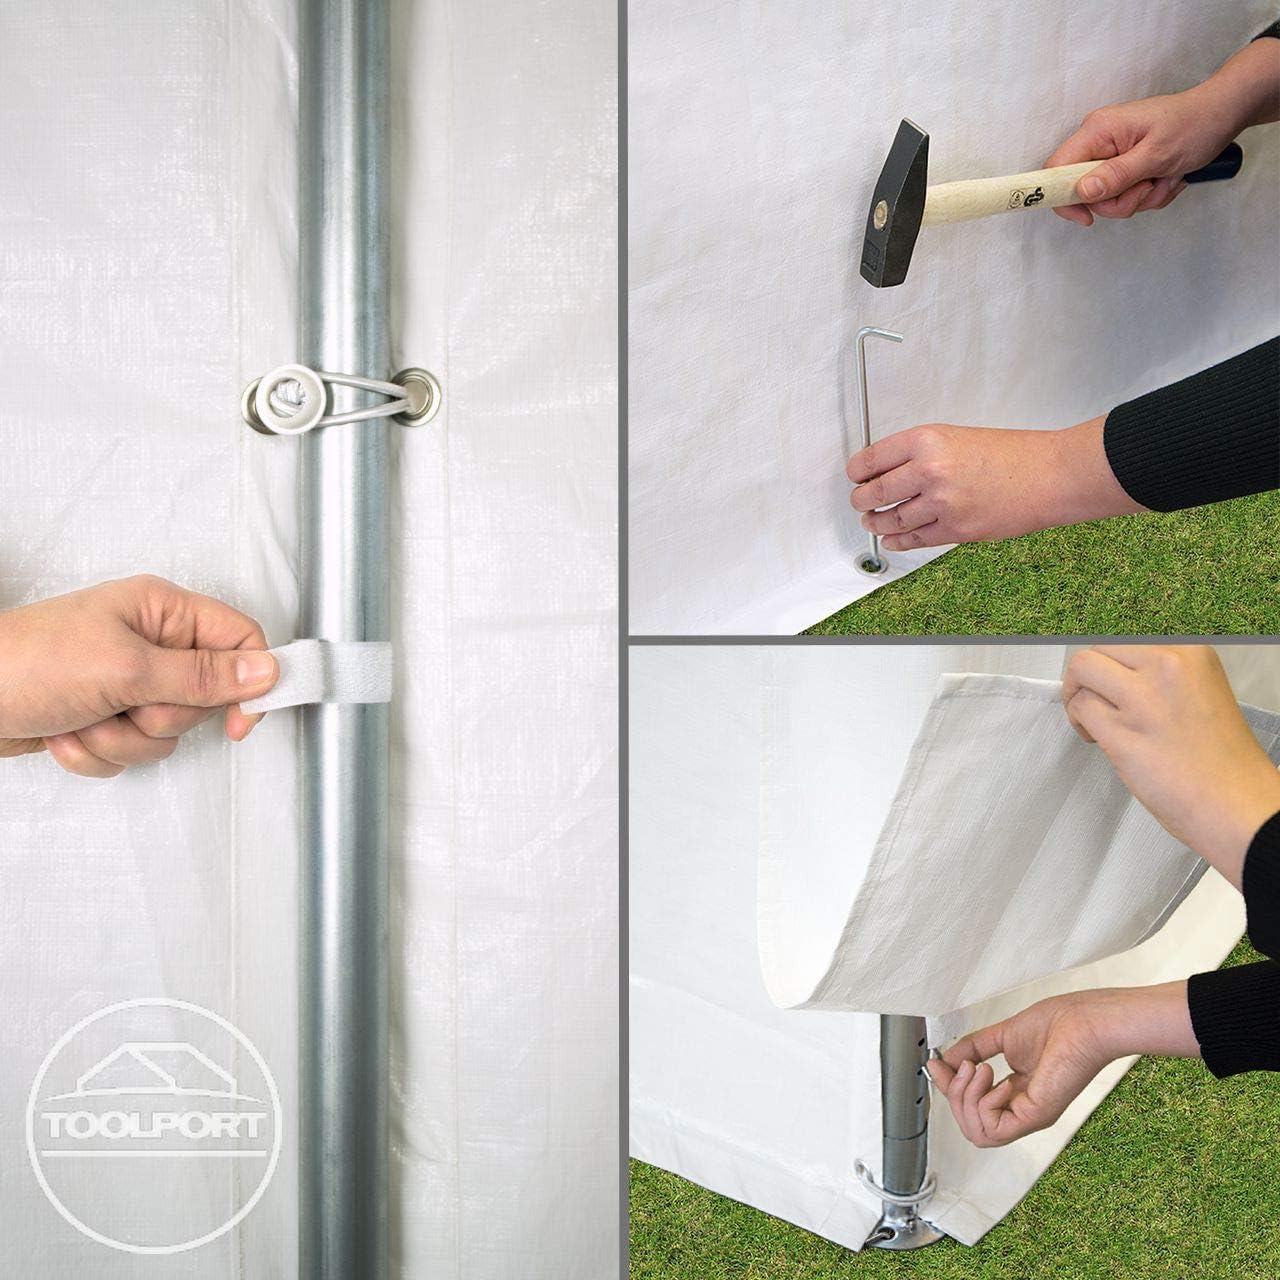
Figure 4: Securing Tarpaulin and Panels. Panels are secured to the frame, and pegs are used for ground anchoring.
4. Anchor the Tent
Once the frame and tarpaulin are in place, use the provided pegs and 3-meter long guy ropes to anchor the tent securely to the ground. Attach guy ropes to the corners of the roof canopy and secure them with pegs. Ensure all foot plates are also pegged down.

Figure 5: Fully Assembled Tent. The tent is ready for use after all components are secured.
Operating Instructions
Ventilation
The tent includes gable end panels with entrances, which can be opened or closed to provide ventilation or protection from elements. Adjust as needed for comfort and air circulation.
Weather Considerations
This tent is designed for short-term use and offers protection from sun and rain. While the tarpaulin is 100% waterproof and UV resistant, it is not intended for use in extreme weather conditions such as heavy winds, snow loads, or severe thunderstorms. Disassemble the tent if such conditions are anticipated.
Maintenance
Cleaning
Clean the tarpaulin with mild soap and water. Do not use harsh chemicals or abrasive cleaners, as these can damage the PE material. Rinse thoroughly and allow to air dry completely before storage.
Storage
Before storing, ensure all components are clean and completely dry to prevent mold and mildew. Disassemble the tent carefully, following the reverse of the assembly steps. Store the frame and tarpaulin in a dry, cool place, away from direct sunlight and pests.
Inspection
Periodically inspect the steel frame for any signs of rust or damage. Check the tarpaulin for tears, punctures, or weakened seams. Address any issues promptly to ensure the longevity and safety of the tent.
Troubleshooting
| Problem | Possible Cause | Solution |
|---|---|---|
| Tent is unstable or sways | Insufficient anchoring; uneven ground; loose frame connections. | Ensure all pegs and guy ropes are securely fastened. Verify all frame connections are clicked into place. Move to a level surface if possible. |
| Water leakage | Tarpaulin not properly tensioned; damage to tarpaulin; seams compromised. | Check tarpaulin tension and adjust. Inspect for tears and repair if necessary. All seams are high-temperature welded for waterproofing, but inspect for any damage. |
| Difficulty connecting poles | Misalignment; debris in connection points. | Ensure poles are aligned correctly. Clear any dirt or debris from the click system mechanism. Apply slight pressure and twist gently. |
Specifications
- Model: FLEX Light
- Brand: TOOLPORT
- Product Dimensions (L x W x H): 600 x 400 x 200 cm (approx. 19.69 x 13.12 x 6.56 ft)
- Floor Area: 24 Square Meters
- Item Weight: 52.6 kg (52600 Grams)
- Frame Material: Fully Galvanized Alloy Steel (Poles: approx. 38mm Ø, Connectors: approx. 42mm Ø)
- Tarpaulin Material: approx. 180 g/m² PE material
- Color: White
- Water Resistance Level: Waterproof
- UV Protection: True
- Recommended Uses: Outdoor Activities, Party
Warranty and Support
For warranty information or technical support, please contact TOOLPORT customer service. Refer to your purchase documentation for specific warranty terms and contact details. Keep your proof of purchase for any warranty claims.
For further assistance, visit the official TOOLPORT website or contact your retailer.


