
PrimeCables Cab-WMC10-2
PrimeCables 9U Wall Mount Server Rack Cabinet Instruction Manual
Model: Cab-WMC10-2
1. Introduction
This manual provides detailed instructions for the assembly, installation, operation, and maintenance of your PrimeCables 9U Wall Mount Server Rack Cabinet. Please read this manual thoroughly before beginning installation to ensure proper setup and safe operation. This cabinet is designed to securely house 19-inch standard network equipment, servers, and related accessories in home or office environments.
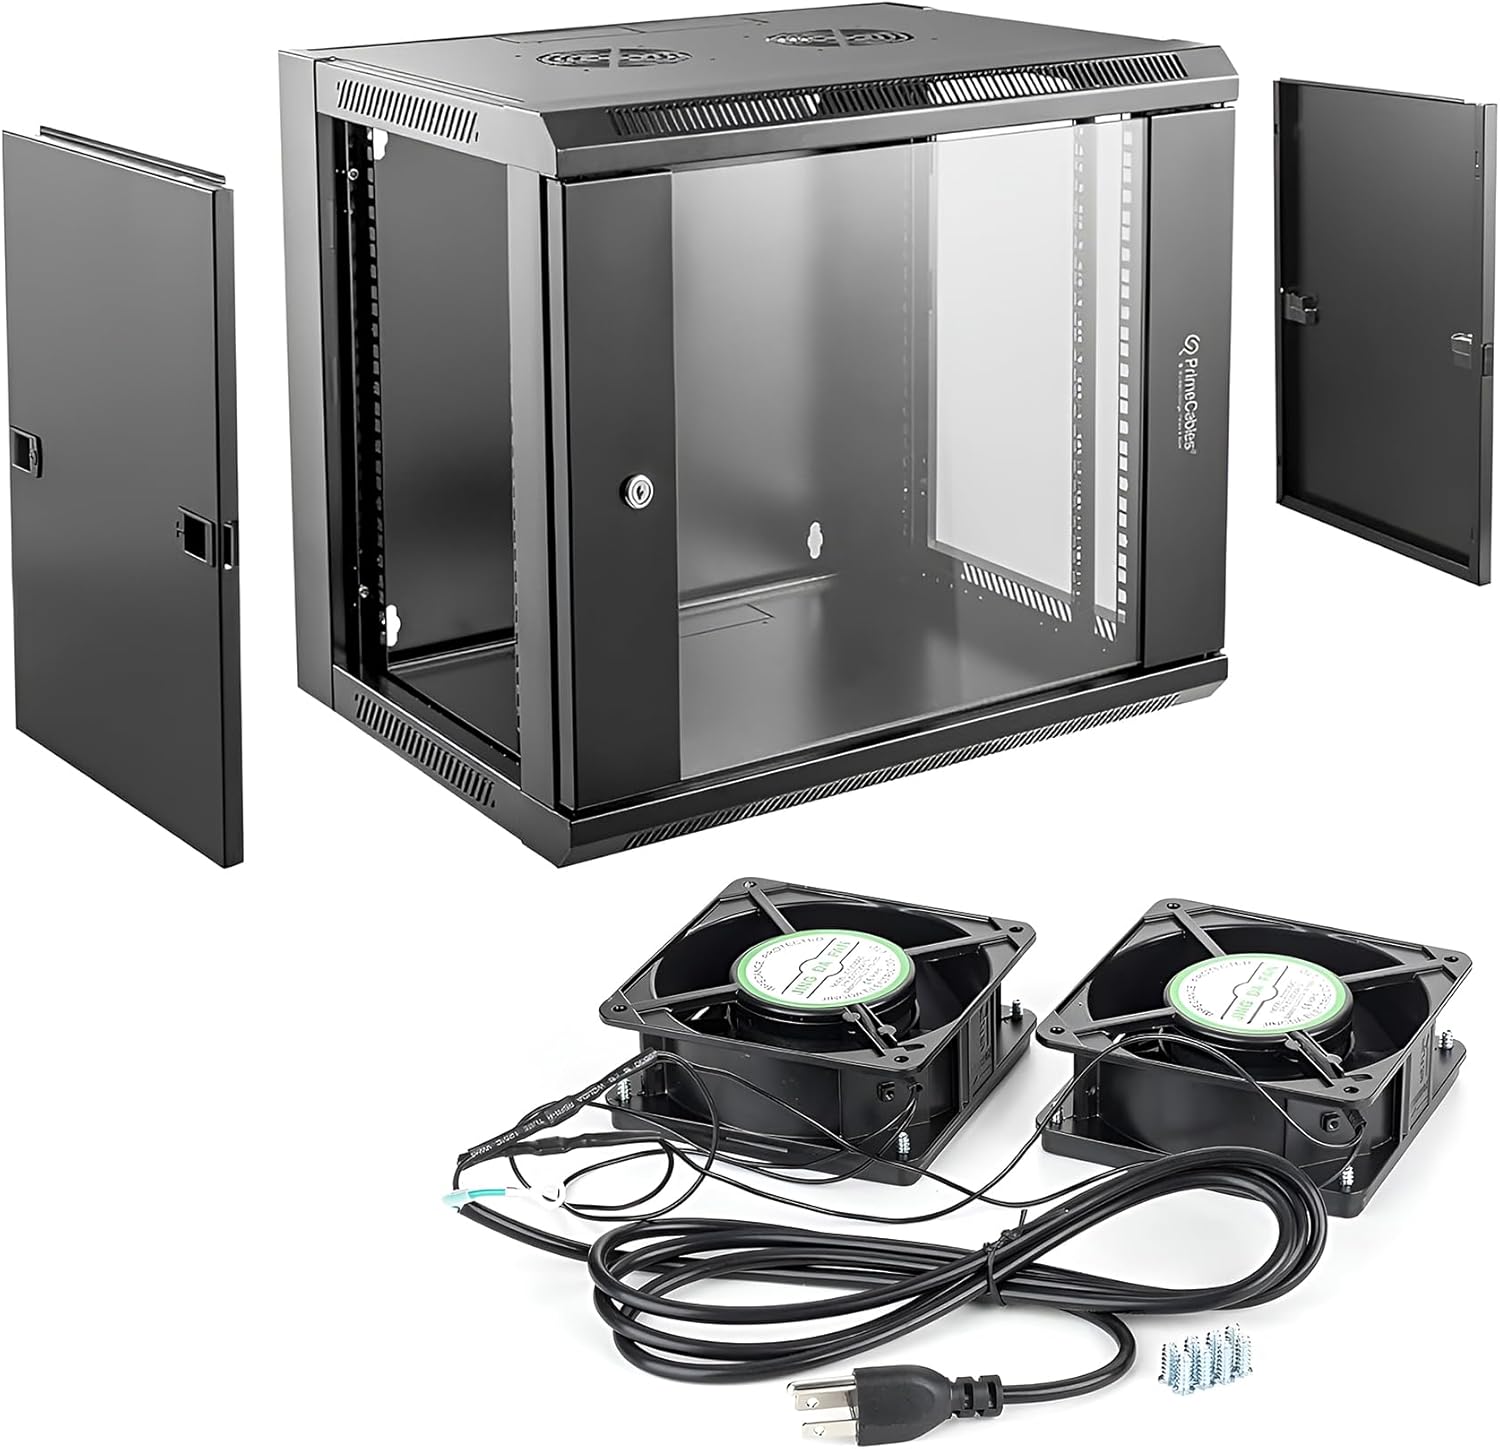
Figure 1.1: PrimeCables 9U Wall Mount Server Rack Cabinet components.
2. Safety Information
- Heavy Item: The server rack cabinet is heavy. Always seek assistance when lifting or mounting the cabinet to prevent injury.
- Mounting Surface: Ensure the wall or mounting surface can safely support the combined weight of the cabinet and all installed equipment. Consult a professional if unsure.
- Ventilation: Do not obstruct the ventilation openings. Proper airflow is crucial for cooling the equipment inside the cabinet.
- Electrical Safety: When connecting the AC fans, ensure power is off and follow all local electrical codes. Do not overload power strips or circuits within the cabinet.
- Secure Equipment: Always secure equipment properly to the mounting rails to prevent accidental dislodgement.
3. Package Contents
Verify that all components are present and undamaged before proceeding with assembly. If any parts are missing or damaged, contact PrimeCables customer support.
- 9U Wall Mount Server Rack Cabinet Frame
- Lockable Tempered Glass Front Door
- Removable Side Panels (2)
- Adjustable Mounting Rails (Set)
- Dual AC Cooling Fans (2) with power cable
- Mounting Hardware (screws, cage nuts, keys for lock)
- User Manual (this document)
4. Setup
4.1. Unpacking and Initial Inspection
Carefully remove all components from the packaging. Inspect each part for any signs of damage during transit. Keep all packaging materials until the cabinet is fully assembled and installed.
4.2. Cabinet Assembly
The PrimeCables 9U cabinet typically comes partially assembled. Follow the included assembly diagrams to connect the main frame components, ensuring all screws are tightened securely. The quick-release hinges on the door allow for easy installation or removal of the front door during assembly or maintenance.

Figure 4.1: Detail of the quick-release hinge.
4.3. Installing Adjustable Mounting Rails and Shelves
The cabinet features adjustable 19-inch mounting rails to accommodate various equipment depths. Install the rails into the desired positions using the provided hardware. The rails can be adjusted from 105mm to 357mm in depth. If using an adjustable shelf (sold separately or included), install it onto the rails at the desired height.

Figure 4.2: Adjustable internal mounting rails.
4.4. Wall Mounting the Cabinet
Before mounting, determine the optimal location, considering cable routing, ventilation, and accessibility. Use the provided cardboard template (if included) or measure carefully to mark the drilling points on the wall. Drill pilot holes and secure the cabinet to the wall using appropriate wall anchors and screws (not always included, depending on wall type). Ensure the cabinet is level and securely fastened before installing any equipment.
4.5. Installing Cooling Fans
The cabinet includes two AC cooling fans designed to be mounted on the top panel. Secure the fans to the designated cutouts using the provided screws. Connect the fan power cable to a suitable power source. Ensure the fans are oriented to draw hot air out of the cabinet for optimal cooling.

Figure 4.3: Top panel with fan mounts and ventilation.
5. Operating
5.1. Accessing the Cabinet
The front door is made of tempered glass and is lockable for security. Use the provided keys to open and close the door. The door can be reversed to open from either the left or right side. Side panels are removable for easy access to the interior during installation or maintenance.
5.2. Equipment Installation and Cable Management
Install your 19-inch rack-mountable equipment (servers, switches, patch panels, etc.) onto the adjustable rails using cage nuts and screws. Plan your cable routing carefully to ensure proper airflow and ease of future maintenance. Utilize cable management accessories (not included) if needed to keep cables organized.

Figure 5.1: Example of equipment installed in the server rack.
5.3. Cooling System Operation
The dual AC fans provide active cooling to dissipate heat generated by the equipment. Ensure the fans are powered on when equipment is operating, especially under heavy load, to maintain optimal temperatures and prevent overheating. The quiet operation of the fans makes this cabinet suitable for home and office environments.
6. Maintenance
- Cleaning: Regularly clean the exterior of the cabinet with a soft, damp cloth. For the glass door, use a standard glass cleaner. Avoid abrasive cleaners.
- Fan Inspection: Periodically check the cooling fans for dust buildup. Clean the fan blades and grilles as needed to ensure efficient airflow.
- Hardware Check: Every few months, inspect all screws and mounting hardware to ensure they remain tight and secure.
- Cable Management: Review cable routing periodically to ensure no cables are obstructing airflow or causing undue strain on connectors.
7. Troubleshooting
- Overheating Equipment:
- Ensure both AC fans are operating correctly and are not obstructed.
- Verify that the cabinet's ventilation openings are clear.
- Check that equipment within the cabinet is not blocking airflow.
- Consider reducing the load on equipment or adding additional cooling if necessary. - Door/Lock Issues:
- If the door does not close or lock properly, check for any obstructions.
- Ensure the hinges are properly aligned and tightened.
- Apply a small amount of lubricant to the lock mechanism if it feels stiff. - Cabinet Instability:
- Re-check all wall mounting points to ensure they are securely fastened.
- Verify that the wall surface is adequate to support the weight.
- Ensure equipment inside is evenly distributed and properly secured.
8. Specifications
Detailed technical specifications for the PrimeCables 9U Wall Mount Server Rack Cabinet:
| Feature | Specification |
|---|---|
| Brand | PrimeCables |
| Model | Cab-WMC10-2 |
| Size | 9U |
| Material | Cold Rolled Low Carbon Steel |
| Product Dimensions (L x W x H) | 45 x 50 x 60 cm (17.7 x 19.7 x 23.6 inches) |
| Item Weight | 13.86 kg (30.56 lbs) |
| Mounting Type | Wall Mount |
| Compatible Devices | Network cable, Server (19-inch standard equipment) |
| Cooling System | Dual AC Fans (included) |
| Front Door | Lockable Tempered Glass Door, Reversible |
| Side Panels | Removable |
| Adjustable Rail Depth | 105-357mm (4.1-14.1 inches) |
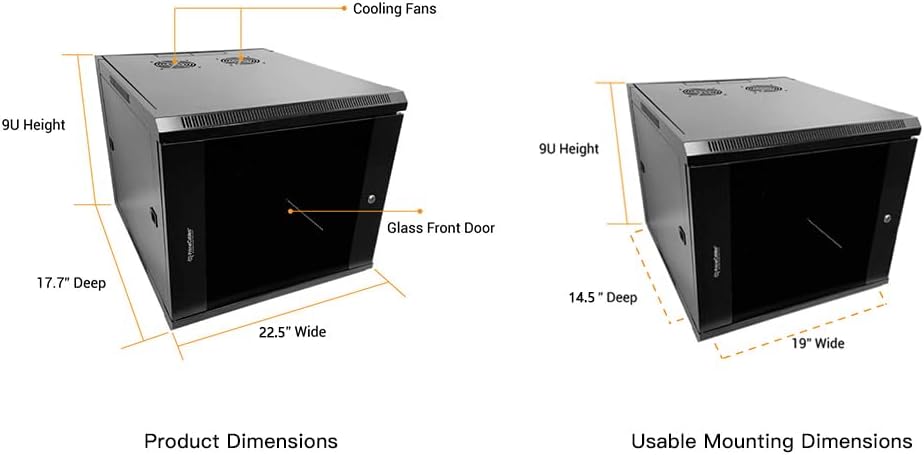
Figure 8.1: Product Dimensions.
9. Warranty and Support
For warranty information, technical support, or to inquire about replacement parts, please refer to the PrimeCables official website or contact their customer service directly. Keep your purchase receipt as proof of purchase for any warranty claims.
Ask a question about this manual
Ask about setup, troubleshooting, compatibility, parts, safety, or missing instructions. Manuals+ will review the question and use this page’s manual context to help answer it.