
1. Introduction
This manual provides essential information for the proper installation, function, and maintenance of the Mevotech Trailing Arm, model CMS801197. Please read these instructions carefully before proceeding with installation or use to ensure safety and optimal performance.
2. Safety Information
Warning:
Automotive repair can be dangerous. Always follow proper safety procedures and use appropriate tools. Failure to do so may result in serious injury or damage to the vehicle.
- Always wear appropriate personal protective equipment, including safety glasses and gloves.
- Ensure the vehicle is securely supported on jack stands on a level surface before working underneath it. Never rely solely on a jack.
- Disconnect the vehicle's battery before performing any electrical work.
- Refer to your vehicle's service manual for specific torque specifications and procedures.
- If you are unsure about any step, consult a qualified automotive technician.
3. Package Contents
Verify that all components are present and undamaged before beginning installation.
- 1 x Mevotech Trailing Arm (CMS801197)
- Additional hardware may be included depending on the specific application.
4. Installation Instructions
Professional installation is highly recommended for this component. The following steps are general guidelines and may not cover all vehicle-specific procedures. Always consult your vehicle's service manual for detailed instructions.
4.1 Tools and Materials Required (Typical)
- Vehicle jack and jack stands
- Wheel chocks
- Socket wrench set
- Torque wrench
- Pry bar (if needed)
- Penetrating oil
- Wire brush
4.2 Removal of Old Trailing Arm
- Safely lift and support the vehicle. Remove the wheel(s) as necessary to access the trailing arm.
- Locate the trailing arm. It typically connects the vehicle's chassis to the rear axle or suspension knuckle.
- Carefully loosen and remove the mounting bolts securing the trailing arm to both the chassis and the suspension component. Note the orientation of all components.
- Remove the old trailing arm.
4.3 Installation of New Trailing Arm
- Position the new Mevotech Trailing Arm (CMS801197) into place.
- Align the mounting holes and insert the bolts. Do not fully tighten at this stage.
- Once both ends are loosely bolted, lower the vehicle until the suspension is at its normal ride height (or as specified by the vehicle manufacturer). This is crucial for proper bushing alignment and longevity.
- Tighten all mounting bolts to the vehicle manufacturer's specified torque settings using a torque wrench.
- Reinstall any removed components (e.g., wheels).
- Lower the vehicle completely.
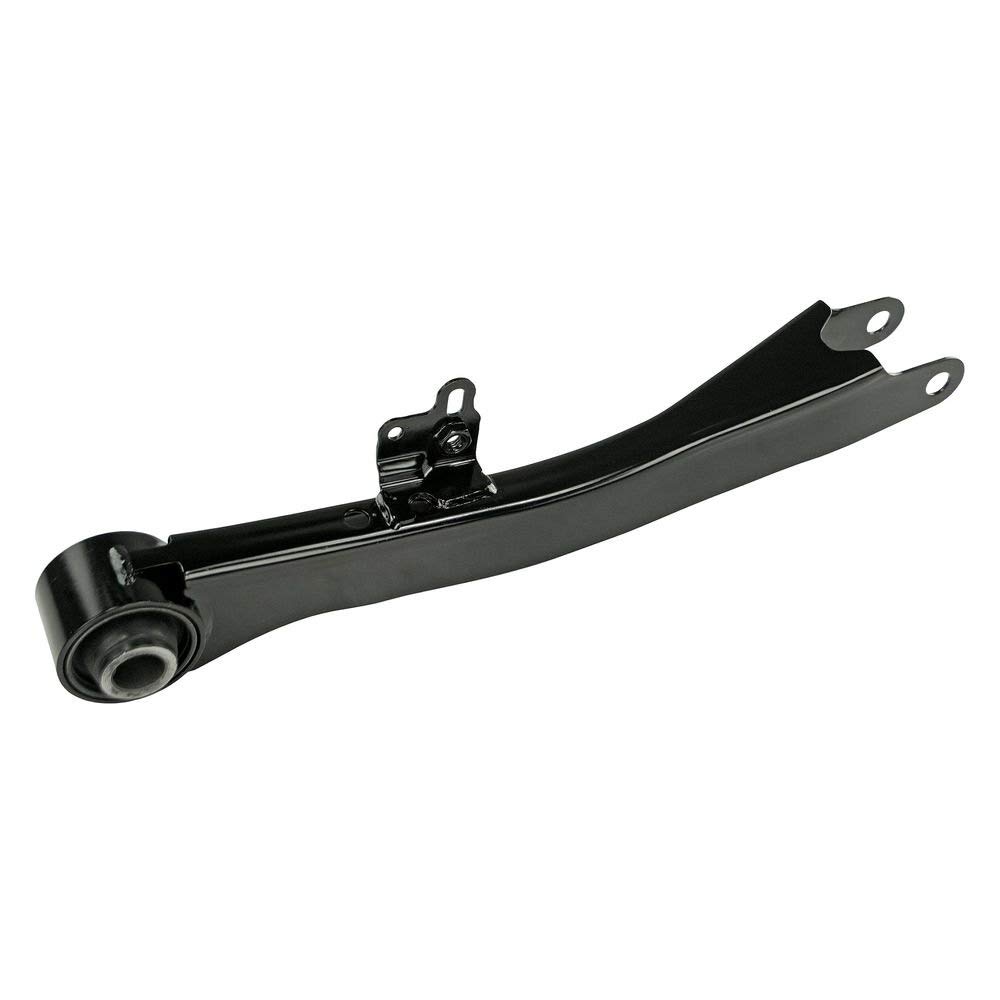
Figure 1: Mevotech Trailing Arm CMS801197. This image shows the complete trailing arm component, typically connecting the vehicle chassis to the rear suspension.

Figure 2: Detailed view of the Mevotech Trailing Arm CMS801197. This image provides a closer look at the arm's construction and bushing.
5. Function of a Trailing Arm
A trailing arm is a component of a vehicle's suspension system, typically found in the rear. Its primary function is to control the fore-and-aft movement of the wheel, maintaining proper wheel alignment and stability during acceleration, braking, and cornering. It pivots from a single point on the chassis, allowing the wheel to move up and down while restricting its longitudinal motion.
6. Maintenance
Regular inspection of suspension components is crucial for vehicle safety and performance. While the Mevotech Trailing Arm is designed for durability, periodic checks can help identify potential issues early.
- Visual Inspection: Periodically inspect the trailing arm for signs of damage, bending, or corrosion.
- Bushing Check: Examine the rubber bushings at the pivot points for cracks, tears, or excessive wear. Worn bushings can lead to clunking noises, poor handling, and premature tire wear.
- Fastener Torque: Ensure all mounting bolts remain tight to the manufacturer's specifications.
- Alignment: After any suspension component replacement, it is recommended to have a professional wheel alignment performed to ensure correct vehicle geometry.
7. Troubleshooting Common Issues
| Symptom | Possible Cause | Solution |
|---|---|---|
| Clunking or knocking noise from the rear suspension | Worn or damaged trailing arm bushings; loose mounting bolts. | Inspect bushings for wear. Tighten mounting bolts to specification. Replace trailing arm if bushings are integral and worn. |
| Poor handling, vehicle wandering, or instability | Excessive play in trailing arm bushings; bent or damaged trailing arm. | Inspect for damage or excessive play. Replace the trailing arm if necessary. Perform a wheel alignment. |
| Uneven tire wear on rear tires | Incorrect wheel alignment due to worn or damaged trailing arm. | Inspect trailing arm and bushings. Replace if damaged. Perform a wheel alignment. |
If these troubleshooting steps do not resolve the issue, it is recommended to seek assistance from a certified automotive technician.
8. Product Specifications
| Attribute | Detail |
|---|---|
| Brand | Mevotech |
| Model | Trailing Arm |
| Item Model Number | CMS801197 |
| Manufacturer Part Number | CMS801197 |
| Item Weight | 2.35 pounds |
| Product Dimensions | 21 x 3.7 x 3.9 inches |
| Exterior Finish | Machined |
| Date First Available | October 2, 2017 |
9. Warranty and Support
For specific warranty information regarding your Mevotech Trailing Arm CMS801197, please refer to the documentation provided with your purchase or visit the official Mevotech website. Warranty terms and conditions may vary.
If you require technical assistance or have questions about this product, please contact Mevotech customer support through their official channels. Ensure you have your product model number (CMS801197) and purchase details available when contacting support.
You can typically find contact information on the Mevotech website: www.mevotech.com