
1. Introduction
This manual provides comprehensive instructions for the safe and efficient operation of your MasterChef 2-Pound Programmable Bread Maker, Model MTF-BRM-764. Please read all instructions carefully before first use and retain this manual for future reference.

Image 1.1: MasterChef Bread Maker, Model MTF-BRM-764, shown with its packaging and a freshly baked, sliced loaf of bread.
2. Important Safety Instructions
When using electrical appliances, basic safety precautions should always be followed to reduce the risk of fire, electric shock, and injury to persons, including the following:
- Read all instructions before operating the bread maker.
- Do not touch hot surfaces. Use handles or knobs.
- To protect against electric shock, do not immerse cord, plugs, or the appliance in water or other liquid.
- Close supervision is necessary when any appliance is used by or near children.
- Unplug from outlet when not in use and before cleaning. Allow to cool before putting on or taking off parts.
- Do not operate any appliance with a damaged cord or plug, or after the appliance malfunctions or has been damaged in any manner.
- The use of accessory attachments not recommended by the appliance manufacturer may cause injuries.
- Do not use outdoors.
- Do not let cord hang over edge of table or counter, or touch hot surfaces.
- Do not place on or near a hot gas or electric burner, or in a heated oven.
- Extreme caution must be used when moving an appliance containing hot oil or other hot liquids.
- To disconnect, turn any control to "off", then remove plug from wall outlet.
- Do not use appliance for other than intended use.
3. Product Overview
The MasterChef Bread Maker is designed for ease of use, featuring 19 programmable settings, a 13-hour delay timer, and a viewing window to monitor the baking process. It can produce 2-pound loaves with adjustable crust settings.

Image 3.1: Key features of the MasterChef Bread Maker, including its 2-pound loaf capacity, 13-hour delay timer, viewing window, keep warm function, included measuring cup and scoop, and 19 programmable settings.
Components:
- Main Unit with Control Panel and LCD Display
- Lid with Viewing Window
- Baking Pan (removable)
- Kneading Paddle
- Measuring Cup
- Measuring Spoon
- Hook for removing kneading paddle

Image 3.2: The MasterChef Bread Maker with its lid open, showing the removable baking pan, measuring cup, measuring spoon, and kneading paddle removal hook.
4. Setup and First Use
- Unpacking: Carefully remove the bread maker and all accessories from the packaging. Retain packaging for future storage or transport.
- Cleaning: Before first use, wash the baking pan and kneading paddle with warm, soapy water. Rinse thoroughly and dry completely. Wipe the interior and exterior of the main unit with a damp cloth. Do not immerse the main unit in water.
- Placement: Place the bread maker on a stable, flat, heat-resistant surface, ensuring adequate ventilation around the appliance.
- Initial Burn-in (Optional): It is recommended to run the "Bake" program (Program 12) for 10 minutes without ingredients to burn off any manufacturing residues. Ensure the area is well-ventilated during this process. Allow the unit to cool completely afterward.
- Power Connection: Plug the power cord into a grounded electrical outlet. The display will illuminate, indicating the unit is ready for use.
5. Operating Instructions
5.1 Basic Operation
- Insert Kneading Paddle: Place the kneading paddle onto the shaft inside the baking pan.
- Add Ingredients: Add ingredients to the baking pan in the order specified by your recipe (typically liquids first, then dry ingredients, with yeast last). Ensure ingredients are measured accurately using the provided measuring cup and spoon.
- Place Baking Pan: Insert the baking pan into the bread maker and turn it clockwise until it locks into place. Close the lid.
- Select Program: Press the "MENU" button repeatedly to cycle through the 19 available programs until your desired program is selected. The program number and corresponding time will appear on the LCD display.
- Select Crust Color: Press the "COLOR" button to choose your preferred crust color: Light, Medium, or Dark.
- Start Baking: Press the "START/STOP" button to begin the selected program. The bread maker will automatically perform kneading, rising, and baking cycles.
- End of Cycle: Once the program is complete, the bread maker will beep and automatically switch to the "Keep Warm" function for up to 60 minutes.
- Remove Bread: Press and hold the "START/STOP" button for 3 seconds to stop the "Keep Warm" function. Unplug the appliance. Using oven mitts, carefully remove the baking pan by turning it counter-clockwise and lifting it out. Invert the pan onto a wire rack to release the bread. If the kneading paddle remains in the bread, use the provided hook to remove it. Allow bread to cool before slicing.
5.2 Program Settings (19 Options)
The MasterChef Bread Maker offers 19 distinct programs for various bread types and other preparations:
- BASIC: For white and mixed breads, mainly using bread flour.
- FRENCH: For light breads made from fine flour.
- WHOLE WHEAT: For breads with a high percentage of whole wheat flour.
- QUICK: For quick bread recipes that do not require a long rise time.
- SWEET: For breads with high sugar content, such as brioche.
- GLUTEN FREE: For gluten-free bread recipes.
- RICE BREAD: For breads incorporating rice flour.
- SANDWICH: For light and fluffy sandwich bread.
- MILK BREAD: For breads enriched with milk.
- KNEAD: For kneading dough only, without baking.
- DOUGH: For preparing dough for rolls, pizza, or pastries.
- BAKE: For baking pre-prepared dough or for additional baking time.
- CAKE: For mixing and baking cakes.
- JAM: For making homemade jams.
- YOGURT: For preparing yogurt.
- STICKY RICE: For preparing sticky rice.
- RICE WINE: For making rice wine.
- DEFROST: For defrosting ingredients.
- STIR-FRY: For stir-frying ingredients (use with caution and appropriate recipes).
5.3 Delay Timer Function
The delay timer allows you to program the bread maker to start baking at a later time, up to 13 hours in advance. This is useful for having fresh bread ready at a specific time.
- Add ingredients to the baking pan.
- Select your desired program and crust color.
- Press the "+" or "-" buttons to adjust the delay time. The displayed time includes the baking program duration. For example, if you want bread in 8 hours and the program takes 3 hours, set the delay to 8:00.
- Press "START/STOP" to activate the delay timer. The timer will count down, and the bread maker will start automatically when the set time is reached.
Caution: Do not use the delay timer with recipes containing highly perishable ingredients like milk, eggs, or fresh fruit, as this may lead to spoilage.
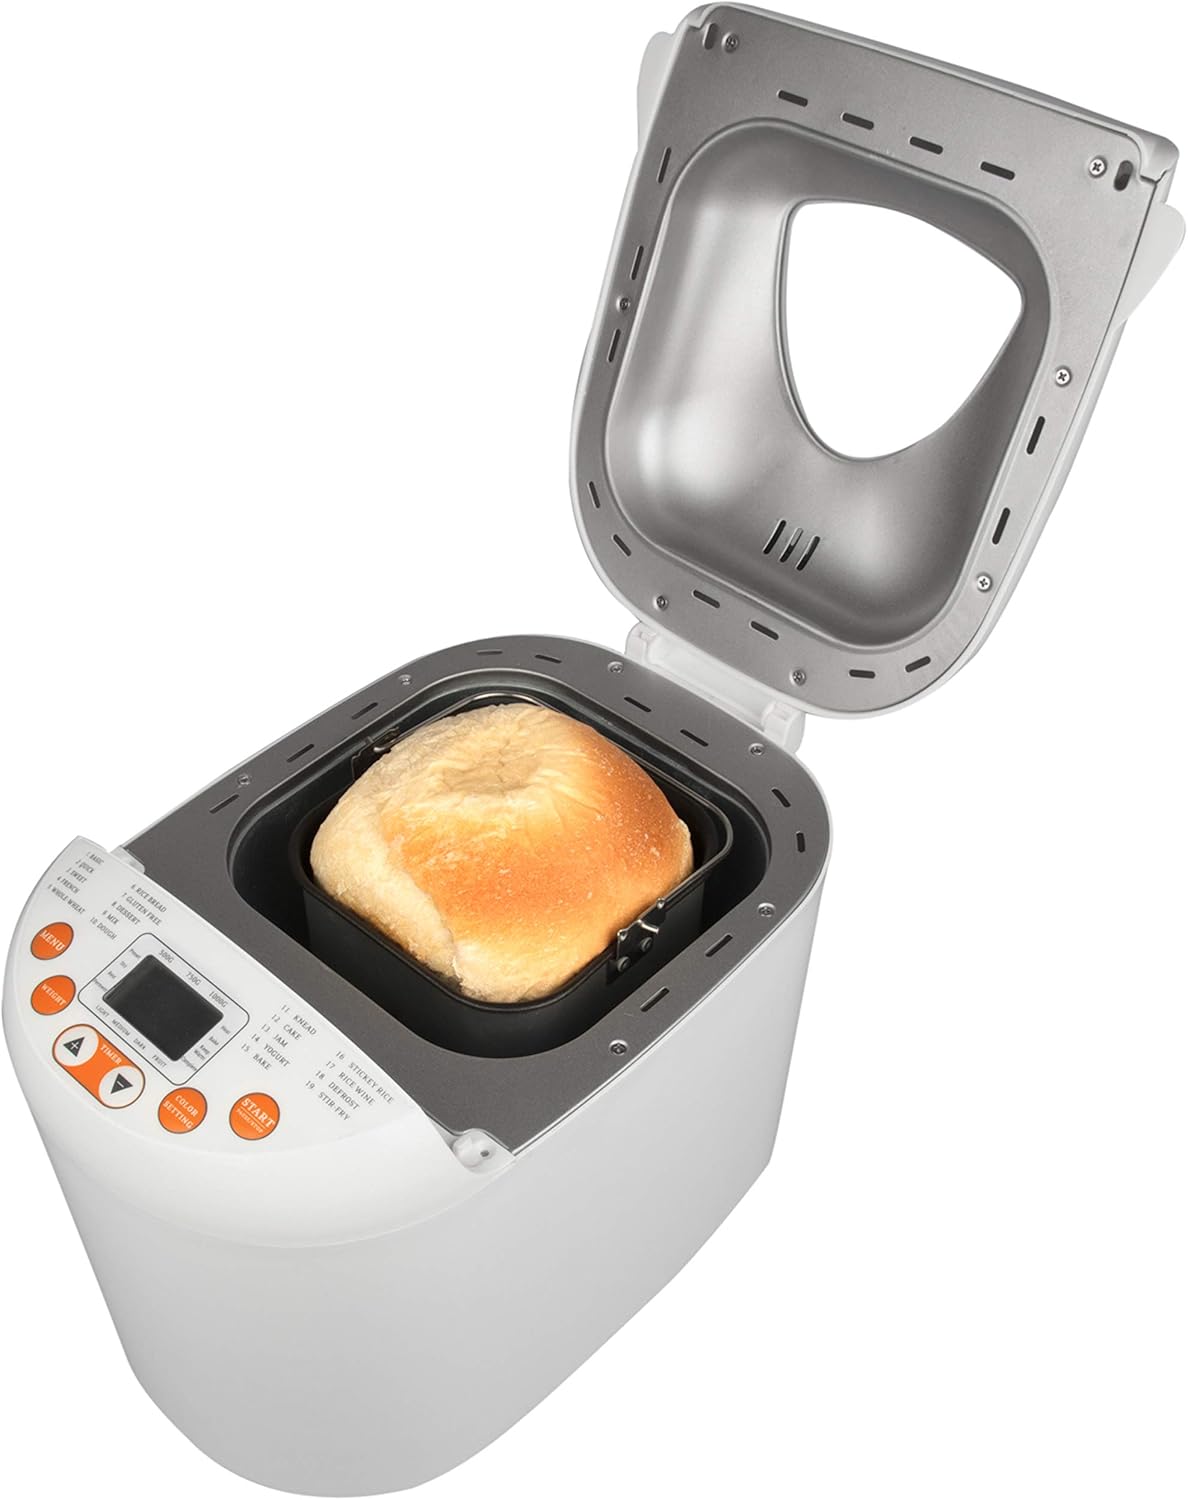
Image 5.1: The MasterChef Bread Maker in operation, with a loaf of bread visible through the viewing window during the baking cycle.
6. Care and Maintenance
6.1 Cleaning
- Always unplug the appliance and allow it to cool completely before cleaning.
- Baking Pan and Kneading Paddle: Wash with warm, soapy water using a soft sponge. Do not use abrasive cleaners or metal scouring pads, as this can damage the non-stick coating. Rinse thoroughly and dry completely.
- Main Unit: Wipe the exterior and interior with a soft, damp cloth. Do not immerse the main unit in water or any other liquid.
- Lid: The lid can be wiped clean with a damp cloth. The viewing window can be cleaned with a mild glass cleaner if necessary.
6.2 Storage
Ensure the bread maker is clean and dry before storing. Store in a cool, dry place. Do not wrap the power cord tightly around the appliance; coil it loosely.
7. Troubleshooting
| Problem | Possible Cause | Solution |
|---|---|---|
| Bread does not rise. | Expired yeast, incorrect water temperature, too much salt, or incorrect program. | Check yeast expiration date. Use lukewarm water (105-115°F / 40-46°C). Ensure salt and yeast are not in direct contact when adding ingredients. Select appropriate program. |
| Bread is too dense. | Too much flour, too little liquid, or incorrect yeast amount. | Measure ingredients precisely. Ensure correct flour-to-liquid ratio. Verify yeast quantity. |
| Bread collapses during baking. | Too much liquid, too much yeast, or high humidity. | Reduce liquid slightly. Reduce yeast slightly. Adjust recipe for high humidity environments. |
| Kneading paddle stuck in bread. | Common occurrence. | Use the provided hook tool to carefully remove the paddle after the bread has cooled slightly. |
| Display shows "HHH" or "LLL". | Internal temperature too high or too low. | Unplug the unit and allow it to cool down or warm up to room temperature before restarting. |
8. Product Specifications
| Feature | Detail |
|---|---|
| Brand | MasterChef |
| Model Number | MTF-BRM-764 |
| Capacity | 2 Pounds |
| Programmable Settings | 19 |
| Delay Timer | Up to 13 Hours |
| Crust Settings | Light, Medium, Dark |
| Voltage | 127 Volts |
| Material | Stainless Steel, Plastic |
| Product Dimensions (L x W x H) | 24.13 x 26.67 x 30.48 cm (approx. 9.5 x 10.5 x 12 inches) |
| Item Weight | 5 Kilograms (approx. 11 lbs) |
| Care Instructions | Wipe with Dry Cloth (for exterior) |

Image 8.1: Visual representation of the MasterChef Bread Maker's dimensions: approximately 12 inches wide, 14 inches high, and 9.5 inches deep.
9. Warranty and Support
For information regarding warranty coverage, product support, or service inquiries, please refer to the warranty card included with your purchase or contact MasterChef customer service directly. Contact details are typically found on the product packaging or the official MasterChef website.