
BETOPPER LM30A
BETOPPER LM30A Spider LED Moving Head Light
User Manual
1. Introduction
Thank you for purchasing the BETOPPER LM30A Spider LED Moving Head Light. This professional stage lighting fixture is designed to create dynamic and vibrant lighting effects for various events, including parties, discos, bars, clubs, and stage performances. Featuring 8 super bright RGBW LEDs and versatile control options, the LM30A delivers an exceptional lighting experience. To ensure safe and optimal performance, please read this manual thoroughly before operation and retain it for future reference.
2. Safety Information
Always observe the following safety precautions to prevent electric shock, fire, or injury:
- Power Supply: Ensure the power supply voltage matches the specifications (240V AC, 45W). Disconnect from power before cleaning or servicing.
- Ventilation: Do not block ventilation openings. Ensure adequate airflow around the unit to prevent overheating.
- Moisture: Do not expose the unit to rain or moisture. Do not use in damp or wet locations.
- Installation: Install the unit securely using the provided mounting bracket. Ensure the mounting surface can support the weight of the fixture.
- Handling: Avoid direct eye exposure to the light source. Do not operate if the housing is damaged.
- Servicing: Refer all servicing to qualified service personnel. There are no user-serviceable parts inside.
3. Product Overview
The BETOPPER LM30A features a compact design with powerful lighting capabilities. Each unit is equipped with 8x3W RGBW LEDs, capable of producing a wide range of colors and dynamic beam effects.
3.1 Key Features
- Magic Ray Effect: Each LED moves independently with a 60-150 degree oscillation motor, creating unique and super cool chasing effects.
- Bright RGBW LEDs: 8 super bright RGBW LEDs provide vibrant color mixing and powerful illumination.
- Multiple Control Modes: Supports Auto, Sound-Activated, DMX512, and Master-Slave modes for versatile operation.
- Easy Installation: Equipped with mounting brackets for floor, T-bar, truss, or ceiling installation.
- Durable Construction: Robust PVC housing and pure copper power cable ensure reliability and longevity.
- Silent Motors: Features silent stepper motors for smooth and quiet operation.
3.2 Components and Connections

Figure 3.2.1: Top View with Key Components
This image displays the top of the LM30A unit, highlighting the LED display, mounting bracket, internal stepper motors, and the RGBW LED array.

Figure 3.2.2: Control Panel and Rear Connections
This image provides a close-up of the control panel with its buttons (Menu/Return, Down/Up, Enter/Confirm) and the integrated microphone. Below, the rear connections are shown, including DMX In, DMX Out, and Power Input.
The unit includes:
- 1 x LED Stage Light
- 1 x Mounting Bracket
- 2 x Screws
- 1 x User Manual (English)
- 1 x French Manual (available via product link details)
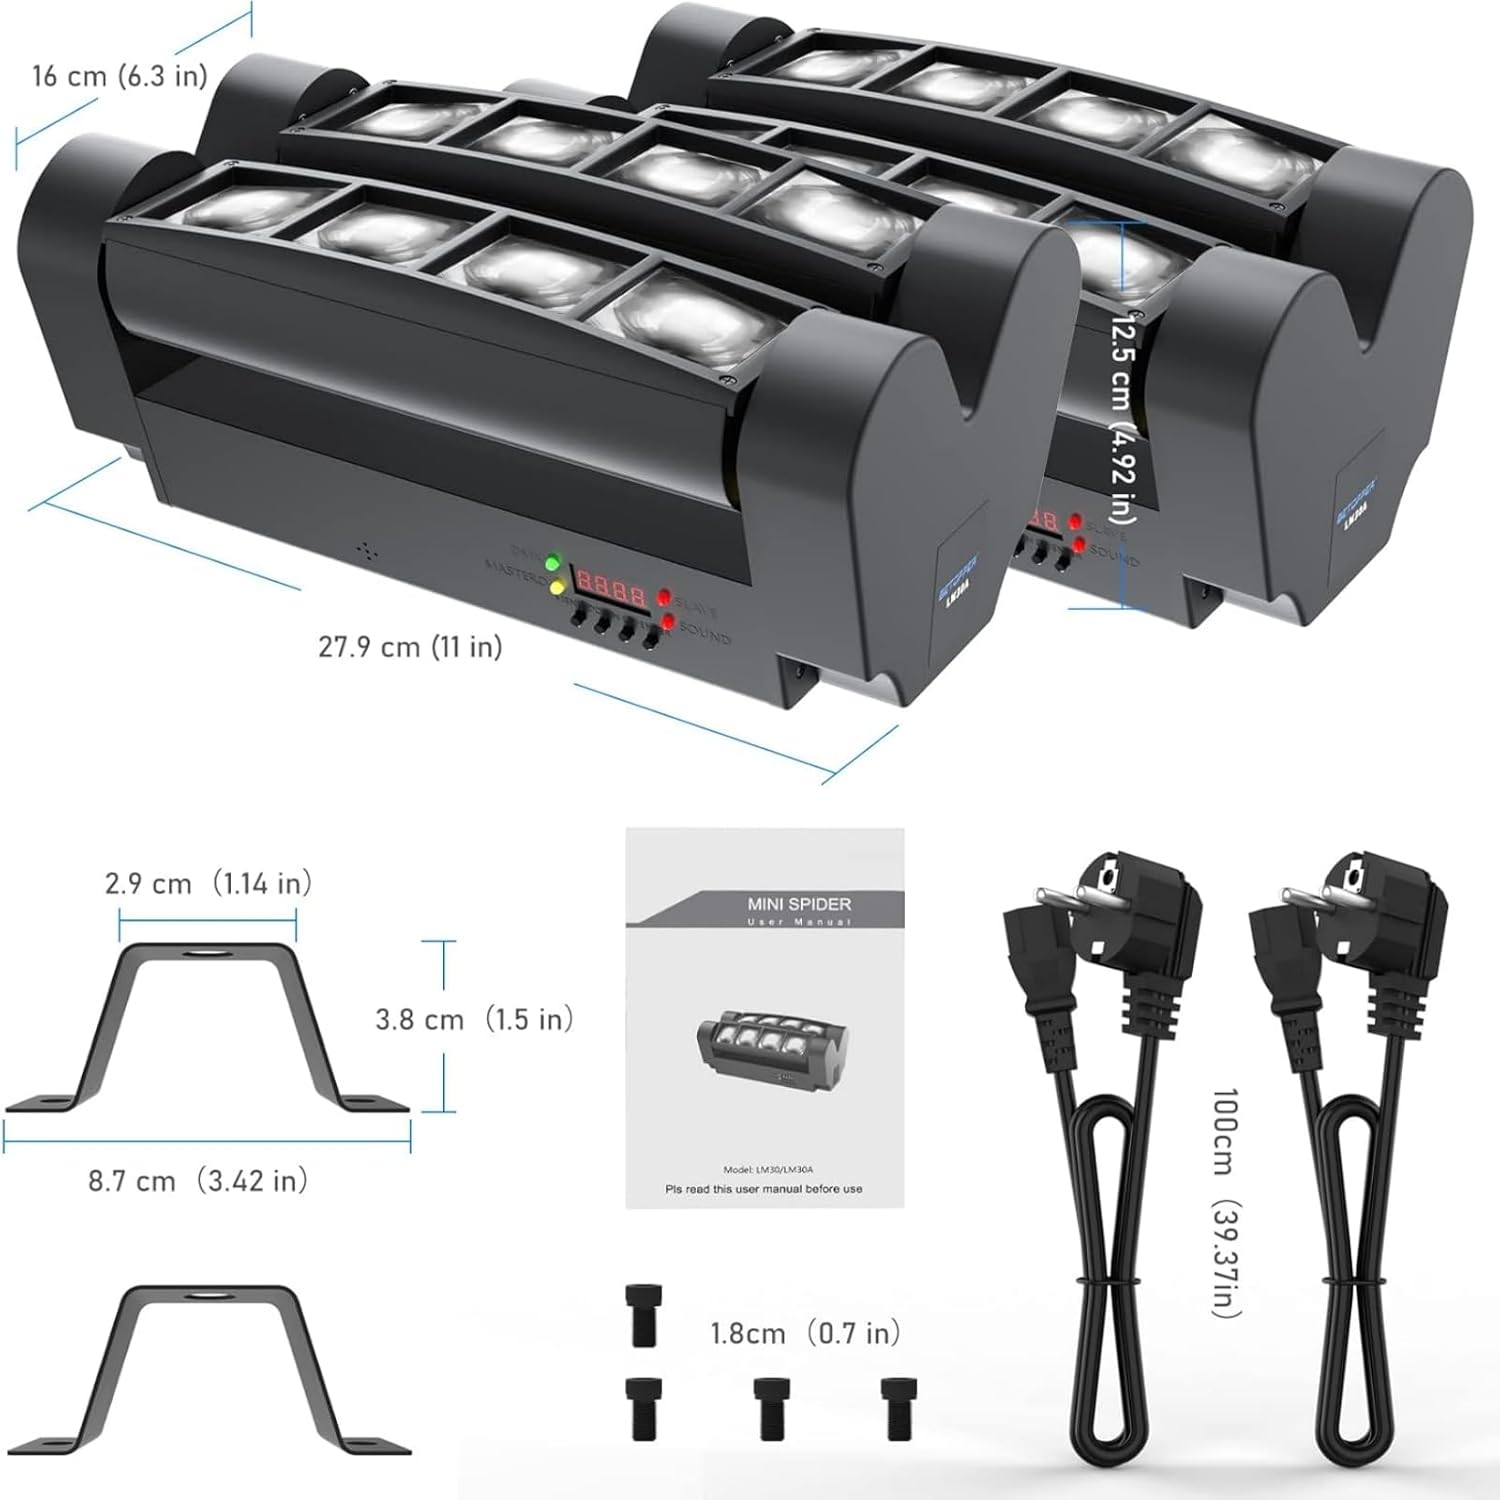
Figure 3.2.3: Product Dimensions and Accessories
This image illustrates the physical dimensions of the LM30A light and details the included accessories: mounting bracket, screws, and power cables.
4. Setup
Follow these steps to set up your BETOPPER LM30A light:
- Unpacking: Carefully remove the light and all accessories from the packaging. Inspect for any damage during transit.
- Mounting:
- Attach the mounting bracket to the light using the provided screws.
- Securely mount the light to a stable surface (floor, T-bar, truss, or ceiling) using appropriate hardware (not included, except for the bracket and screws for attaching to the light). Ensure the mounting point can safely support the fixture's weight.
- Power Connection: Connect the power cable to the unit's power input and then to a suitable power outlet (240V AC).
- DMX Connection (Optional): If using DMX control, connect a DMX cable from your DMX controller's output to the LM30A's DMX IN port. For multiple units, daisy-chain them by connecting the DMX OUT of the first unit to the DMX IN of the next.

Figure 4.1: Multiple Units Setup
This image demonstrates how multiple LM30A units can be connected in a series for synchronized operation, typically via DMX or Master-Slave mode.
5. Operating Modes
The BETOPPER LM30A offers four primary operating modes, selectable via the control panel:
- Automatic Mode (Auto): The light runs through pre-programmed patterns and color changes automatically.
- Sound-Activated Mode (Sound): The light reacts to music or sound, changing patterns and colors in sync with the beat.
- DMX512 Mode (DMX): Allows professional control over all functions using an external DMX controller.
- Master-Slave Mode (Master/Slave): Connect multiple units where one acts as the master, controlling all other slave units for synchronized effects.
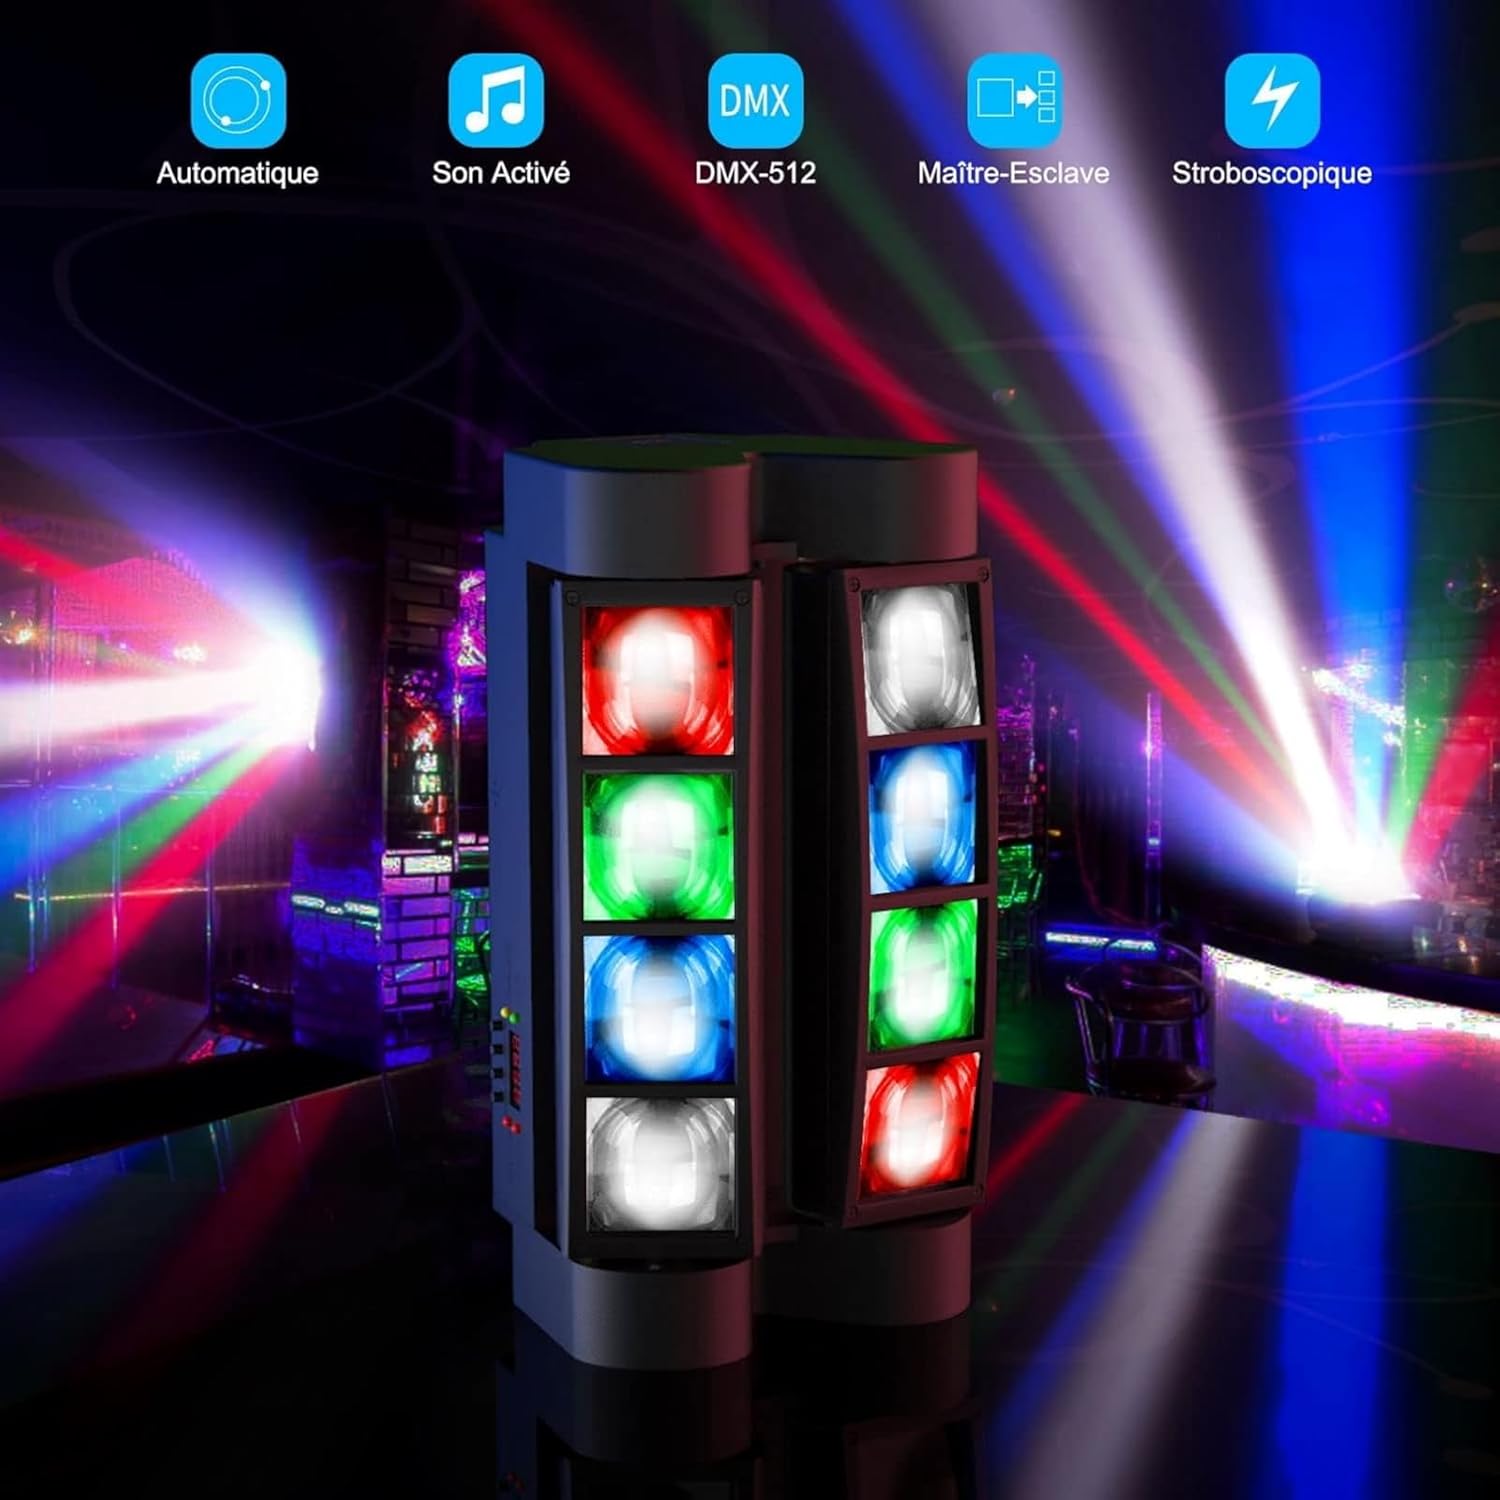
Figure 5.1: Operational Modes Overview
This image visually represents the different control modes available for the LM30A light, including Automatic, Sound Activated, DMX-512, Master-Slave, and Stroboscopic effects.
5.1 Navigating the Control Panel
Use the buttons on the control panel (refer to Figure 3.2.2) to navigate menus and select modes:
- MENU/RETURN: Press to enter the menu or go back to the previous screen.
- DOWN/UP: Use to scroll through options or adjust values.
- ENTER/CONFIRM: Press to confirm a selection or enter a submenu.
5.2 Automatic Mode Operation
To set the light to Automatic Mode and select an effect:

Figure 5.2.1: Automatic Mode Settings
This diagram illustrates the steps to set the light to Automatic Mode (Shnd) and select from 24 different effects (Sh01-Sh24). It also shows how to adjust the speed (SPEd) from SP01 (slowest) to SP08 (fastest).
- Press MENU to enter the main menu.
- Use DOWN/UP to navigate to "Shnd" (Automatic Mode). Press ENTER.
- You can now select an effect from "Sh01" to "Sh24" using DOWN/UP. Press ENTER to confirm.
- To adjust speed, navigate to "SPEd" (Speed) and press ENTER. Use DOWN/UP to select speed from "SP01" (slowest) to "SP08" (fastest). Press ENTER to confirm.
5.3 Sound-Activated Mode Operation
To set the light to Sound-Activated Mode and adjust sensitivity:

Figure 5.3.1: Sound-Activated Mode Settings
This diagram provides instructions for setting the light to Sound-Activated Mode (Slnd), activating the sound switch (Soud), and adjusting the sound sensitivity (SoEn) from 001 to 100.
- Press MENU to enter the main menu.
- Use DOWN/UP to navigate to "Slnd" (Sound Mode). Press ENTER.
- To activate the sound switch, navigate to "Soud" and press ENTER. Use DOWN/UP to select "on". Press ENTER to confirm.
- To adjust sensitivity, navigate to "SoEn" (Sound Sensitivity) and press ENTER. Use DOWN/UP to set a value between 001 and 100 (100 being the most sensitive). Press ENTER to confirm.
Tips for Sound Mode:
- Default sound command sensitivity is 50.
- For best effect, the sound received at the product's location should be above 85 dB. Adjust the distance between the sound source and the machine for optimal reception.
- Increasing the SENS value (up to 100) will make the product more sensitive to sound. For a good experience, the product should receive at least 75 dB. Normal speech is around 60-65 dB.
5.4 DMX512 Mode
The LM30A supports DMX512 control, allowing precise control over various parameters such as dimming, color, strobe, and movement. This unit offers 7 or 15 DMX channels. Refer to the DMX channel chart in the full manual (often provided separately or online) for detailed channel assignments and values.
To enter DMX mode, select "DMX" from the main menu and set the DMX address. Ensure your DMX controller is properly configured.
5.5 Master-Slave Mode
To use Master-Slave mode, connect multiple LM30A units via DMX cables. Set the first unit to Master mode and all subsequent units to Slave mode. The slave units will then mimic the master unit's behavior, creating synchronized lighting effects without a DMX controller.
6. Maintenance
Regular maintenance ensures the longevity and optimal performance of your LM30A light:
- Cleaning: Periodically clean the lenses and housing with a soft, lint-free cloth. Do not use abrasive cleaners or solvents.
- Inspection: Regularly check power cables, DMX cables, and mounting hardware for any signs of wear or damage.
- Storage: When not in use, store the unit in a dry, dust-free environment, preferably in its original packaging or a protective case.
- Recycling: For information on recycling light bulbs, please refer to local regulations or the provided link: EPREL Product Information.
7. Troubleshooting
If you encounter issues with your LM30A light, refer to the following common problems and solutions:
| Problem | Possible Cause | Solution |
|---|---|---|
| No power | Power cable disconnected; no power from outlet; fuse blown. | Check power cable connection; test outlet with another device; check and replace fuse if necessary. |
| Light not responding to DMX | Incorrect DMX address; faulty DMX cable; DMX controller issue; DMX termination missing. | Verify DMX address matches controller; check DMX cable integrity; ensure DMX controller is sending signal; use a DMX terminator on the last unit in the chain. |
| Sound-activated mode not working | Microphone sensitivity too low; no sound input; microphone blocked. | Increase sound sensitivity (SoEn setting); ensure sufficient sound level near the unit (above 75 dB recommended); check if microphone is obstructed. |
| Lights are flickering or erratic | Unstable power supply; DMX signal interference; overheating. | Ensure stable power; check DMX connections and signal quality; ensure proper ventilation and allow unit to cool down. |
If the problem persists after trying these solutions, please contact BETOPPER customer support.
8. Specifications
| Parameter | Value |
|---|---|
| Model Number | LM30A |
| Light Source | 8 x 3W RGBW LEDs |
| Power Consumption | 45 Watts |
| Voltage | 240 Volts (AC) |
| Material | Plastic (PVC) |
| Control Modes | Auto, Sound-Activated, DMX512, Master-Slave |
| DMX Channels | 7/15 CH |
| Y-Axis Rotation | 60-150 degrees (independent movement) |
| Item Weight | 1.5 Kilograms |
| Dimensions (approx.) | 27.9 cm (L) x 16 cm (W) x 12.5 cm (H) |
| Spare Parts Availability | 1 Year |

Figure 8.1: Energy Label
The energy label for the LM30A, indicating an energy consumption of 45 kWh per 1000 hours.
9. Warranty and Support
BETOPPER is committed to providing excellent customer service. If you have any questions or encounter problems during product use, please contact us. We will respond within 24 hours.
- Returns/Exchanges: Every customer benefits from 30 days of free returns/exchanges.
- Contact: For support, please refer to the contact information provided with your purchase or visit the official BETOPPER store on Amazon: BETOPPER Amazon Store.
Related documentsLM30A


Ask a question about this manual
Ask about setup, troubleshooting, compatibility, parts, safety, or missing instructions. Manuals+ will review the question and use this page’s manual context to help answer it.