
1. Product Overview
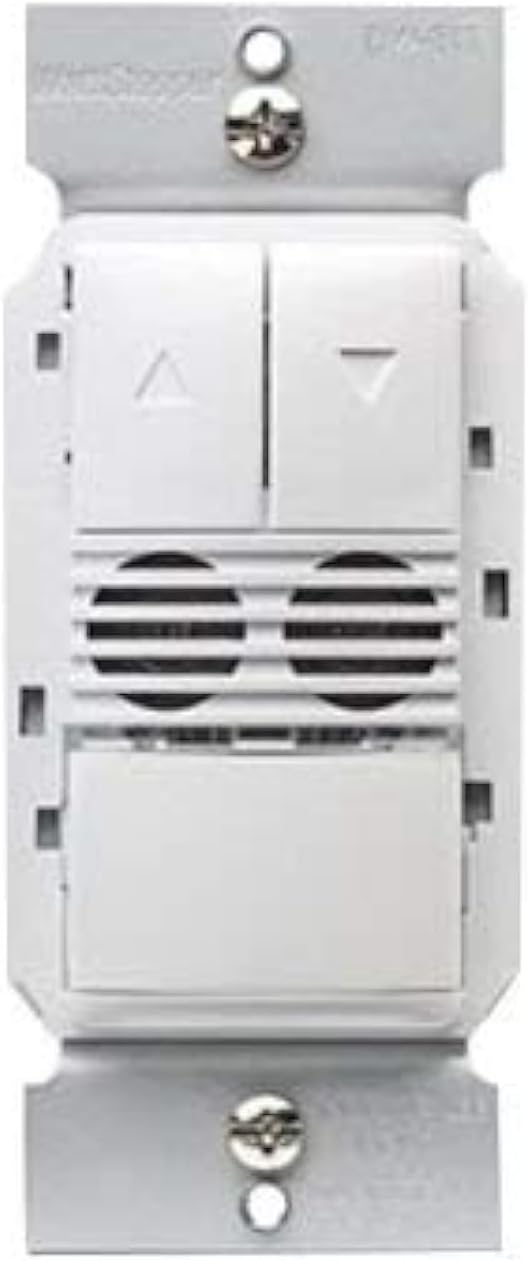
The Legrand Wattstopper DW-311-W is a state-of-the-art dual technology dimming wall switch occupancy sensor designed for efficient lighting control. This device combines passive infrared (PIR) and ultrasonic (US) technologies to accurately detect occupancy, ensuring lights are only on when needed. It operates on 120/277 Volt AC and provides dimming control, making it suitable for various commercial and residential applications. The sensor is designed to enhance energy savings and convenience by automatically turning lights on and off based on room occupancy and ambient light levels.

2. Safety Information
WARNING: Risk of Electric Shock. Improper installation can lead to serious injury or death.
- Always turn off power at the circuit breaker or fuse(s) before installing or servicing the device.
- This device is intended for installation in accordance with the National Electrical Code and local regulations.
- Installation should be performed by a qualified electrician.
- Use copper wire only.
- Do not touch wires or terminals when the circuit breaker is ON.
3. Tools Required
- Screwdriver (Phillips head recommended)
- Wire Stripper
- Voltage Tester (Electroprobe)
- Electrical Tape (optional, for labeling)
4. Installation
Follow these steps carefully to install your new dimming occupancy sensor. Ensure power is OFF at the circuit breaker before beginning.
- Turn Off Power: Locate the circuit breaker controlling the switch you are replacing and turn it OFF. Verify power is off using a voltage tester.
- Remove Existing Switch: Unscrew and carefully pull the existing wall plate and switch out of the wall box.
- Identify Wires: With the power temporarily turned ON (exercise extreme caution), use a voltage tester to identify the HOT wire (line wire) and the LOAD wire. The HOT wire will cause the tester to light up or beep. The LOAD wire should not have power when the light switch is off. Label these wires if desired. Turn power OFF at the circuit breaker again before proceeding.
- Identify Neutral and Ground Wires: The NEUTRAL wire is typically white. The GROUND wire is typically bare copper or green.
- Identify 0-10V Dimming Wires (if applicable): For 0-10V dimming systems, you will also have two low voltage wires, typically purple (positive) and grey (negative), connected to the ballast.
- Disconnect Old Switch: Detach all wires from the old switch.
- Wire the New Sensor: Refer to the wiring diagram below and the general wiring instructions for a dual technology dimming sensor.
4.1 Wiring Connections
- Connect the Black wire from the sensor to the HOT (Line) wire from the wall box.
- Connect the Red wire from the sensor to the LOAD wire from the wall box.
- Connect the White wire from the sensor to the NEUTRAL wire from the wall box.
- Connect the Green wire from the sensor to the GROUND wire from the wall box.
- For 0-10V dimming: Connect the Purple wire from the sensor to the Positive (+) 0-10V dimming wire from the ballast.
- For 0-10V dimming: Connect the Grey wire from the sensor to the Negative (-) 0-10V dimming wire from the ballast.
Secure all connections with wire nuts, ensuring no bare wire is exposed.
- Mount the Sensor: Carefully push the wired sensor back into the wall box. Secure it with the provided screws.
- Install Wall Plate: Attach the wall plate over the sensor.
- Restore Power: Turn the power back ON at the circuit breaker.
5. Operation
The DW-311-W sensor operates in either Occupancy Mode (lights turn ON automatically when motion is detected) or Vacancy Mode (lights must be turned ON manually, but turn OFF automatically). It also features dimming control.
- Manual ON/OFF: Press the main paddle button to manually turn lights ON or OFF.
- Dimming Control: Use the UP (▲) and DOWN (▼) buttons to adjust the light intensity.
- Automatic Operation: In Occupancy Mode, lights will turn on automatically when motion is detected and turn off after a set time delay when the area is vacant. In Vacancy Mode, lights are turned on manually and turn off automatically.
6. Programming and Settings
The sensor offers adjustable settings for optimal performance. These settings are typically accessed by removing the push buttons on the face of the device to reveal adjustment dials.
- Time Delay: Adjusts how long the lights remain ON after the last detected motion. Common settings include 15 seconds, 5 minutes, 10 minutes, 15 minutes, 20 minutes, or 30 minutes.
- Sensor Sensitivity Range: Controls the detection range of the motion sensor. Adjust this based on the size of the room and desired coverage.
- Light Level (Ambient Light Sensor): Determines the ambient light threshold at which the sensor will allow lights to turn ON automatically. This helps prevent lights from turning on if there is already sufficient natural light.
6.1 Switching Occupancy and Vacancy Modes
You can change the device's operating mode between Occupancy and Vacancy:
- To change to Occupancy Mode: Press and hold down both the UP (▲) and DOWN (▼) buttons for approximately 5 seconds until the LED indicator flashes 2 times.
- To change to Vacancy Mode: Press and hold down both the UP (▲) and DOWN (▼) buttons for approximately 5 seconds until the LED indicator flashes 4 times.
7. Specifications
| Feature | Detail |
|---|---|
| Operation Mode | Automatic |
| Operating Voltage | 120/277 Volts (AC) |
| Contact Type | Normally Open |
| Connector Type | Hardwired |
| Brand | Legrand |
| Terminal | Screw |
| Circuit Type | 1-way |
| Actuator Type | Dimmer |
| Contact Material | Copper, Brass, Stainless Steel |
| Number of Positions | 2 |
| Control Method | Touch |
| Connectivity Protocol | Wi-Fi |
| Color | WHITE |
| Wattage | 1200 watts |
| Unit Count | 1.0 Count |
| Manufacturer | Wattstopper |
| Control Type | Dimming and Occupancy Control |
| UPC | 754182939428 |
| Package Dimensions | 5.08 x 3.07 x 2.6 inches |
| Item Weight | 7.8 ounces |
| Item model number | DW-311-W |
| Date First Available | August 2, 2017 |


