
1. Product Overview
The BAOSHISHAN PU Round Belt Welding Machine, model HUK2390, is a specialized tool designed for efficiently connecting polyurethane (PU) round belts and other fusible materials. This device maintains a precise temperature to ensure a strong, stable, and quick belt formation, preventing breakage. It is suitable for various applications, including welding V-belts, pentagonal belts, PU round belts, PU tubes, and plastic strips.
2. Safety Instructions
- Always ensure the power supply matches the device's voltage (220V).
- Exercise caution when handling the hot melt machine as it operates at high temperatures (180-200°C). Avoid direct contact with the heating element.
- Use the device in a well-ventilated area.
- Keep the device out of reach of children.
- Unplug the device when not in use or before cleaning.
- Do not operate the machine if the power cord or plug is damaged.
3. Package Contents
The complete set includes the following components:
- Hot Melt Machine (Electric Soldering Iron)
- High-Precision Round Belt Connector (Fixture)
- Multi-Angle Cutting Scissors
- Power Cord
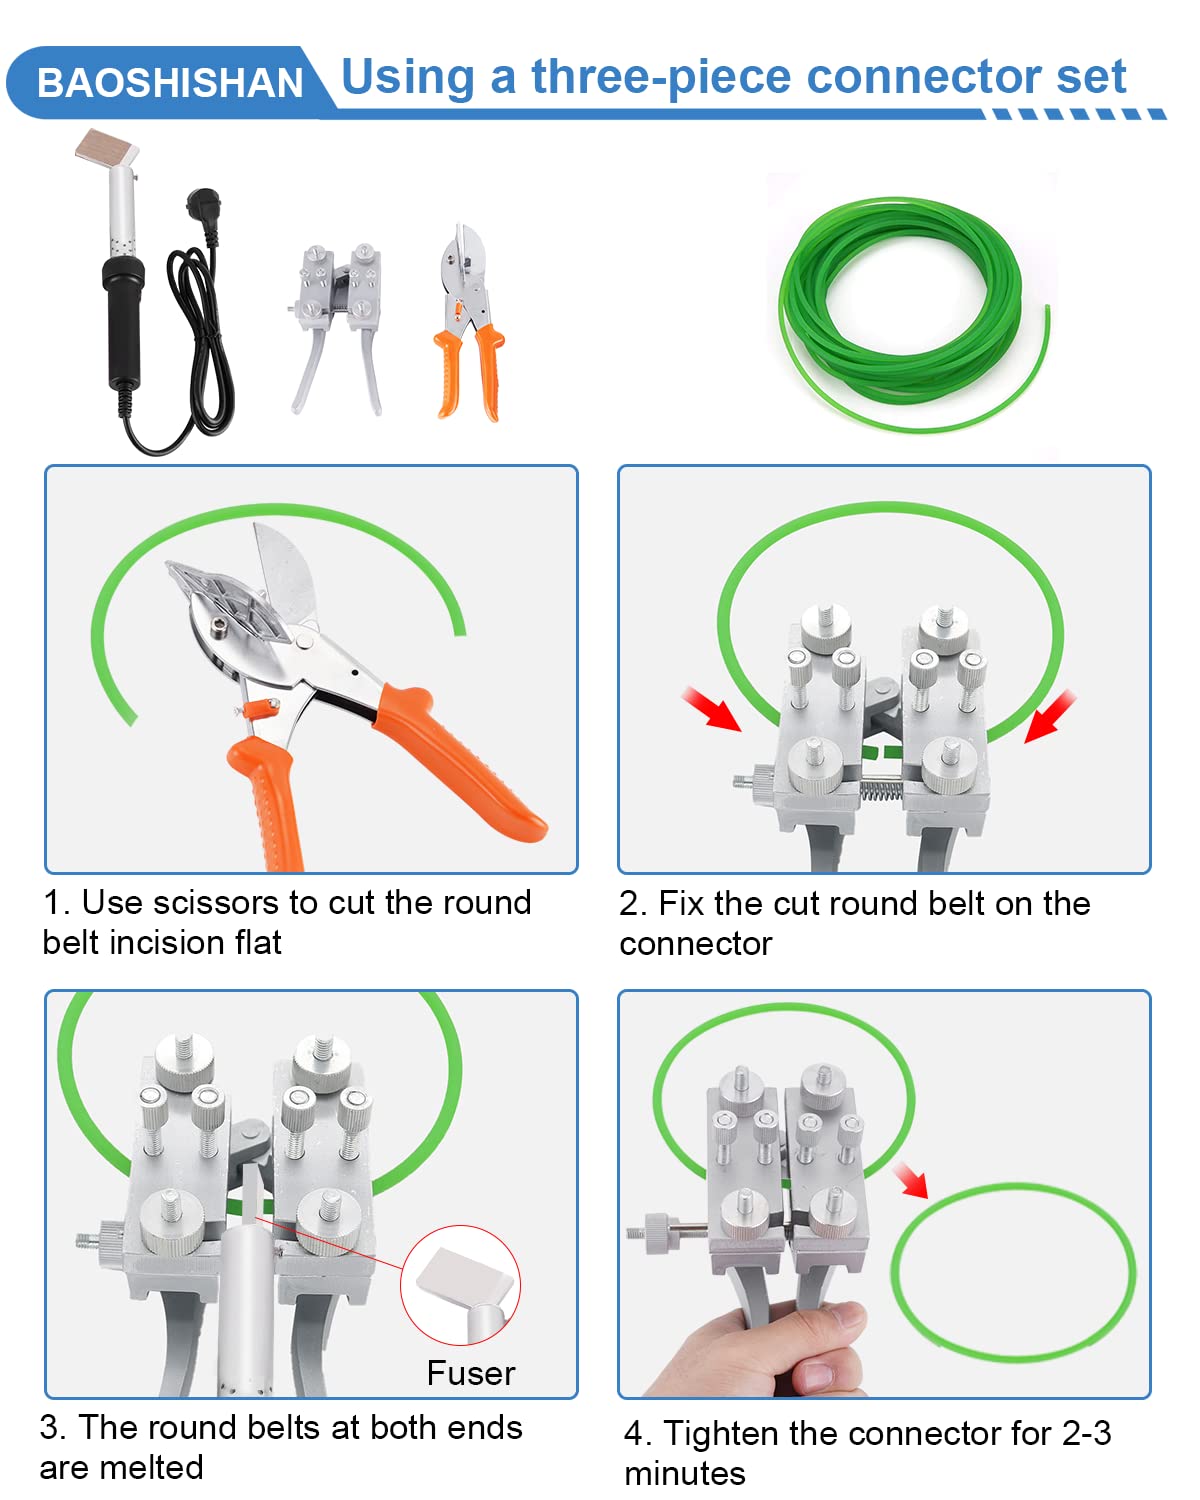
Figure 3.1: Overview of the BAOSHISHAN PU Round Belt Welding Machine components, including the hot melt machine, scissors, and connector.
4. Setup and Component Identification
4.1 Hot Melt Machine
The hot melt machine, also referred to as the electric soldering iron, is the heating element for welding. It consists of:
- Electric Iron Head: The heating surface that melts the belt ends.
- Sleeve: Protects the internal wiring and provides structural support.
- Insulation Handle: Designed for safe and comfortable gripping during operation.
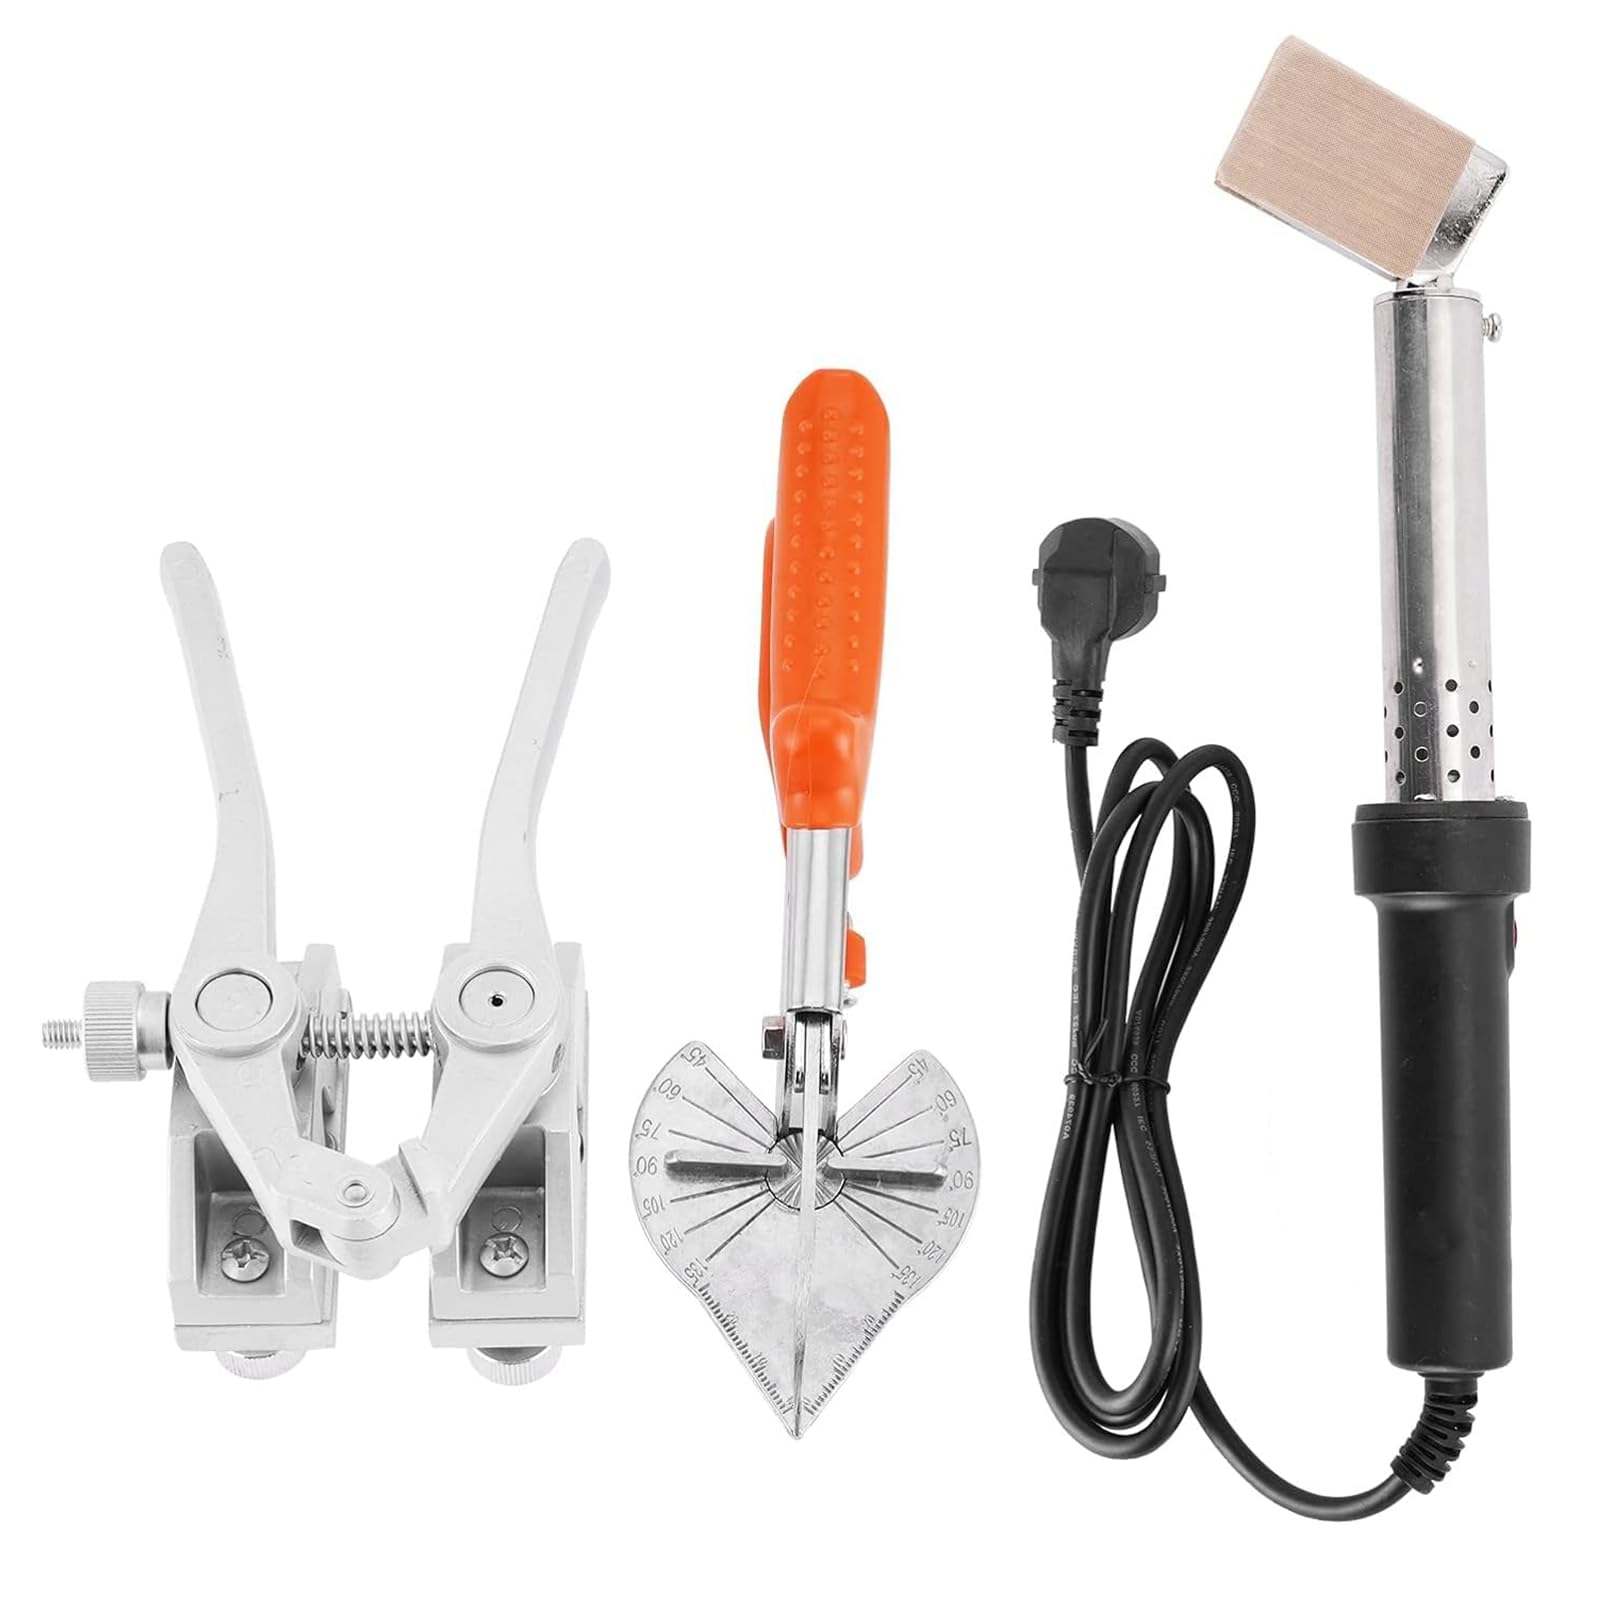
Figure 4.1: Detailed view of the hot melt machine with its main parts labeled.
4.2 High-Precision Round Belt Connector
The connector holds the belt ends securely in place during the welding process. It features:
- Large V-groove: Suitable for connecting triangle belts or 8mm-30mm round belts.
- Small V-slot: Designed for connecting 2mm-8mm round belts.
- Positioning Pin: Ensures precise alignment of the belt ends.

Figure 4.2: The round belt connector with its various V-grooves and positioning pin.
4.3 Multi-Angle Cutting Scissors
The scissors are used for preparing the belt ends for welding. Key features include:
- Rubberized Handle: Provides a comfortable and secure grip.
- Clear Dial: Allows for easy adjustment of cutting angles (45-135 degrees).
- Fixed Lock: For safe and convenient storage.
- Blade: Designed for sharp and precise cutting.

Figure 4.3: The multi-angle cutting scissors for preparing belt ends.
5. Operating Instructions
Follow these steps for effective welding of PU round belts:
- Prepare the Belt: Use the multi-angle cutting scissors to cut the ends of the round belt flat and straight. This ensures a clean joint.
- Secure the Belt in Connector: Place the cut ends of the round belt into the appropriate V-groove of the connector. Ensure the ends are aligned precisely and fixed securely.
- Melt the Belt Ends: Plug in the hot melt machine (soldering iron) and allow it to reach its operating temperature, typically between 180-200°C. Carefully bring the heated iron head into contact with both belt ends simultaneously until they begin to melt. The connector is made of high-temperature resistant metal, ensuring a good hot-melt effect. The temperature of the hot melter should be within 250 degrees.
- Join and Cool: Once the belt ends are sufficiently melted, remove the hot melt machine and quickly bring the two melted ends together by tightening the connector. Hold the connector firmly for 2-3 minutes to allow the joint to cool and solidify completely.
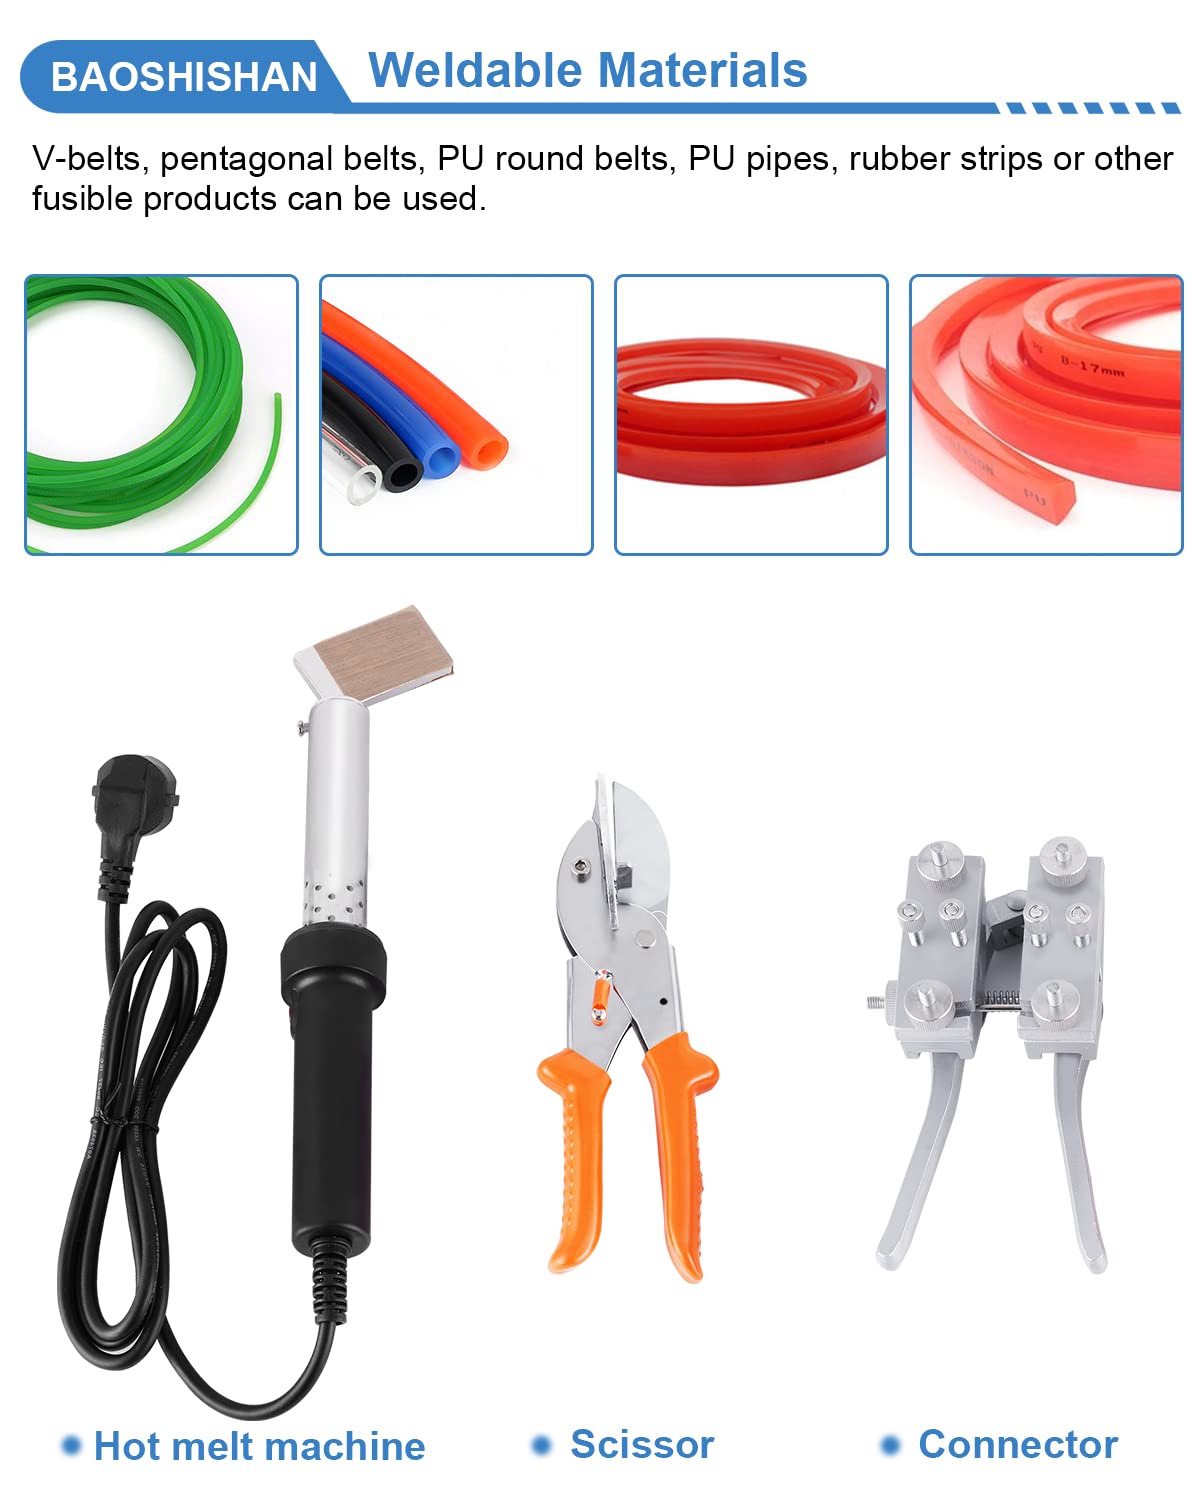
Figure 5.1: Step-by-step guide for welding a PU round belt using the connector set.
5.1 Weldable Materials
This machine is suitable for welding a wide range of fusible materials, including:
- V-belts
- Pentagonal belts
- PU round belts
- PU pipes
- Rubber strips
- Other fusible plastic products
6. Maintenance
- After each use, ensure the hot melt machine has cooled down completely before cleaning.
- Wipe the electric iron head and connector with a clean, dry cloth to remove any residue.
- Store all components in a dry, clean place, away from direct sunlight and moisture.
- Regularly inspect the power cord for any signs of damage.
7. Troubleshooting
- Poor Weld Quality: Ensure the belt ends are cut flat and clean. Verify the hot melt machine has reached the correct operating temperature (180-200°C). Ensure sufficient melting time and firm pressure during cooling.
- Belt Not Holding in Connector: Check that the correct V-groove size is selected for the belt diameter. Ensure the positioning pins are properly engaged.
- Machine Not Heating: Check the power connection and ensure the outlet is functional. If the issue persists, discontinue use and contact support.
8. Specifications
| Feature | Specification |
|---|---|
| Model Number | HUK2390 |
| Dimensions (L x W x H) | 39 x 20 x 15 cm |
| Item Weight | 2.22 Kilograms |
| Operating Voltage | 220V |
| Operating Temperature | 180-200°C (Max 250°C for hot melter) |
| Weldable Materials | PU round belts, V-belts, pentagonal belts, PU tubes, plastic strips, rubber strips |
9. Warranty and Support
Information regarding product warranty and customer support is not available in the provided product data. Please refer to the product packaging or contact the manufacturer directly for details on warranty coverage and technical assistance.