
Kienzle Digi Time
Kienzle Digi Time Digital Alarm Clock User Manual
Model: Digi Time
Introduction
Thank you for choosing the Kienzle Digi Time Digital Alarm Clock. This device is designed to provide accurate timekeeping, alarm functions, and environmental readings (temperature and humidity) in a compact and stylish form. Please read this manual carefully before using the product to ensure proper operation and to maximize its lifespan.
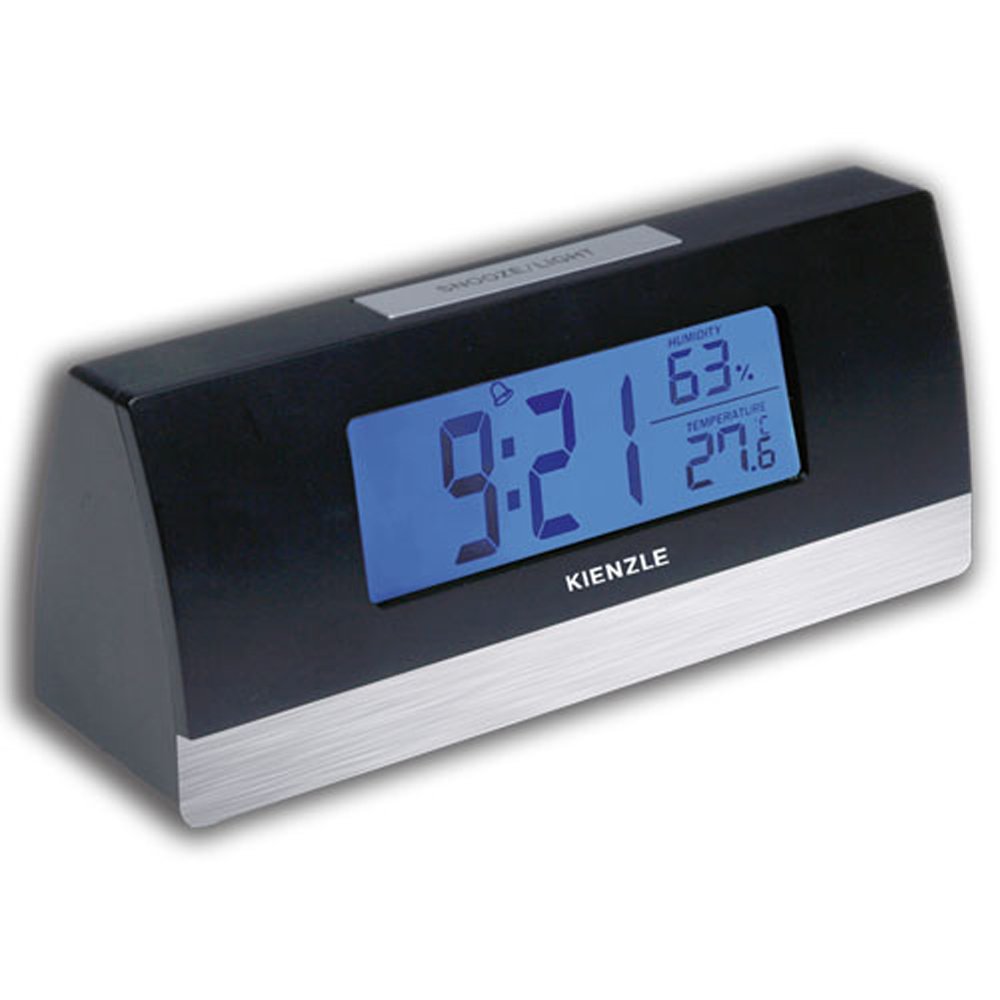
Image: The Kienzle Digi Time Digital Alarm Clock, black with a silver base, displaying the time 9:21, humidity at 63%, and temperature at 27.6 degrees Celsius on its blue backlit screen. The Kienzle logo is visible below the display, and a 'SNOOZE/LIGHT' button is on top.
Setup
1. Battery Installation
The Kienzle Digi Time alarm clock requires three (3) AAA batteries (not included) for operation.
- Locate the battery compartment cover on the back or bottom of the unit.
- Slide or lift the cover to open the compartment.
- Insert three AAA batteries, ensuring the correct polarity (+ and -) as indicated inside the compartment.
- Replace the battery compartment cover securely.
2. Initial Power-On
Once batteries are installed, the display should light up, and the clock will typically show a default time (e.g., 12:00 AM) or begin counting from zero. The temperature and humidity readings will also appear.
3. Setting the Time
Refer to the buttons on the back or side of the clock. Common buttons include MODE, SET, UP/+, DOWN/-.
- Press the MODE button repeatedly until the time setting mode is activated (e.g., the hour digits start flashing).
- Use the UP/+ or DOWN/- buttons to adjust the hour.
- Press MODE again to move to the minute setting.
- Use the UP/+ or DOWN/- buttons to adjust the minutes.
- Press MODE one more time to confirm and exit the time setting mode.
4. Setting the Alarm
The alarm setting process is similar to setting the time.
- Press the MODE button until the alarm time is displayed or the alarm setting mode is activated (e.g., an alarm icon flashes).
- Use the UP/+ or DOWN/- buttons to set the desired alarm hour.
- Press MODE again to move to the alarm minute setting.
- Use the UP/+ or DOWN/- buttons to set the desired alarm minutes.
- Press MODE to confirm. An alarm icon (e.g., a bell) should appear on the display, indicating the alarm is active.
Operating Instructions
1. Using the Alarm
When the set alarm time is reached, the alarm will sound. To turn off the alarm, press any button other than the SNOOZE/LIGHT button. The alarm will reset for the next day.
2. Snooze Function
To temporarily silence the alarm and activate the snooze function, press the SNOOZE/LIGHT button located on the top of the clock. The alarm will pause for approximately 5-10 minutes (duration may vary) and then sound again.
3. Blue Backlight
To illuminate the display with a blue backlight for easy viewing in low light conditions, press the SNOOZE/LIGHT button. The backlight will typically stay on for a few seconds and then turn off automatically to conserve battery life.
4. Temperature and Humidity Display
The clock continuously displays the current air temperature and humidity. No special action is required to view these readings.
Maintenance
1. Cleaning
To clean the clock, use a soft, dry cloth. For stubborn marks, a slightly damp cloth can be used, but ensure no water enters the device. Do not use abrasive cleaners, solvents, or chemical sprays, as these can damage the surface and internal components.
2. Battery Replacement
When the display dims or the clock functions become erratic, it is time to replace the batteries. Follow the battery installation steps outlined in the Setup section. Always replace all three AAA batteries at the same time with new ones. Dispose of old batteries responsibly according to local regulations.
3. Storage
If the clock will not be used for an extended period, remove the batteries to prevent leakage and potential damage to the unit.
Troubleshooting
| Problem | Possible Cause | Solution |
|---|---|---|
| Display is blank or dim. | Low or dead batteries; incorrect battery polarity. | Replace batteries with new AAA batteries, ensuring correct polarity. |
| Alarm does not sound. | Alarm not set or not activated; low batteries. | Ensure alarm is set and the alarm icon is visible on the display. Replace batteries if needed. |
| Time is incorrect. | Time not set correctly; batteries removed or low. | Reset the time following the instructions in the Setup section. Replace batteries if they are low. |
| Temperature/Humidity readings seem inaccurate. | Clock placed near heat/cold sources or in direct sunlight/drafts. | Relocate the clock to a stable environment away from extreme temperature fluctuations or direct air currents. |
Specifications
- Brand Name: Kienzle
- Manufacturer: Kienzle
- Color: Black
- Product Dimensions: 20 x 10 x 10 cm; 100 g (approx. 7.87 x 3.94 x 3.94 inches; 3.53 oz)
- ASIN: B0797SYY1Y
- EAN: 7896733521591
- Package Dimensions: 10 x 10 x 10 centimeters
- Battery(ies) Required: 3 AAA batteries (not included)
- Available for purchase since: January 23, 2018
- Discontinued by manufacturer: No
- Shape: Rectangular
- Alarm Clock: Yes
- Display: Digital with blue backlight
- Additional Features: Temperature and humidity display, Snooze function
Warranty and Support
For information regarding warranty coverage, technical support, or service inquiries, please contact Kienzle customer service directly. Details can typically be found on the product packaging or the official Kienzle website. Please retain your purchase receipt as proof of purchase for any warranty claims.
Related documentsDigi Time


Ask a question about this manual
Ask about setup, troubleshooting, compatibility, parts, safety, or missing instructions. Manuals+ will review the question and use this page’s manual context to help answer it.