
RYOBI P770
Ryobi 18-Volt ONE+ 6 Gal. Cordless Wet/Dry Vacuum Instruction Manual
Model: P770
Introduction
The RYOBI ONE+ 6 Gallon Wet/Dry Vacuum offers powerful cleaning performance with the convenience of cordless operation. Its multi-size no-tip wheel design and 360° mobility ensure stability and ease of movement across various surfaces. Designed for efficient dust, debris, and liquid collection, this vacuum features convenient onboard accessory storage and a hose dock for organized storage. The removable top simplifies emptying, making cleanup quick and mess-free. Its compact design also allows for space-saving storage when not in use. This tool is an integral part of the RYOBI ONE+ system, compatible with over 100 tools.
Important Safety Information
Always read and understand all instructions before using this product. Failure to follow all instructions listed below may result in electric shock, fire, and/or serious personal injury.
- Ensure the vacuum is disconnected from its power source (battery) before performing any adjustments, changing accessories, or storing the tool.
- Do not pick up any flammable or combustible materials, such as gasoline, or use in areas where they may be present.
- Do not pick up anything that is burning or smoking, such as cigarettes, matches, or hot ashes.
- Do not use without filters in place.
- Use only as described in this manual. Use only manufacturer’s recommended attachments.
- Keep hair, loose clothing, fingers, and all parts of body away from openings and moving parts.
- Exercise extreme caution when cleaning on stairs.
- This product is intended for household use only.
Package Contents
Verify that all items listed below are included in your package:
- RYOBI ONE+ 6 Gal. Cordless Wet/Dry Vacuum (Bare-Tool)
- Hose
- Crevice Tool
- Floor Nozzle
- Extension Wand
- Dry Use Filter (pre-installed or separate)
- Float Assembly (pre-installed or separate)
- Owner's Manual

Figure 1: The Ryobi 18-Volt ONE+ 6 Gallon Cordless Wet/Dry Vacuum shown with its hose, crevice tool, floor nozzle, and extension wand. This image provides a comprehensive view of the product and its included accessories.
Setup
Follow these steps for initial assembly and preparation for use:
- Unpacking and Component Identification: Carefully remove all components from the packaging. Lay them out to identify each part. Refer to the "Package Contents" section to ensure all items are present.

Figure 2: Side view of the Ryobi Wet/Dry Vacuum, highlighting its integrated hose storage and robust wheels for easy maneuverability. This perspective helps in identifying the main body and attachment points.
- Attaching the Float Assembly and Filter:
The float assembly and dry use filter are crucial for proper operation, especially during wet vacuuming. The float prevents water from reaching the motor when the tank is full.
- Locate the float assembly (often a cage-like structure) and the dry use filter (a pleated paper filter).
- If not already installed, attach the float assembly to the underside of the vacuum's lid. It typically twists or snaps into place.
- Slide the dry use filter over the float assembly. Ensure it fits snugly and covers the float completely. This filter separates dirt and debris from the air, collecting it in the tank.
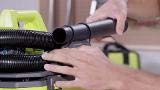
Figure 3: An overhead view of the Ryobi Wet/Dry Vacuum with the lid removed, clearly showing the internal filter and float assembly. This view is essential for understanding how to properly install or clean these components.
- Securing the Lid: Place the lid back onto the vacuum tank. Engage the locking latches on both sides to securely fasten the lid to the bucket. Ensure a tight seal for optimal suction.
- Connecting the Hose: Insert one end of the flexible hose into the intake port on the vacuum. Twist or push firmly until it locks into place.

Figure 4: A close-up image illustrating the proper connection of the hose to the vacuum's intake port. This detail is important for ensuring a secure and efficient vacuuming experience.
- Attaching Accessories: Attach the desired accessory (crevice tool, floor nozzle, or extension wand) to the open end of the hose. For extended reach, connect the extension wand(s) between the hose and the desired nozzle.
- Battery Installation: Insert a fully charged RYOBI ONE+ 18V battery into the battery port on the vacuum's lid. Ensure it clicks into place.
Operating Instructions
This vacuum is designed for both wet and dry applications. Always ensure the correct filter is installed for the task.
Dry Vacuuming
- Ensure the dry use filter is properly installed over the float assembly.
- Select the appropriate accessory for the surface you are cleaning (e.g., floor nozzle for large areas, crevice tool for tight spaces).
- Turn on the vacuum using the power switch located on the lid.
- Move the nozzle over the dry debris to be collected.
Wet Vacuuming
- For wet vacuuming, the dry use filter should be removed. A foam filter (sold separately or included with some models) is typically used for wet applications to protect the motor from liquids. If no foam filter is available, ensure the float assembly is clear and functioning.
- Turn on the vacuum.
- Move the nozzle over the liquid spill. The float assembly will rise and shut off suction when the tank is full to prevent overflow.
- Once the tank is full or the task is complete, turn off the vacuum and empty the tank.
Maintenance
Regular maintenance ensures optimal performance and extends the life of your vacuum.
- Emptying the Tank:
After each use, especially after wet vacuuming, empty the tank. Disconnect the battery, unlatch the lid, and carefully lift it off. Dispose of collected debris or liquids. The removable top design facilitates quick and mess-free emptying.
- Cleaning the Filter:
For dry use filters, tap off loose debris or brush it clean. For heavily soiled filters, wash with mild soap and water, rinse thoroughly, and allow to air dry completely before reinstallation. Never use a wet filter for dry vacuuming.
- Cleaning the Tank and Accessories:
Wipe down the inside of the tank with a damp cloth. Clean accessories as needed to prevent clogs and maintain suction.
- Storage:
Store the vacuum in a dry, indoor area. Utilize the onboard accessory storage and hose dock for a simple and compact storage solution.
Troubleshooting
| Problem | Possible Cause | Solution |
|---|---|---|
| Vacuum does not turn on. | Battery not installed correctly or discharged. | Ensure battery is fully charged and properly seated. |
| Low suction. | Clogged hose or filter; full tank; improperly sealed lid. | Check and clear hose/accessories for obstructions. Clean or replace filter. Empty tank. Ensure lid latches are securely fastened. |
| Motor shuts off during wet vacuuming. | Tank is full; float assembly activated. | Empty the tank. The float assembly is a safety feature. |
| Dust escaping from vacuum. | Filter is missing, damaged, or improperly installed. | Check filter installation. Clean or replace damaged filter. |
Specifications
- Model Number: P770
- Brand: RYOBI
- Power Source: 18V ONE+ Battery (Battery not included with bare tool)
- Capacity: 6 Gallons
- Airflow: 80 CFM (Cubic Feet per Minute)
- Product Dimensions: 23.5 x 19.5 x 17.2 inches
- Weight: 16 Pounds (without battery)
- Filter Type: Foam (for wet applications), Pleated Paper (for dry applications)
- Included Accessories: Crevice Tool, Floor Nozzle, Extension Wand
- Special Feature: Compact design, Cordless operation, Multi-size no-tip wheel design, 360° mobility, Onboard accessory storage, Hose dock, Removable top.
Warranty and Support
This RYOBI product comes with a limited manufacturer's warranty. For detailed warranty information, including terms, conditions, and registration, please refer to the warranty card included with your product or visit the official RYOBI website. For technical support, replacement parts, or service inquiries, please contact RYOBI customer service through their official channels.
Online Support: www.ryobitools.com/support
Phone Support: Refer to your product documentation for regional contact numbers.
Related documentsP770


Ask a question about this manual
Ask about setup, troubleshooting, compatibility, parts, safety, or missing instructions. Manuals+ will review the question and use this page’s manual context to help answer it.