
1. Introduction
This manual provides essential instructions for the safe and effective use of your FUJIFILM Instax Mini 9 Instant Camera. Please read this manual thoroughly before using the camera and keep it in a safe place for future reference. The Instax Mini 9 is designed for instant film photography, offering ease of use and immediate print results.
2. Package Contents
Verify that all items are present in your package:
- Instax Mini 9 Camera Body
- Close-up Lens Adapter
- Wrist Strap
- AA Batteries (2)
- User Manual (this document)
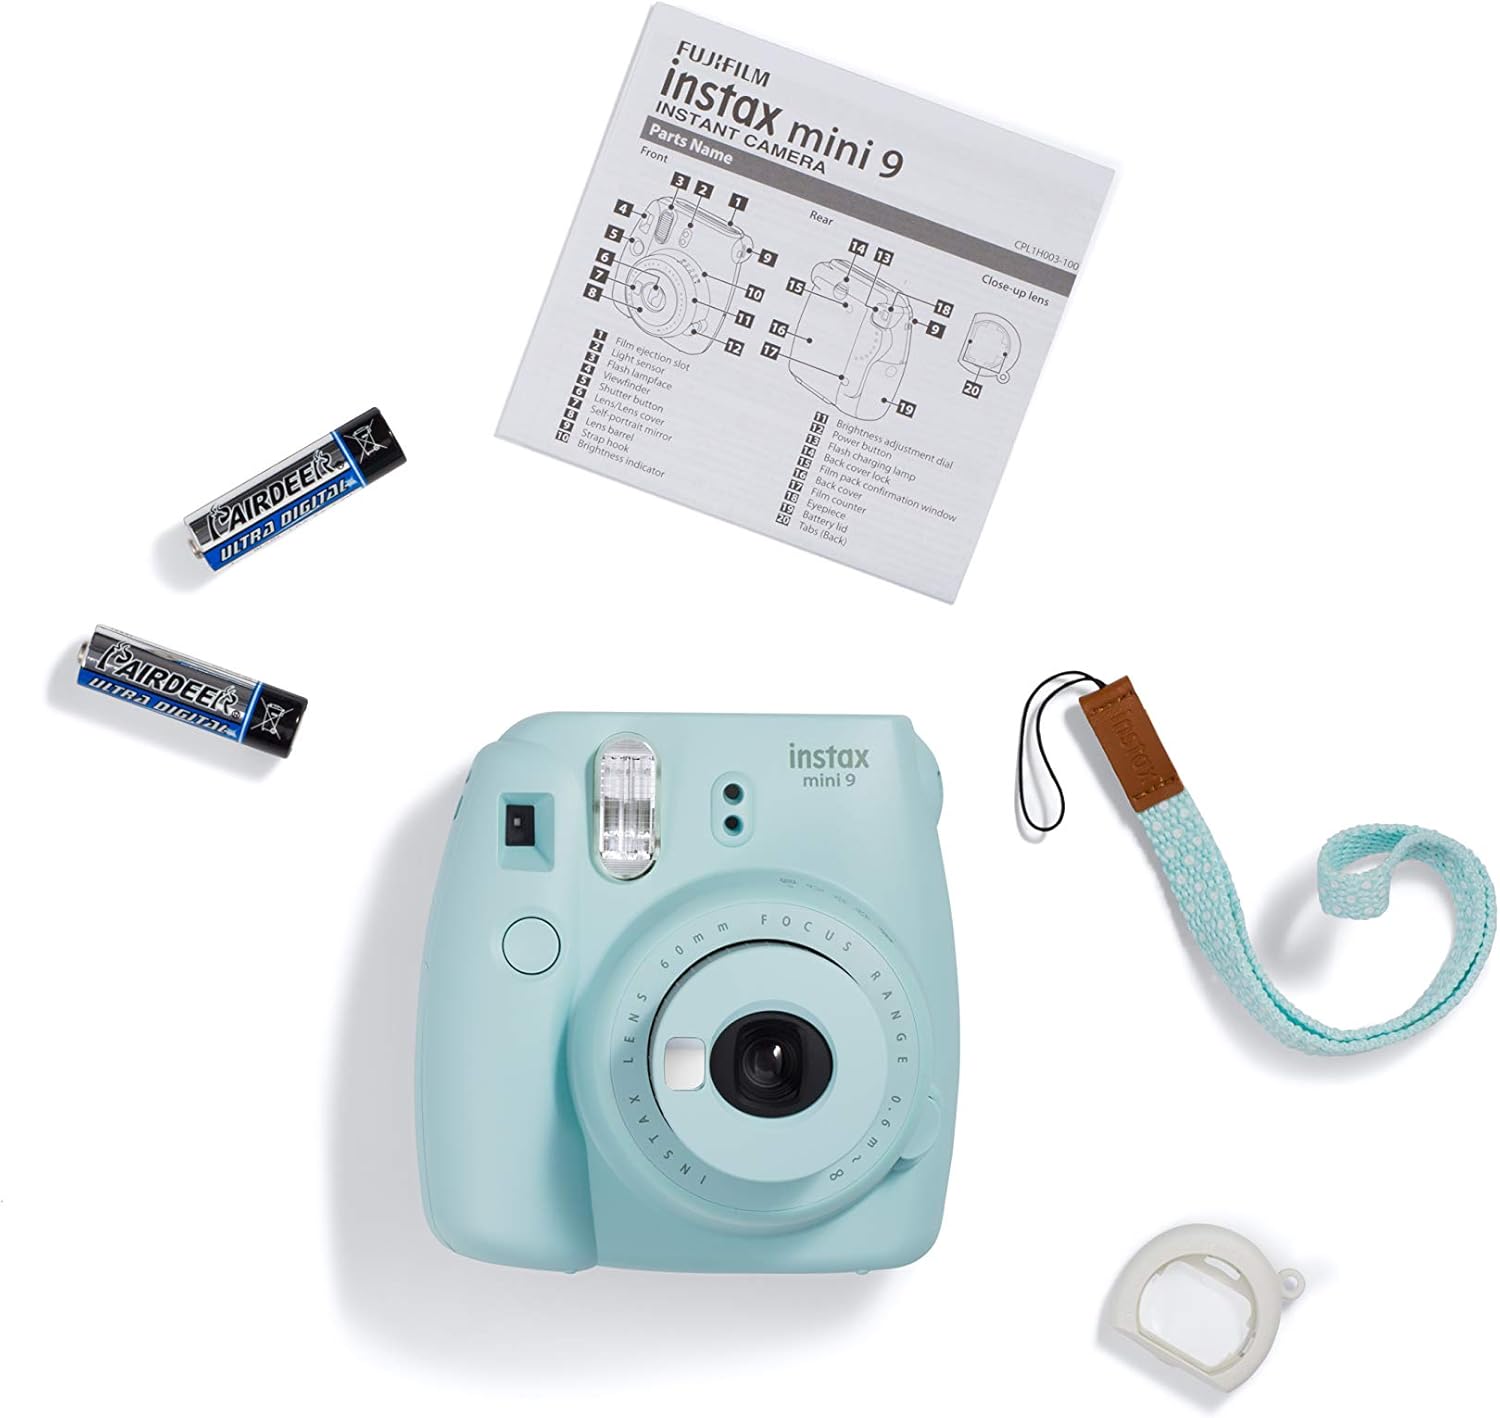
Image: Package contents of the Instax Mini 9 camera.
3. Camera Parts
Familiarize yourself with the main components of your Instax Mini 9 camera.

Image: Front view of the Instax Mini 9 camera.
- Lens: Captures the image.
- Flash: Provides illumination in low-light conditions.
- Shutter Button: Press to take a photo.
- Brightness Adjustment Dial: Used to select the appropriate exposure setting.
- Viewfinder: For composing your shots.
- Selfie Mirror: Located next to the lens for self-portraits.
- Film Ejection Slot: Where printed photos emerge.
- Battery Compartment: Holds two AA batteries.
- Film Cover Lock: Secures the film compartment.

Image: Back view of the Instax Mini 9 camera.
4. Setup
4.1. Installing Batteries
- Open the battery compartment cover located on the side of the camera.
- Insert two new AA 1.5V alkaline batteries, ensuring correct polarity (+/-).
- Close the battery compartment cover securely.
4.2. Loading Film
- Open the film cover on the back of the camera by sliding the film cover lock.
- Align the yellow mark on the film pack with the yellow mark on the camera's film compartment.
- Insert the film pack straight into the compartment. Do not press down on the film pack.
- Close the film cover. The film counter will display "S".
- Press the shutter button once to eject the black film cover. The film counter will then display "10", indicating 10 printable photos remaining.
Important: Never open the film cover after loading film until all 10 photos have been taken and ejected. Doing so will expose the film and render it unusable.
4.3. Attaching the Wrist Strap
Thread the included wrist strap through the strap eyelet on the side of the camera to prevent accidental drops.
4.4. Attaching the Close-up Lens Adapter
For close-up shots (35-50 cm), attach the close-up lens adapter to the camera lens. Ensure it clicks into place securely. Remove it for normal shooting distances.
5. Operating the Camera
5.1. Powering On/Off
- To power on, press the button next to the lens. The lens will extend, and the flash charging lamp will light up.
- To power off, push the lens back into the camera body.
5.2. Adjusting Brightness (Exposure)
The camera automatically detects the ambient light and indicates the recommended brightness setting with a flashing LED on the brightness adjustment dial.
- Turn the brightness adjustment dial to align the mark on the dial with the flashing LED.
- Available settings include:
- Indoor/Night: For dark environments.
- Cloudy/Shade: For overcast days or shaded areas.
- Sunny/Slightly Cloudy: For bright outdoor conditions.
- Very Sunny: For extremely bright outdoor conditions.
- High-Key: For brighter pictures with a soft look, ideal for portraits.

Image: Instax Mini 9 camera with an example instant photo.
5.3. Taking a Photo
- Power on the camera.
- Adjust the brightness dial to the recommended setting indicated by the flashing LED.
- Look through the viewfinder to compose your shot. For selfies, use the selfie mirror next to the lens.
- Press the shutter button. The flash will fire, and the photo will eject from the top slot.
- Allow the photo to develop naturally. Do not shake or bend the print.
6. Maintenance
6.1. Cleaning the Camera
- Wipe the camera body with a soft, dry cloth.
- For the lens and viewfinder, use a lens cleaning cloth. Avoid abrasive materials.
- Do not use organic solvents such as thinner or alcohol to clean the camera.
6.2. Battery Care
- Replace both AA batteries simultaneously when the flash charging lamp takes longer to light up or does not light up at all.
- Remove batteries if the camera will not be used for an extended period.
6.3. Film Storage
Store Instax Mini film in a cool, dry place, away from direct sunlight and high temperatures.
7. Troubleshooting
| Problem | Possible Cause | Solution |
|---|---|---|
| Camera does not power on. | Batteries are dead or incorrectly inserted. | Replace with new AA batteries, ensuring correct polarity. |
| Photos come out completely black. | Film compartment was opened after film was loaded; incorrect exposure setting; film expired or damaged. | Ensure film compartment remains closed. Check brightness dial setting. Use fresh film. Allow film to develop in room temperature. |
| Photos are too dark or too bright. | Incorrect brightness adjustment dial setting. | Adjust the brightness dial to match the recommended LED indicator for the lighting conditions. |
| Film does not eject. | No film loaded; film jam; batteries low. | Load a new film pack. Check for obstructions in the film ejection slot. Replace batteries. |
| Flash does not fire. | Batteries low; flash charging. | Replace batteries. Wait for the flash charging lamp to stop blinking before taking a photo. |
8. Specifications
| Feature | Detail |
|---|---|
| Brand | Fujifilm |
| Model Name | Instax Mini 9 |
| Film Format | Instax Mini |
| Lens | 60mm, f/12.7 |
| Focus Range | 0.6m - ∞ (infinity) |
| Close-up Lens Adapter | 35cm - 50cm |
| Shutter Speed | 1/60 sec. |
| Exposure Control | Automatic, with manual switching system (LED indicator) |
| Flash | Constant firing flash (automatic light adjustment) |
| Power Supply | Two AA-size 1.5V alkaline batteries |
| Dimensions (W x H x D) | Approx. 3 x 5 x 5.5 inches |
| Weight | Approx. 0.8 Pounds (without batteries, strap, and film pack) |
| Special Features | Selfie Mirror, High-Key Mode |
9. Warranty and Support
9.1. Warranty Information
This FUJIFILM Instax Mini 9 camera comes with a 90-day limited warranty. Please retain your proof of purchase for any warranty claims. The warranty covers manufacturing defects under normal use. It does not cover damage caused by misuse, accidents, or unauthorized repairs.
9.2. Return Policy
Eligible for a refund or replacement within 90 days of purchase, subject to the retailer's return policy.
9.3. Customer Support
For further assistance, technical support, or warranty service, please contact FUJIFILM customer support through their official website or the contact information provided with your purchase.


