
OCT17 10505-Brown
OCT17 Wooden Alarm Clock User Manual
Model: 10505-Brown | Brand: OCT17
1. Introduction
Thank you for choosing the OCT17 Wooden Alarm Clock. This smart LED digital clock is designed to enhance your bedroom or desk with its modern and elegant appearance, while providing multiple functionalities. It displays time, date, month, year, temperature, and humidity, along with alarm clock features. The clock also includes convenient USB charging ports for your mobile devices.
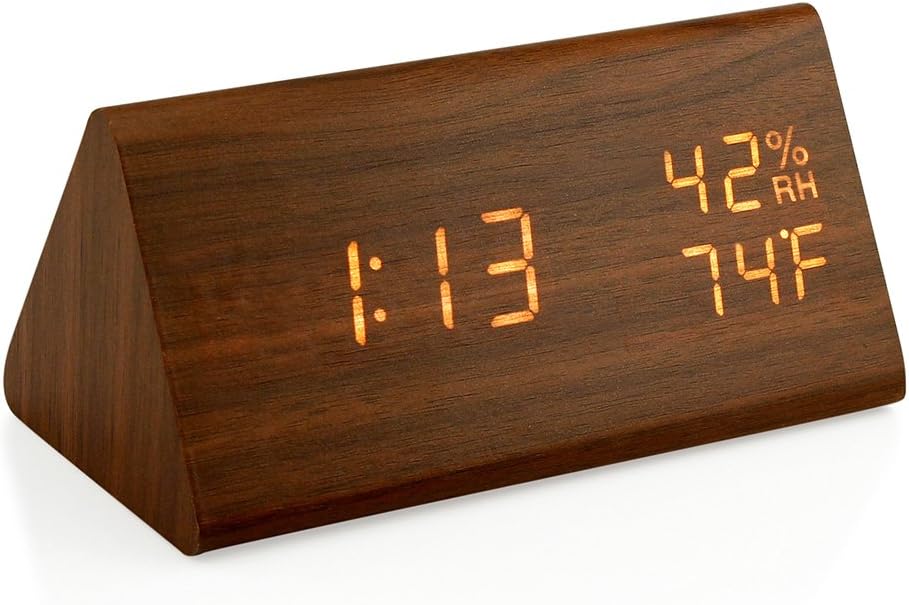
Figure 1: Front view of the OCT17 Wooden Alarm Clock displaying 1:13, 42% RH, and 74°F.
Its minimalist design, crafted from premium quality engineered wood with a white LED backlight display, seamlessly integrates into any modern home or office environment. The compact size (approximately L6 x W3 x H3 inches) makes it a versatile addition to any room.
2. Package Contents
Please verify that all items are present in your package:
- OCT17 Wooden Alarm Clock x 1
- AC Adapter x 1
- USB Charging Cable x 1
- User Manual x 1 (This document)

Figure 2: Included AC adapter and USB charging cable.
3. Setup
3.1 Power Connection
- Insert Backup Batteries (Optional but Recommended): Before connecting the main power, insert 4 AAA batteries (not included) into the battery compartment located on the back of the clock. This ensures that time and settings are retained during power outages.
- Connect AC Adapter: Plug the small end of the provided USB charging cable into the DC 5V port on the back of the clock.
- Connect to Power Outlet: Plug the AC adapter into a standard wall outlet. The clock display will illuminate.
Note: While the clock can theoretically run on batteries alone, the display will typically turn off after a short period to conserve power. For continuous display, it is recommended to keep the clock plugged in using the AC adapter.

Figure 3: Rear view of the clock with control buttons and power input.
4. Operating Instructions
4.1 Setting Time, Date, and Year
The clock features three control buttons on the back: SET, UP (+), and DOWN (-).
- Press and hold the SET button for a few seconds to enter the setting mode.
- The first setting (e.g., Year) will begin to flash. Use the UP (+) or DOWN (-) buttons to adjust the value.
- Press SET again to confirm the value and move to the next setting (e.g., Month, Day, Hour, Minute).
- Repeat step 2 and 3 until all desired settings are configured.
- Once all settings are complete, the clock will exit setting mode automatically after a few seconds of inactivity, or you can press SET repeatedly until the display returns to normal time.
4.2 Alarm Clock Functions
The clock supports up to three independent alarms (A1, A2, A3).
- Press the ALARM button (or SET button, depending on model, refer to specific manual if available) to cycle through alarm settings (A1, A2, A3).
- When an alarm setting is displayed, press and hold the SET button to enter alarm time adjustment.
- Use the UP (+) or DOWN (-) buttons to set the desired alarm hour and minute.
- Press SET to confirm and move to the alarm frequency setting (e.g., everyday, weekdays only).
- Use UP (+) or DOWN (-) to select the frequency.
- Press SET to save and exit.
- To activate or deactivate an alarm, short press the ALARM button until the desired alarm (A1, A2, or A3) is displayed, then use the UP (+) or DOWN (-) button to toggle it ON or OFF. An alarm icon will appear on the display when active.
- To stop a sounding alarm, press any button. To completely disable the alarm sound, ensure the alarm is set to OFF in the settings.
4.3 Adjustable Brightness
The clock features 7 levels of brightness adjustment for the LED display.
- Short press the UP (+) button to cycle through the brightness levels (L1 - L7, or L1, L2, L3 depending on model). L1 is the dimmest, L7 (or L3) is the brightest.
- Select the desired brightness level for optimal visibility in different lighting conditions.

Figure 4: Brightness adjustment levels.
4.4 Sound Control Function
This feature allows the clock display to go into standby mode after 10 seconds of inactivity, conserving power. The display can be reactivated by making a sound (e.g., clapping hands) above 60dB or by touching the clock.
- To activate or deactivate sound control, refer to the specific instructions in your included user manual. Typically, this involves a specific button combination or a switch on the back of the unit.
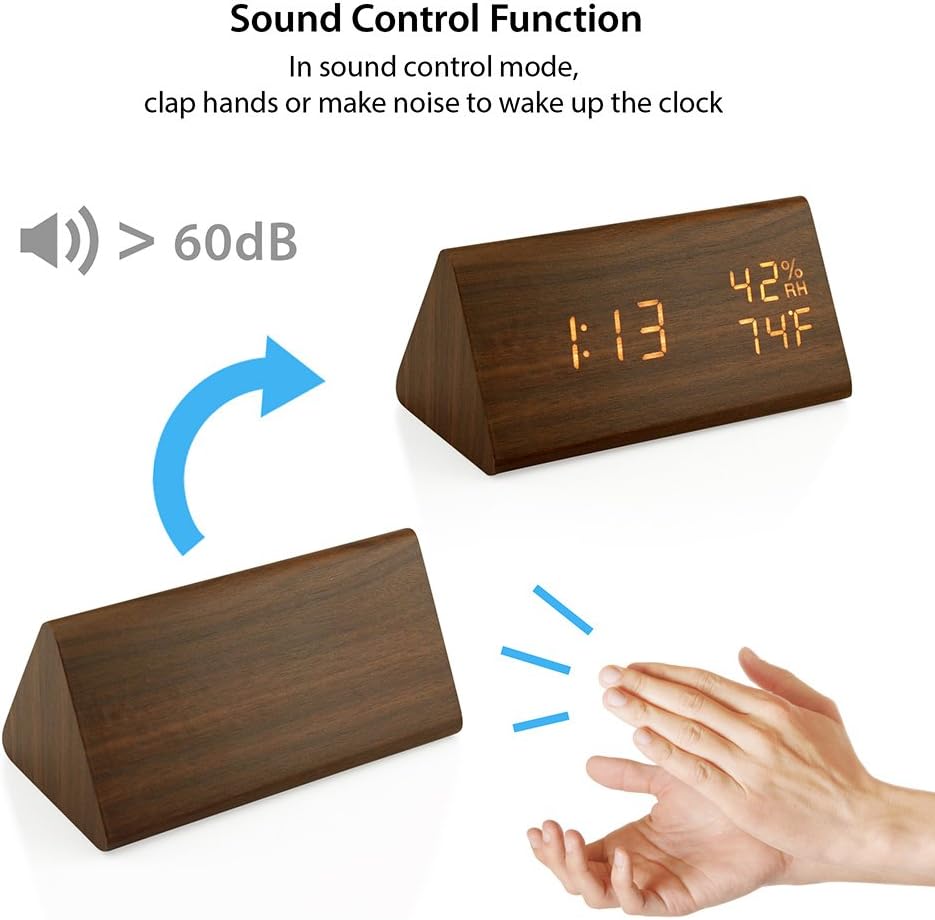
Figure 5: Sound control function illustration.
4.5 Temperature and Humidity Display
The clock displays both temperature and relative humidity. The temperature can be switched between Celsius and Fahrenheit.
- To switch between Celsius (°C) and Fahrenheit (°F), short press the UP (+) button once when the temperature is displayed.
4.6 USB Charging Ports
The clock is equipped with two USB output ports (5V, 1A) on the back, allowing you to charge compatible smartphones (Android or Apple) simultaneously.
- Connect your device's USB charging cable to one of the USB output ports on the clock.
- Ensure the clock is powered via the AC adapter for optimal charging performance.
5. Maintenance
To ensure the longevity and optimal performance of your OCT17 Wooden Alarm Clock, follow these simple maintenance guidelines:
- Cleaning: Gently wipe the clock's surface with a soft, dry, or slightly damp cloth. Avoid using abrasive cleaners, solvents, or harsh chemicals, as these may damage the finish or electronic components.
- Placement: Place the clock on a stable, flat surface away from direct sunlight, excessive heat, humidity, or strong magnetic fields.
- Power: Always use the provided AC adapter and USB cable for power. If using battery backup, ensure batteries are replaced periodically to prevent leakage.
6. Troubleshooting
| Problem | Possible Cause | Solution |
|---|---|---|
| Display is off or very dim. | Sound control mode is active; Brightness set too low; Not connected to continuous power. | Make a sound (e.g., clap) to activate display. Press UP (+) button to increase brightness. Ensure clock is plugged into AC power for continuous display. |
| Time/settings reset after power disconnection. | No backup batteries installed or batteries are depleted. | Install 4 AAA batteries in the battery compartment. Replace old batteries if already installed. |
| Difficulty setting time/alarm. | Incorrect button sequence or short press instead of long press. | Ensure you are pressing and holding the SET button for a few seconds to enter setting mode. Follow instructions in Section 4.1 and 4.2 carefully. |
| Alarm sounds unexpectedly or cannot be turned off. | Alarm is active; Alarm not fully deactivated. | Press any button to snooze/stop. To fully disable, ensure the alarm is toggled to OFF in the alarm settings (refer to Section 4.2). |
| Temperature/Humidity readings seem inaccurate. | Internal sensor reading ambient conditions; Not calibrated. | The clock provides ambient readings. Ensure the clock is not placed near heat sources, vents, or in direct sunlight, which can affect readings. No user calibration is available. |
7. Specifications
| Feature | Detail |
|---|---|
| Brand | OCT17 |
| Model Number | 10505-Brown |
| Color | Brown |
| Display Type | Digital LED |
| Product Dimensions | 6"W x 3"H (approx. L15 x W7 x H7 cm) |
| Item Weight | 7.7 ounces (218 grams) |
| Power Source | AC Adapter (included), Battery Powered (for backup) |
| Battery Type (Backup) | 4 x AAA batteries (not included) |
| USB Output Ports | 2 x 5V, 1A |
| Material | Engineered Wood |
| Special Features | Time, Date, Year, Temperature (°F/°C), Humidity (%RH), Alarm Clock, Adjustable Brightness, Sound Control, USB Charging |
| UPC | 649558342158 |

Figure 6: Product dimensions (approx. 15cm x 7cm).
8. Warranty and Support
OCT17 is committed to customer satisfaction. While specific warranty details are not provided in this manual, the manufacturer stands behind its product. If you encounter any issues or are not completely satisfied with your OCT17 Wooden Digital Alarm Clock, please contact OCT17 customer service for assistance.
For support, please refer to the contact information provided on the product packaging or the official OCT17 website. Your satisfaction is our priority, and we will endeavor to resolve any concerns you may have.
Product of Oct17, Trademark Registered. US Trademark Registration Number 5178135 will be fully enforced.
Ask a question about this manual
Ask about setup, troubleshooting, compatibility, parts, safety, or missing instructions. Manuals+ will review the question and use this page’s manual context to help answer it.