Introduction
This manual provides essential information for the safe assembly, operation, and maintenance of your AVENLI Rectangular Frame Pool. Please read all instructions carefully before setting up and using the pool. Proper installation and maintenance are crucial for the longevity and safe use of your pool.
Important Safety Information
Failure to follow these instructions can result in serious injury or death. Always supervise children in and around the pool. No diving or jumping. Ensure the pool is set up on a level surface. Keep all electrical equipment away from the pool. Consult local regulations regarding pool installation and safety barriers.
- Adult supervision is required at all times.
- Do not dive or jump into the pool.
- Install the pool on a firm, level surface.
- Keep electrical devices away from the pool area.
- Secure the pool area to prevent unsupervised access by children.
Package Contents
Verify that all components listed below are present before beginning assembly.
- Rectangular Pool Liner (Grey PVC laminated material)
- Rust-resistant Steel Frame Components
- Filter Pump (2006 l/h capacity)
- 2 Filter Cartridges
- Safety Ladder (122 cm)
- Drain Valve Adapter for Garden Hose
- Repair Kit
- Instruction Manual (this document)

Image: The AVENLI Rectangular Frame Pool with its main components: the pool structure, filter pump, filter cartridge, and safety ladder.

Image: A detailed view of the filter pump, an essential component for water circulation and filtration.

Image: A new, clean filter cartridge, ready for installation in the filter pump.

Image: The 122 cm safety ladder, designed for safe entry and exit from the pool.
Setup and Assembly
The AVENLI Rectangular Frame Pool is designed for relatively easy assembly, typically taking about 45 minutes with two people. No special tools are required.
1. Site Preparation
Choose a firm, completely level area for pool installation. The ground must be free of sharp objects, debris, and excessive slopes. A slight incline can cause the pool to collapse. Ensure adequate drainage away from the pool area.
2. Laying Out the Liner
Unfold the pool liner in the chosen location. Ensure the drain valve is positioned where it can be easily accessed for future draining.
3. Assembling the Frame
Connect the steel frame components according to the diagrams provided in the included DVD or printed manual. Ensure all connections are secure. The frame provides the structural support for the pool.

Image: An illustrative diagram detailing the pool's dimensions (400x207x122 cm) and indicating quick assembly, U-frame support, repair kit, no tools required, and Lam-Tech material.
4. Attaching the Filter Pump and Ladder
Once the frame is assembled and the liner is in place, connect the filter pump hoses to the designated inlets and outlets on the pool liner. Install the safety ladder securely according to its separate instructions.

Image: Components for the pool's drain valve, including the cap, internal fitting, and garden hose adapter, facilitating easy emptying.
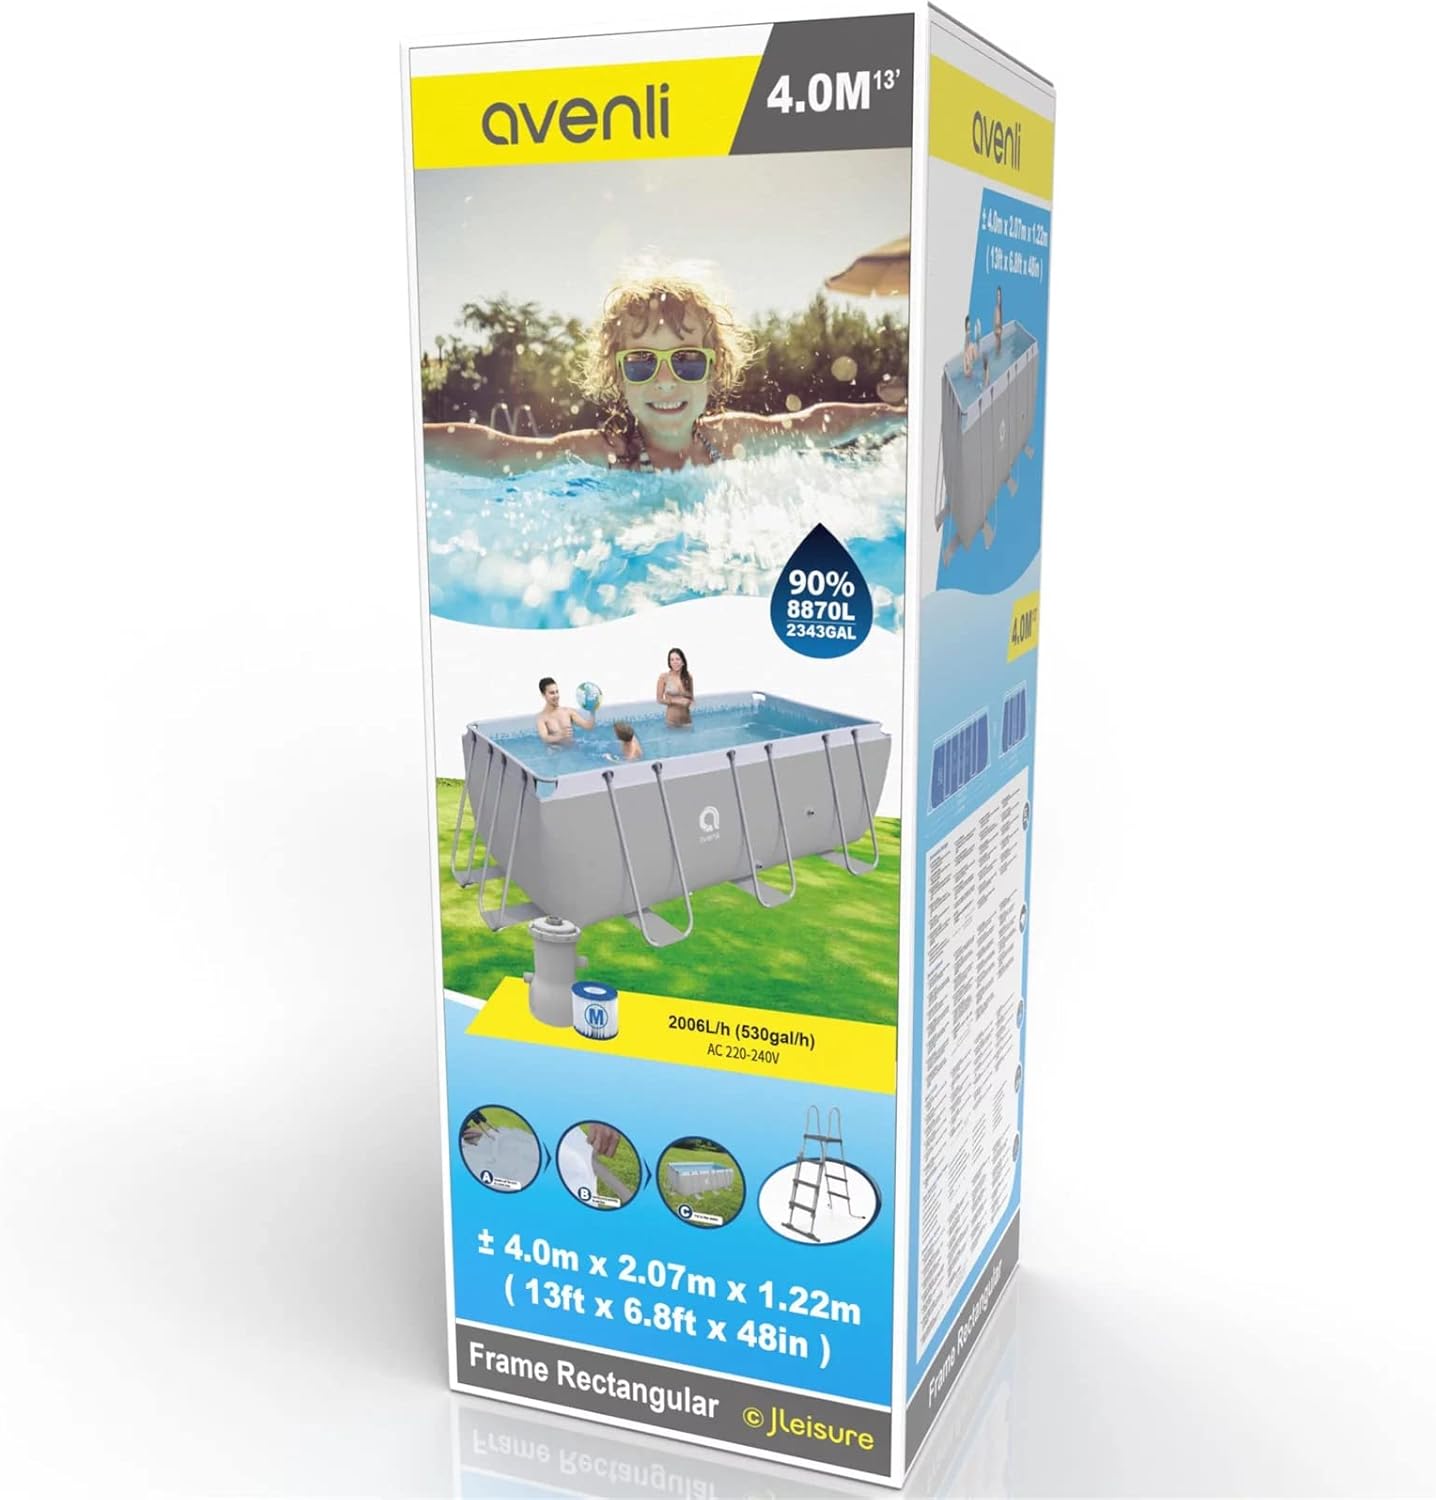
Image: A close-up view of a vertical support pole correctly inserted into the pool liner's sleeve, demonstrating part of the frame assembly.
Operation
1. Filling the Pool
Begin filling the pool with water. As the water level rises, gently smooth out any wrinkles in the liner from the center outwards. Fill the pool to approximately 90% capacity (8870 liters for this model), which is typically just below the filter pump's upper inlet.
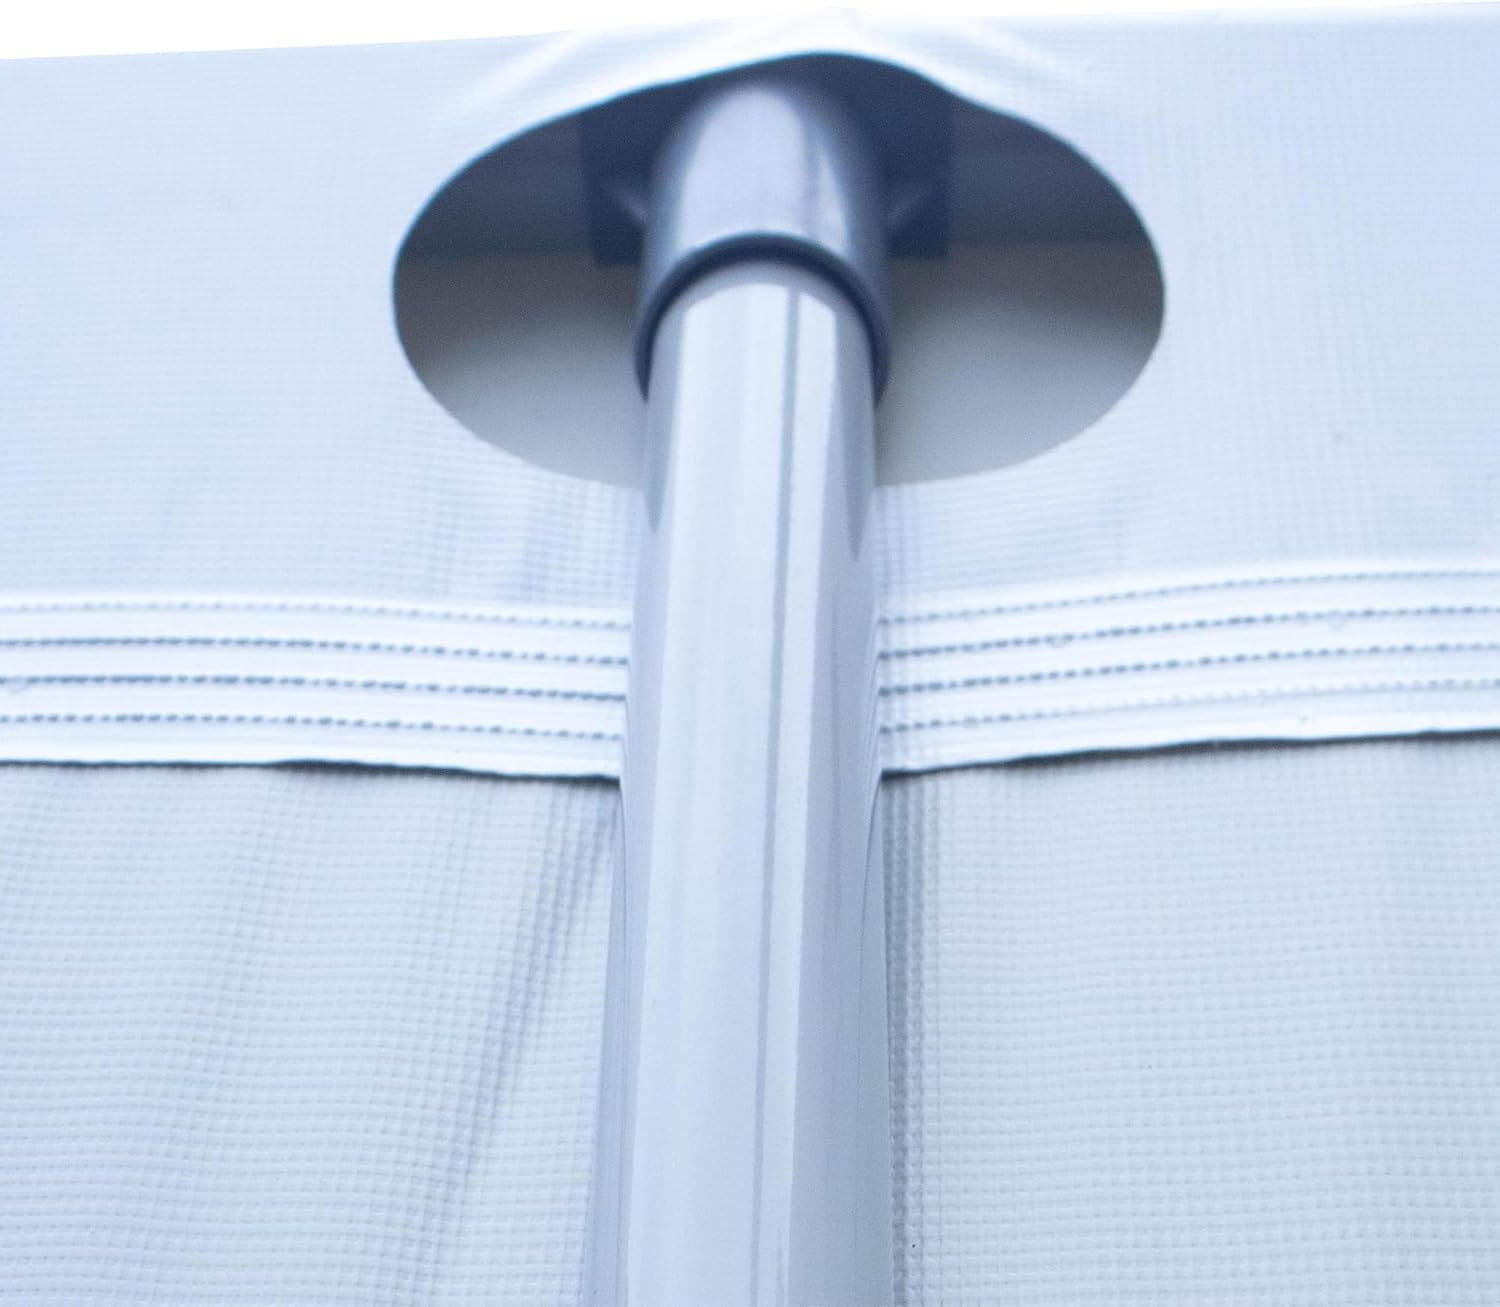
Image: A family enjoying the AVENLI Rectangular Frame Pool in a backyard setting, illustrating the pool in use.
2. Filter Pump Operation
Once the pool is filled, ensure the filter pump is properly connected and primed. Operate the filter pump daily for several hours to circulate and filter the water, keeping it clean and clear. Refer to the filter pump's specific manual for detailed operating instructions and safety precautions.
3. Water Chemistry
Regularly test the pool water chemistry (pH, chlorine, alkalinity) and adjust as needed using appropriate pool chemicals. Maintain proper chemical balance to ensure water safety and prevent algae growth.
Maintenance
1. Cleaning the Pool
Regularly skim debris from the water surface and vacuum the pool floor to remove dirt and sediment. Use a soft brush to clean the pool walls as needed.
2. Filter Cartridge Replacement
The filter cartridge should be rinsed with a garden hose every few days and replaced every 2-4 weeks, depending on pool usage and water quality. Always turn off and unplug the filter pump before cleaning or replacing the cartridge.
3. Winterization and Storage
At the end of the swimming season, completely drain the pool using the integrated drain valve and garden hose adapter. Clean and thoroughly dry all pool components before disassembling the frame. Store the liner and frame parts in a dry, protected area, away from extreme temperatures and pests, to prevent damage and extend product life.
Troubleshooting
| Problem | Possible Cause | Solution |
|---|---|---|
| Water is cloudy/dirty | Insufficient filtration; dirty filter cartridge; improper chemical balance. | Run filter pump longer; clean or replace filter cartridge; test and adjust water chemistry. |
| Filter pump not working | Not plugged in; tripped breaker; airlock; clogged impeller. | Check power connection; reset breaker; bleed air from pump; inspect and clear impeller. |
| Pool losing water level | Evaporation; leak in liner or connections. | Normal evaporation occurs; check for visible leaks and use repair kit if necessary; tighten connections. |
| Frame instability | Uneven ground; improper assembly. | Ensure pool is on a perfectly level surface; re-check all frame connections for proper assembly. |
Specifications
- Model: 17727EU
- Dimensions (L x W x H): 400 x 207 x 122 cm (13.1 ft x 6.8 ft x 4 ft)
- Water Capacity (90%): 8870 Liters (2343 Gallons)
- Swim Area (L x W x H): 376 x 173 x 109 cm (12.3 ft x 5.7 ft x 3.6 ft)
- Material: Multi-layer Laminated PVC Liner, Rust-resistant Steel Frame
- Color: Grey
- Filter Pump Capacity: 2006 Liters/hour (530 Gallons/hour)
- Safety Ladder Height: 122 cm (48 inches)
- Assembly Time: Approximately 45 minutes (2 people)
- Product Weight: 57 kg (125.7 lbs)
Warranty and Support
For warranty information, technical support, or to purchase replacement parts, please contact AVENLI customer service. Refer to your purchase documentation for specific warranty terms and contact details. You can also visit the official AVENLI website for further assistance.
For general inquiries or to explore other AVENLI products, visit the AVENLI store on Amazon: AVENLI Store


