
1. Introduction
The Cooler Master MasterBox Q300L is a Micro-ATX tower designed for compact yet functional PC builds. This manual provides essential information for setting up, operating, and maintaining your computer case, ensuring optimal performance and longevity.
2. Safety Information
- Always disconnect power before performing any installation or maintenance.
- Handle components with care to prevent damage from static electricity.
- Keep small parts and packaging materials away from children.
- Ensure proper ventilation around the case to prevent overheating.
- Avoid placing the case in direct sunlight or near heat sources.
3. Package Contents
Verify that all items are present in the package:
- 1 computer case
- Accessory box (screws, standoffs, cable ties)
- User Manual (this document)
4. Key Features
The MasterBox Q300L offers several design elements for an optimized building experience:
- Ample Interior: Designed for Micro-ATX or Mini-ITX motherboards, allowing for easy expansion.
- Components Clearance: Supports CPU coolers up to 159mm, GPU cards up to 360mm, and PSUs up to 160mm.
- Versatile Cooling: Maximize cooling with support for a 240mm liquid cooler and up to 5 fans.
- Modular I/O Panel: The I/O panel can be adjusted to six different locations (front, top, or bottom on both sides).
- Edge-To-Edge Panel: A transparent acrylic side panel showcases your internal components.
- Open Thermal Design: Perforated design on all sides ensures optimal airflow and heat dissipation.
- Magnetic Dust Filters: Unique patterned dust filters provide easy cleaning and a distinctive look.
- Routing Space: 28mm of space behind the motherboard tray for efficient cable management.
- Multiple Positioning: The case can be oriented either vertically or horizontally.
Feature Visuals
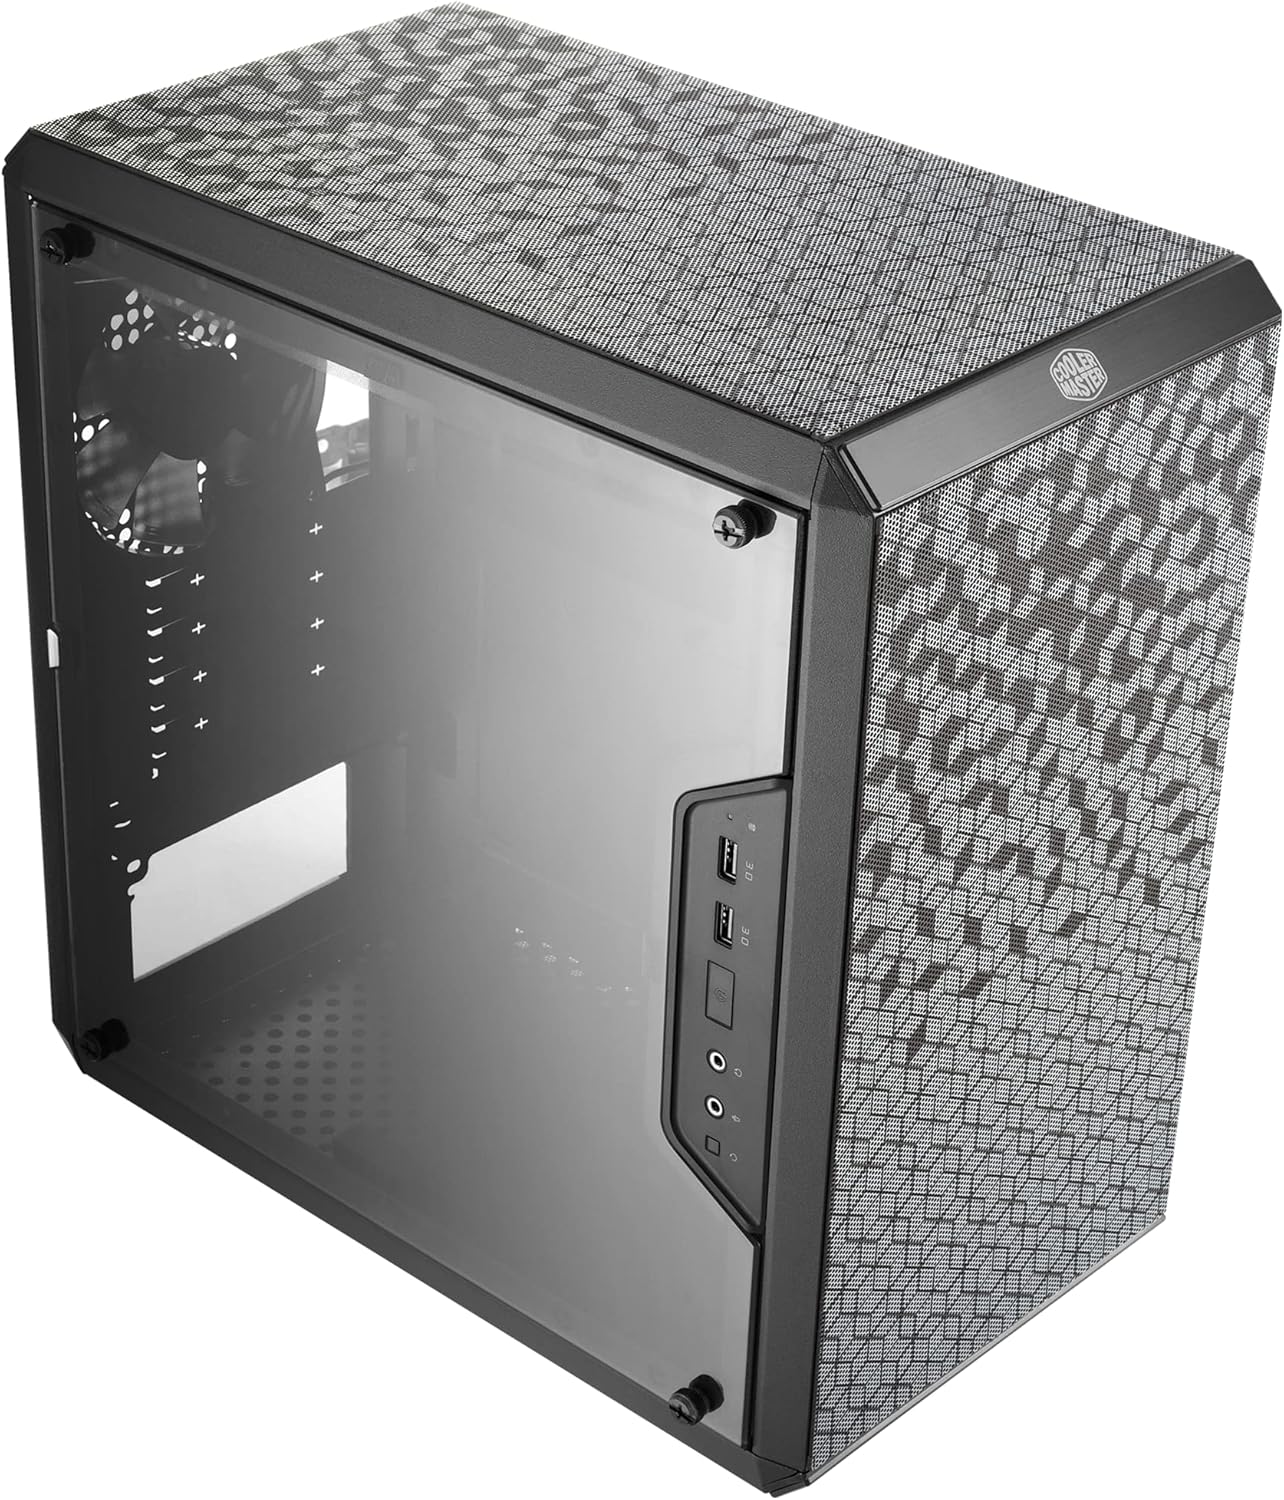
Figure 4.1: Overall view of the Cooler Master MasterBox Q300L Micro-ATX Tower.

Figure 4.2: Magnetic dust filters with a unique pattern for easy removal and cleaning.

Figure 4.3: Diagram illustrating component clearance for CPU cooler (159mm), GPU (360mm), and PSU (160mm).

Figure 4.4: Internal view showing versatile cooling options, including support for a 240mm liquid cooler and multiple 120mm/140mm fans.

Figure 4.5: Illustration of the modular I/O panel, which can be repositioned on the front, top, or bottom on either side of the case.

Figure 4.6: The transparent edge-to-edge acrylic side panel, allowing a clear view of the internal components.

Figure 4.7: The perforated design on all sides of the case, promoting optimal airflow and heat dissipation.

Figure 4.8: Internal layout showing ample space for Mini-ITX and Micro-ATX motherboards.

Figure 4.9: View of the 28mm routing space behind the motherboard tray for efficient cable management.

Figure 4.10: The case can be oriented either vertically or horizontally to suit your setup.
5. Setup Guide
Follow these steps to assemble your PC components within the MasterBox Q300L case.
- Prepare the Motherboard: Install your CPU, RAM modules, and M.2 SSDs onto the motherboard before placing it into the case.
- Install Power Supply Unit (PSU): Mount the PSU into its designated compartment, typically at the bottom rear of the case. Secure it with screws.
- Install Cooling System: If using an AIO liquid cooler, install the radiator and fans to the top or front panel as per your configuration. If using an air cooler, install it onto the CPU on the motherboard.
- Install Motherboard: Carefully place the prepared motherboard into the case, aligning it with the standoffs. Secure it with screws.
- Install Graphics Card: Insert your graphics card into the appropriate PCI-E slot on the motherboard and secure it with the retention mechanism and screws.
- Connect Cables: Connect all necessary power cables from the PSU to the motherboard, graphics card, and other components. Connect data cables for storage drives. Route cables through the designated cutouts for tidy management.
- Close Side Panels: Once all components are installed and cables are managed, reattach the side panels, including the transparent acrylic panel.
Setup Videos
Video 5.1: Assembly demonstration for a mini Micro-ATX case, showing component installation steps.
Video 5.2: Product overview and assembly demonstration for a computer case, highlighting internal features and installation.
6. Operating Instructions
After successful assembly, connect your peripherals (monitor, keyboard, mouse) and power cable to the PC. Press the power button on the I/O panel to start your system. Ensure all fans are spinning and components are receiving power.
7. Maintenance
- Dust Filters: Regularly remove and clean the magnetic dust filters located on the top, front, and bottom panels. Use compressed air or a soft brush to remove accumulated dust.
- Internal Cleaning: Periodically use compressed air to clean dust from internal components such as CPU cooler fins, GPU heatsinks, and case fans.
- Exterior Cleaning: Wipe the exterior surfaces with a soft, damp cloth. Avoid abrasive cleaners that may damage the finish or acrylic panel.
8. Troubleshooting
- No Power: Check all power connections, including the PSU cable, motherboard power, and front panel power switch connection. Ensure the PSU switch is in the 'ON' position.
- Overheating: Verify that all case fans and CPU/GPU coolers are functioning correctly. Clean dust filters and ensure adequate airflow.
- I/O Panel Issues: Ensure all front panel connectors (USB, audio) are correctly plugged into the motherboard headers.
9. Specifications
| Feature | Detail |
|---|---|
| Brand | Cooler Master |
| Model Name | Q300L |
| Item Model Number | MCB-Q300L-KANN-S00 |
| Case Type | Mini-Tower |
| Motherboard Compatibility | Micro-ATX, Mini-ITX |
| Color | Black |
| Material | Alloy Steel, Plastic |
| Item Weight | 1.06 pounds (480 Grams) |
| Product Dimensions (LxWxH) | 15.39 x 9.06 x 15 inches |
| CPU Cooler Clearance | 159mm |
| GPU Clearance | 360mm |
| PSU Clearance | 160mm |
| Cooling Method | Air |
| Number of USB 3.0 Ports | 2 |
10. Warranty and Support
For warranty information and technical support, please refer to the official Cooler Master website or contact their customer service. Keep your purchase receipt for warranty claims.


