
1. Introduction
Thank you for choosing the HUANUO Dual Arm Monitor Stand. This product is designed to enhance your workspace by providing an ergonomic and space-saving solution for mounting two computer monitors. With its full motion gas spring arms, you can easily adjust your monitors to optimal heights and angles, reducing strain on your neck, back, and shoulders, and improving productivity.
This manual provides detailed instructions for assembly, operation, and maintenance to ensure safe and efficient use of your monitor stand.
2. Safety Information
WARNING:
- Do NOT install this monitor stand on glass desktops.
- Do NOT install this monitor stand on desks made of particle board, as it may cause damage or instability.
- Ensure your desk surface is sturdy and capable of supporting the combined weight of the monitor stand and your monitors.
- Do not exceed the maximum load capacity of 17.6 lbs (8 kg) per arm.
- Keep children and pets away during installation.
- Always follow the assembly instructions carefully. If you have any questions, contact customer support.
3. Package Contents
Please verify that all components are present and undamaged before beginning assembly.
- Dual Gas Spring Monitor Arms (2)
- Desk Clamp Base (1)
- Grommet Base (1)
- Main Pole (1)
- VESA Plates (2)
- Hardware Kit (Screws, Washers, Allen Keys)
- Cable Management Clips
- Instruction Manual
4. Setup and Installation
The HUANUO Dual Arm Monitor Stand offers two installation options: C-clamp and Grommet base. Choose the method that best suits your desk.

Image: The C-clamp and grommet base options for securing the monitor stand to your desk.
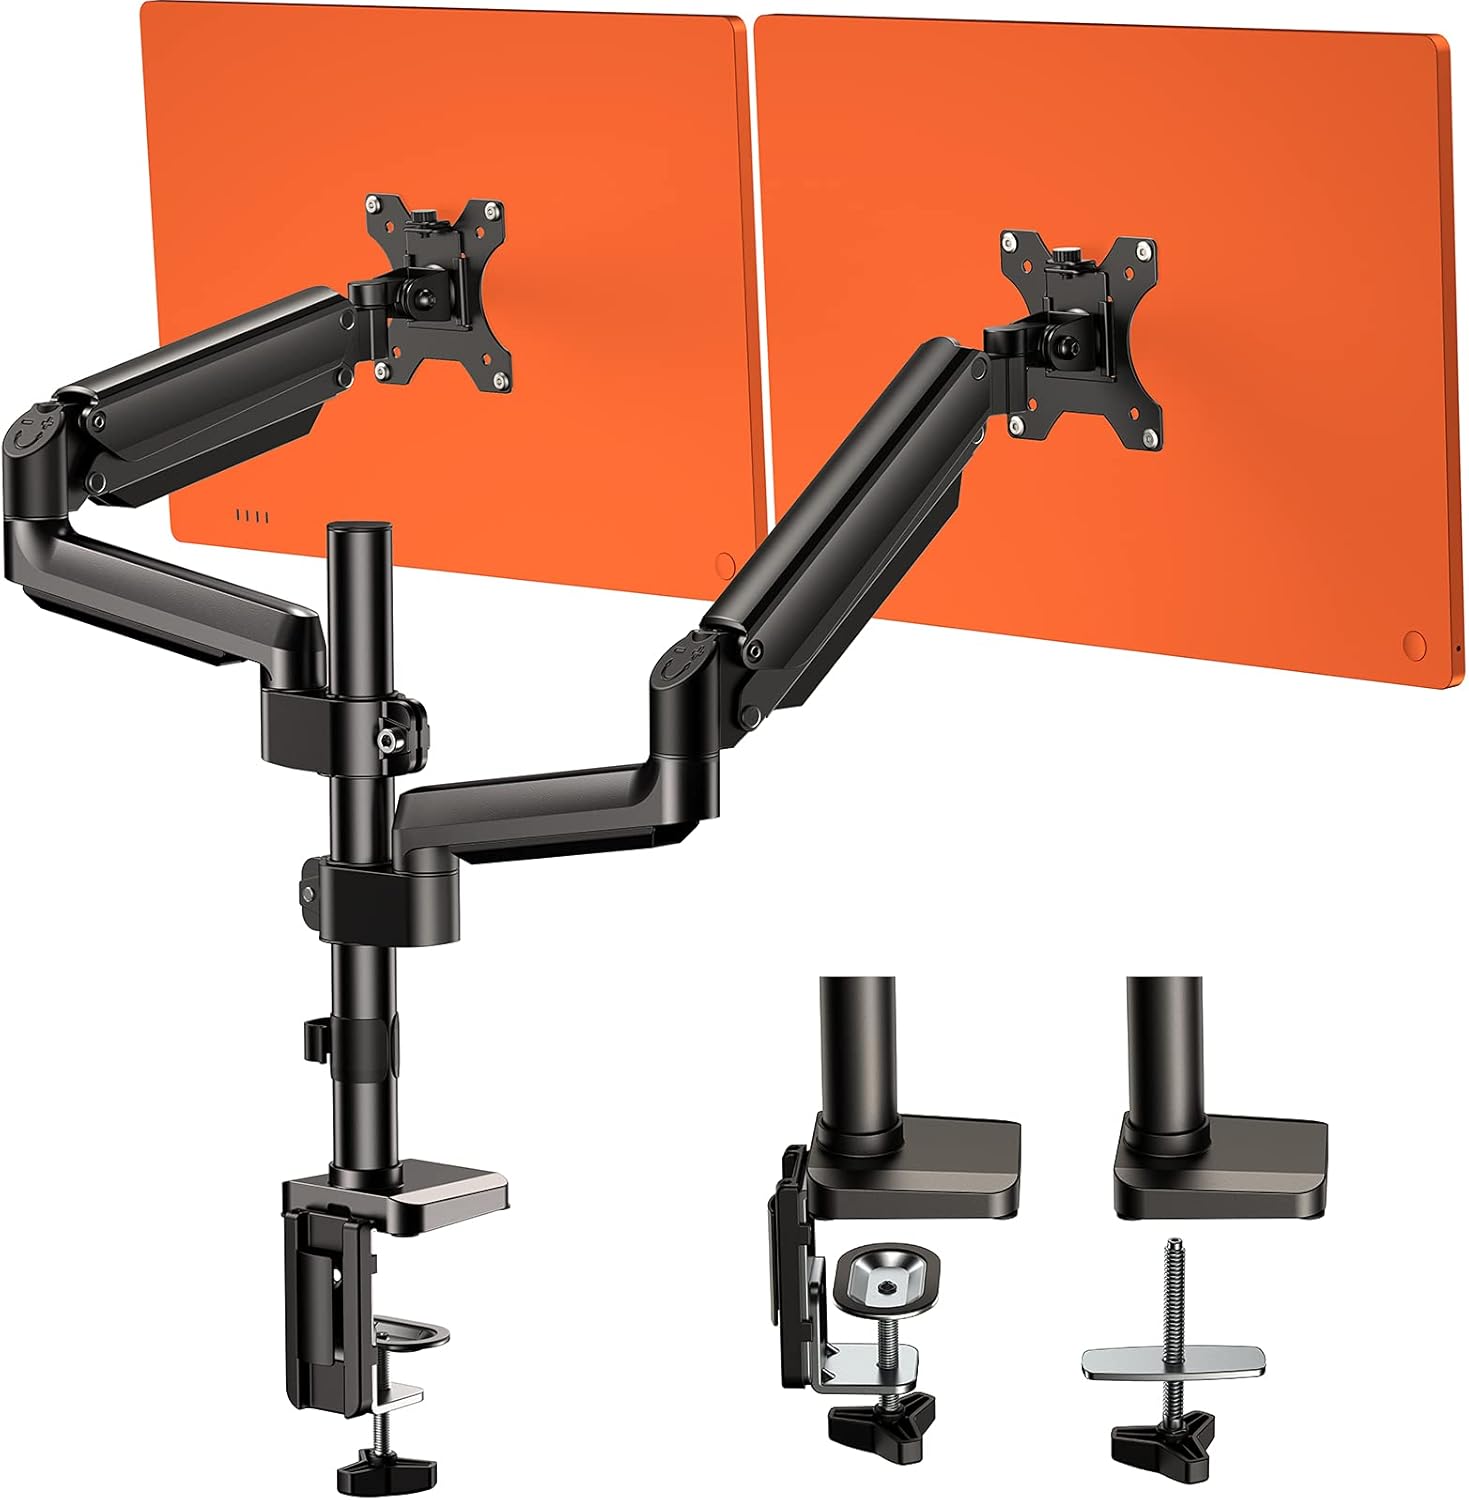
Image: Overview of the HUANUO Dual Arm Monitor Stand components, including the C-clamp and grommet base options.
4.1. Attaching the Base to Your Desk
- C-Clamp Installation:
Attach the C-clamp to the main pole. Position the stand on the edge of your desk and tighten the clamp screw until it is securely fastened. Ensure the clamp is stable and does not wobble. - Grommet Base Installation:
If your desk has a grommet hole, disassemble the C-clamp and use the grommet base plate and screw to secure the main pole through the hole. Tighten the nut from underneath the desk.
4.2. Assembling the Monitor Arms
- Slide the monitor arms onto the main pole. Adjust their height and tighten the locking collars to secure them in place.
- Attach the VESA plates to the back of your monitors using the provided screws. Ensure the screws are compatible with your monitor's VESA mounting holes (75x75mm or 100x100mm).
- Carefully slide the monitors (with VESA plates attached) onto the arms. Ensure they click into place. Use the safety screws to prevent accidental detachment.

Image: A VESA plate securely attached to the rear of a monitor, ready for mounting onto the arm.
4.3. Cable Management
Route your monitor cables through the integrated cable management clips on the arms and down the main pole to maintain a tidy workspace.

Image: Cables neatly organized and routed along the monitor arm using the integrated cable management system.
5. Operating and Adjustments
The gas spring system allows for smooth and effortless adjustments. Adjust the tension of the gas spring to match the weight of your monitors for optimal movement.
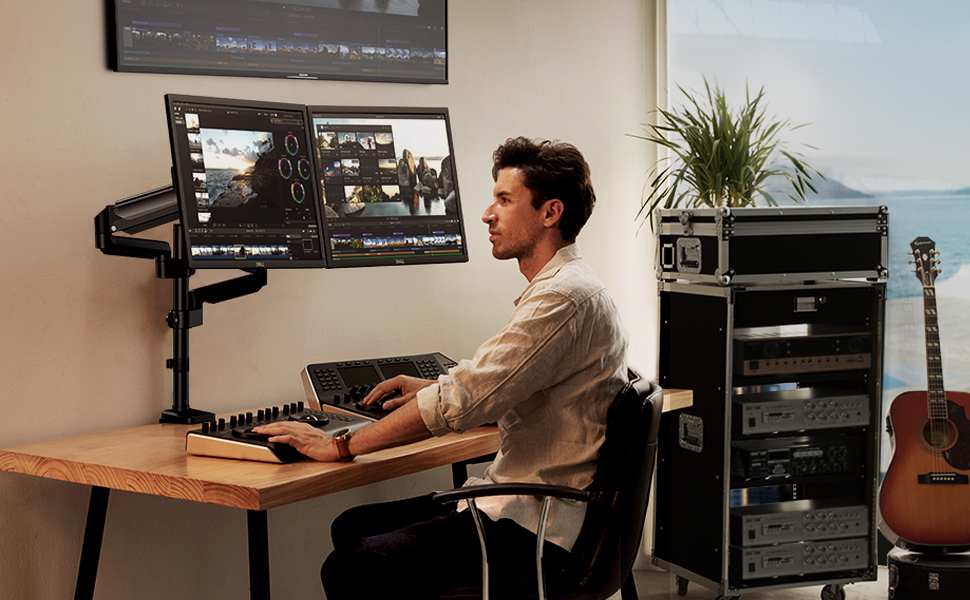
Image: Illustrates the monitor's tilt adjustment range, allowing movement from -45 to +45 degrees.

Image: Demonstrates the monitor's ability to rotate a full 360 degrees for portrait or landscape viewing.

Image: Shows the monitor's swivel capability, allowing for 180-degree horizontal adjustment.

Image: Displays the maximum height adjustment of the monitor stand, reaching up to 16.53 inches.
5.1. Adjusting Gas Spring Tension
If your monitor sags or rises too easily, you may need to adjust the gas spring tension. Use the provided Allen key to turn the adjustment screw located on the arm. Turn clockwise to increase tension (for heavier monitors) or counter-clockwise to decrease tension (for lighter monitors).
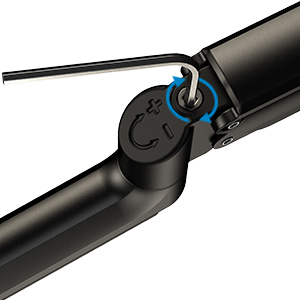
Image: Close-up view of the gas spring adjustment screw on the monitor arm, being turned with an Allen key.
5.2. Monitor Positioning
- Height Adjustment: Lift or lower the monitor arm to your desired ergonomic height.
- Tilt Adjustment: Tilt the monitor screen up or down (-45° to +45°) to reduce glare and find your optimal viewing angle.
- Swivel Adjustment: Swivel the monitor left or right (-90° to +90°) to share your screen or adjust your viewing position.
- Rotation Adjustment: Rotate the monitor 360° to switch between landscape and portrait orientations.
6. Maintenance
- Cleaning: Wipe the stand with a soft, damp cloth. Avoid harsh chemicals or abrasive cleaners.
- Periodic Checks: Regularly check all screws and connections to ensure they remain tight and secure. Re-tighten if necessary.
- Gas Spring: The gas spring is designed for long-term use and generally requires no maintenance. If you notice a change in performance, re-adjust the tension as described in Section 5.1.
7. Troubleshooting
| Problem | Possible Cause | Solution |
|---|---|---|
| Monitor sags or drops | Gas spring tension is too low for monitor weight. | Increase gas spring tension by turning the adjustment screw clockwise (see Section 5.1). |
| Monitor floats up or is difficult to push down | Gas spring tension is too high for monitor weight. | Decrease gas spring tension by turning the adjustment screw counter-clockwise (see Section 5.1). |
| Stand is unstable or wobbles | Base clamp/grommet is not securely tightened. | Re-tighten the C-clamp or grommet base screws. Ensure desk surface is suitable. |
| Monitor cannot be tilted/swiveled/rotated | Joints are too tight. | Loosen the corresponding joint screws slightly. |
8. Specifications
| Feature | Specification |
|---|---|
| Model Number | HNDSK2-VC |
| Compatible Screen Size | 17" to 32" LCD Computer Screens |
| Load Capacity (per arm) | 3.3 lbs - 17.6 lbs (1.5 kg - 8 kg) |
| VESA Compatibility | 75mm x 75mm, 100mm x 100mm |
| Pole Height | 16.5 inches (approx.) |
| Screen Tilt Range | -45° to +45° |
| Arm Swivel Range | +/- 180° |
| Screen Swivel Range | -90° to +90° |
| Screen Rotation | 360° |
| Material | High-grade Steel |
| Color | Black |
| Item Weight | 11.77 lbs |
| Product Dimensions (L x W x H) | 16.85 x 10.47 x 4.09 inches |
9. Warranty and Support
HUANUO products are designed for durability and performance. This product comes with a standard manufacturer's warranty. For detailed warranty information, product support, or to report any issues, please refer to the warranty card included in your package or visit the official HUANUO website.
For further assistance, please contact HUANUO customer service.


