Introduction
This manual provides detailed instructions for the VTech DS6151-11 DECT 6.0 2-Line Expandable Cordless Phone. Please read this manual thoroughly before operating your new telephone to ensure proper installation and use. Keep this manual for future reference.
1. Setup
1.1 Package Contents
Ensure all items are present in your package:
- Main telephone base unit with corded handset
- Cordless handset(s) with charger(s)
- AC power adapter(s)
- Telephone line cord
- Battery pack(s) for cordless handset(s)
- Wall mount bracket (optional)
1.2 Connecting the Telephone Base
- Plug the small end of the AC power adapter into the power jack on the back of the telephone base.
- Plug the large end of the AC power adapter into a wall outlet not controlled by a wall switch.
- Plug one end of the telephone line cord into the TEL LINE jack on the back of the telephone base.
- Plug the other end of the telephone line cord into a telephone wall jack.

Figure 1: VTech DS6151-11 Cordless Phone Base Unit and Handset
1.3 Battery Installation and Charging
- Open the battery compartment cover on the back of the cordless handset.
- Connect the battery pack plug securely into the jack inside the battery compartment.
- Place the battery pack with the label UP and tuck the wires neatly inside the battery compartment.
- Close the battery compartment cover.
- Place the cordless handset in the telephone base or charger to charge. The CHARGE light on the handset will turn on.
Allow the handset to charge for at least 10 hours before initial use.
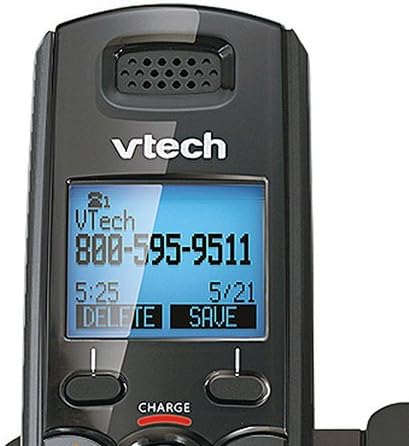
Figure 2: Close-up of VTech DS6151-11 Cordless Handset Display
1.4 Setting Date and Time
After the handset is charged, the display will prompt you to set the date and time. Follow the on-screen instructions to configure these settings.
2. Operating Instructions
2.1 Making and Receiving Calls
- To make a call: Press TALK/FLASH or SPEAKER, then dial the phone number.
- To answer a call: Press TALK/FLASH or SPEAKER when the phone rings.
- To end a call: Press OFF/CANCEL or place the handset in the charger.
2.2 Answering System
The telephone base features a digital answering system with dedicated mailboxes for each line. It can record up to 22 minutes of messages.
- To turn on/off: Press ON/OFF LINE 1 or ON/OFF LINE 2 on the base unit.
- To play messages: Press PLAY/STOP on the base unit.
- To delete messages: Press DELETE during message playback or after listening to a message.
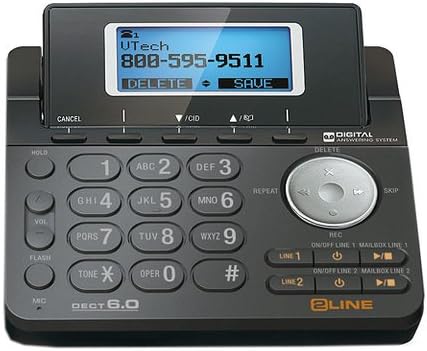
Figure 3: Close-up of VTech DS6151-11 Base Unit Keypad and Controls
2.3 Caller ID and Call Waiting
This phone supports Caller ID and Call Waiting services. You can review the last 50 incoming calls in the Caller ID log.
- To review Caller ID log: Press CID on the handset or base.
- To dial a number from Caller ID: Select the desired entry and press TALK/FLASH or SPEAKER.
2.4 Phonebook
The phonebook can store up to 50 entries. Each entry can save 30 digits for the phone number and 15 characters for the name.
- To add an entry: Press MENU, navigate to Phonebook, select Add New Entry, and follow prompts.
- To search/dial: Press DIR, select the entry, and press TALK/FLASH.
Video 1: How to add a cellphone using Bluetooth (VTech Communications, Inc.)
This video demonstrates how to connect a cellphone via Bluetooth to the VTech phone system, enabling calls and contact synchronization.
2.5 Call Blocking
The Smart Call Blocker feature helps screen unwanted calls. You can add numbers to a block list or a star name list.
- To block a number during a call: Press CALL BLOCK.
- To add a number to the block list manually: Press MENU, navigate to Smart Call Blocker, then Block List, and select Add New.
- To add a number to the star name list: Press MENU, navigate to Smart Call Blocker, then Star Name List, and select Add New.
Video 2: How to build up Block List & Star Name List (VTech Communications, Inc.)
This video guides users on how to manage the call block list and star name list to filter unwanted calls and allow important contacts.
2.6 Intercom
You can use the intercom feature to communicate between handsets or between a handset and the base unit.
- To initiate an intercom call: Press INT on the handset, then dial the desired handset number (1-12) or 0 for the base unit.
3. Maintenance
3.1 Battery Care
- Charge the handset fully before initial use.
- If the handset will not be used for an extended period, remove the battery to prevent leakage.
- Replace batteries when the handset indicates low battery or performance degrades.
3.2 Cleaning
Clean the telephone base and handset with a soft, damp cloth. Do not use cleaning sprays or harsh chemicals.
4. Troubleshooting
| Problem | Solution |
|---|---|
| No dial tone | Ensure the telephone line cord is securely plugged into the base and the wall jack. Check if other phones on the same line are working. |
| Static or poor sound quality | Move the handset closer to the base unit. Avoid placing the phone near other electronic devices that may cause interference. |
| Handset does not charge | Ensure the AC adapter is properly connected. Clean the charging contacts on the handset and charger with a dry cloth. Verify the battery pack is correctly installed. |
| Cannot make/receive calls | Check if the phone line is active. Ensure the handset is registered to the base unit. If issues persist, try resetting the base unit by unplugging the power for a few minutes. |
5. Specifications
- Technology: DECT 6.0 Digital Technology
- Lines: 2-Line Operation
- Expandability: Up to 12 Handsets
- Display: Large Backlit LCD Display
- Phonebook Capacity: 50 Station Phone Directory / Dialer
- Caller ID Memory: 50 Station Name / Number Caller ID Memory
- Answering System: Digital Answering System with 22 minutes recording time
- Battery: 1 AA batteries required (for each handset)
- Power Source: Corded Electric
- Features: Adjustable Handset Volume Control, Selectable Ringtones, Page/Handset Locator
6. Warranty & Support
6.1 Limited Warranty
VTech Communications, Inc. warrants to the holder of a valid proof of purchase that the product and all accessories provided in the sales package are free from material defects in material and workmanship, pursuant to the following terms and conditions, when installed and used normally and in accordance with the operating instructions.
The limited warranty extends only to the original purchaser of the product and is not transferable. The warranty period is typically one (1) year from the date of purchase. For specific details regarding warranty coverage, limitations, and procedures, please refer to the warranty card included with your product or visit the official VTech website.
6.2 Customer Support
For technical support, product registration, or to purchase replacement parts and accessories, please visit the VTech support website or contact VTech customer service. Contact information can typically be found on the VTech website or in the product packaging.
Online Support: www.vtechphones.com/support


