1. Introduction
Thank you for purchasing the Roadstar HRA-9D+BT/RDL Digital Stereo System. This versatile audio system combines classic and modern features, offering DAB, DAB+, FM radio, CD playback, Bluetooth connectivity, and USB/AUX input. This manual provides essential information for setting up, operating, and maintaining your device to ensure optimal performance and longevity. Please read this manual thoroughly before use and retain it for future reference.
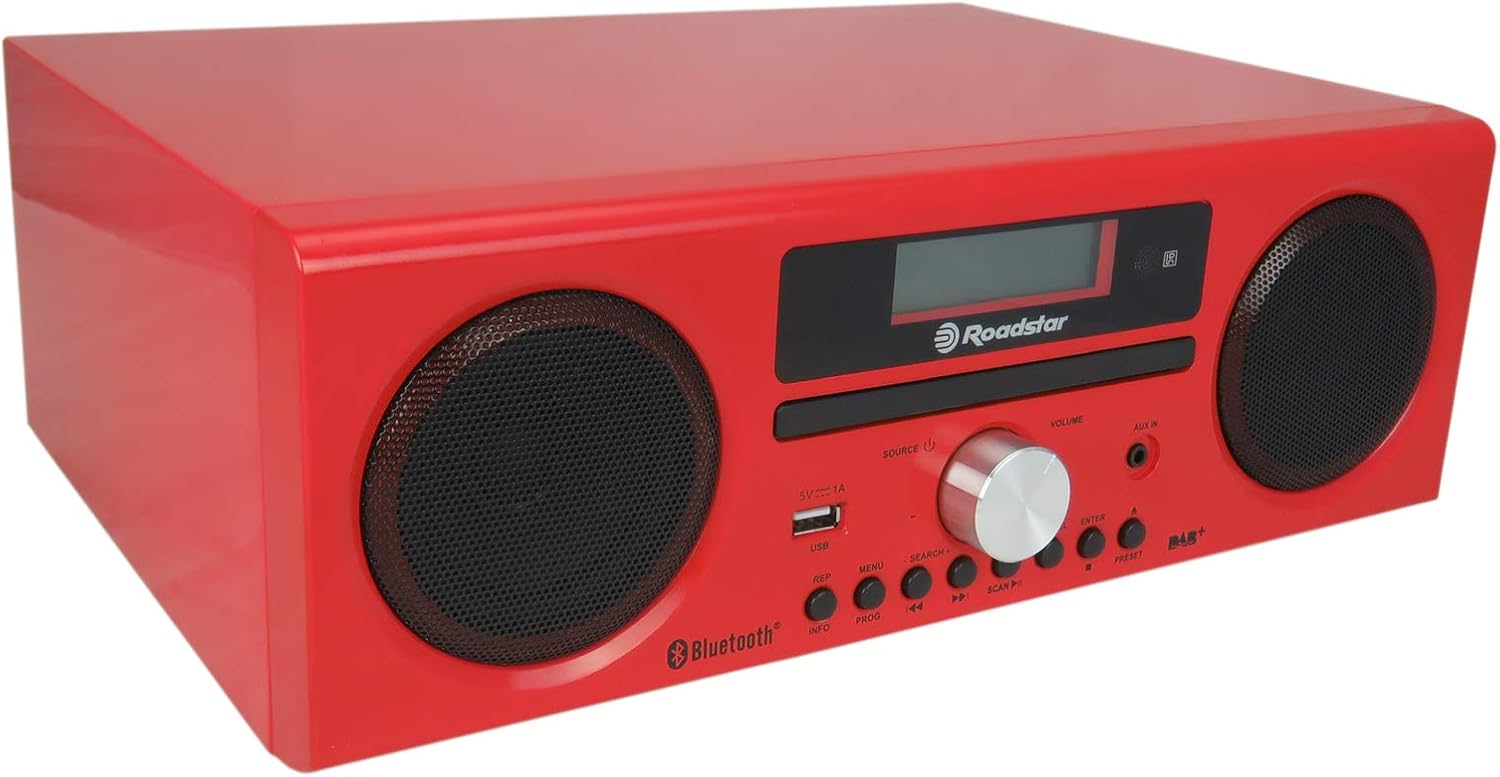
Figure 1.1: Roadstar HRA-9D+BT/RDL Digital Stereo System, angled front view. This image shows the compact red unit with its two front speakers, central display, and control panel.
2. Safety Information
To reduce the risk of electric shock, fire, or damage to the unit, please observe the following safety precautions:
- Power Source: Use only the specified power supply (AC 230V). Ensure the power cord is not damaged or pinched.
- Ventilation: Do not block any ventilation openings. Allow adequate space around the unit for proper airflow.
- Water and Moisture: Do not expose the unit to rain, moisture, dripping, or splashing. Do not place objects filled with liquids, such as vases, on the unit.
- Heat: Keep the unit away from heat sources such as radiators, heat registers, stoves, or other apparatus (including amplifiers) that produce heat.
- Cleaning: Unplug the unit from the power outlet before cleaning. Use a dry cloth for cleaning.
- Servicing: Do not attempt to service this product yourself. Refer all servicing to qualified service personnel.
- Placement: Place the unit on a stable, flat surface. Avoid placing it in direct sunlight or in areas with excessive dust, vibration, or mechanical shock.
3. Package Contents
Please check that all items listed below are present in the package:
- Roadstar HRA-9D+BT/RDL Digital Stereo System Unit
- Remote Control
- AC Power Cord
- FM Antenna (75 ohm coaxial type)
- User Manual (this document)

Figure 3.1: The Roadstar HRA-9D+BT/RDL unit shown with its included remote control. The remote is black with various function buttons.
4. Product Overview
4.1 Front Panel Controls and Features
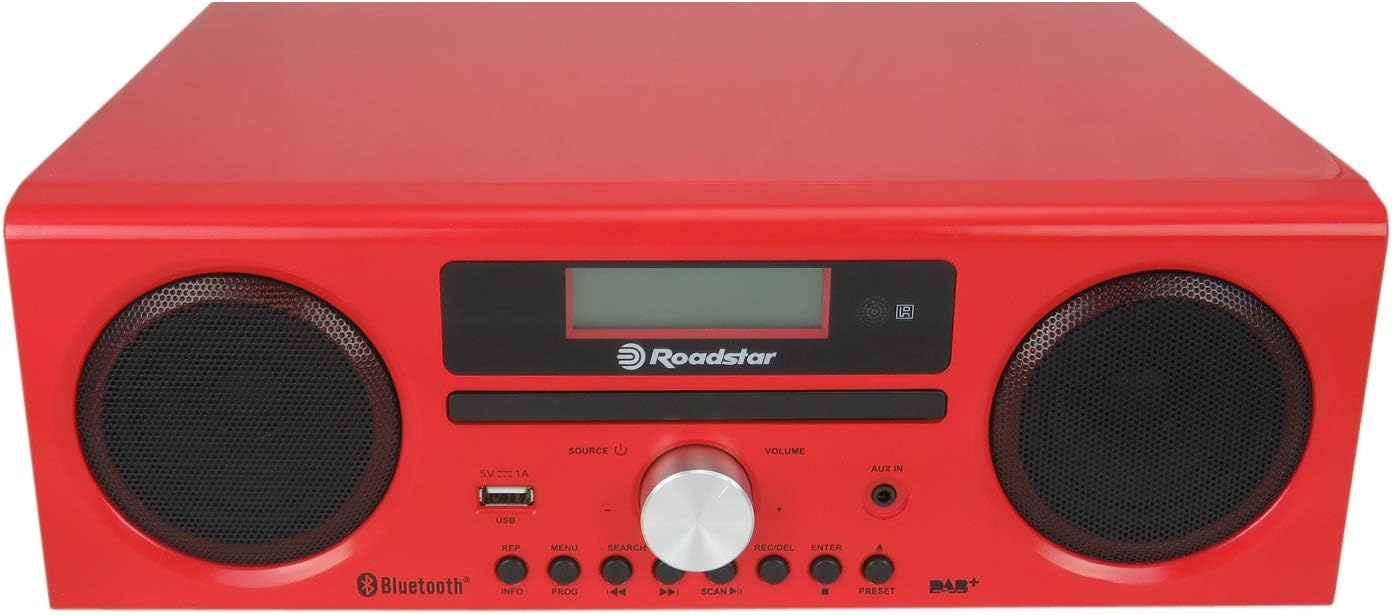
Figure 4.1: Front view of the Roadstar HRA-9D+BT/RDL, highlighting the display, CD tray, speakers, and control buttons.
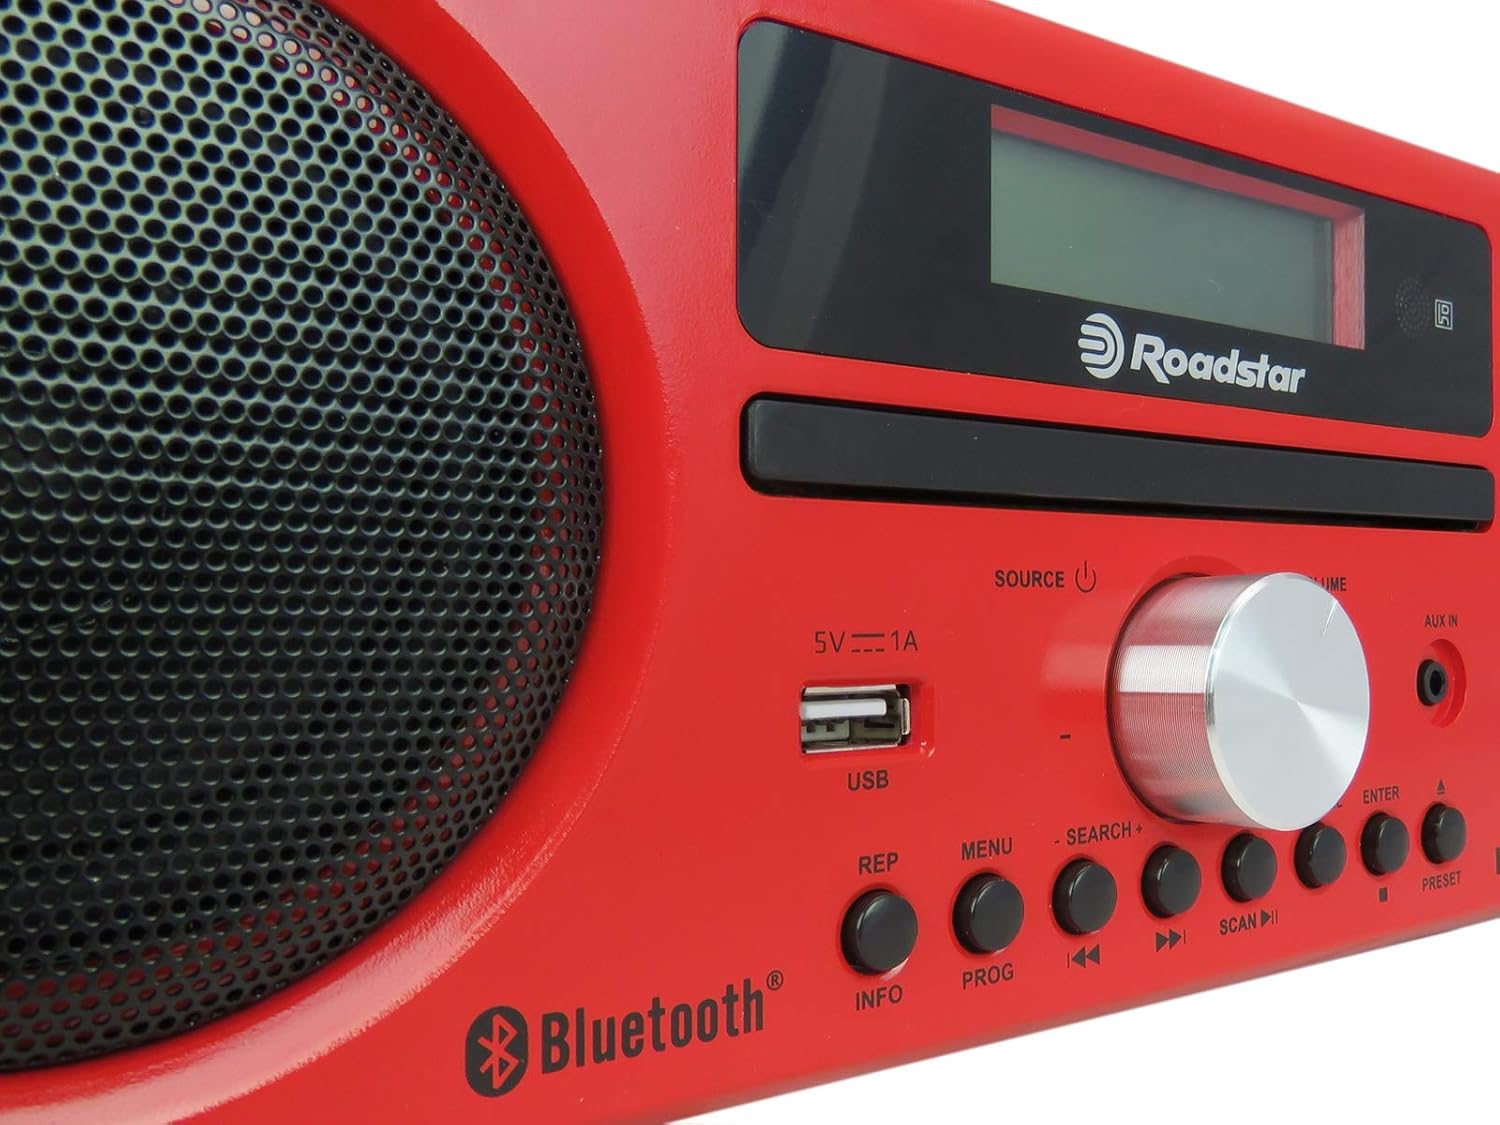
Figure 4.2: Close-up view of the central control panel, showing the USB port, volume knob, and various function buttons clearly labeled.
- Speakers: Left and right audio output.
- Display: LED screen for showing mode, track information, station frequency, etc.
- CD Tray: For inserting audio CDs.
- SOURCE / Power Button: Press to switch between input sources (DAB, FM, CD, Bluetooth, USB, AUX). Press and hold to power the unit on/off.
- VOLUME Knob: Rotate to adjust the audio volume.
- USB Port (5V 1A): For connecting USB storage devices for MP3 playback.
- AUX IN Jack: 3.5mm input for connecting external audio devices.
- REP (Repeat) Button: Repeats current track or all tracks.
- INFO Button: Displays additional information (e.g., DAB station details).
- MENU Button: Accesses menu options for the current mode.
- PROG (Program) Button: Programs radio presets or CD track order.
- SEARCH +/- Buttons: Used for searching radio stations or navigating menus.
- Previous / Fast Rewind Button: Skips to the previous track/station or fast rewinds.
- Play/Pause Button: Starts or pauses playback.
- Next / Fast Forward Button: Skips to the next track/station or fast forwards.
- SCAN Button: Initiates auto-scan for radio stations.
- ENTER Button: Confirms selections in menus.
- PRESET Button: Accesses saved radio presets.
4.2 Rear Panel Features

Figure 4.3: Rear view of the Roadstar HRA-9D+BT/RDL, showing the FM antenna input, power input, and product label.
- FM ANT (75 ohm) Jack: For connecting the external FM antenna.
- AC Power Input: For connecting the AC power cord.
- Product Label: Contains model number, serial number, and electrical specifications.
5. Setup
5.1 Unpacking
Carefully remove the unit and all accessories from the packaging. Retain the packaging materials for future transport or storage.
5.2 Power Connection
- Ensure the unit is placed on a stable, flat surface.
- Connect the supplied AC power cord to the AC Power Input jack on the rear of the unit.
- Plug the other end of the AC power cord into a standard AC 230V wall outlet.
5.3 FM Antenna Connection
For optimal FM radio reception, connect the supplied FM antenna to the "FM ANT 75 ohm" jack on the rear panel. Extend the antenna fully and adjust its position for the best signal.
5.4 Initial Power On
After connecting power, press and hold the SOURCE / Power button on the front panel to turn on the unit. The display will light up.
6. Operating Instructions
6.1 Switching Modes
Press the SOURCE button repeatedly to cycle through the available modes: DAB, FM, CD, Bluetooth, USB, and AUX.
6.2 Radio Operation (DAB/DAB+ and FM)
- Select Mode: Press SOURCE to select DAB or FM mode.
- Auto Scan: In DAB or FM mode, press the SCAN button to automatically scan for available stations. The unit will store found stations.
- Manual Tuning (FM): In FM mode, press the Previous / Next buttons to manually tune the frequency.
- Selecting Stations: Use the Previous / Next buttons to navigate through scanned DAB stations or FM frequencies.
- Saving Presets:
- Tune to the desired station.
- Press and hold the PROG button.
- Use the Previous / Next buttons to select a preset number.
- Press ENTER to confirm.
- Recalling Presets: Press the PRESET button, then use Previous / Next to select the desired preset, and press ENTER.
- Info Display: Press the INFO button to cycle through various information displays (e.g., program type, signal strength, time).
6.3 CD Player Operation
- Select Mode: Press SOURCE to select CD mode.
- Insert CD: Gently insert a CD (CD, CD-R, CD-RW) into the CD tray with the label side facing up. The unit will automatically start reading the disc.
- Play/Pause: Press the Play/Pause button to start or pause playback.
- Skip Tracks: Press the Previous / Next buttons to skip to the beginning of the previous or next track.
- Fast Forward/Rewind: Press and hold the Previous / Next buttons to fast rewind or fast forward through a track.
- Repeat Playback: Press the REP button to cycle through repeat modes (e.g., repeat one track, repeat all tracks).
- Program Playback: Press the PROG button to create a custom playback order for CD tracks.
6.4 Bluetooth Operation
- Select Mode: Press SOURCE to select Bluetooth mode. The display will show "PAIRING" or "BLUETOOTH".
- Enable Bluetooth: On your Bluetooth-enabled device (smartphone, tablet, etc.), turn on Bluetooth and search for available devices.
- Pairing: Select "Roadstar HRA-9D+BT/RDL" (or similar name) from the list of found devices. Once paired, the unit will indicate a successful connection.
- Play Audio: Start playing audio on your connected device. The sound will be streamed through the stereo system.
- Control Playback: Use the Play/Pause and Previous / Next buttons on the unit or your connected device to control playback.
6.5 USB Playback
- Insert USB: Insert a USB storage device (flash drive) containing MP3 audio files into the USB port on the front panel.
- Select Mode: Press SOURCE to select USB mode. The unit will automatically start reading the files.
- Control Playback: Use the Play/Pause and Previous / Next buttons to control playback.
- Supported Format: Only MP3 audio files are supported for USB playback.
6.6 AUX Input
- Connect Device: Connect an external audio device (e.g., smartphone, MP3 player) to the AUX IN jack on the front panel using a 3.5mm audio cable (not supplied).
- Select Mode: Press SOURCE to select AUX mode.
- Play Audio: Start playing audio on your connected external device. The sound will be output through the stereo system.
- Volume Control: Adjust the volume using the VOLUME knob on the unit and/or the volume control on your external device.
7. Maintenance
- Cleaning the Unit:
Wipe the exterior of the unit with a soft, dry cloth. Do not use abrasive cleaners, waxes, or solvents as they may damage the finish. For stubborn stains, a slightly damp cloth can be used, followed by a dry cloth.
- CD Care:
Handle CDs by their edges. Keep them clean and free from scratches. Store CDs in their cases when not in use. Do not use abrasive cleaners or solvents on CDs.
- Storage:
If the unit is not used for an extended period, unplug it from the power outlet and store it in a cool, dry place, away from direct sunlight and extreme temperatures.
8. Troubleshooting
| Problem | Possible Cause | Solution |
|---|---|---|
| No power | Power cord not connected; Power outlet not active. | Ensure power cord is securely plugged into the unit and a working wall outlet. Try a different outlet. |
| No sound | Volume too low; Incorrect source selected; Mute activated. | Increase volume. Press SOURCE to select the correct input. Check if mute is active (if applicable, though not explicitly mentioned for this model). |
| Poor radio reception | Antenna not connected or poorly positioned; Weak signal. | Ensure FM antenna is connected and fully extended. Adjust antenna position. Try moving the unit to a different location. |
| CD skipping or not playing | CD is dirty or scratched; CD inserted incorrectly. | Clean the CD with a soft, lint-free cloth. Ensure the CD is inserted correctly with the label side up. Try a different CD. |
| Bluetooth not connecting | Unit not in Bluetooth mode; Device not in pairing mode; Device too far. | Ensure the unit is in Bluetooth mode. Make sure Bluetooth is enabled on your device and it's in pairing mode. Move devices closer. |
| USB playback issues | Unsupported file format; USB drive corrupted; USB drive not inserted correctly. | Ensure files are MP3 format. Try reformatting the USB drive (backup data first). Reinsert the USB drive. |
9. Specifications
| Brand | Roadstar |
| Model Number | HRA-9D+BT/RDL |
| Dimensions (W x H x D) | 31 x 17 x 22 cm |
| Weight | 3.25 kg |
| Rated RMS Power | 30 W |
| Supported Radio Bands | DAB, DAB+, FM |
| Supported Disc Types | CD, CD-R, CD-RW |
| Supported Audio Formats (USB) | MP3 |
| Connectivity | Bluetooth, USB (5V 1A), AUX In (3.5mm) |
| Display Type | LED |
| Power Source | AC 230V |
10. Warranty and Support
This product is covered by a warranty in accordance with local consumer protection laws. For specific details regarding warranty coverage, returns, and repairs, please refer to the purchase documentation or the retailer's policy where the product was acquired.
For technical assistance or further inquiries, please contact Roadstar customer support. Contact information can typically be found on the official Roadstar website or on your product's packaging.
Note: If you wish to return a product within 30 days of receipt because you have changed your mind, consult the retailer's return policy page. If you have received a defective or damaged product, consult the retailer's help page on damaged goods. For specific information on purchases made on marketplaces, consult their respective help pages.


